I am so excited to be a part of Project Run and Play! You can vote HERE.
When we found out the themes for this season, I knew the first challenge would be the hardest for me. We don't travel, so I don't even think about places I would like to visit one day. My Plan A was something safe and simple, but I knew that I wasn't really pushing my sewing skills or my creativity. Eventually, I changed my mind and started over. I stepped totally out of my comfort zone and tried something original, knowing that no matter the outcome of the competition, I put forth my best effort.
The challenge said, "Show us where you would like to travel to, with this destination-inspired outfit for your child." Since I was finally being honest with myself, the first thing that had popped into my mind when I thought about travel, if I allow myself to dream, is that I would love to visit Europe to see the beautiful architecture. My brother has been travelling recently and I am a little jealous of his tourist photos. I studied cathedrals for an art history paper in college and I especially love the Notre Dame cathedral in Paris.

The daughter I chose to model loves to dress up, so there is nothing too fancy for her. She wears a fabulous outfit and coordinating headband nearly every day. Trust me. There are a lot of arguments over fashion in our house.
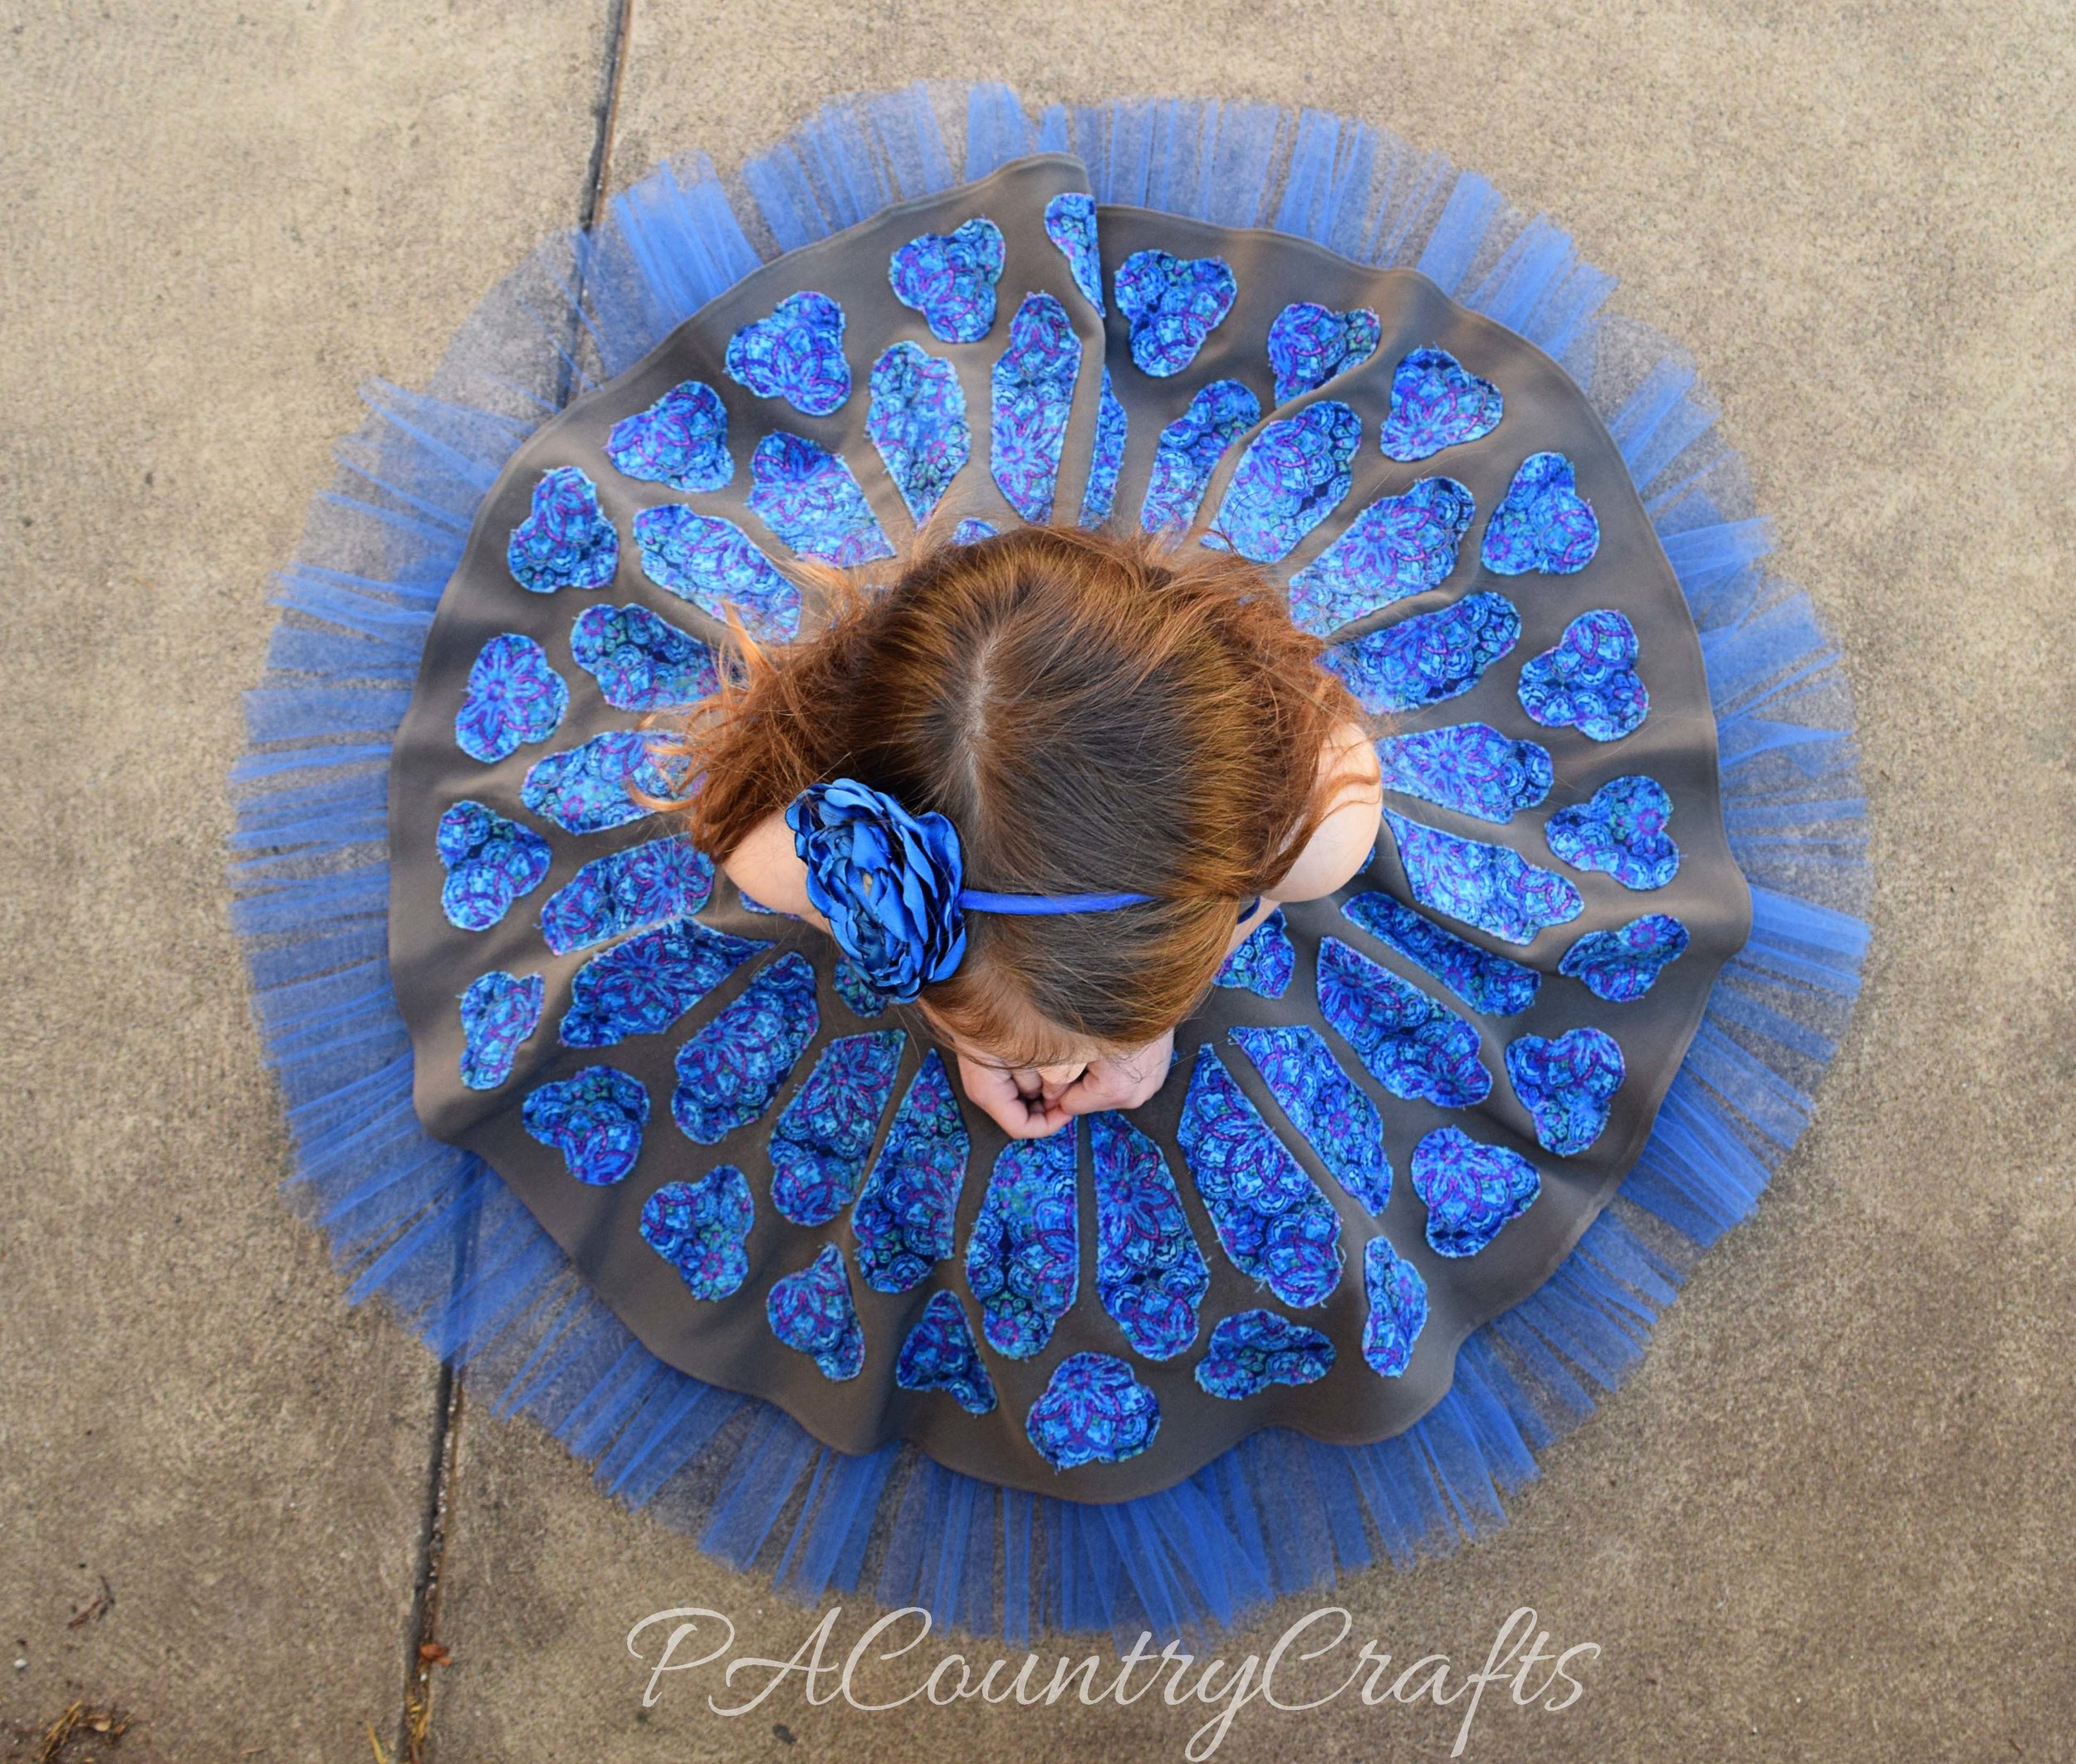
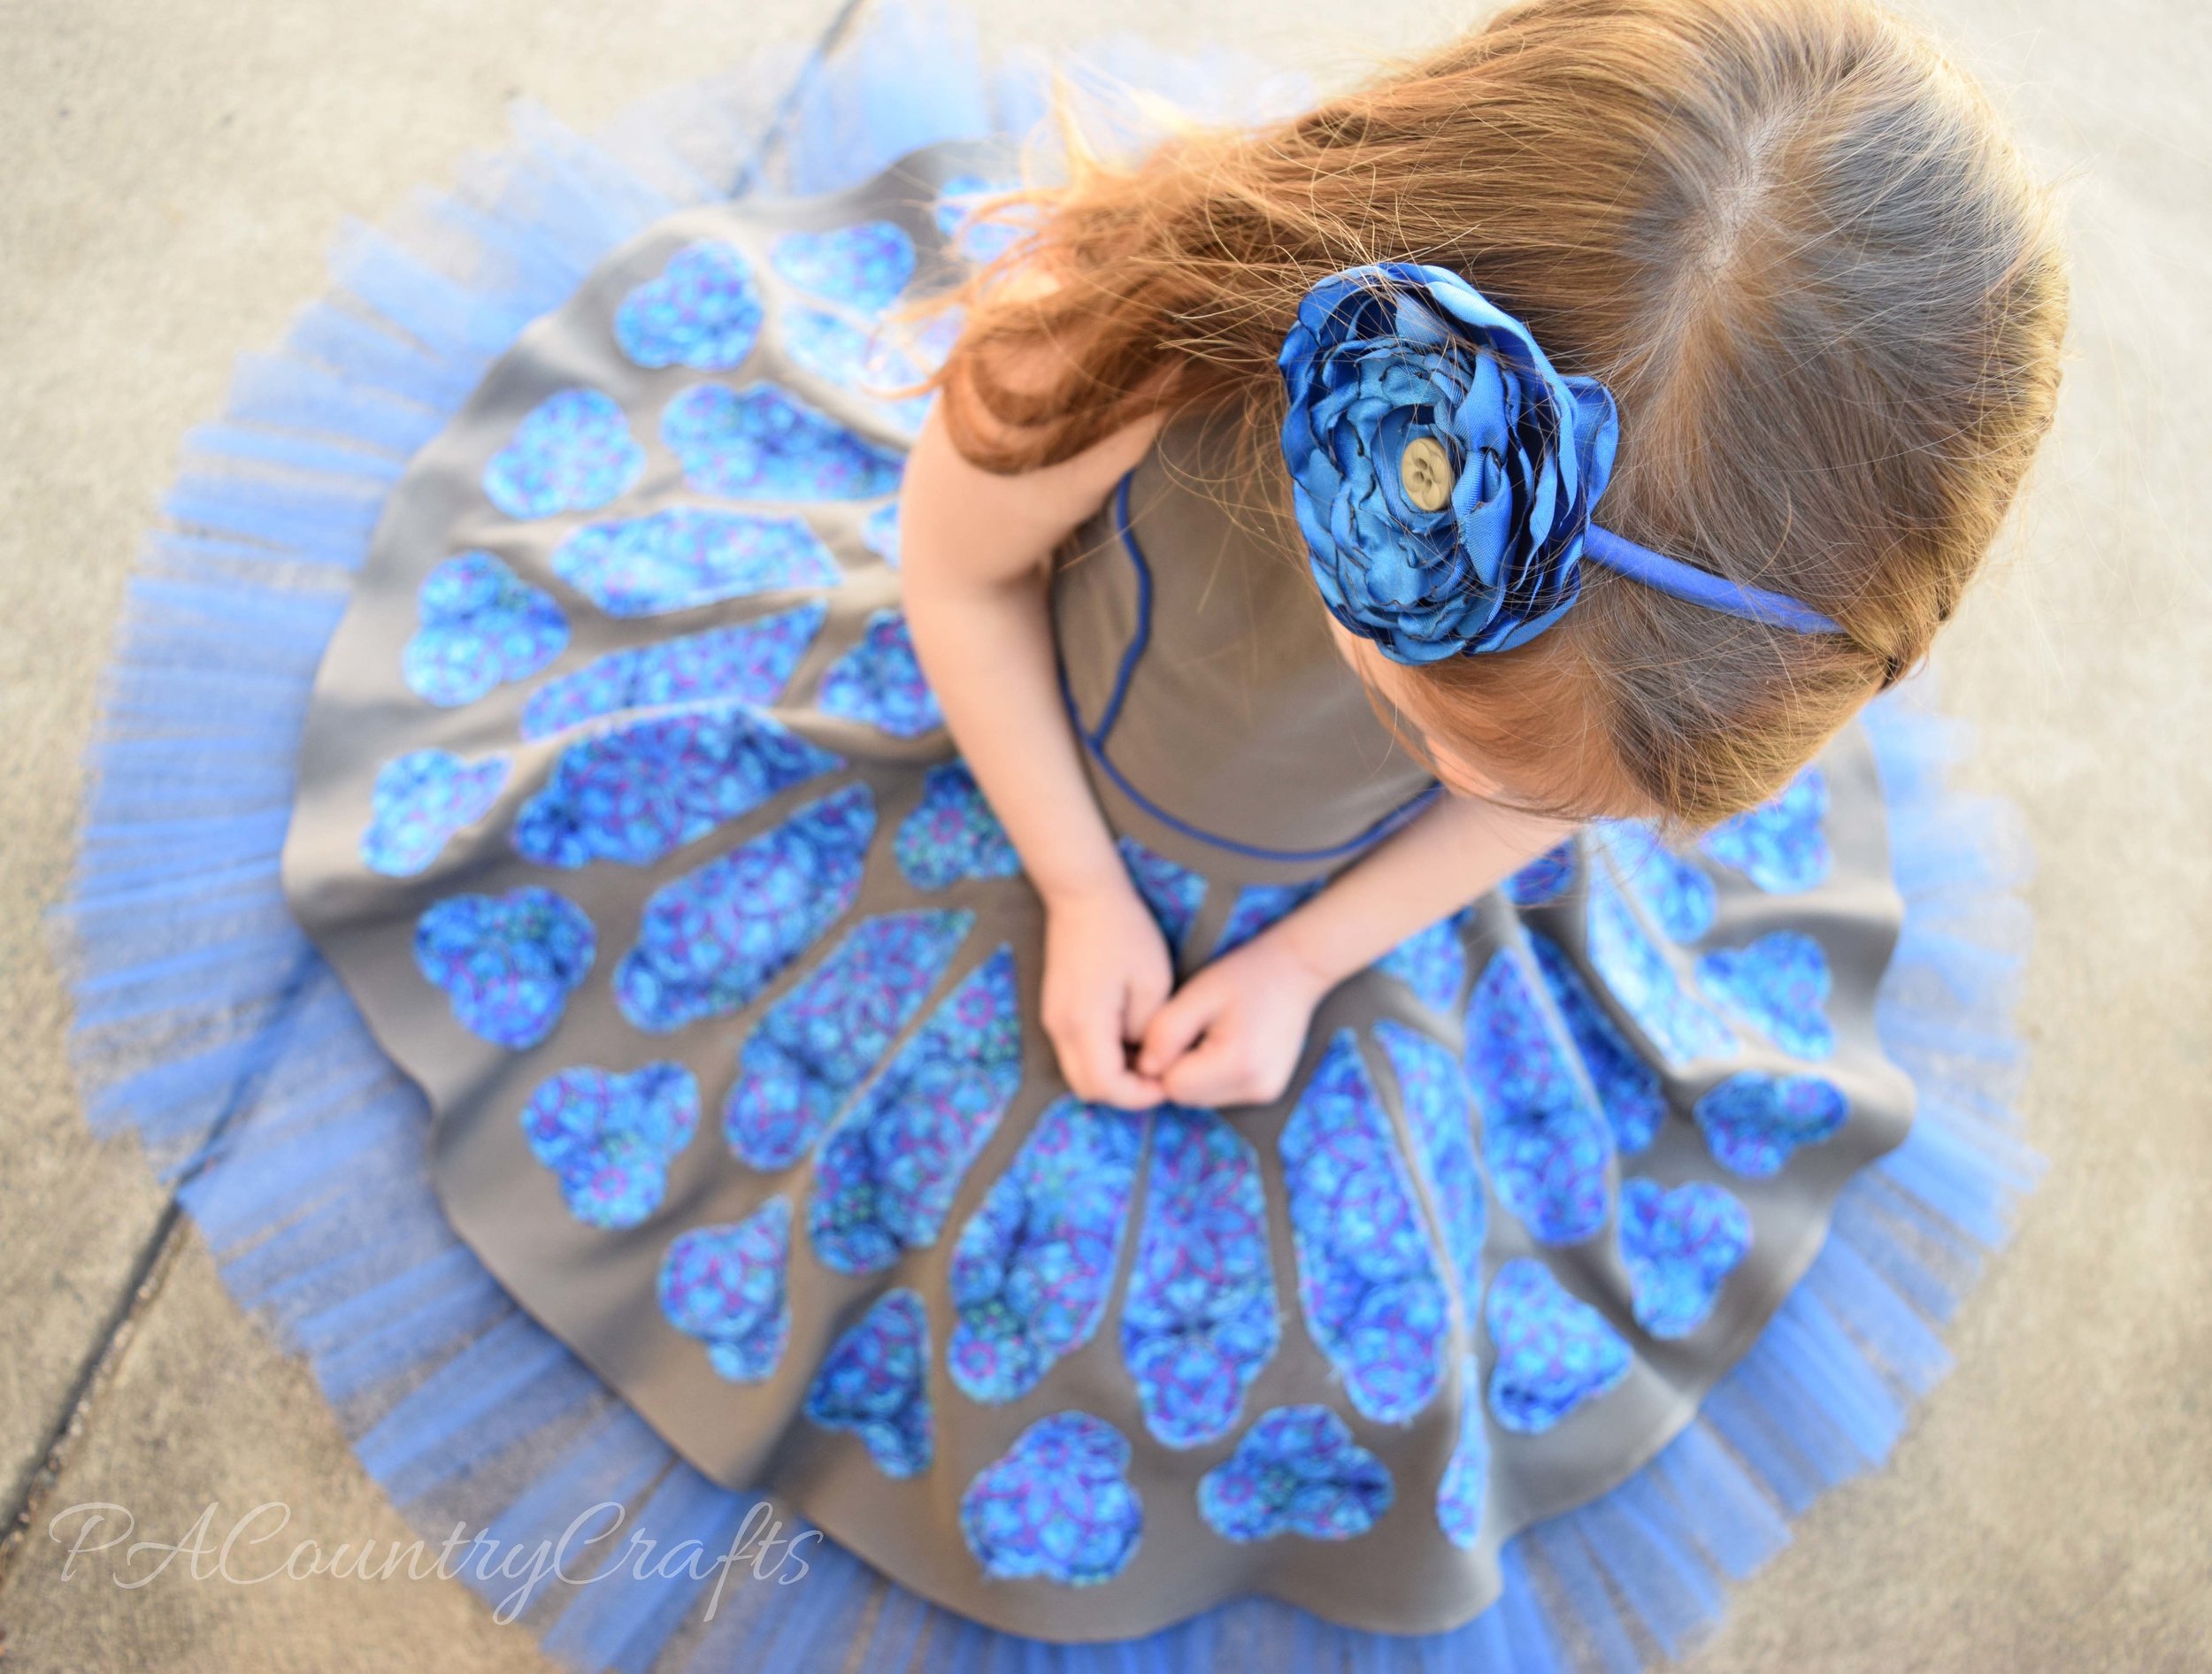
I started by making a circle skirt inspired by the rose window of the Notre Dame cathedral. After cutting my skirt piece, I designed a template and then stitched 60 pieces onto the fabric. I wanted a raw edge applique and I didn't want to make the skirt too stiff by using an iron-on adhesive. I tried quilt basting spray and glue stick, but resorted to just holding the pieces down with straight pins because the worked the best. It took FOR.EV.ER. I also made a lining with a gathered tulle layer at the hem. It reminds me of the light radiating from the windows.


 For the bodice of the dress, I wanted to mimic some of the architectural details. I added piping to the front inspired by the arc of the flying buttresses that support the cathedral walls.

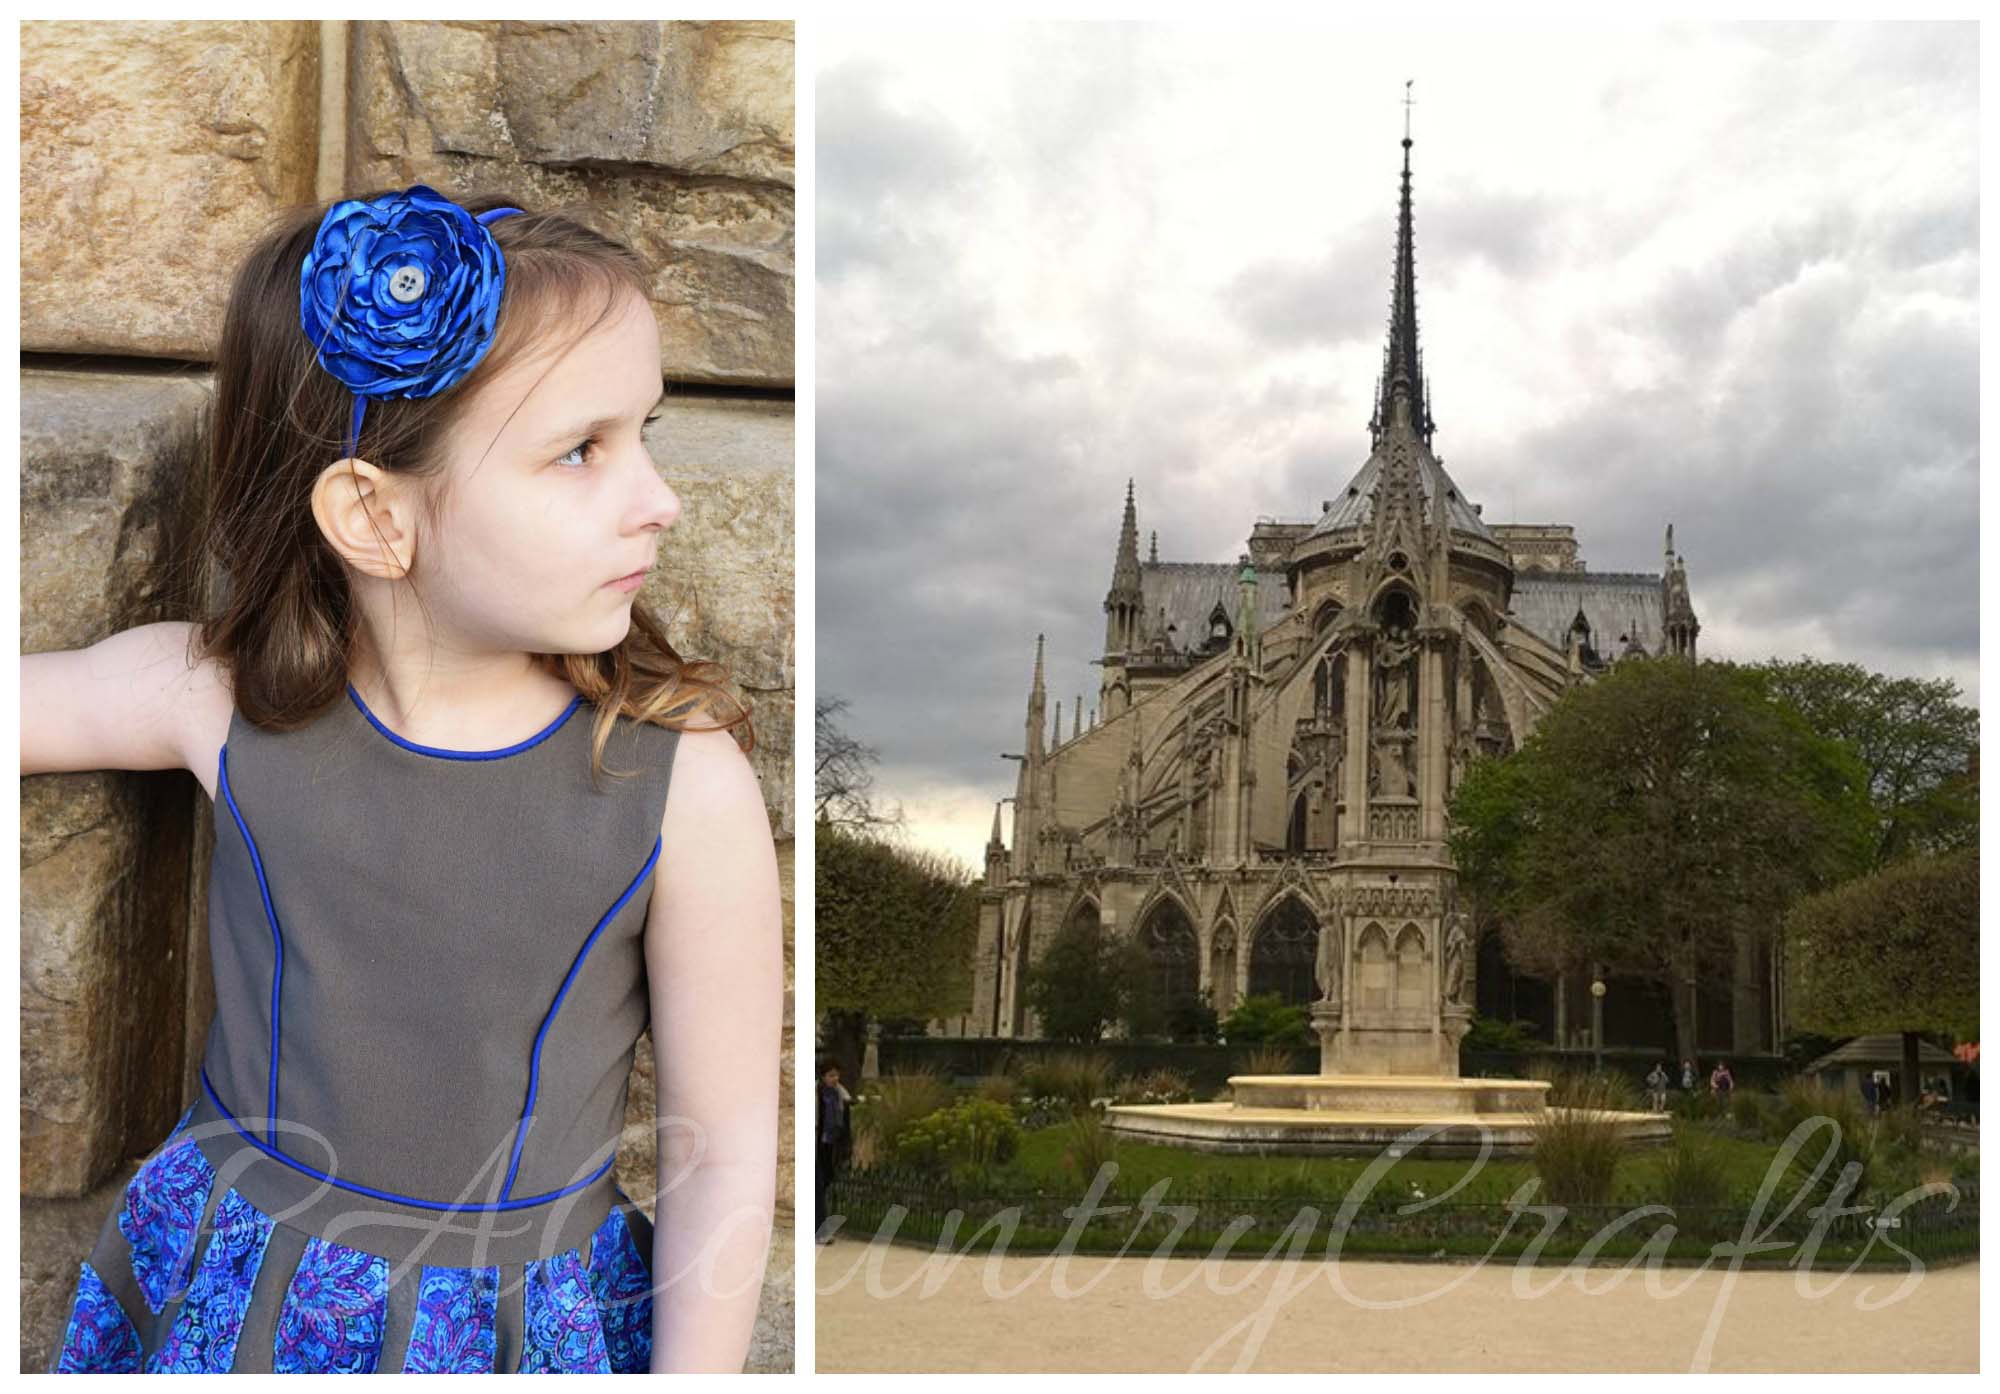 In the back, I made a Gothic, pointed arch cut-out and added soft, ruffle elastic, criss-crossing straps inside that mirror the beams in the vaulted ceilings. It closes with coordinating gray buttons, and I even hand-stitched the buttonholes because the fabric was thick and I had broken almost all of my needles earlier.


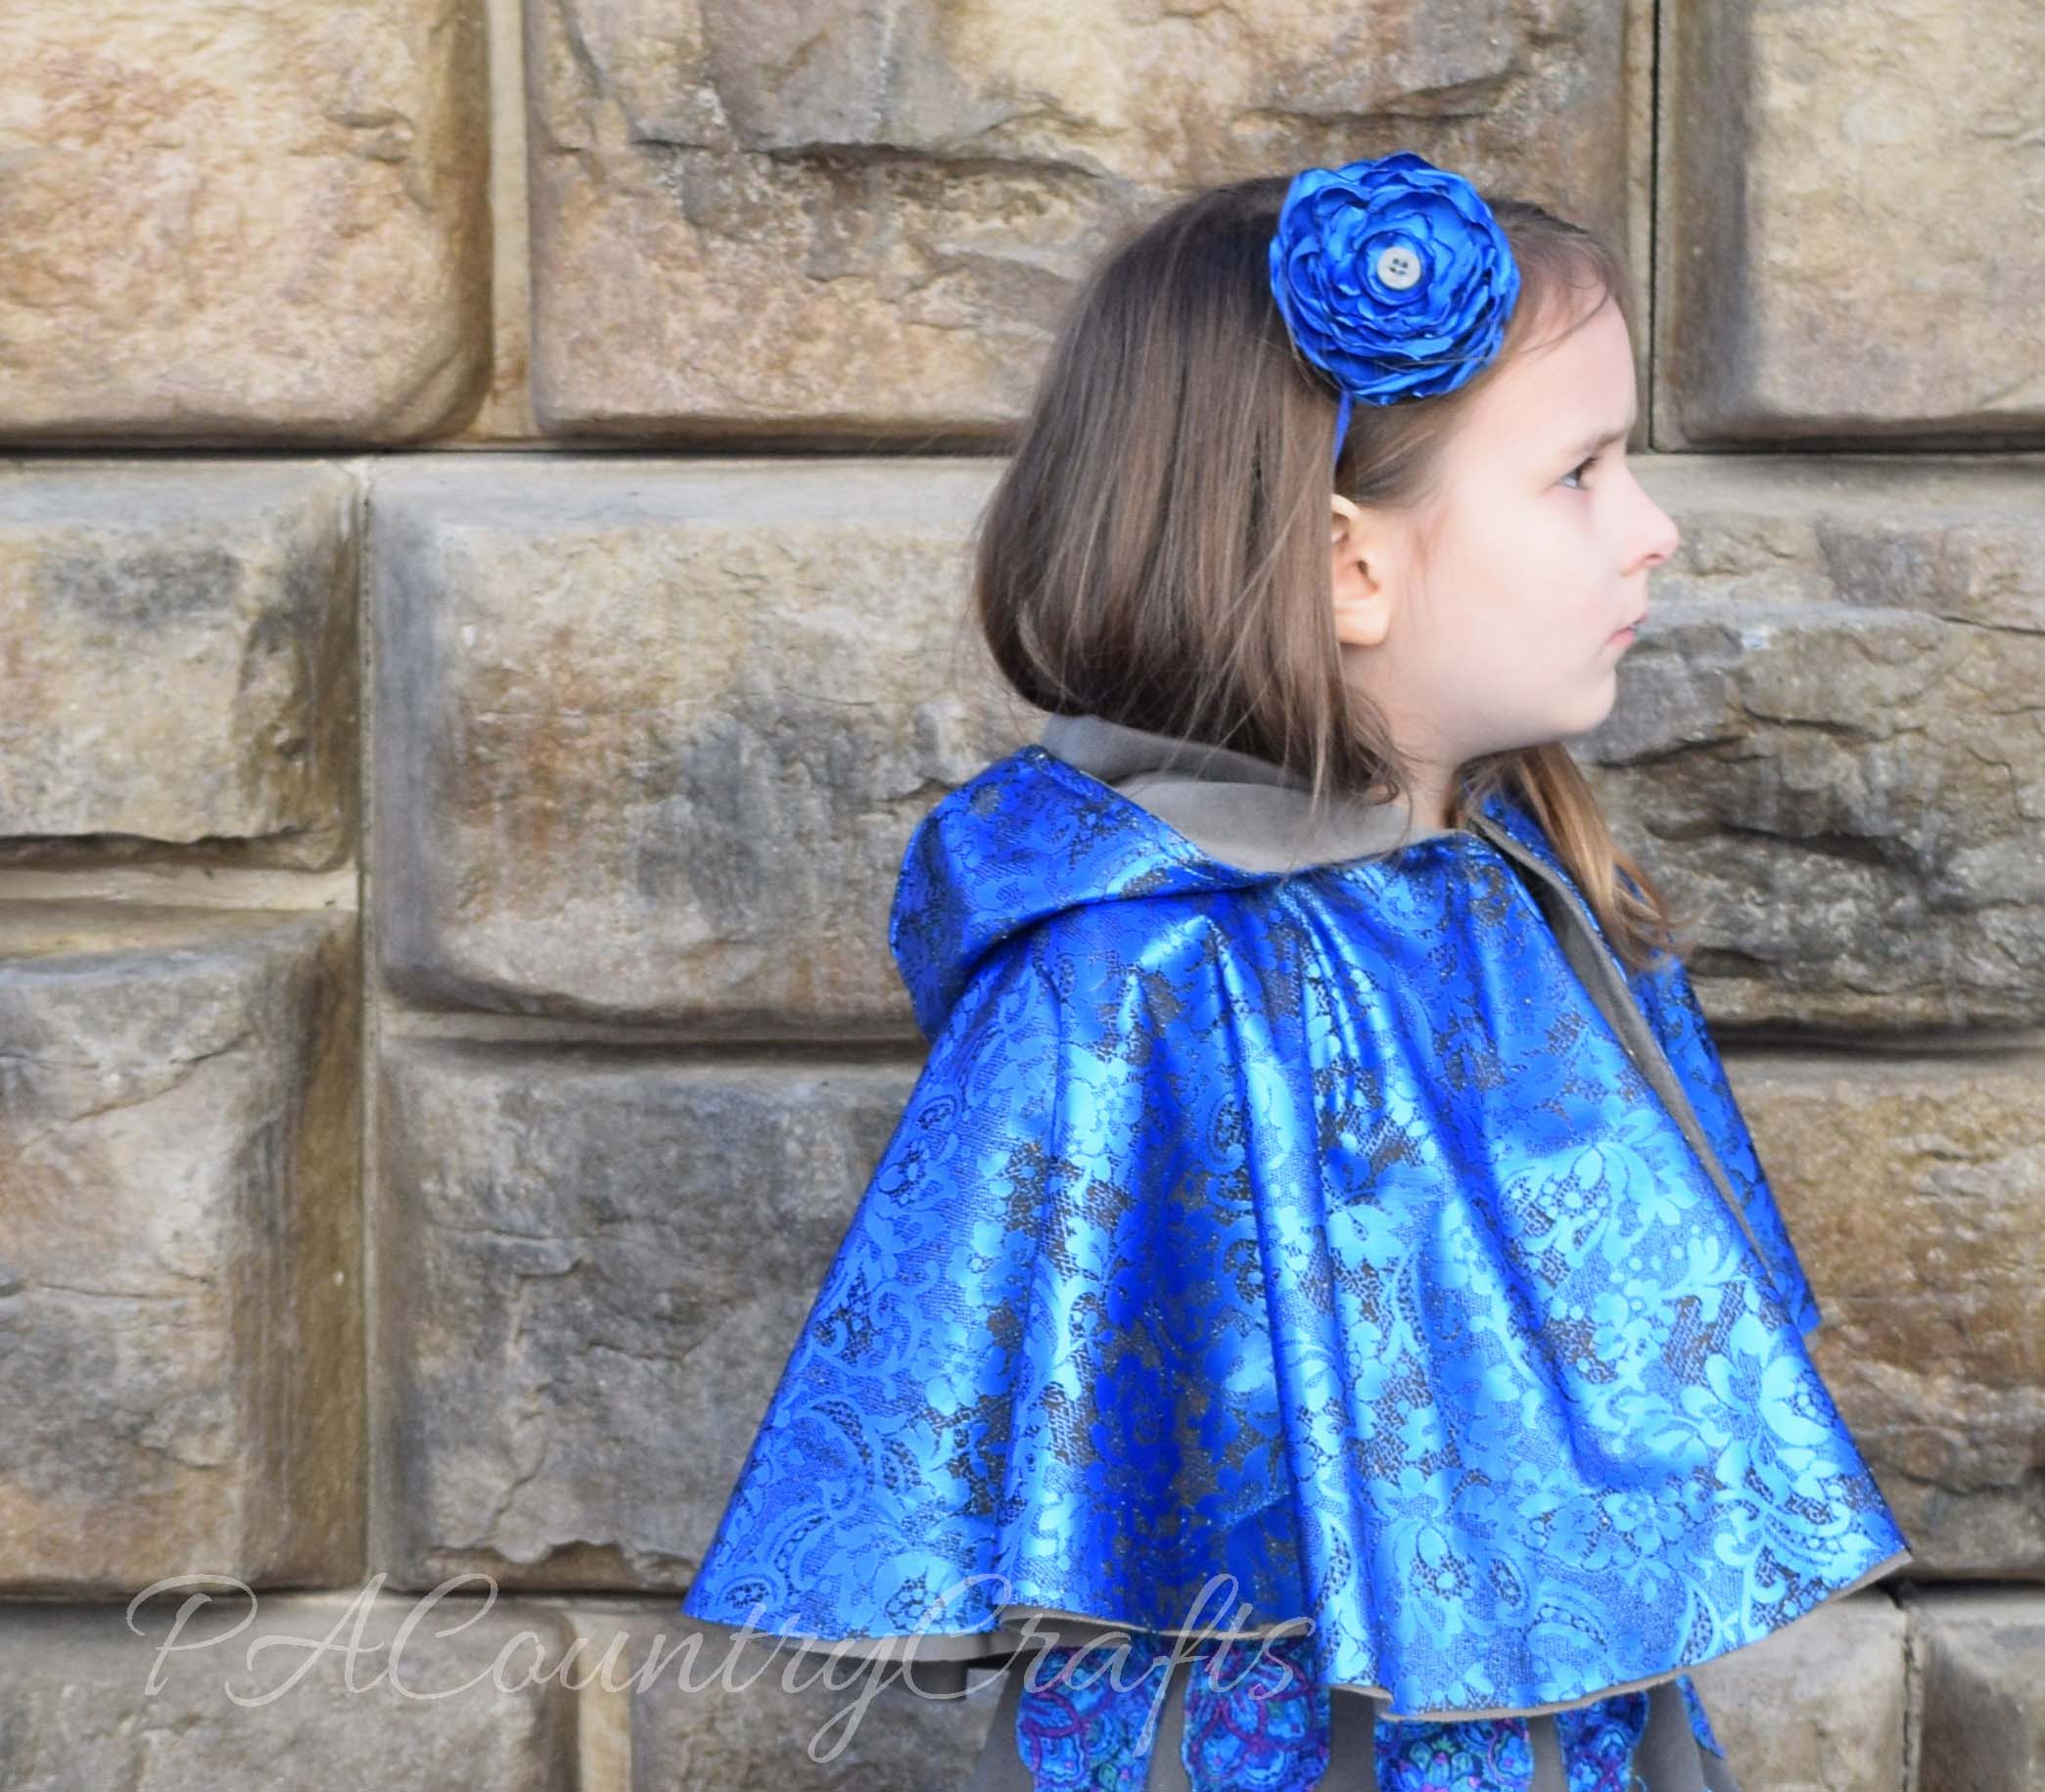
Since the applique took so long, I missed the warm spell we had a few weeks ago and it was again freezing outside when it was time to take pictures. To try to keep my little girl warm, I made a reversible cape out of a gray velour remnant and some metallic finish blue lace.

 Finally, because she loves to have matching headbands, I made a blue satin flower to coordinate with the dress. Originally I was going to make something much more elaborate, but I thought there was enough going on with the dress already, so simple was best.

 My daughter loves the outfit and she was such a trooper taking these pictures on such a cold day!


A big thank you goes out to Rita for letting us take pictures with your gargoyles and stone wall! Thank you to Bruce for letting me use your tourist pictures. Thank you to all of the friends and family who let me bounce ideas off of them and ramble on about sewing things that they don't understand. The past few weeks were especially stressful and busy, so I felt like I was scrambling to finish, but I have a lot of support and it really means a lot to me.
You can vote for your favorite design over at Project Run and Play.