Upcycled Jar Spring Decor
/
Make these simple Easter jars using old candle or pickle jars and some simple items from Dollar Tree!
Read MoreMake these simple Easter jars using old candle or pickle jars and some simple items from Dollar Tree!
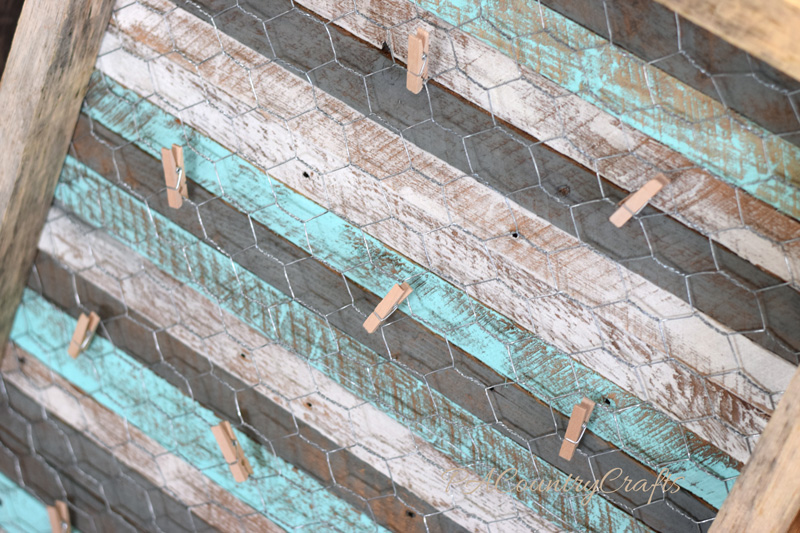
Read MoreI think my 17yo son inherited some of my crafty genes. When I took him school shopping he asked to go to craft stores to get inspiration for his girlfriend's birthday gift. I didn't mind. ;) They are renovating her bedroom, so he wanted to make something for her new room. He combined inspiration from a few different pieces that we saw, made a small tray for a practice run, then built the final product.
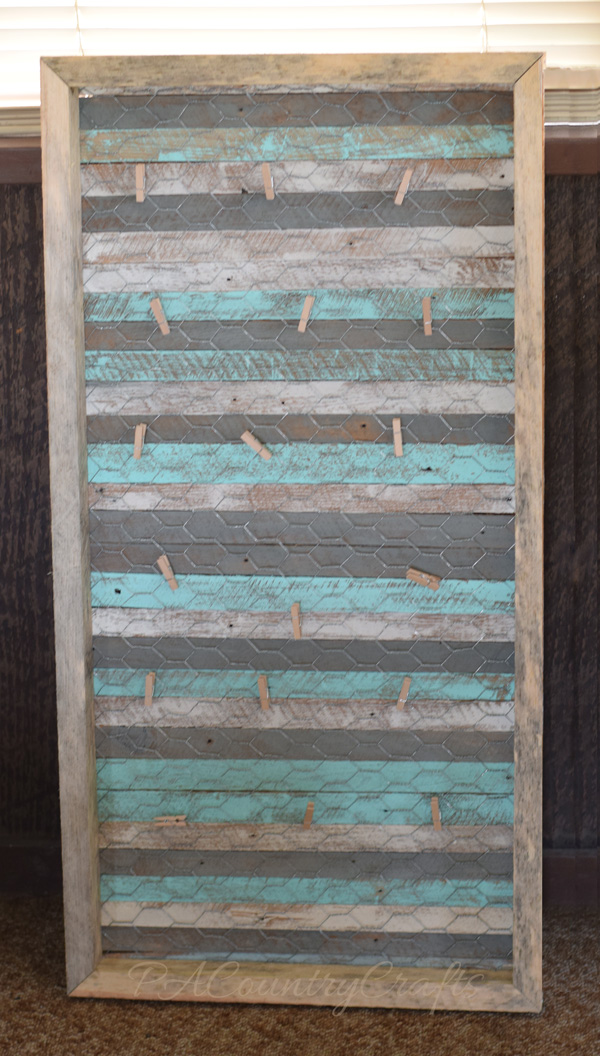
He chose the paint colors (the aqua will match her decor) and did everything by himself. The back of the display is made of plaster lath so it has a rough texture that looks really rustic when painted.
His sisters also wanted to make something for her birthday. They insisted that I was not allowed to help them, but somehow blamed me when things didn't work. (You can't hot glue shells to wet sand!) On the third attempt, after much fighting and drama, they finally succeeded.

Hopefully she likes to decorate with pictures. :)
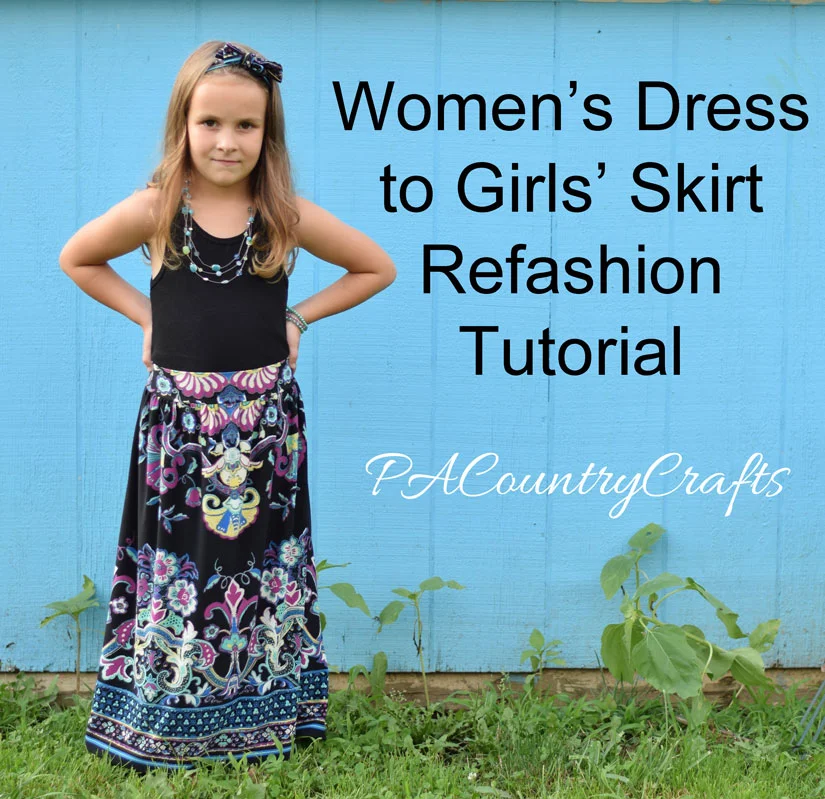
Refashion a thrifted women’s dress into a girls’ maxi skirt! Step by step tutorial pictures to upcycle stretch fabric in a few simple steps.l
Read MoreSummer vacation is rough!!! I (laughably) thought it might be easier this year because I actually downsized from being with 20 kids all day to just 5. Hahahahaha! Dealing with 5 of my own kids is entirely different. They aren't used to being with each other all day so they need to reestablish the pecking order. It is taking longer than usual with the hormones raging in this house these days (oh, just a sample of what is to come, I know!) Now we have a heat wave and my car is in the garage. It has been quite the week! So, if you are wondering where I have been, I am probably hiding- locked in my bedroom and curled up in the fetal position with a bag of chocolate chips.
OK. Not really.
I have ice cream.
Every now and then I get ambitious/drink extra coffee and try do something fun. Last week we went on our planned shopping excursion, but it took until 2pm or so to get them to clean their rooms so we could leave. Our first stop was the thrift store for a very specific purpose- bunny ears. The kids are waking up right now so I am going to let my 9yo do a little guest posting and tell you about it!
~~~~~~~~~~~~~~~~~~~~~~~~~~~~~~~~~~~~~~~~~~~~~~~~~~~~~~~~~~~~
I have a stuffed bunny named Twinkle Toes. It is a Beanie Boo that has the same birthday as me. My aunts' dog chewed off my bunnies' ears. They don't make these bunnies anymore so we couldn't get a new one. My mom and I decided to go to the thrift store to find new ears. I found the perfect bunny. It's ears were backwards! We all went home and mom washed the bunny. A few days later, my mom seam ripped what was left of the ears on Twinkle Toes. She also cut the ears off of the 2nd bunny. She sewed the ears on Twinkle Toes. We even added a pink flower! AGAIN, MOM SAVES THE DAY!!!!!!!!!
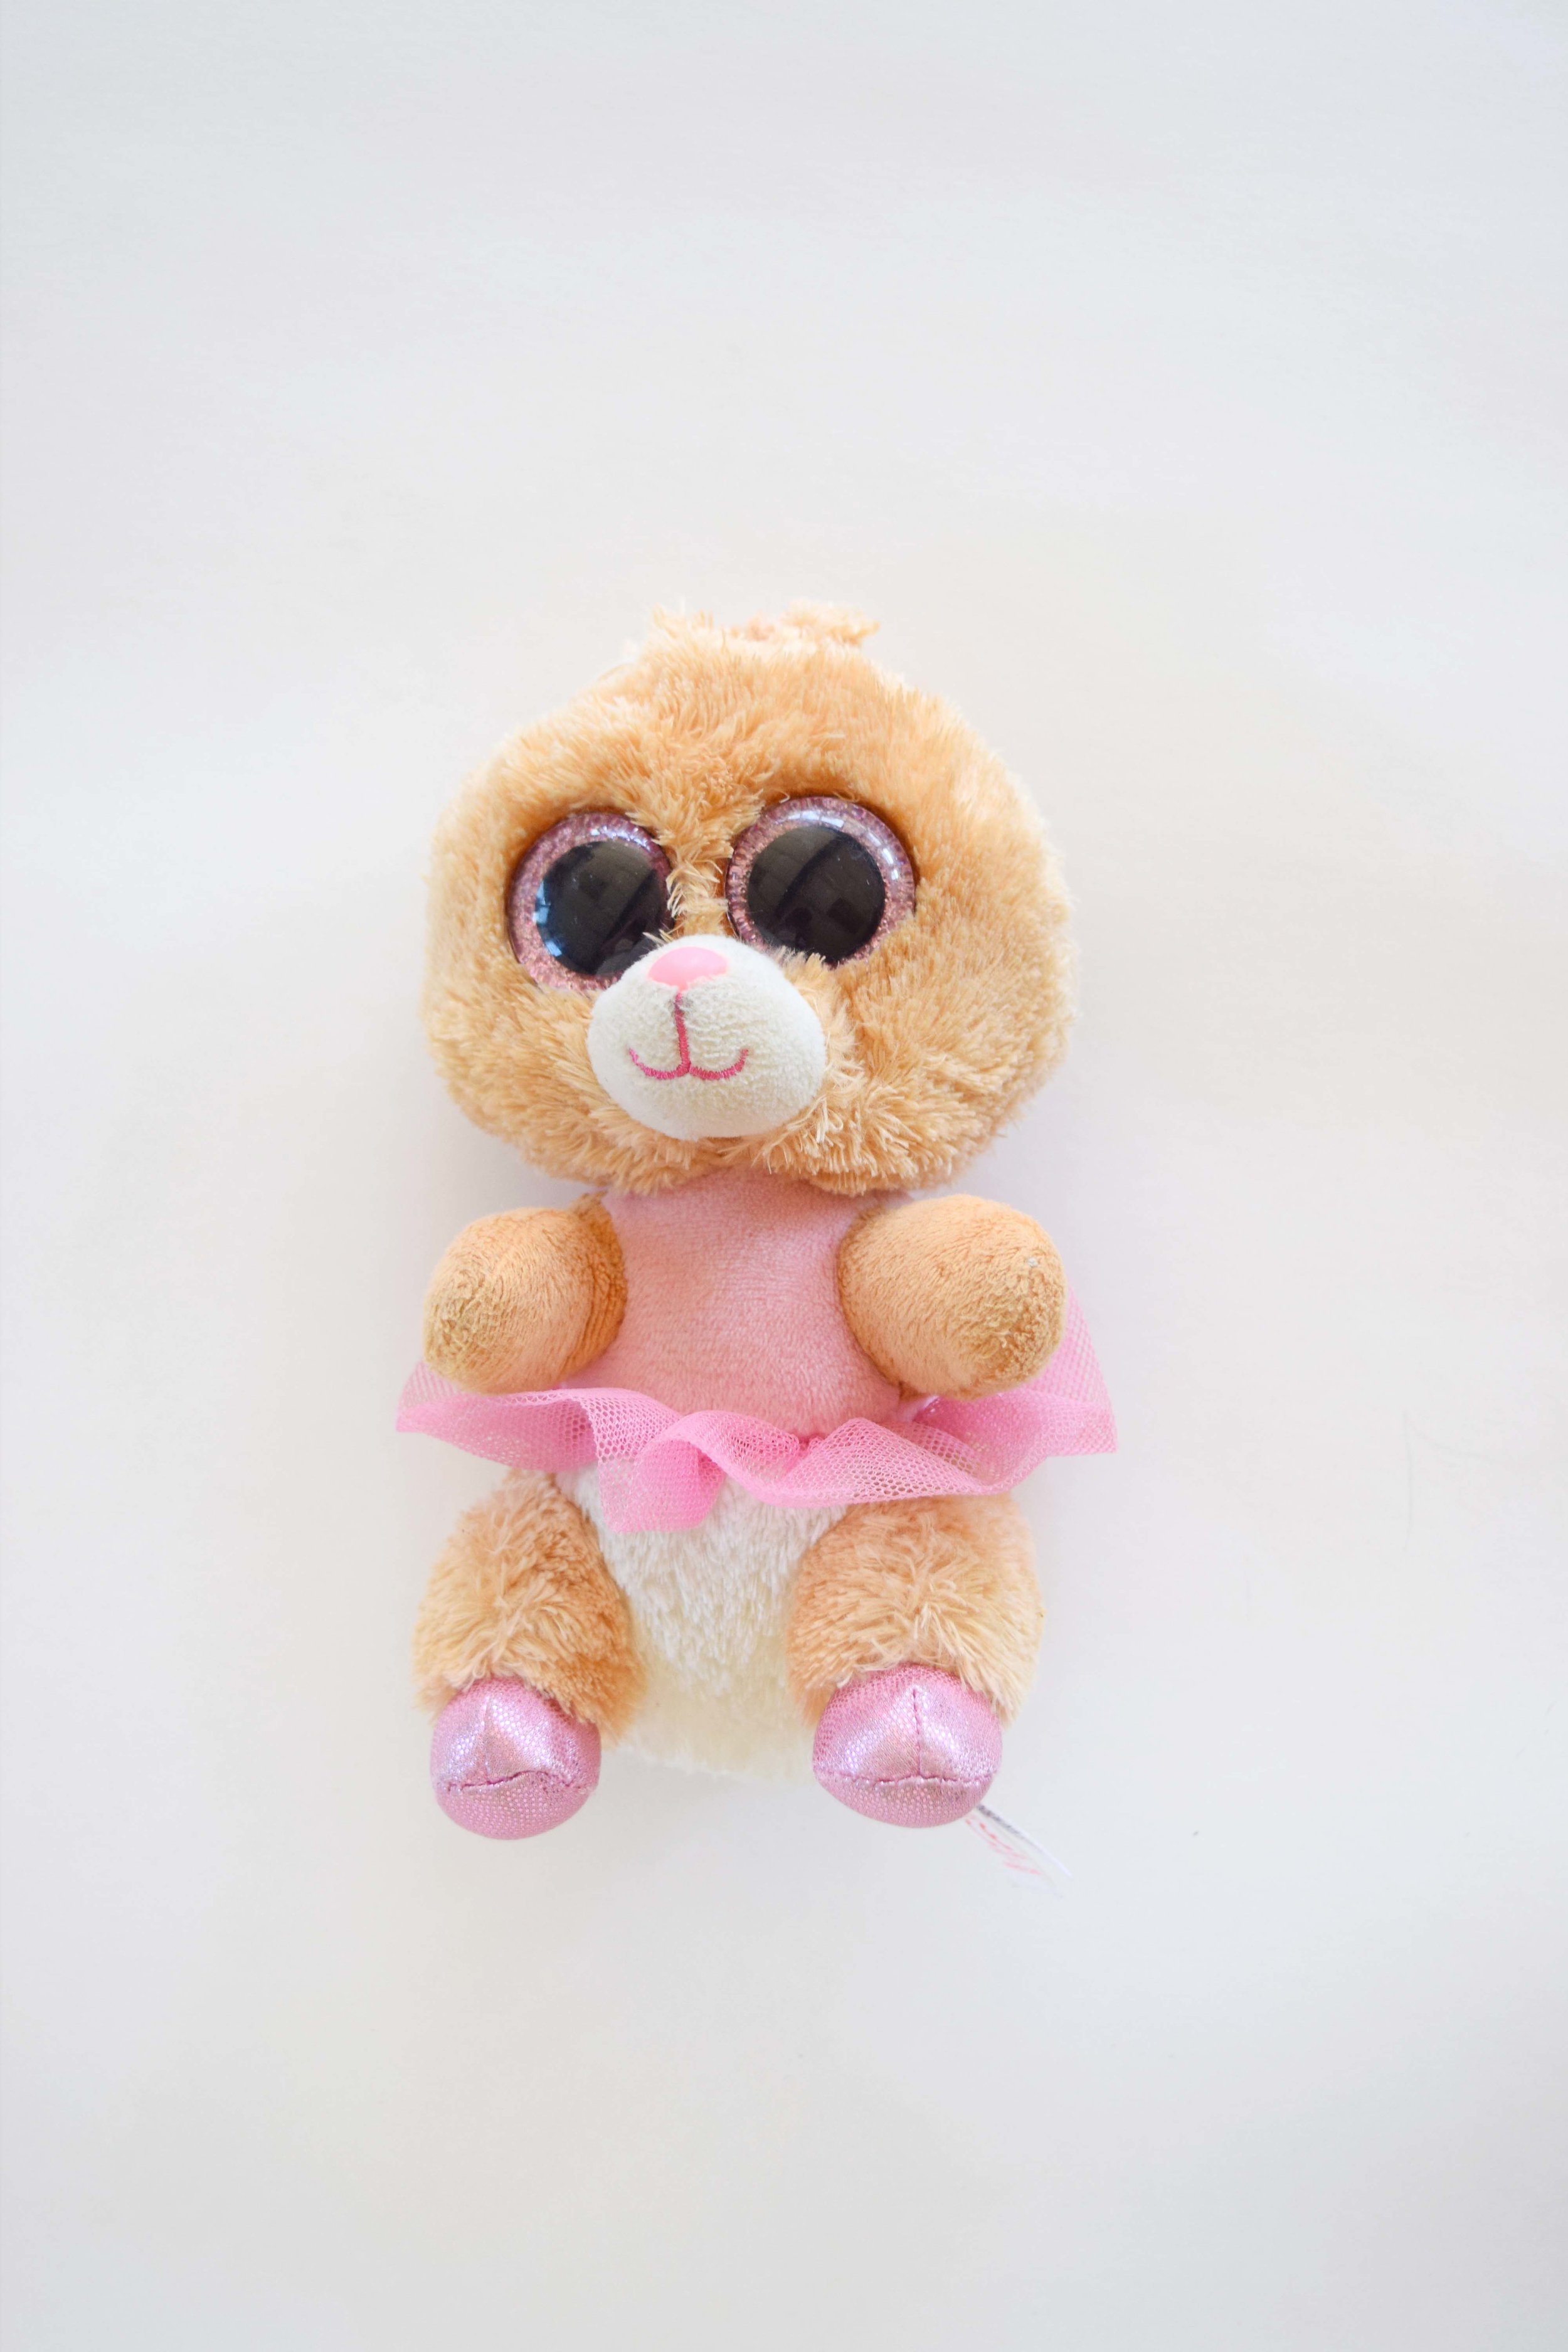
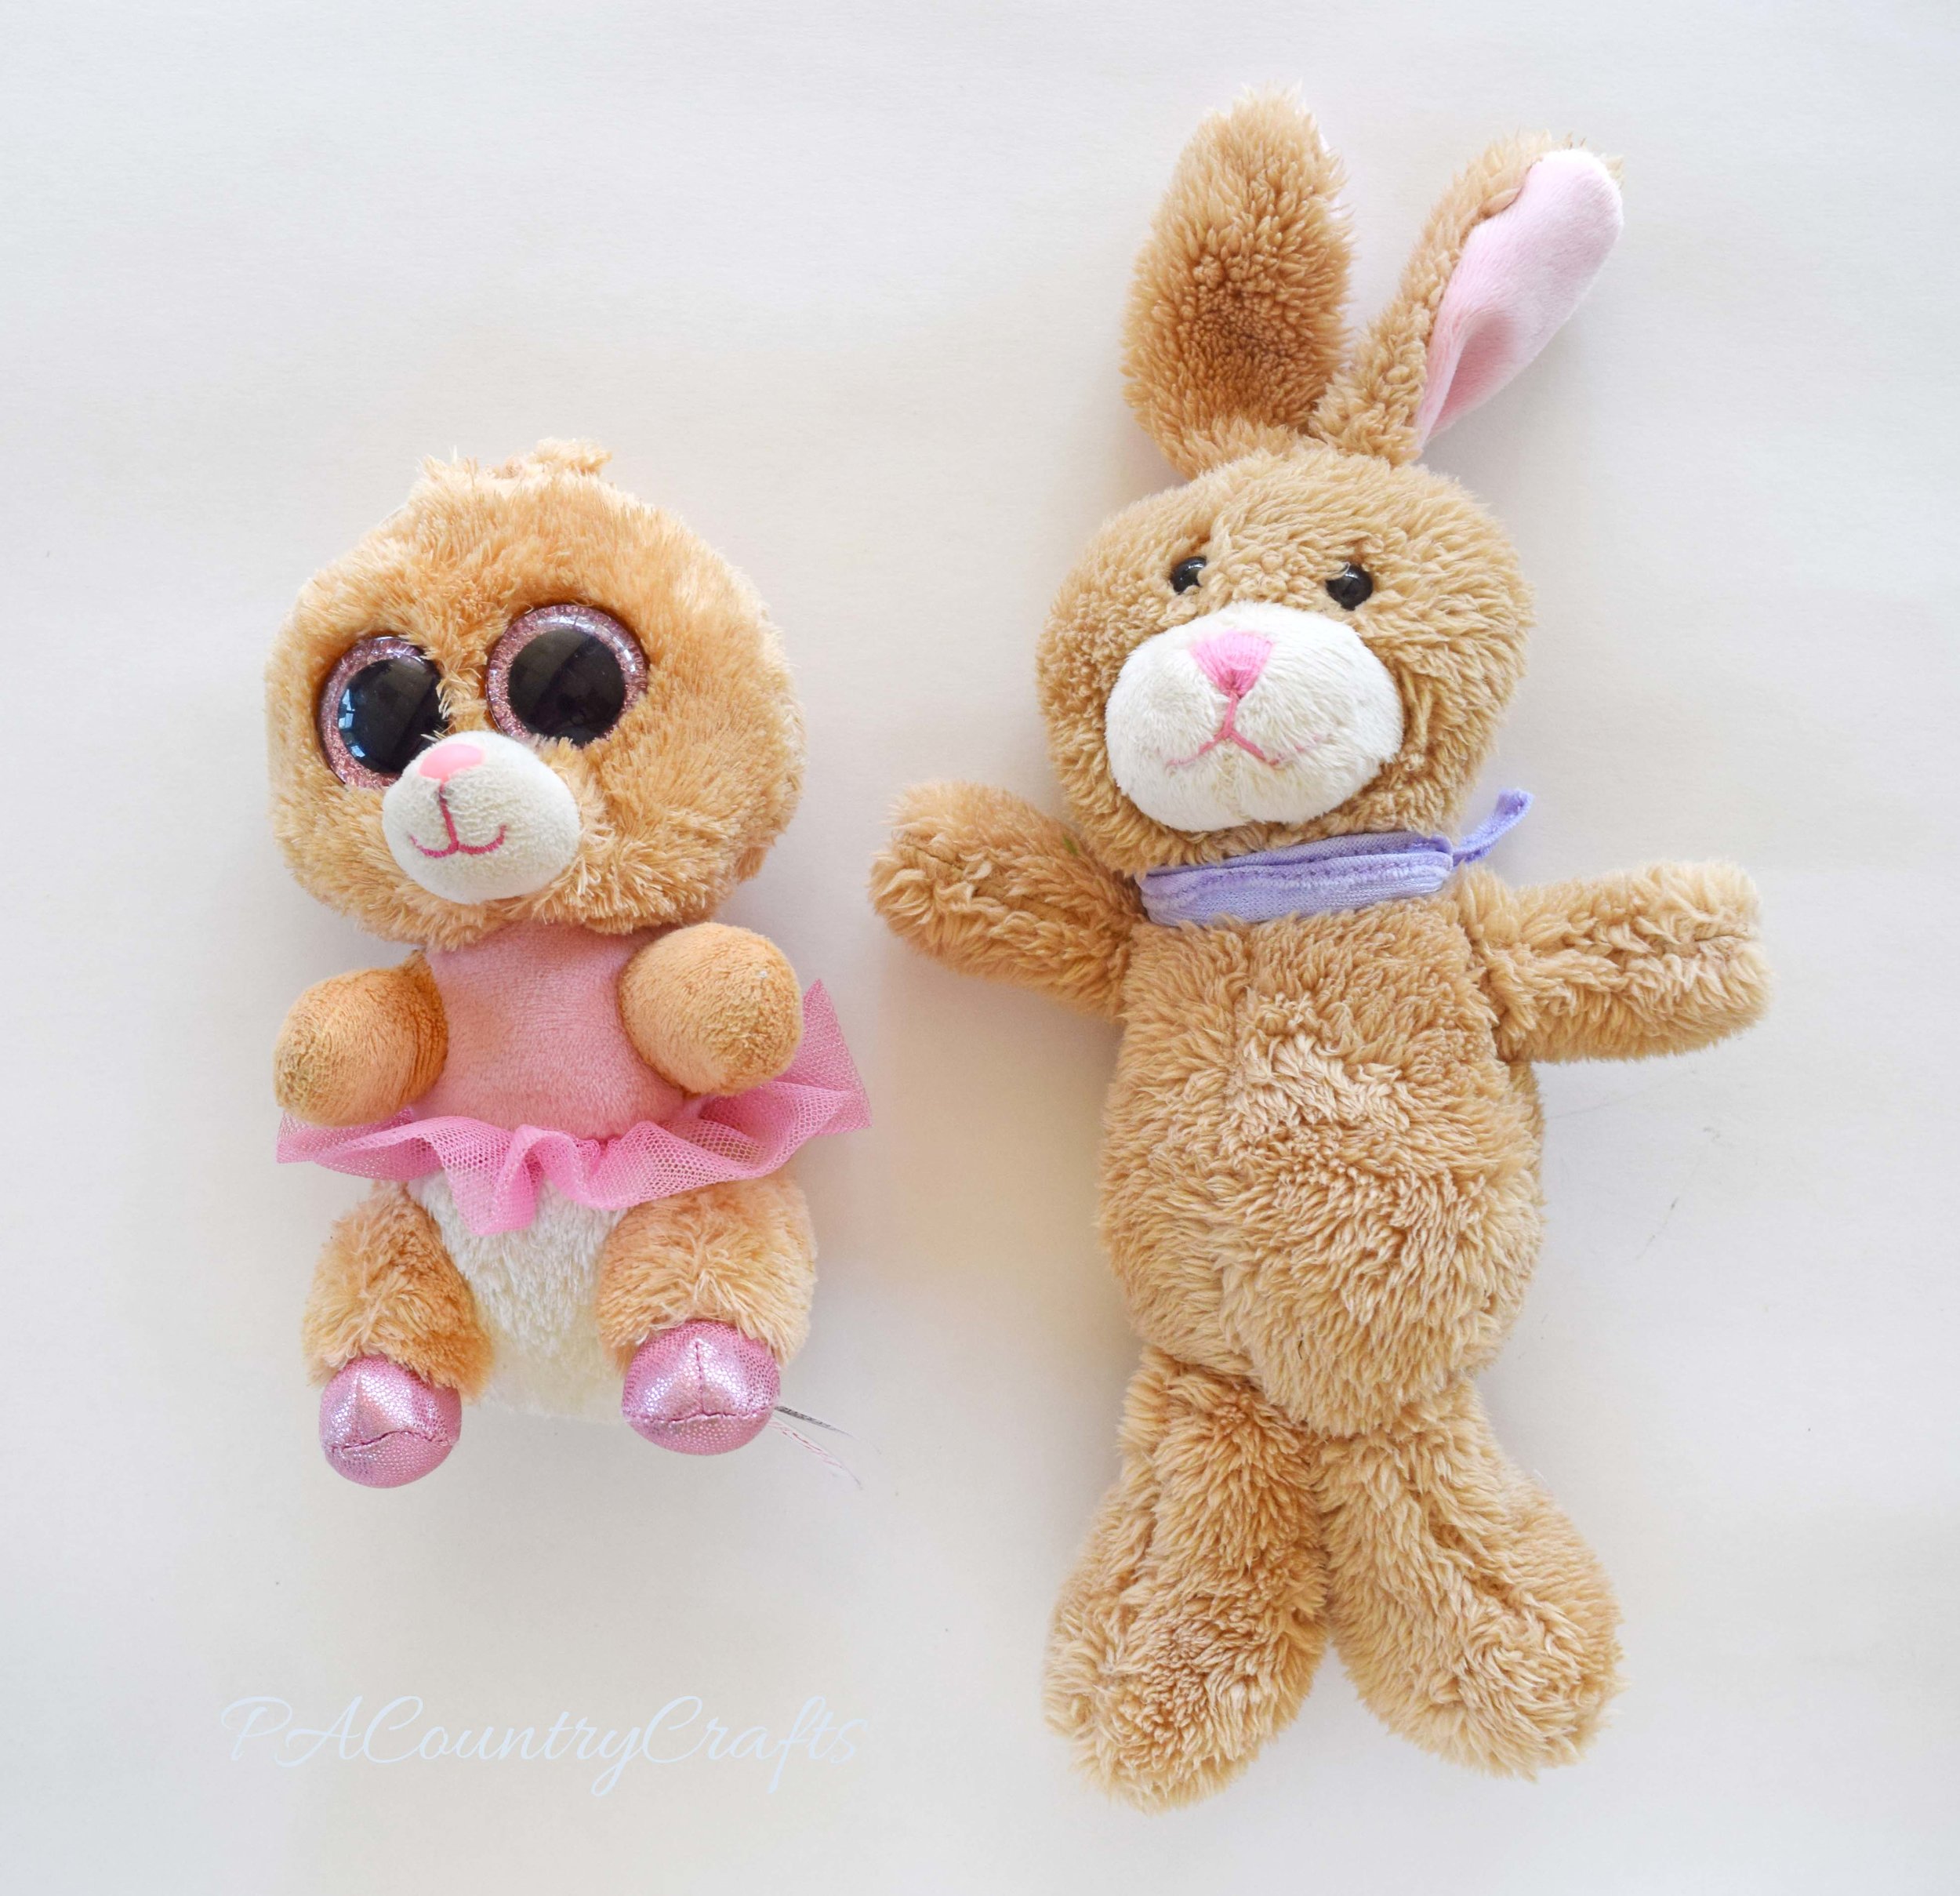
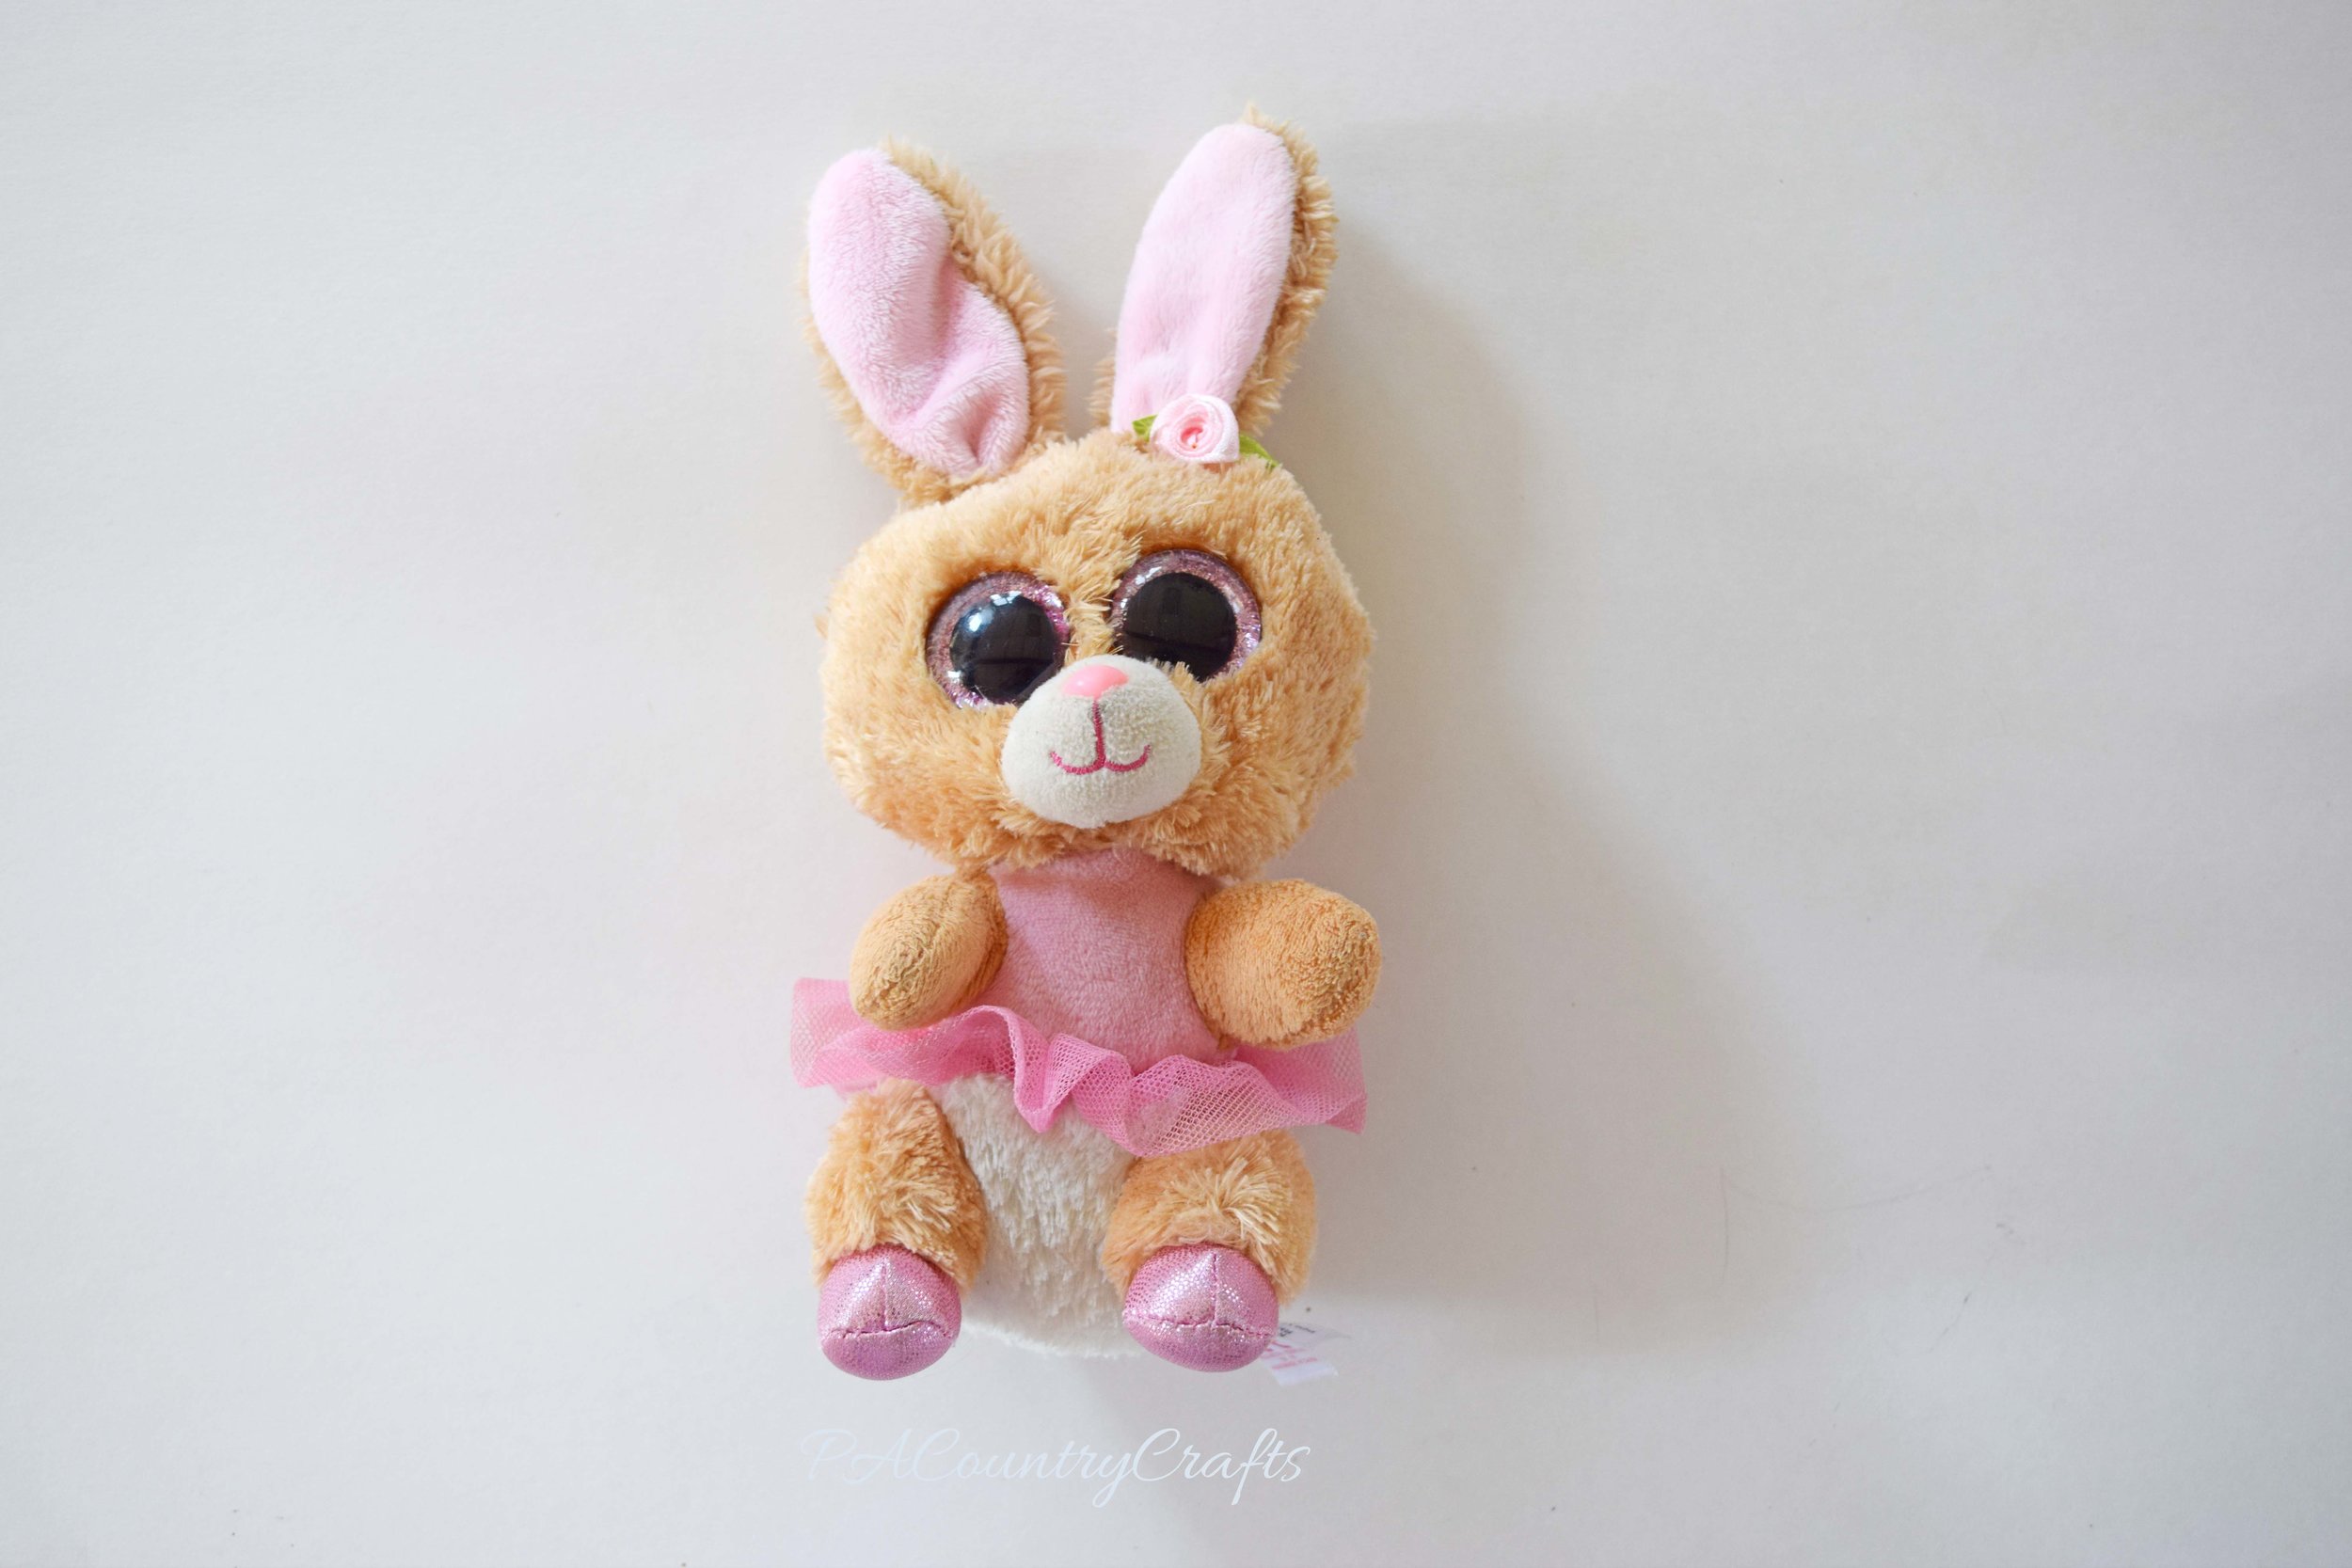
Thank you for posting for me today, Lydia! I am happy that I could fix your bunny for you!
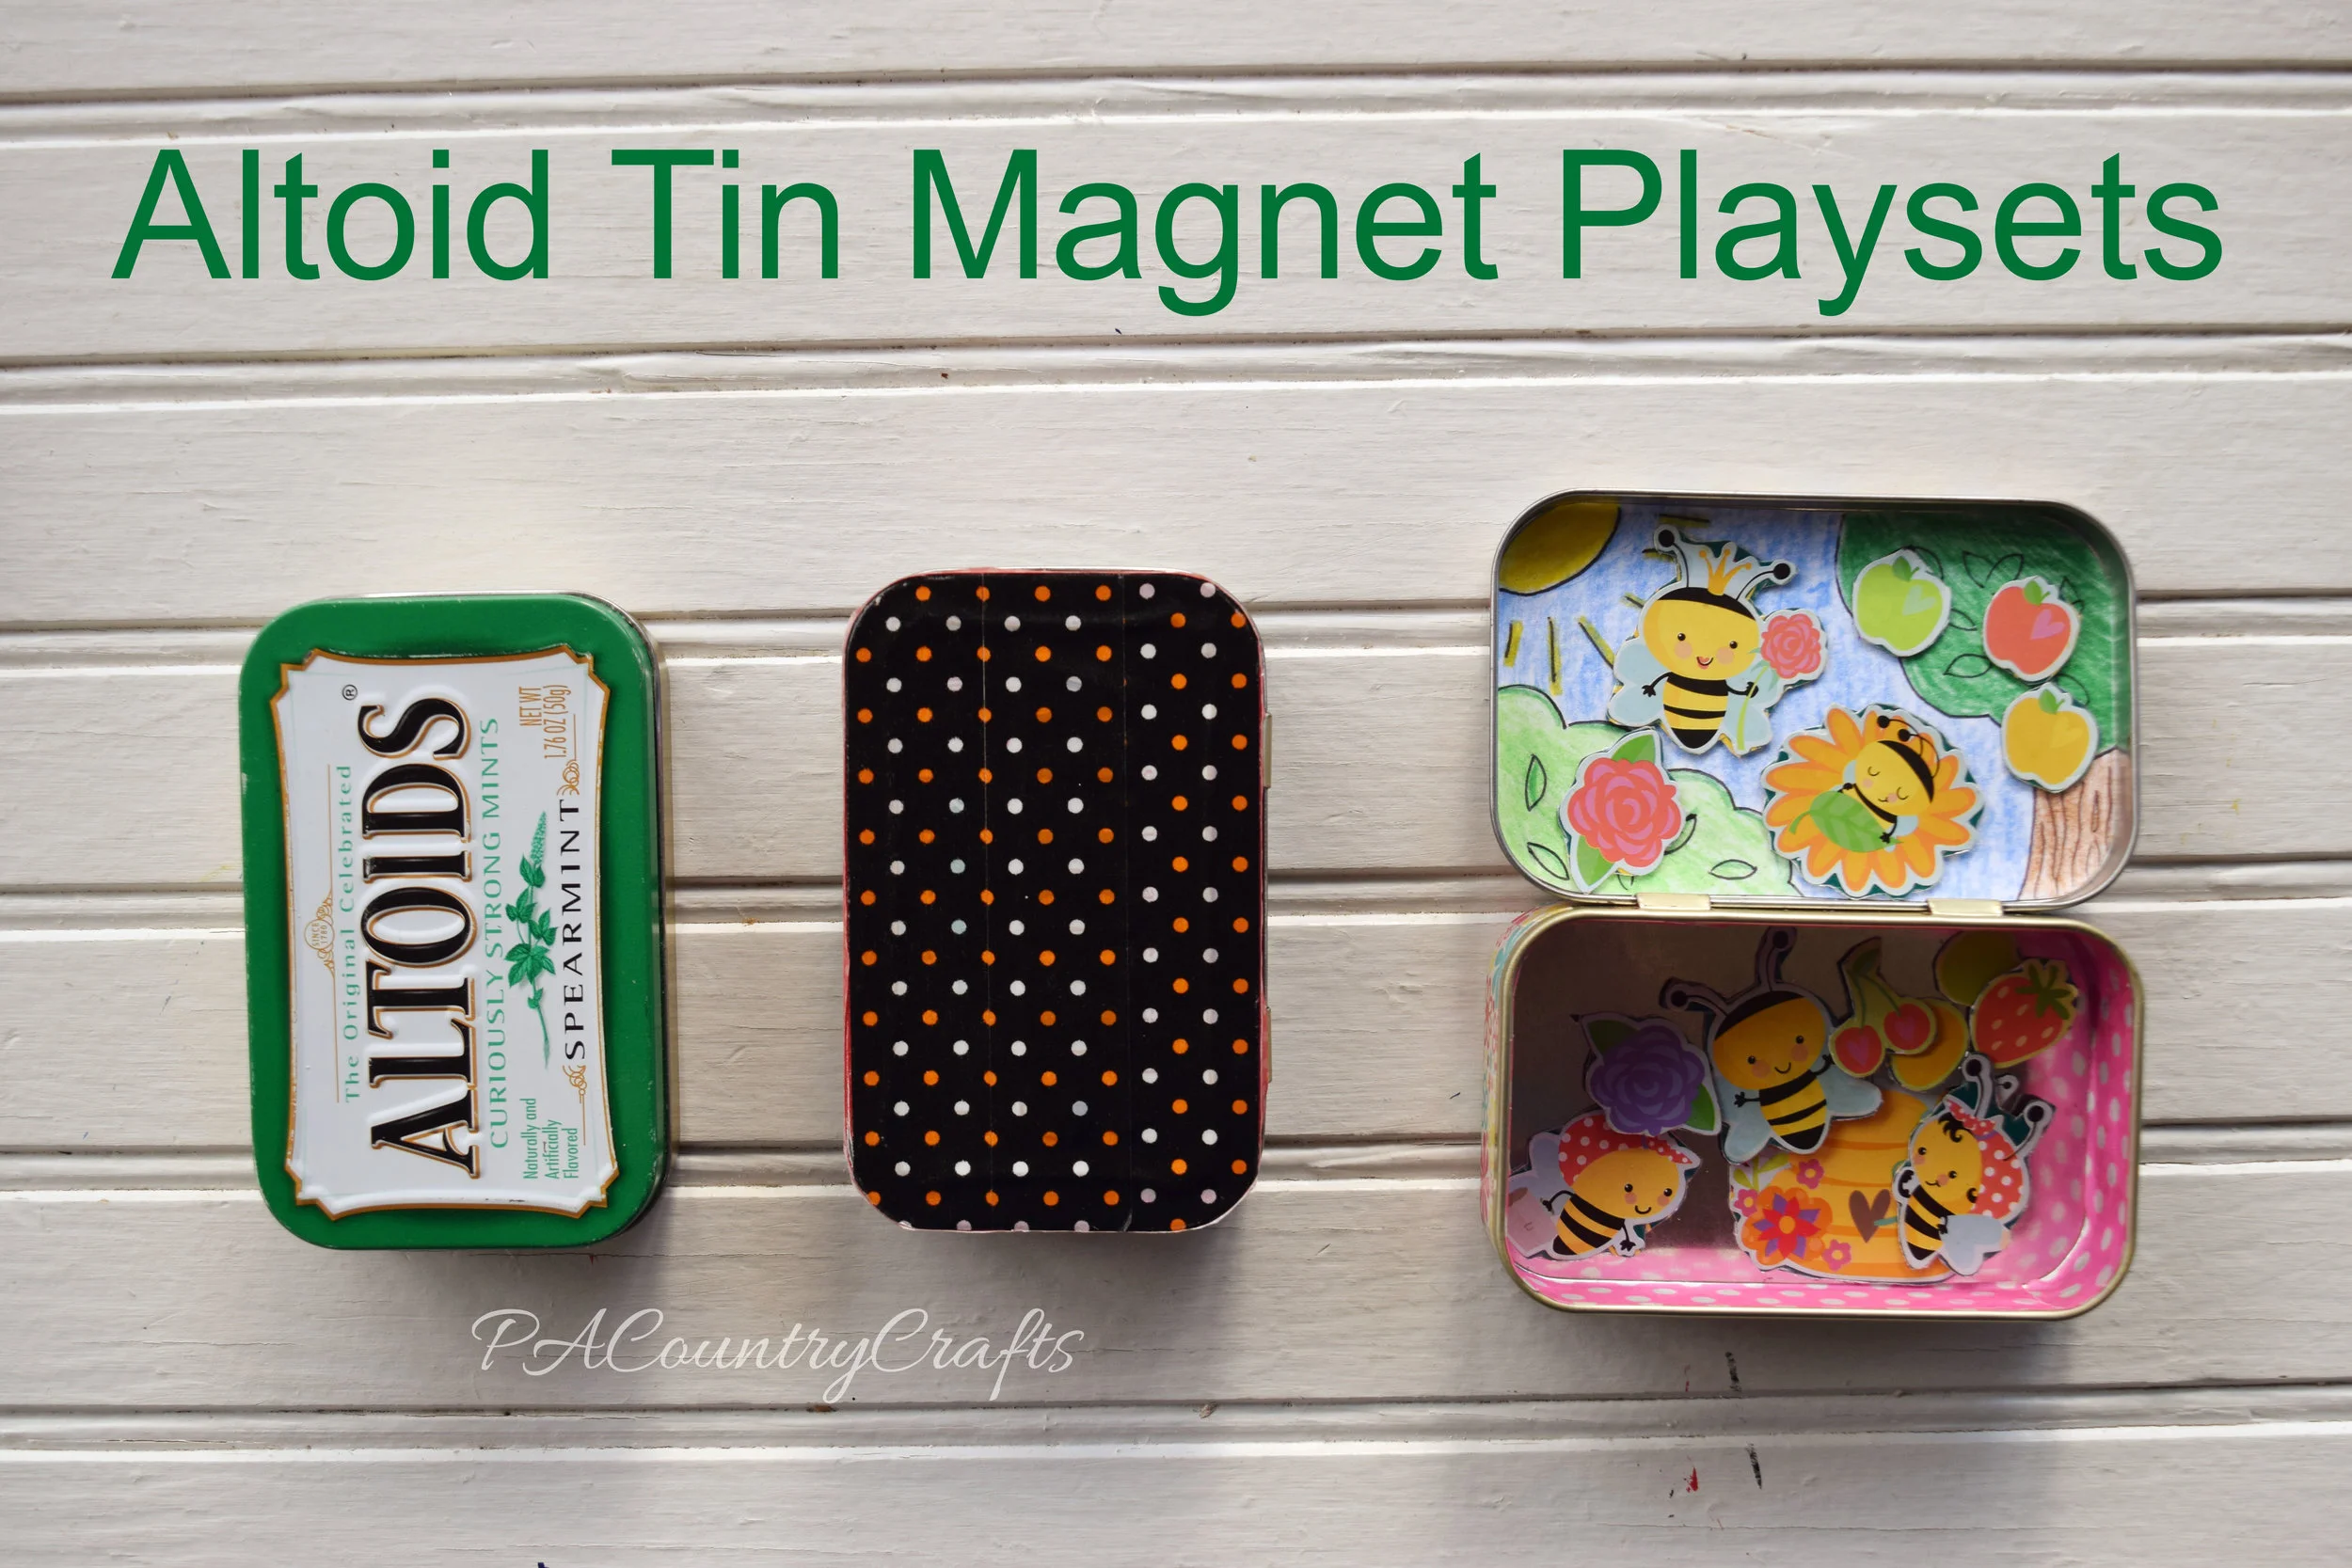
Make a magnetic playset from an altoid tin! Great recycled project and kids craft. It is perfect for a travel activity or to include in Operation Christmas Child shoebox gifts!
Read MoreSometimes I get these overly ambitious ideas and that is as far as they go. Just big ideas.Sometimes, a year or so later, I actually act on them. And, more often than not, it was a lot easier than I anticipated.
This particular big idea: I wanted to make hand warmers from sweater scraps. I made some sweater pillows (some are still not finished, so I will blog about them eventually) and I have a pile of sleeves laying around. Originally, I was going to make hand warmers for my kids' classmates for Valentine's Day, but I really don't have that much ambition. I realized that they are best in pairs, so I would have to make 80+ hearts. No, thank you! Instead, I gave them out as little thank you gifts for some friends and family.


They are soft and lavender scented and pretty. Just microwave them for about 30 seconds and tuck them in your pocket. They make a really pretty little favor or thank you gift. I just tied mine with baker's twine and made little tags to go with them.

I took some pictures to show you how to make them, and I even did it two different ways to make it even more beginner-friendly!
Start with your fabric- I used scraps from a sweater sleeve.

Make a template- mine are about 3" across. I used an old receipt from the grocery store. Place the sweater scraps right side out and pin the template to them. You want to leave some extra fabric all around the template so that there is wiggle room if/when it shifts.
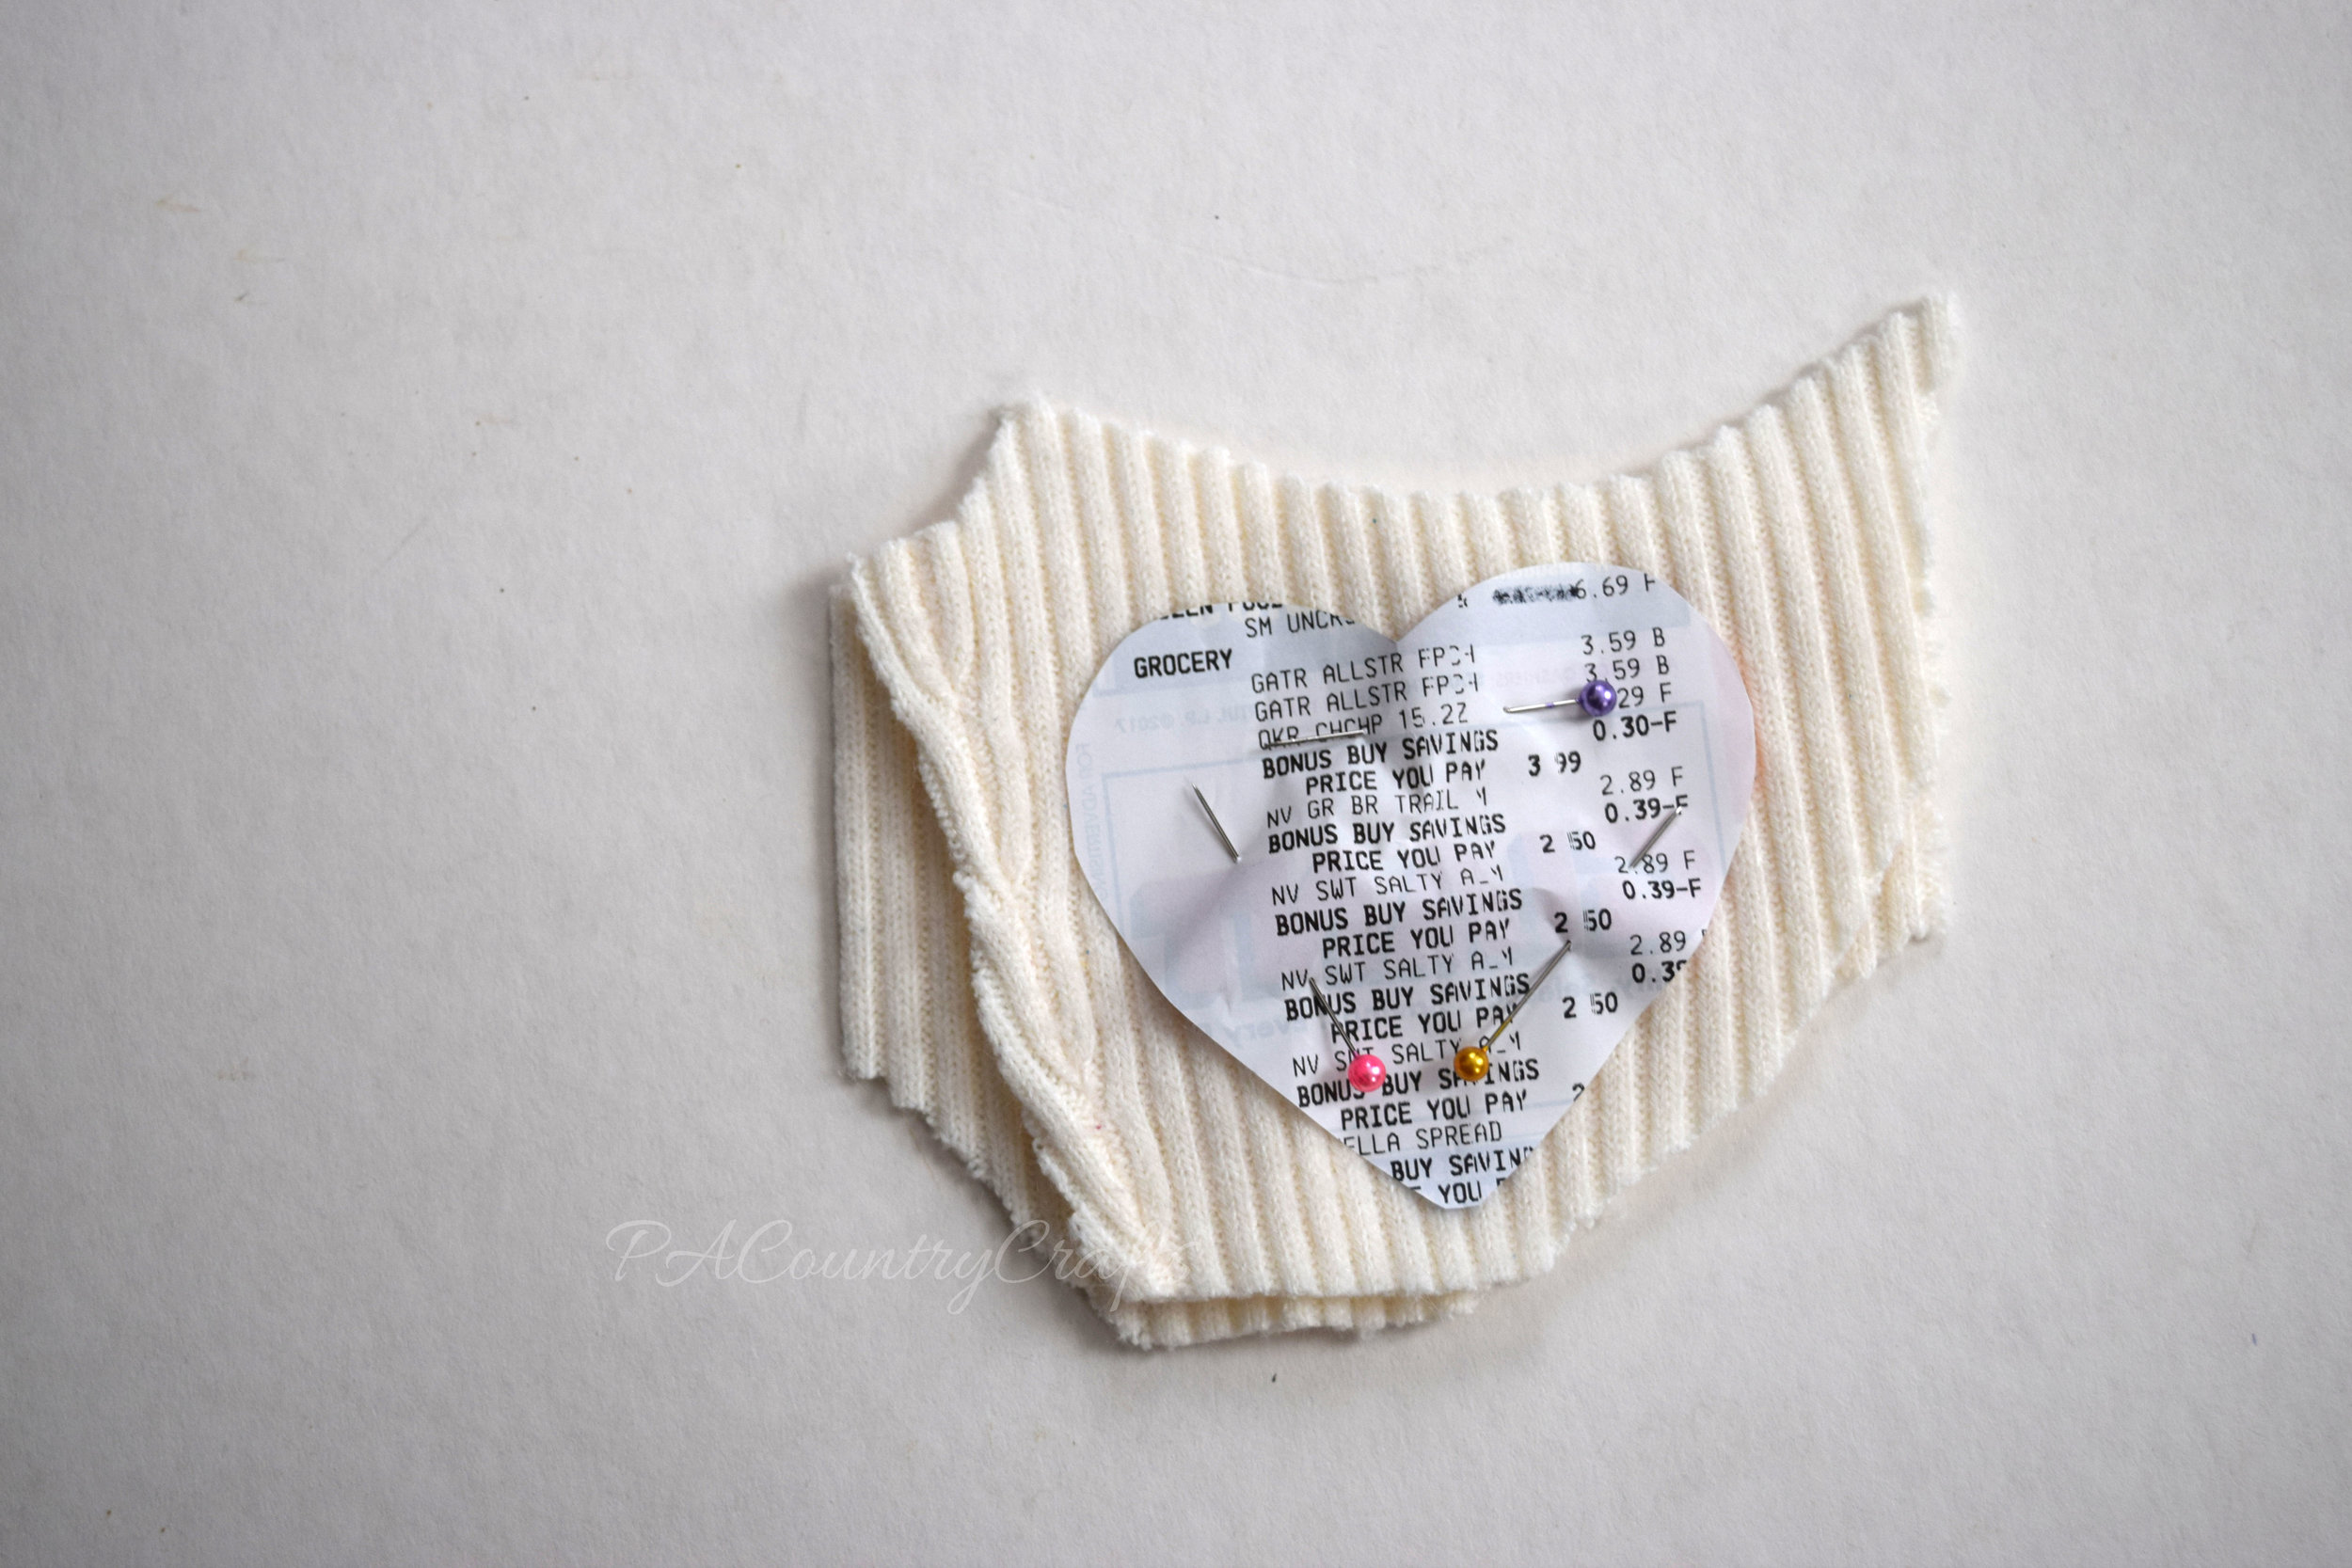
Start on the straight side of one heart just before it starts to curve. Backstitch, then sew all around the template, leaving a small opening on the straight side. I used a receipt because if I caught the edge of the paper it didn't matter- it tears away easily.

Take our your pins and remove the template.

Fill the hand warmer with rice. (A funnel is really helpful!) I mixed mine with some lavender essential oil.

Sew the opening closed. It is a straight line, so it is pretty easy!


Use pinking shears to trim all the way around the heart.

Easy, right?

But there is another way to do it that I found to be even easier...
Draw a template on a piece of tissue paper.

Pin the template to your sweater pieces- I just folded the bottom of the sleeve in half, keeping the right sides out.

Now, here is the even easier step... sew right on top of the tissue paper, following the lines you drew on the template. Again, start on the straight side right before the heart starts to curve and leave an opening at the end, stopping a half inch or so after the point at the bottom of the heart.

See? The tissue paper just tears right off!

Now, the only downside that I found was that the pencil from the template made my threads darker. So, if this bothers you, don't say that I didn't warn you. I put it in bold AND italics. Maybe a Frixion pen would work and iron out? If you try it, let me know! I can't find mine.


If you want to pin it for later…

Here are some more ideas you might like…


As pomised yesterday, here is my new tutorial on the play pea pods I made with the girls.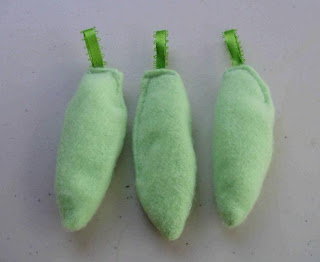.jpg)
I used some old green fleece (felt would have been better but I didn't have any green), beads from a broken, gaudy, old Avon necklace, and some green ribbon.
.jpg)
.jpg)
I clipped the curves a bit and turned right-side-out..jpg)
.jpg)
.jpg)
.jpg) And... TA DA!!! Pea pods. I may be crazy but I am considering making play food as things come in season in the garden. Big ideas... maybe I should finish something else first!
And... TA DA!!! Pea pods. I may be crazy but I am considering making play food as things come in season in the garden. Big ideas... maybe I should finish something else first! Sewing, crafts, tutorials, recipes, and a little look at our life in the country - raising half a dozen children.

Hi! Thanks so much for stopping by! My name is Lindsay and on this blog you will find sewing, crafts, decorating, recipes, and tutorials with a little bit of honesty and encouragement.