Free Printable Planner Stickers ~ Houseplants
/
These free printable planner stickers feature houseplants in a gray, green, and gold color scheme.
Read MoreThese free printable planner stickers feature houseplants in a gray, green, and gold color scheme.
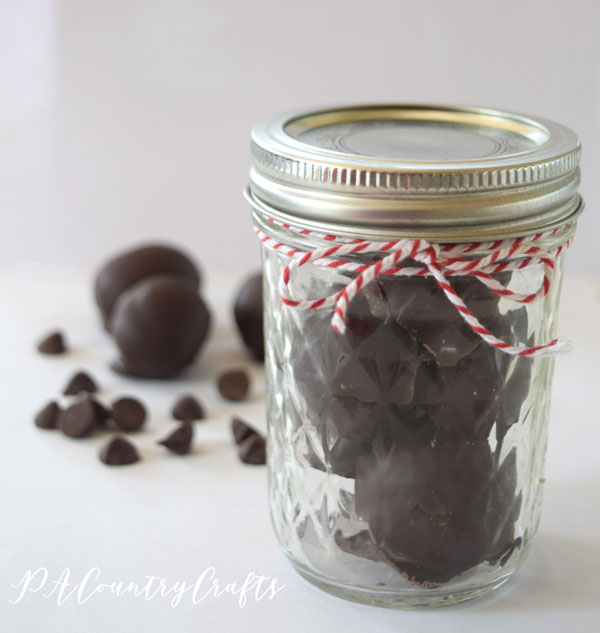
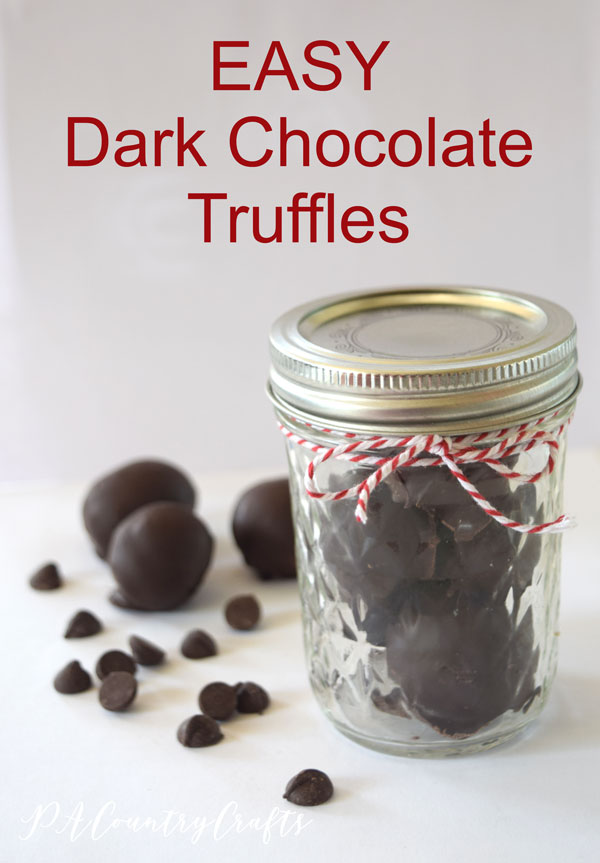
Read MoreI love truffles! Especially dark chocolate truffles! I have made truffles several different ways and these are definitely the easiest. I am almost embarrassed to share this recipe because it is so easy!
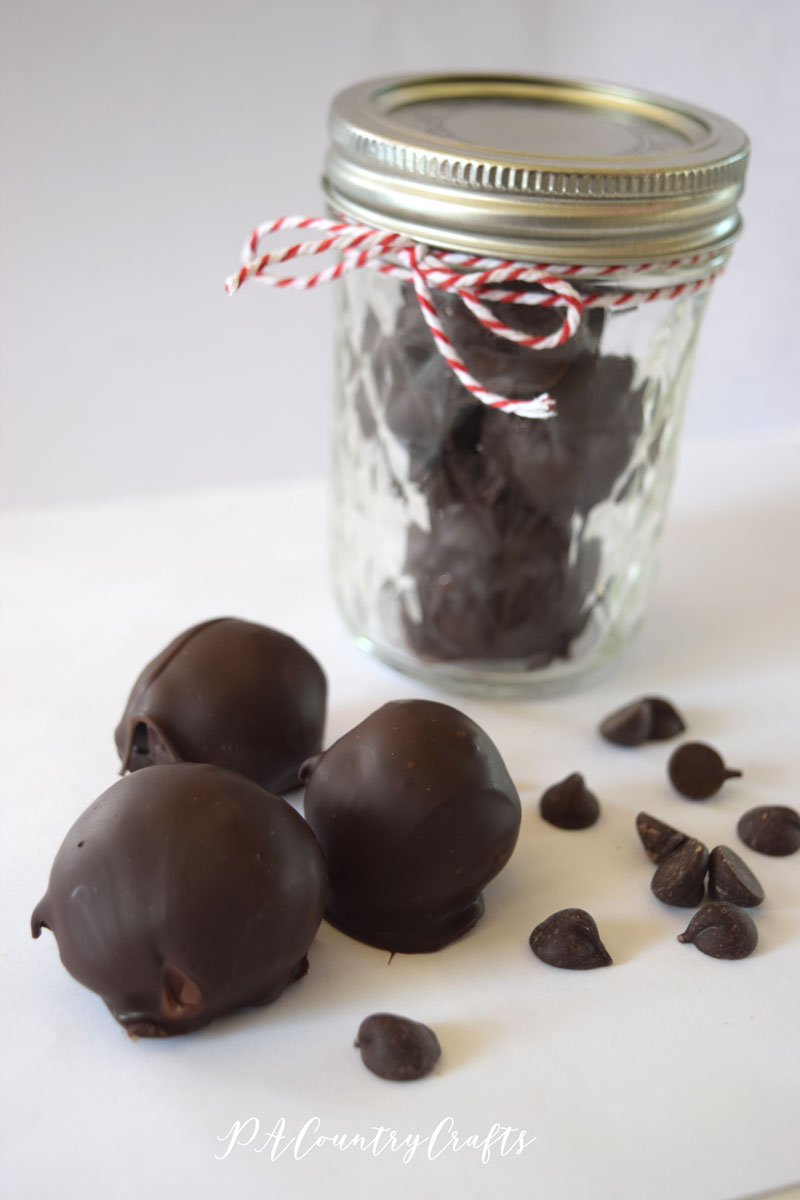
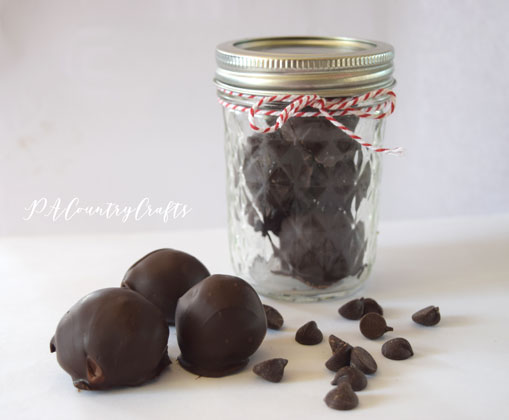
I make these for teacher gifts (some teachers have even requested them) and put them in a cute little tin or jar. The minimal effort in making these does not mean I appreciate them any less, but I do feel a little guilty when anyone is impressed by them.
Ready for the recipe with step by step pictures? It took me longer to edit pics and blog about these truffles than it did to make them.
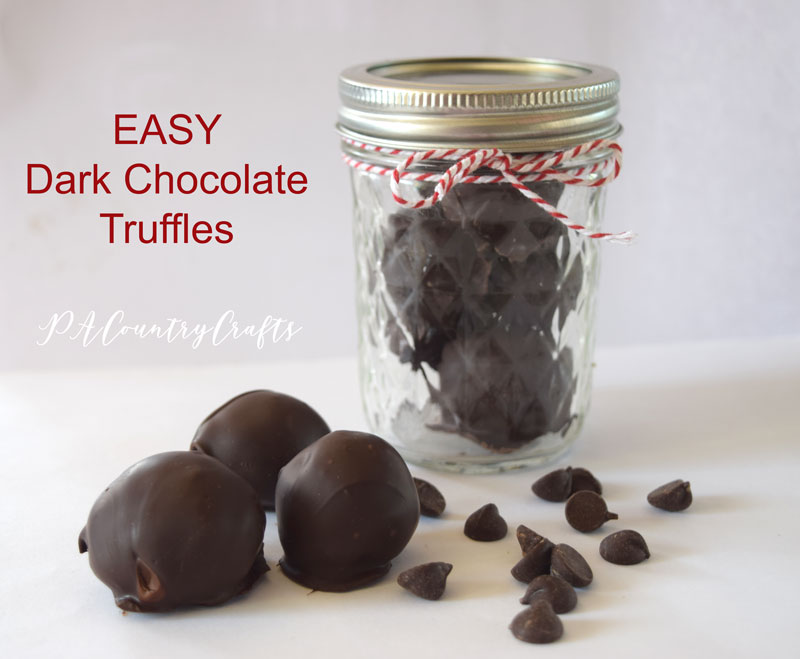
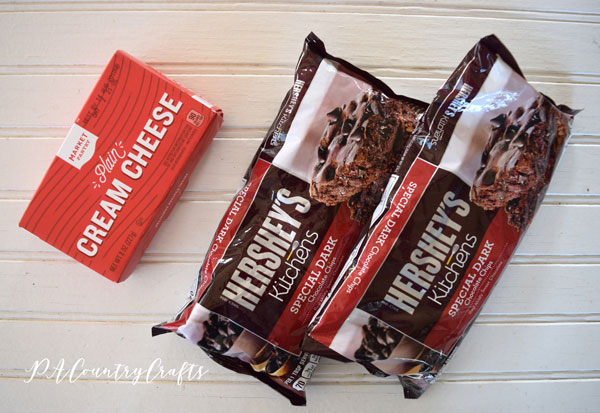
These are your ingredients. Yup. That is it! One pack of cream cheese (I think I do prefer Philadelphia just a bit) and two bags of Hershey's Special Dark chocolate chips. You can use other chocolate if you prefer, but this is my favorite.
Melt one bag of chocolate chips. I used to have a chocolate melter, but the kids broke it. My other tactic is this one: pour a bag of chocolate chips into a plastic, microwave safe container. (I use plastic because after it is empty you can put it in the freezer and then squeeze the container so the hardened chocolate bits pop right out. Easy clean up!)
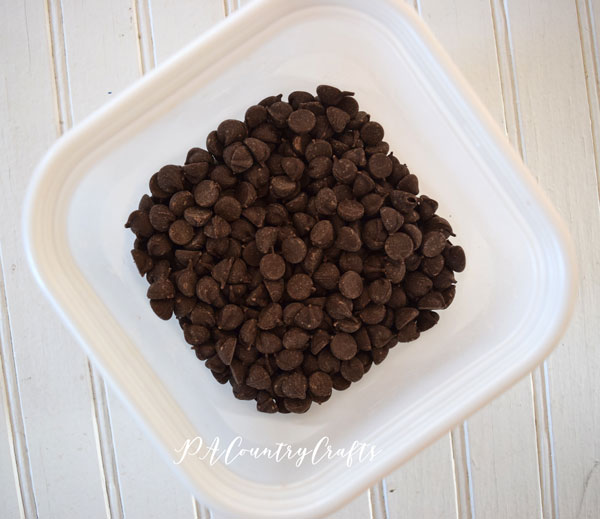
Melt the chocolate for one minute at 50% power. Stir. Place chocolate back into the microwave at 50% power and stir every 30 seconds until melted.
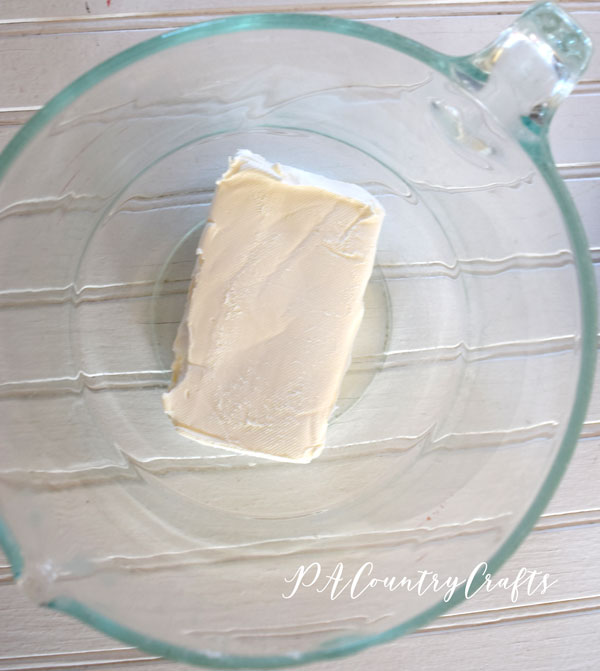
Put the cream cheese in a medium mixing bowl. I guess you could soften it, but it always seems to be soft enough for me to work with. Your call.
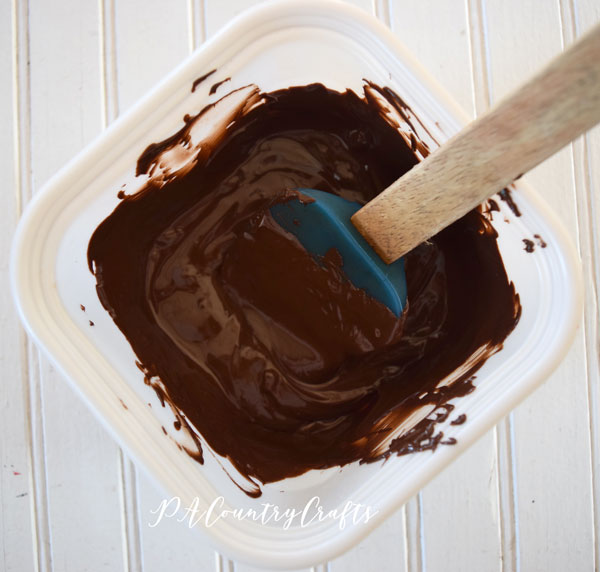
Pour the melted chocolate over the cream cheese.

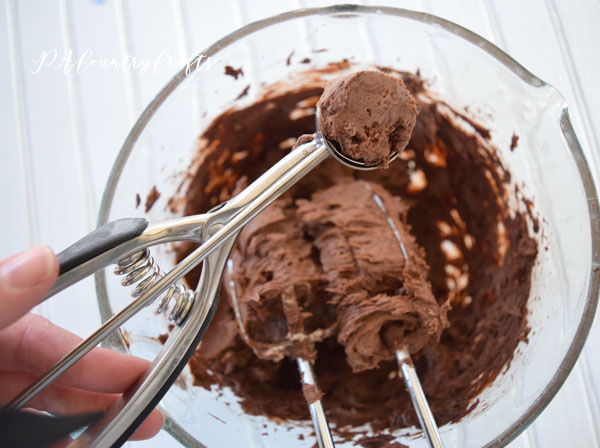
Mix the chocolate and cream cheese together. You are going to need some sort of mixer for this one, especially if you didn't soften the cream cheese.

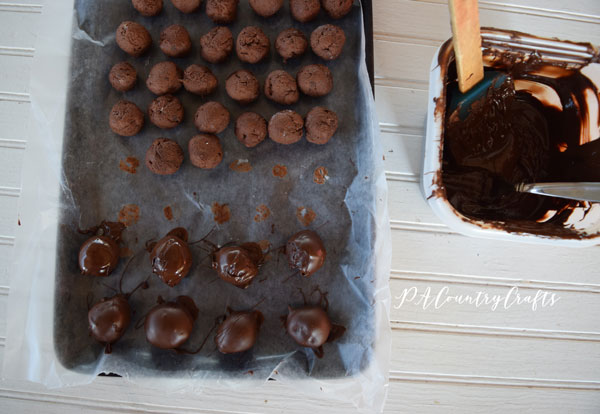
Roll the truffle mixture into little balls. I have a small cookie scoop that is the perfect size and keeps them pretty uniform. Place the truffles on a wax paper covered cookie sheet.
Place the truffles in the refrigerator or freezer until they are firm.

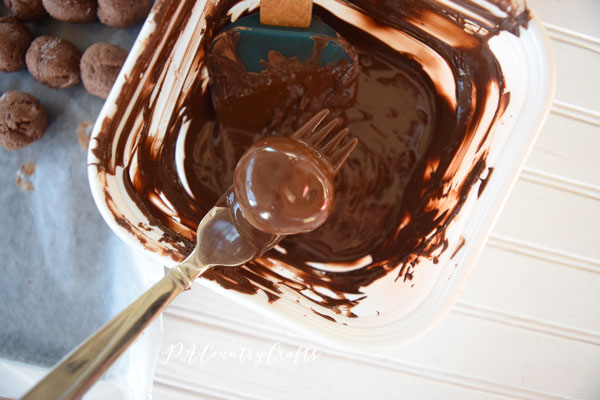
Melt the second bag of chocolate chips as before. I like the chocolate a little thick so I do not add any wax or oil. I am not great at chocolate coating, though, so do whatever works for you! Dip the truffles into the melted chocolate. I just use a fork and tap off the excess chocolate before placing them back on the cookie sheet.
Since the cookie sheet should still be cold the chocolate hardens right away.
That is it! Easy, right? You don't have to share the recipe. No one will know.
If you want to pin it for later...
Here are some more chocolate recipes that you might enjoy...
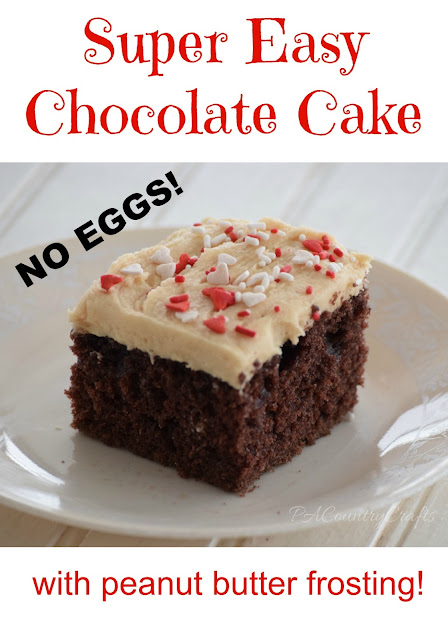
Zucchini Chocolate Cake

It is not too often that I actually make something for myself. I actually do not have a great place to display this wreath, but I made it anyway and I really love it!
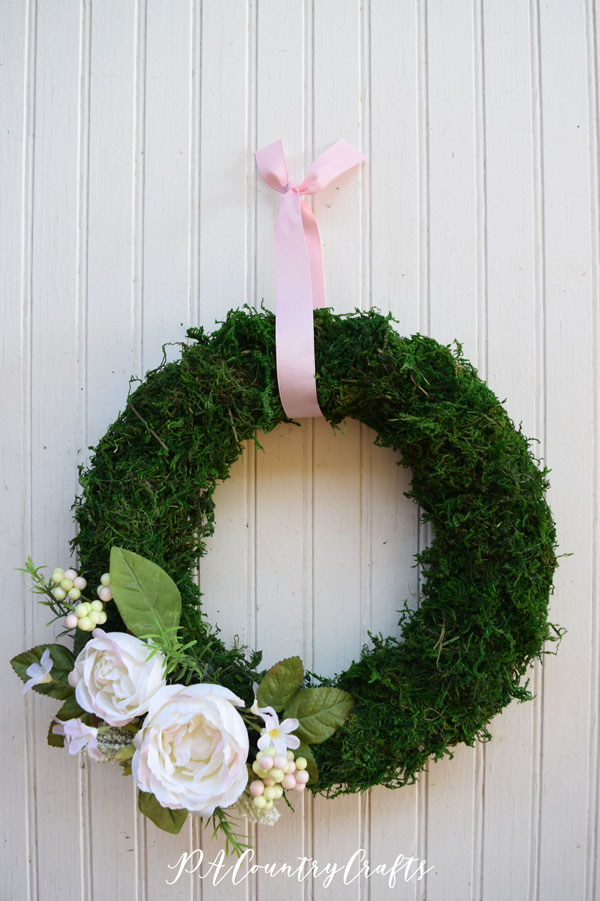
I had some foam wreath forms a friend had given to me a long time ago and I just hadn't found a use for them. Recently, I was browsing Pinterest and saw some cute moss wreaths I thought I could make. For myself!
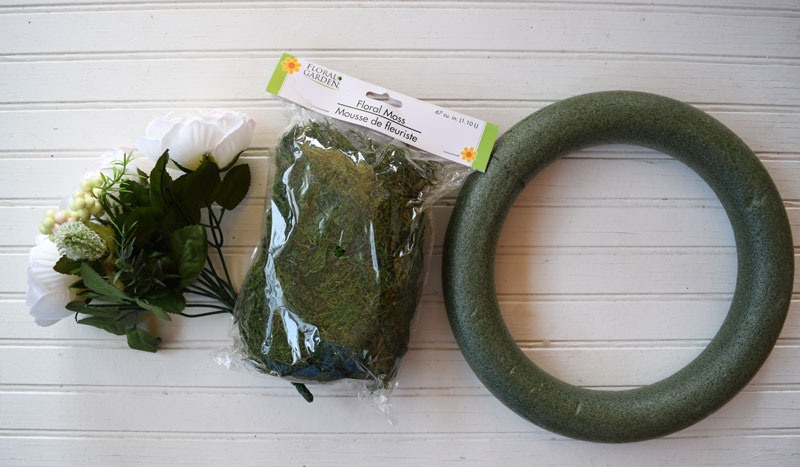
The wreath form was free, but they do carry slightly smaller ones at the Dollar Tree. I also got a bag of moss at the Dollar Tree. The flowers came from Michaels. I actually wanted coral ones, but there was a sweet older lady who asked my 12yo which flowers she recommended (I guess we have similar taste, my daughter and I) so I found something else. Anyway, this was a really cheap project!
So, gather all of your supplies...
A ribbon to hang would be helpful and is not shown. You also need hot glue sticks, a glue gun, toothpicks, and green floral tape.
Now, the moss part was a mess. I made this on my kitchen counter, but anticipate snibbles of moss everywhere!
Just take small bunches of moss and hot glue them onto the wreath form. It takes quite a few sticks of hot glue. Check for any thin spots and add more as needed.
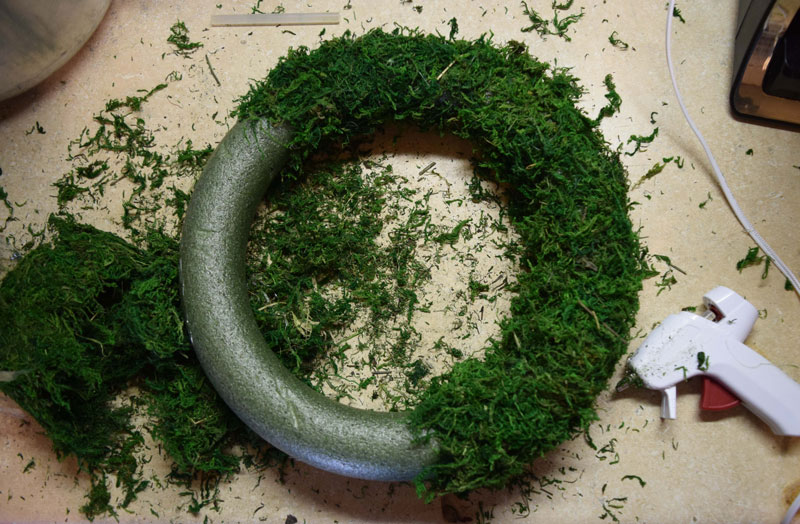
It is actually still pretty cute plain!

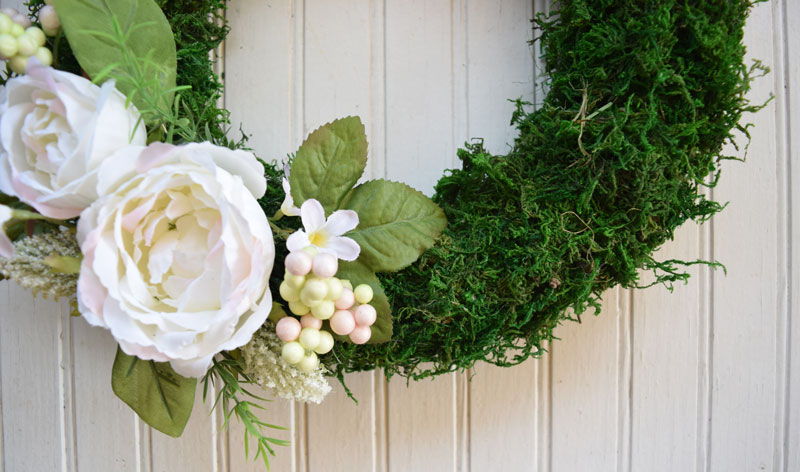
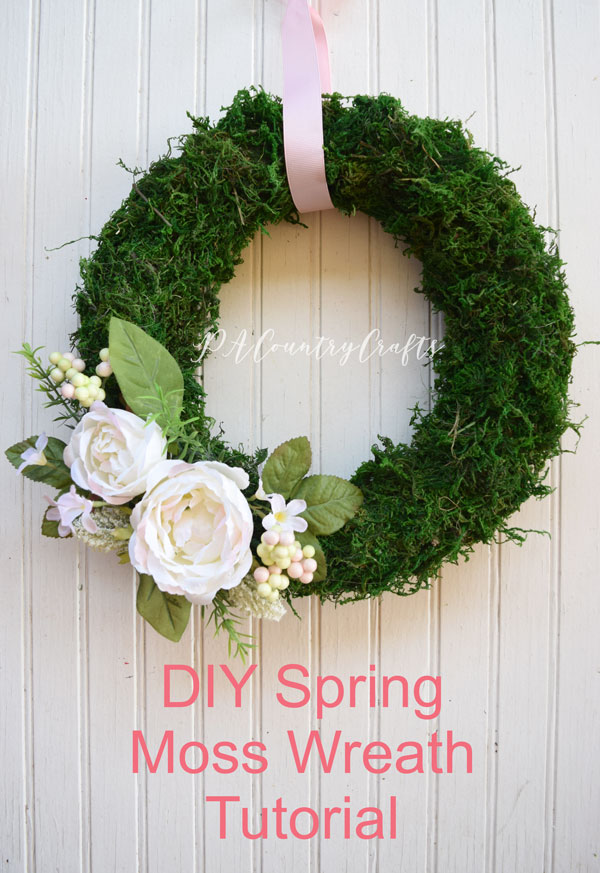
Next, add the flowers. Cut them apart and lay them on the wreath until you get an arrangement you are happy with. My flowers had enough stem to poke into the wreath but I added some hot glue around the bottom of the flower just in case. Attach the leaves to toothpicks using hot glue and green floral tape. Stick them into the wreath as well.


Pretty easy, right? Hot gluing the moss is a little messy and tedious, but I priced similar wreaths at $30. The moss sheds a little, so I don't want to hang it on a door that is opened and closed a lot, but on a wall it is pretty!
If you want to pin it for later...
You may also like these posts...
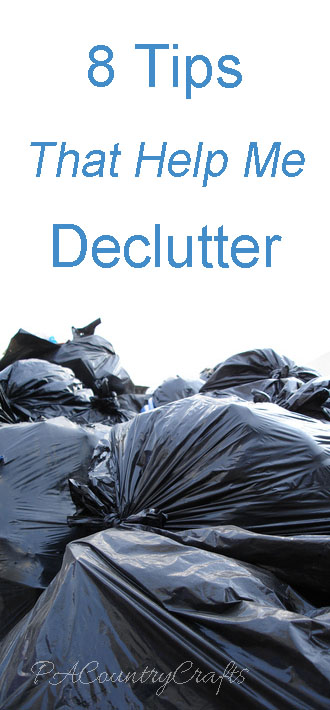
How did the Spring Decluttering Challenge go? Did you join in, even a little? (Giveaway at the end of this post!) For me, I was not super consistent in decluttering a little bit every day. Life happens. I got a little carried away some days, though, so it all evened out. I have been sharing some of my decluttering progress over on Instagram. (Click HERE if you want to follow me!)
Because they are always satisfying to see... a couple of before and after pics:
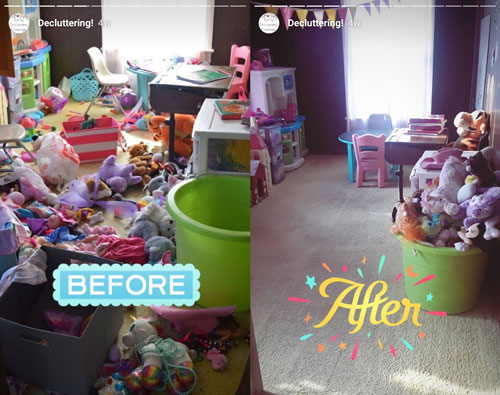
I am still working on a few projects but I will eventually blog about the playroom. I actually removed 2 more garbage bags of stuff after I took the after pic above!
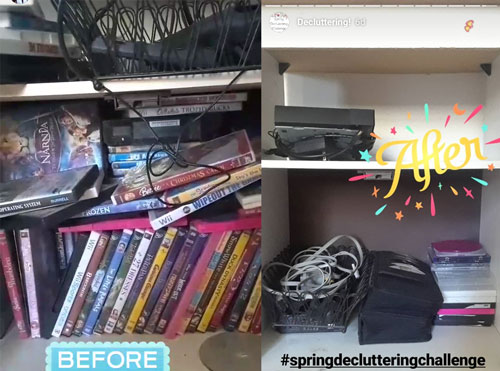
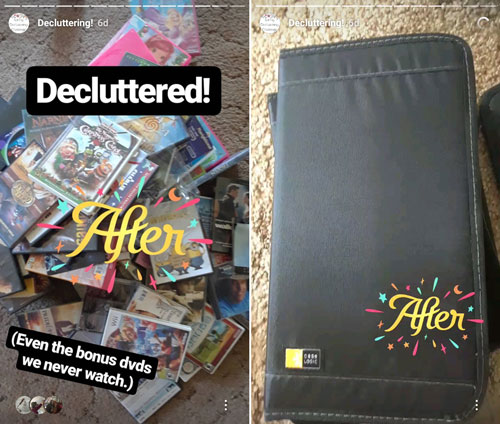
This was my boldest move... I threw away almost all of our DVD cases! They were in terrible shape anyway. No one put things back right. It just made sense. I got some zippered file cases from Amazon and put them all in those instead.
I can honestly see a big difference in our home at this point. It is easier to clean things up, especially in the kids' bedrooms. Clutter still accumulates in certain areas- don't get me wrong- and we still have messes, but it is getting to be more manageable.
My grand total of garbage bags purged during the Spring Decluttering Challenge is.... (drumroll).........
Not too bad! I am pretty happy with my progress.
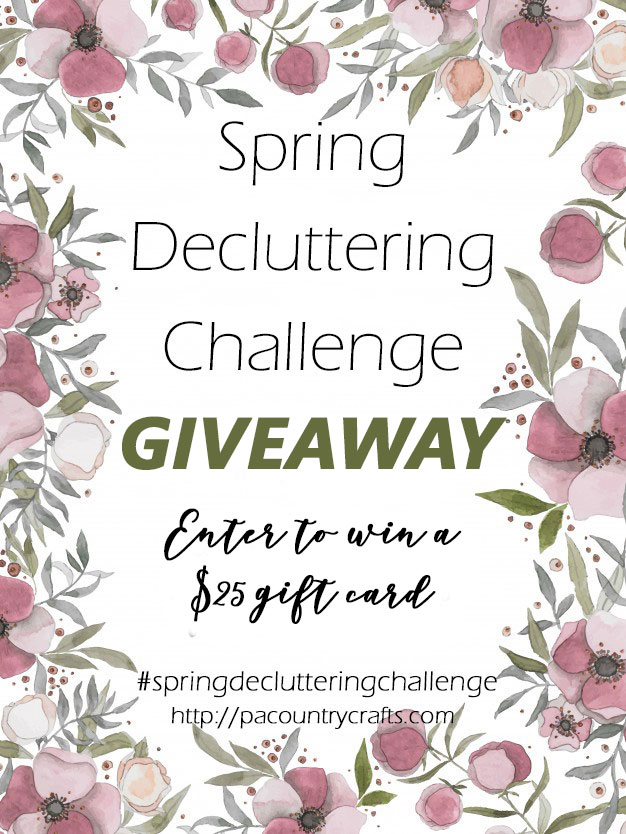
Now for the giveaway...
***UPDATE!!! The giveaway is now closed. Congratulations to Taryn for winning the $25 gift card!***
To Enter: Leave a comment letting me know how many garbage bags of stuff you purged during the challenge. It could be stuff put in garbage, donated, given to someone else, sold, etc. You will get one entry per bag. Honor system. I trust you.
The Prize: I overthought this quite a bit. I don't really want to add any more clutter to someone's life after they just decluttered! So, I am offering a $25 gift card to your choice of store or restaurant (as long as I am able to get it for you).
I will use excel to do a random selection (because I love spreadsheets sooooo much!) on May 11th at 8am EDT.
More decluttering inspiration...
I am getting ready to graduate from MOPS :( but I decided that I would share our last craft project for the year. I thought it would be nice for the moms to be able to make some spa themed goodies to take home with them and, hopefully, relax a little bit later. I presented several options to our steering team and they wanted do to them all. So, we made rice socks, sugar scrubs, and bath bombs.

I have also done some of these crafts with tween girls so these are all simple projects that work well for a girls' night, youth group, girl scouts, birthday party, craft club, etc. Here are the details on each of them...
Rice Sock
These are really nice to warm up and wrap around your neck to relieve tension. I microwave mine for about a minute, but my microwave is super old so yours may be different. You can also store them in the freezer for boo-boos.
I got socks at the Dollar Tree (2 pair for $1) and small elastic hair ties. Then, I fumbled around in the grocery store with gigantic, 20lb bags of rice. It took about 2 cups of rice per sock.
At the craft tables, we had measuring cups (the glass ones with the pouring spout) to measure the rice and mix in essential oils if desired (we had people bring their own). One person held the sock open while the other poured the rice into the sock. Then, we tied them shut with the hair elastics. However, some people were concerned about the hair ties melting or not holding up over time so they just tied a knot in the end of the sock. That made it faster, easier, and smarter!
Sugar Scrubs
I made these a really, really long time ago and they make nice little gifts. They work really well for getting dirt out of your skin if you are gardening or have kids who play in the mud.
I got 10-packs of little containers at the Dollar Tree. Then, I got sugar and dish soap at the grocery store. We used Dawn Olay Hand Renewal dish soap in blueberry something and the store brand in pomegranate. (I have since found that Target has their generic even cheaper! Click HERE to see it.) It is just the stuff that smells pretty and is supposed to be good for your hands.
For these containers, we used 3 Tablespoons of sugar mixed with 1 Tablespoon of dish soap and stirred with a popsicle stick. (As long as you keep the 3:1 ratio it works.)
Bath Bombs
An April craft meeting meant it was great timing to get plastic Easter eggs as bath bomb molds. I got ours at Walmart and I have noticed that they are smaller then my older plastic eggs. I think the plastic egg industry is slowly shrinking them on us. I got the remaining ingredients at a bulk foods store, except the citric acid which I ordered from Amazon.
This station was really messy, so I am glad that we kept it in the kitchen. To prepare, I had measuring cups set out with each ingredient, bowls for mixing, and sandwich bags to hold the plastic eggs (in case they popped open later). I also melted the coconut oil and kept it warm in a bowl sat on top of a pot of warm water.
We used a basic recipe and the moms were encouraged to bring oils to add to them. Each recipe made 5-6 eggs.
1/2 cup baking soda 1/4 cup corn starch 1/4 cup epsom salt 1/4 cup citric acid 3-4 teaspoons melted coconut oil 1-2 teaspoons water essential oils
The dry ingredients were mixed together and then the wet ingredients were added. It should be the consistency of a wet sand and start to stick together when you squeeze it. If it was too dry, more water or oil was added. Then, we pressed everything together into the egg. The egg halves had to be overflowing a bit. When the two sides were pressed together, the excess fell out. This made sure the eggs were full with no air bubbles.
It was a lot of work to gather all of the supplies for a large group, but the craft went pretty well. They seemed to be simple enough for everyone to easily make. If someone did not want to make all of them, they did not have to do it.
You can see some of the other MOPS crafts we did by clicking on the pictures below...


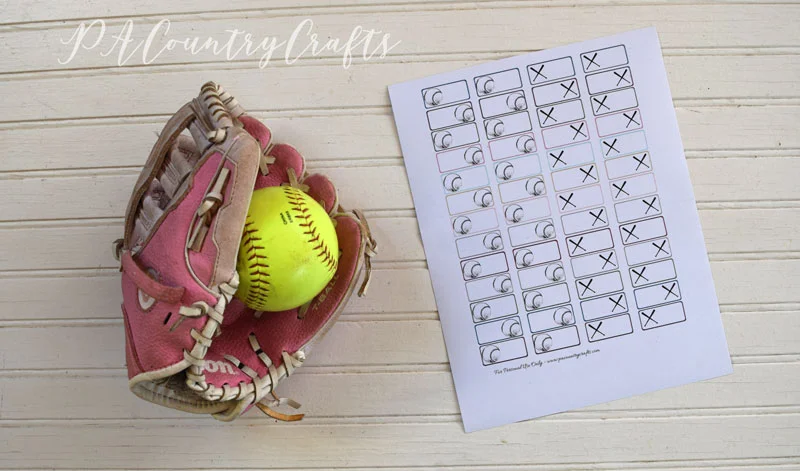
Free printable planner stickers to track softball or baseball games and practices! They fit the Classic Happy Planner.
Read MoreEarth Day is coming up! To be honest, I generally don't do anything to celebrate it, but I tend to do a lot of upcycling projects so I thought that I would do a round-up post of some of my favorites! I picked the top ten, but you can see more of my upcycle projects HERE.
Women's Dress to Girls' Maxi Skirt (and bracelets and headband!)
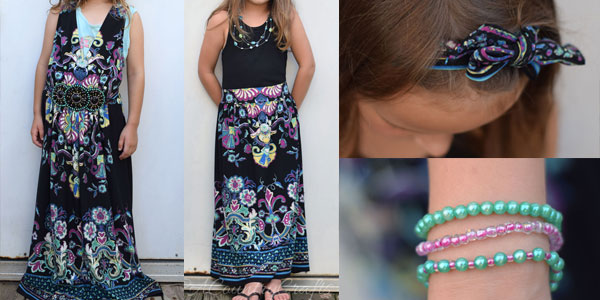
I got a women's dress at the local thrift store and turned it into a maxi skirt for my daughter. I even seam ripped off the beading from that jazzy medallion at the waist and helped her to make bracelets out of them. One of the waist ties became a headband. Triple upcycling! Do I get bonus points for that? You can see the full post and tutorial HERE.
Altoid Tins to Magnetic Playset
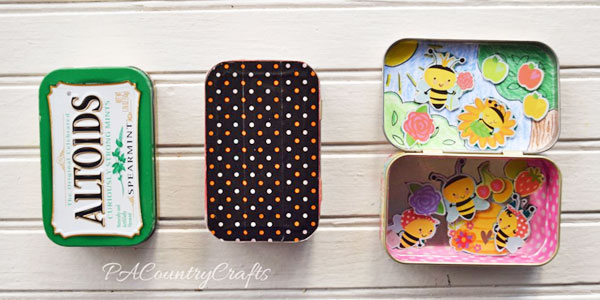
This is a non-sewing project that you can do with the kids. Some washi tape, stickers, paper, and old promo magnets transform these into little magnetic playsets that you can tuck into your purse to keep kids occupied in waiting rooms, etc. Full tutorial to make these available HERE.
Sweater Scraps to Hand Warmers
Got a hole in your favorite, softest sweater? These little hand warmers are really cute and I have a little trick to sewing these! See the tutorial HERE.
Men's Shirt to Girls' Vintage Style Dress

Upcycling with Men's Dress Shirts is actually a fun project. There are a lot of possibilities. I have a mini-tutorial showing how I used this shirt as an efficient fabric source to make the dress HERE.
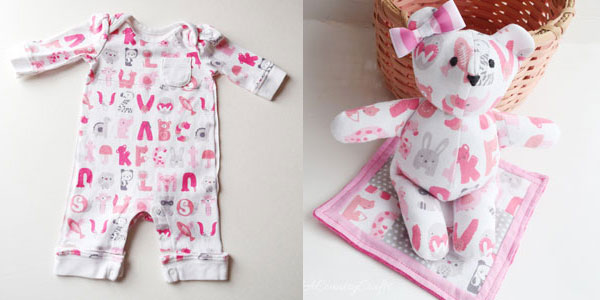
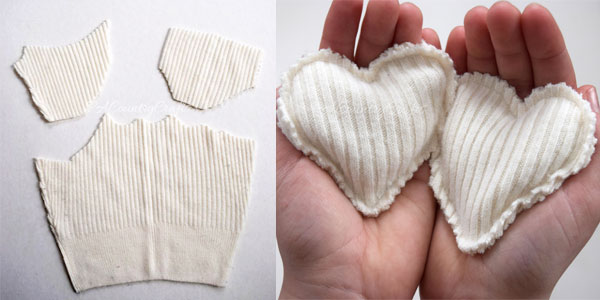
So, this is a pretty popular post on the blog. It is a really sweet way to preserve a special baby outift, though! Full tutorial and pattern available HERE.
Three Ways to Mend Holes in Jeans
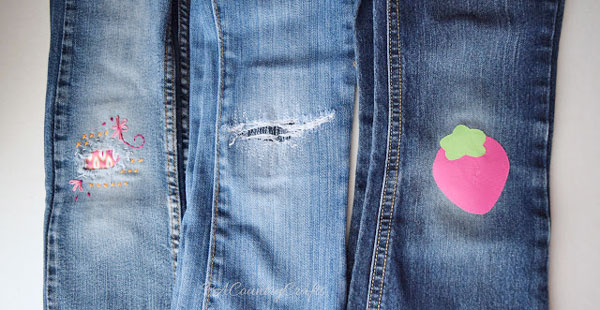
One daughter in particular is really, really hard on her jeans! Which style is your favorite? Details on how to do each one are available HERE.
Vintage Sheets to Easter Dresses
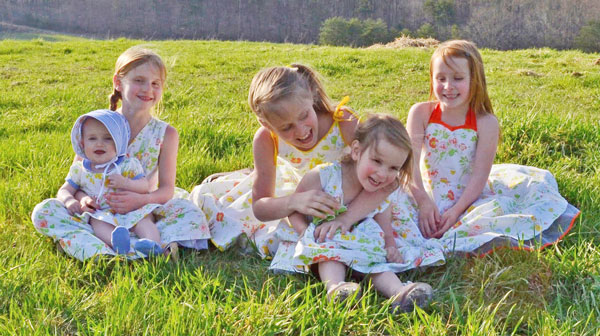
I made five Easter dresses from a couple of vintage sheets that had belonged to my Nana. I was strategic so I didn't even have to hem some of them! This was my absolute favorite year for Easter dresses and I have tutorials for each of them. They are all linked at the bottom of THIS post.
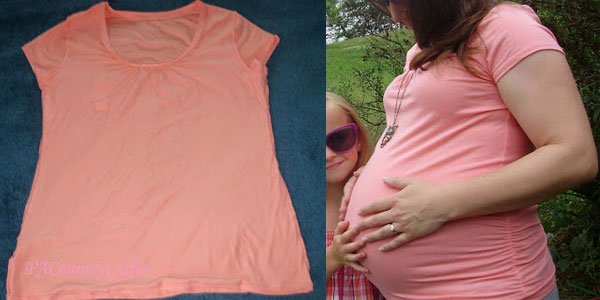
EEK! I was so big here (at only 29 weeks)! Trust me, this shirt stretched out WAAAAAAY further until the end and surprisingly still covered my watermelon belly. Full tutorial HERE.
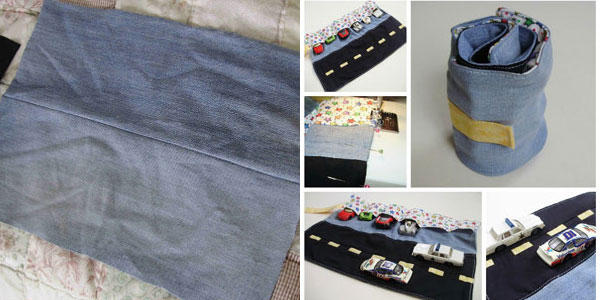
Hey! Look! Something for the boys! (Although my girls play with cars, too.) Using old jeans legs for the base of this made it sturdy and more durable. Full tutorial HERE.
Now, for my all-time favorite upcycle project. Drumroll, please! .....................................................
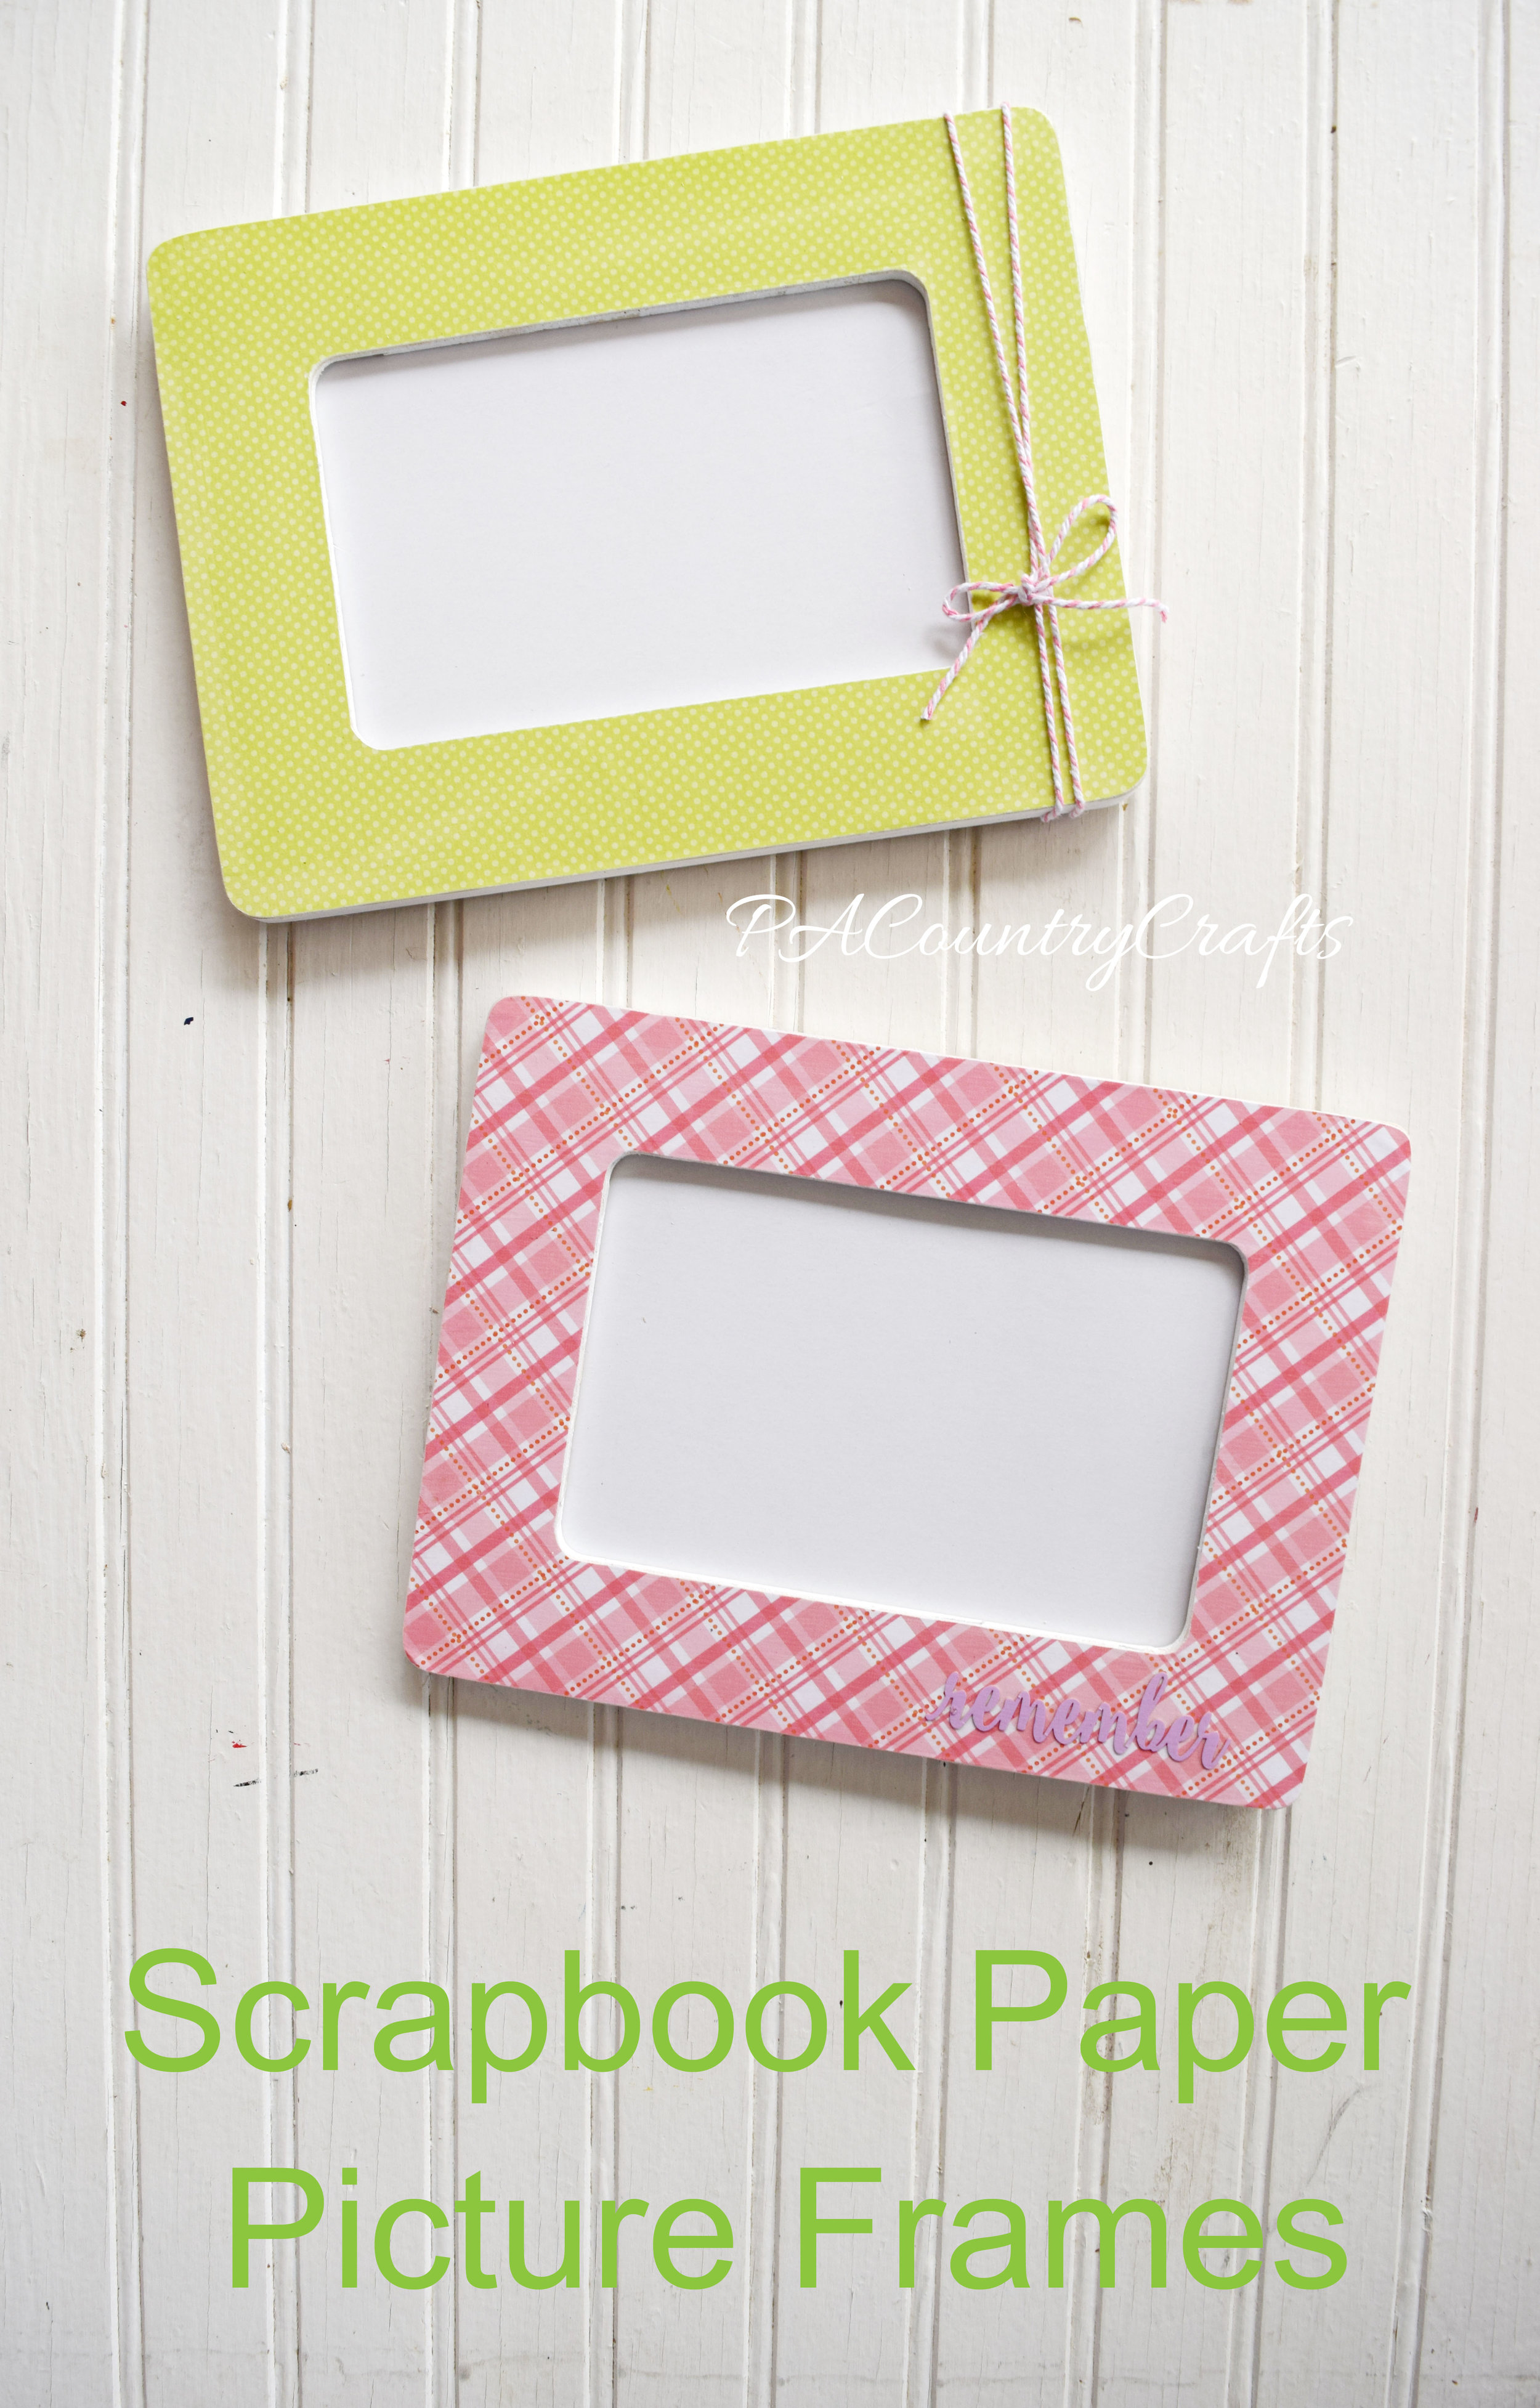
Collage Wall from Thrift Store Frames
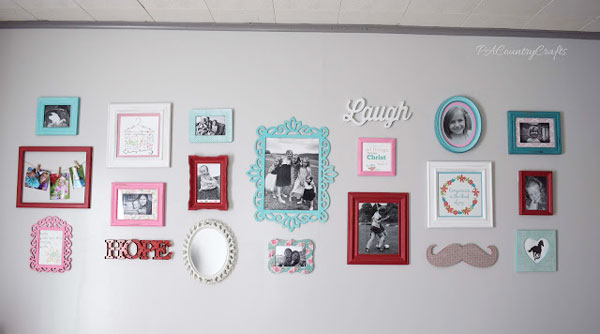
I love this wall so much! It still looks pretty much the same, except the girls put some things on the tops of their beds and block the stuff on the bottom sometimes. We got a bunch of frames at yard sales and thrift stores (plus a few from Michaels) and we turned them into this cute collage wall. See all of the details (and get free printables) HERE.
If you want to pin this for later...

Don't forget to check out all of my upcycle projects HERE!
Sewing, crafts, tutorials, recipes, and a little look at our life in the country - raising half a dozen children.

Hi! Thanks so much for stopping by! My name is Lindsay and on this blog you will find sewing, crafts, decorating, recipes, and tutorials with a little bit of honesty and encouragement.