

How I Survived The Last Year of Kindergarten
/
How I handled the adjustment of my youngest child’s first year of school and the autograph patchwork quilt that I made for her Kindergarten teacher!
Read MoreHow I handled the adjustment of my youngest child’s first year of school and the autograph patchwork quilt that I made for her Kindergarten teacher!
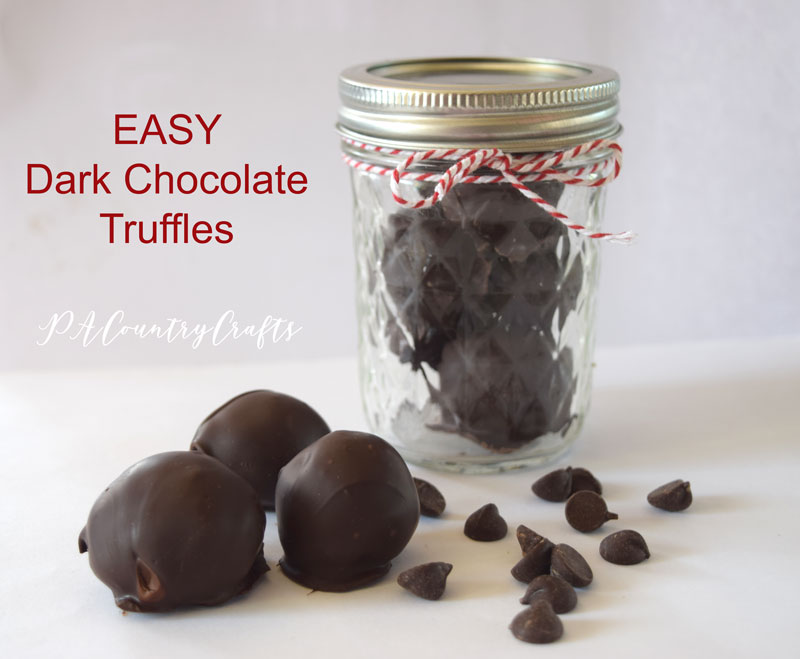
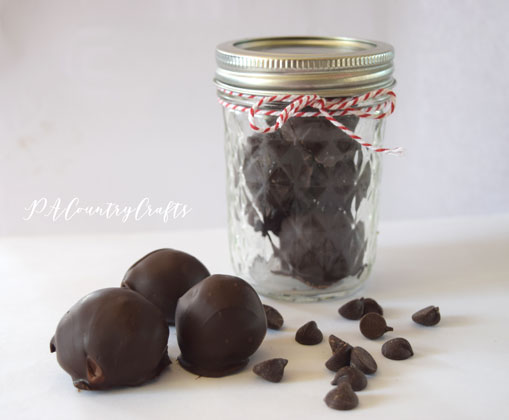
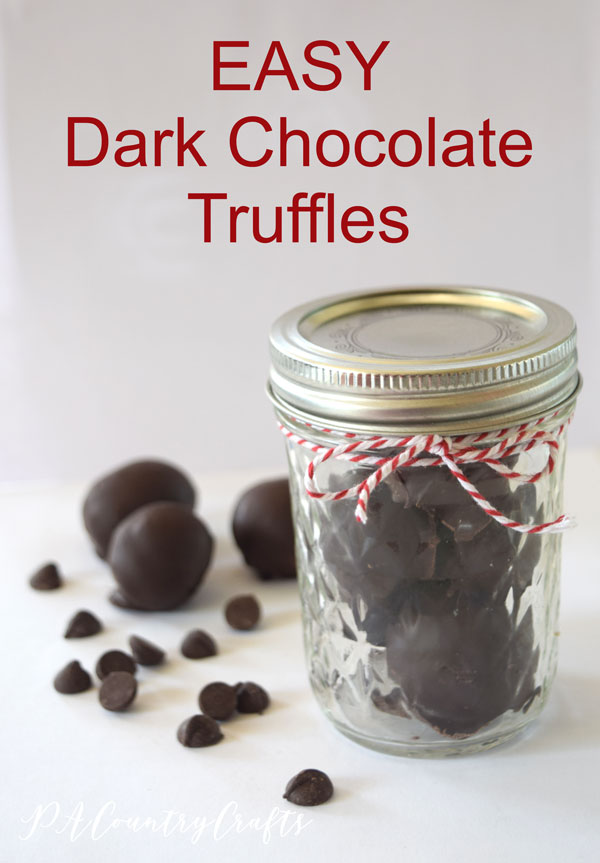
Read MoreI love truffles! Especially dark chocolate truffles! I have made truffles several different ways and these are definitely the easiest. I am almost embarrassed to share this recipe because it is so easy!
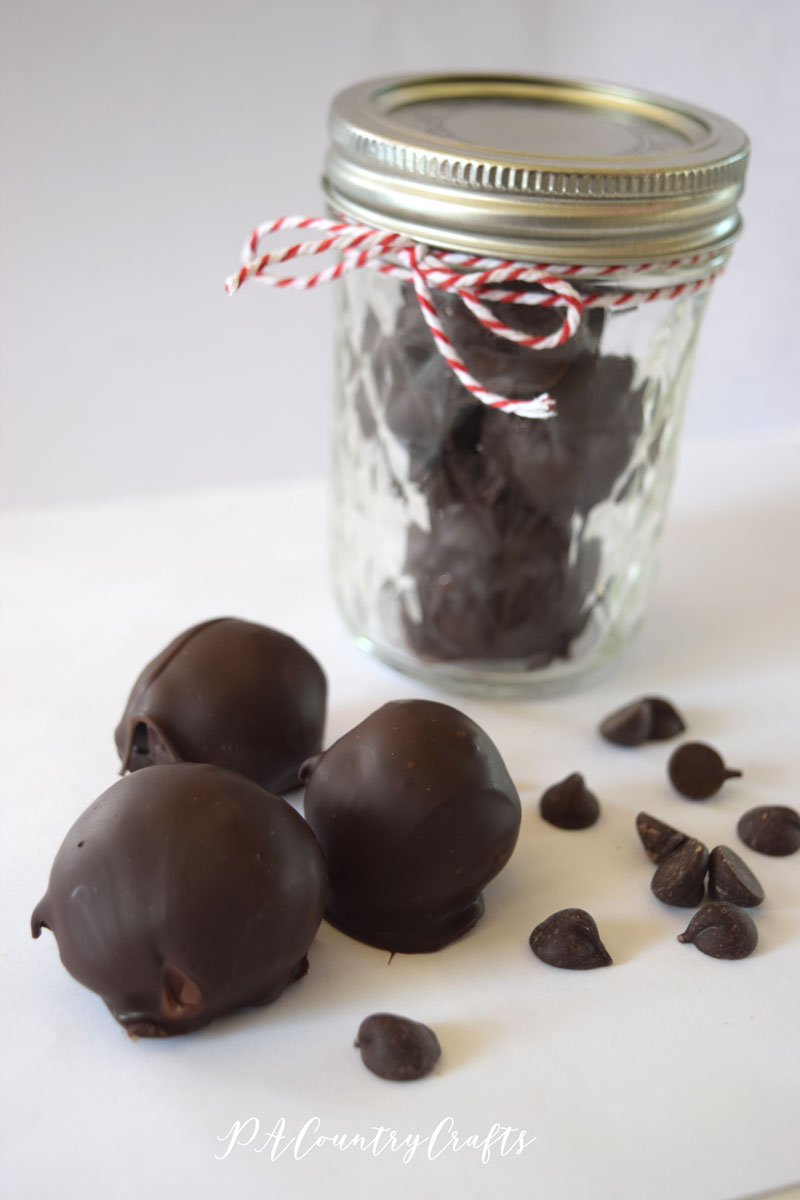
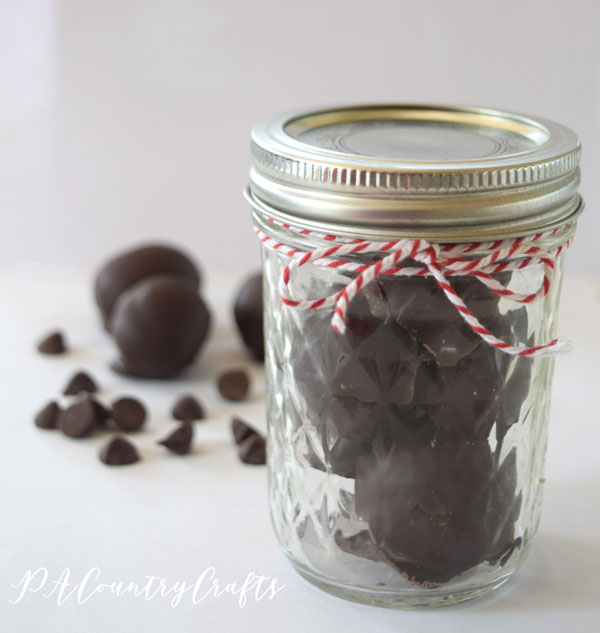
I make these for teacher gifts (some teachers have even requested them) and put them in a cute little tin or jar. The minimal effort in making these does not mean I appreciate them any less, but I do feel a little guilty when anyone is impressed by them.
Ready for the recipe with step by step pictures? It took me longer to edit pics and blog about these truffles than it did to make them.
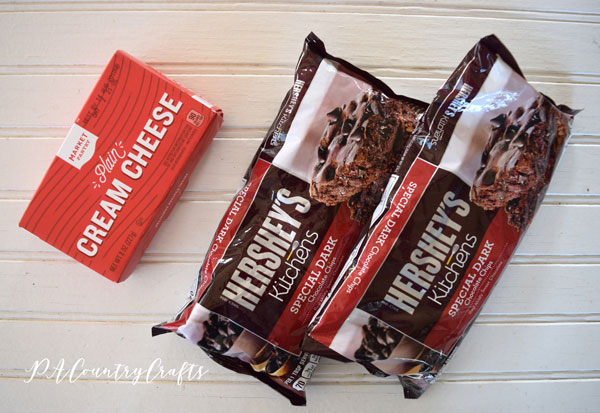
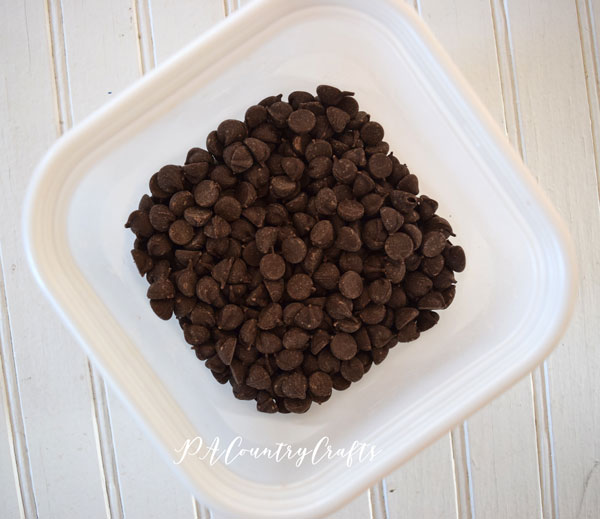
These are your ingredients. Yup. That is it! One pack of cream cheese (I think I do prefer Philadelphia just a bit) and two bags of Hershey's Special Dark chocolate chips. You can use other chocolate if you prefer, but this is my favorite.
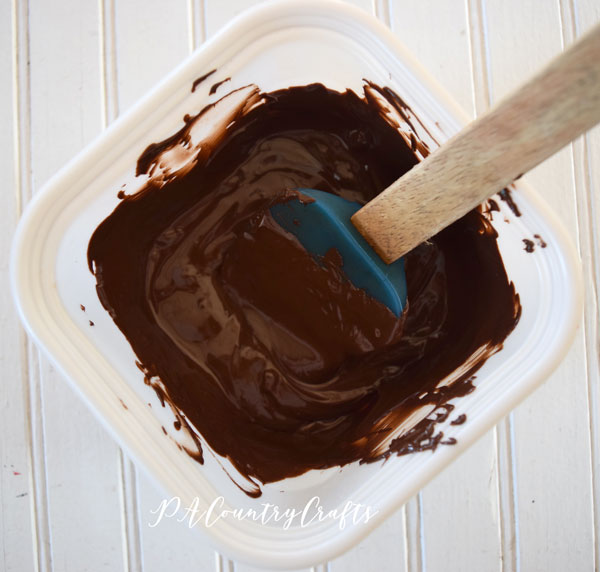
Melt one bag of chocolate chips. I used to have a chocolate melter, but the kids broke it. My other tactic is this one: pour a bag of chocolate chips into a plastic, microwave safe container. (I use plastic because after it is empty you can put it in the freezer and then squeeze the container so the hardened chocolate bits pop right out. Easy clean up!)
Melt the chocolate for one minute at 50% power. Stir. Place chocolate back into the microwave at 50% power and stir every 30 seconds until melted.
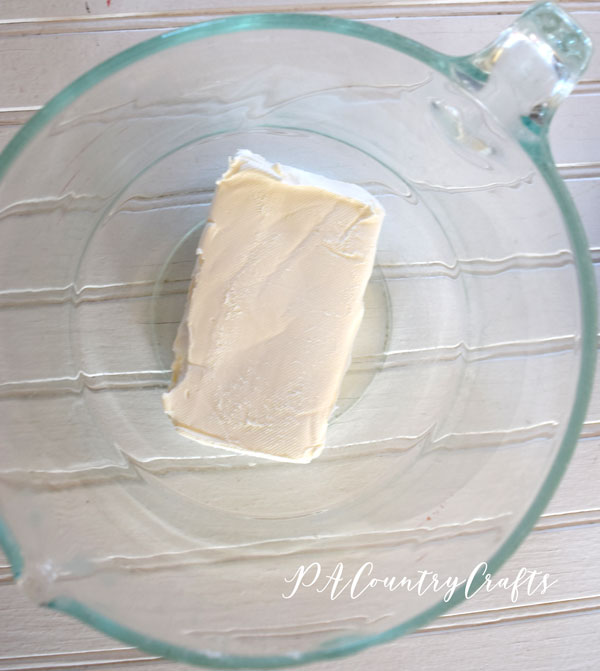
Put the cream cheese in a medium mixing bowl. I guess you could soften it, but it always seems to be soft enough for me to work with. Your call.
Pour the melted chocolate over the cream cheese.

Mix the chocolate and cream cheese together. You are going to need some sort of mixer for this one, especially if you didn't soften the cream cheese.

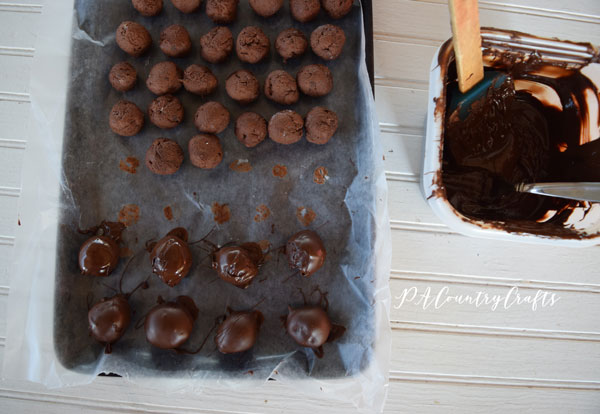
Roll the truffle mixture into little balls. I have a small cookie scoop that is the perfect size and keeps them pretty uniform. Place the truffles on a wax paper covered cookie sheet.
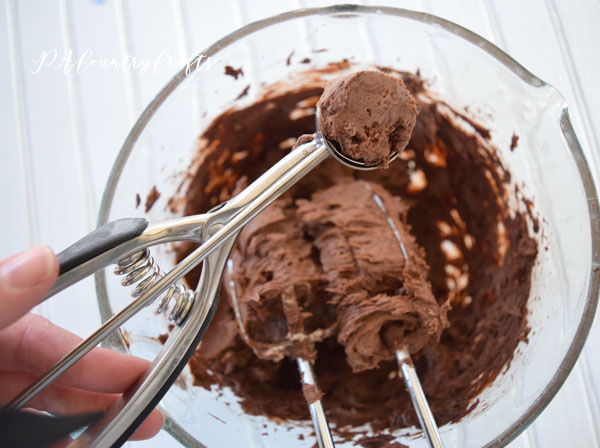
Place the truffles in the refrigerator or freezer until they are firm.

Melt the second bag of chocolate chips as before. I like the chocolate a little thick so I do not add any wax or oil. I am not great at chocolate coating, though, so do whatever works for you! Dip the truffles into the melted chocolate. I just use a fork and tap off the excess chocolate before placing them back on the cookie sheet.
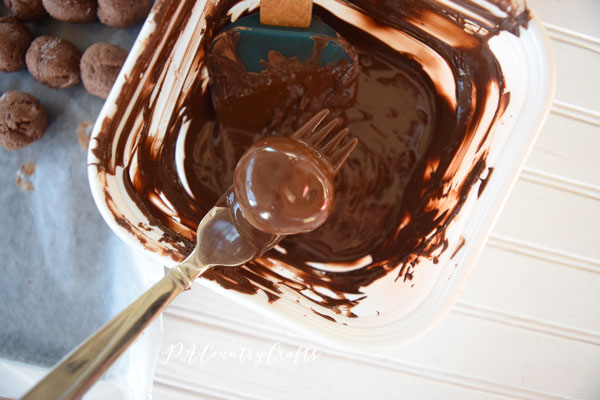
Since the cookie sheet should still be cold the chocolate hardens right away.
That is it! Easy, right? You don't have to share the recipe. No one will know.
If you want to pin it for later...
Here are some more chocolate recipes that you might enjoy...
Zucchini Chocolate Cake

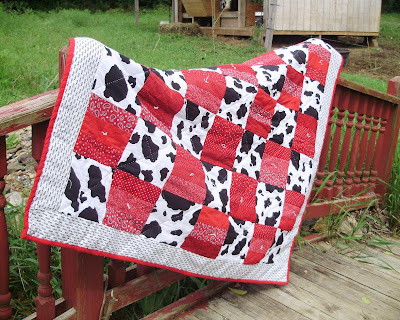
Most people do not understand, but there is a lot of disagreement within the farming community. Red vs. Green
There are other tractors, but the main rivalry exists between John Deere and International Harvester users. I married into the red side. (My dad was just happy for a working tractor- color did not matter.) Snarky t-shirts are often seen at family picnics. My youngest daughter refuses to wear green or yellow. The kids argue at school with classmates about "Junk Deere" tractors.
I thought it was perfectly appropriate to welcome a new bride into our family of red tractor fanatics with embellished Farmall/IH dish towels.
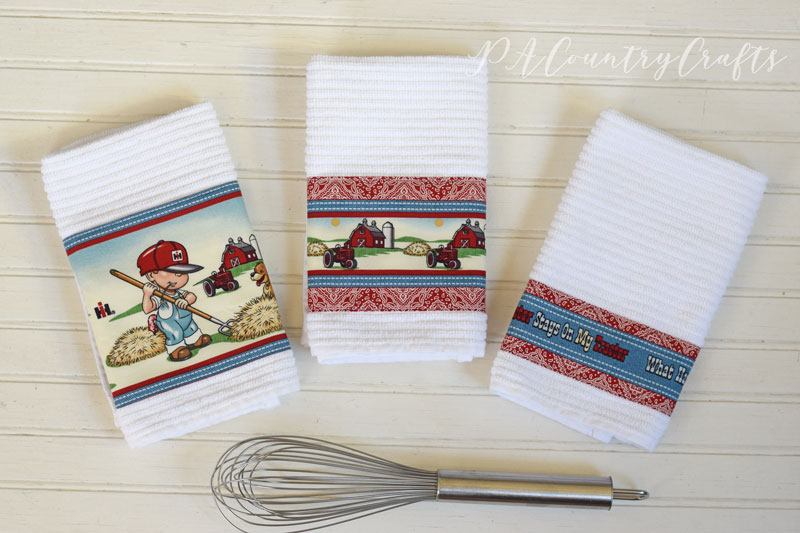
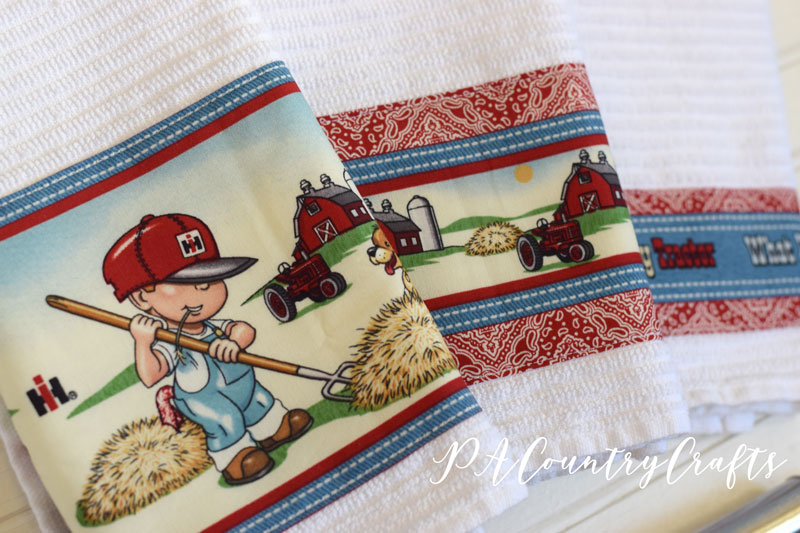
I had some fabric with rows of red tractor designs left over from THIS quilt back. So, I carefully cut strips and sewed them to some bar mop dish towels for an accent border. These were fairly simple to make.
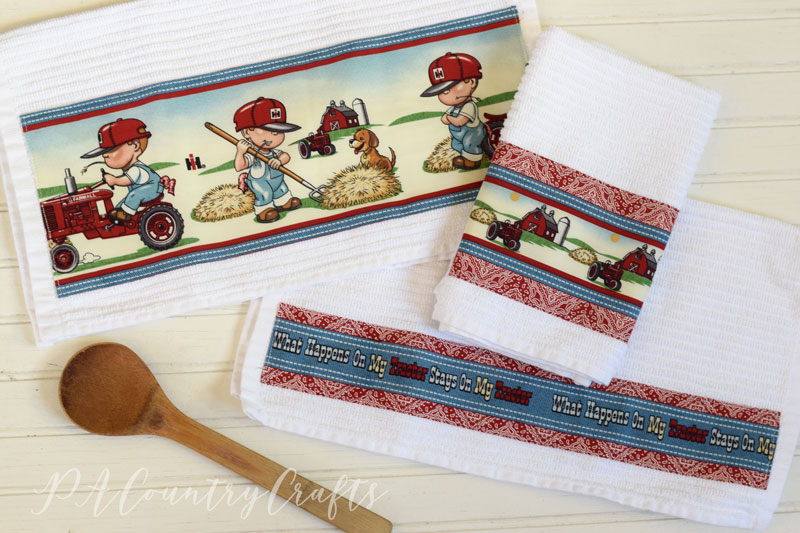
I cut the rows apart with my rotary cutter and cut the width a little more than a half inch wider than the dish towel. I pressed the top and bottom edges under 1/4" and pinned them to the towels, following the textured rows of the towels. Then, I folded the ends under (saving it for last because the fabric can shift) and pinned them in place just inside the towel edge. I slowly and carefully stitched all the way around the fabric 1/8" from the folded edge.
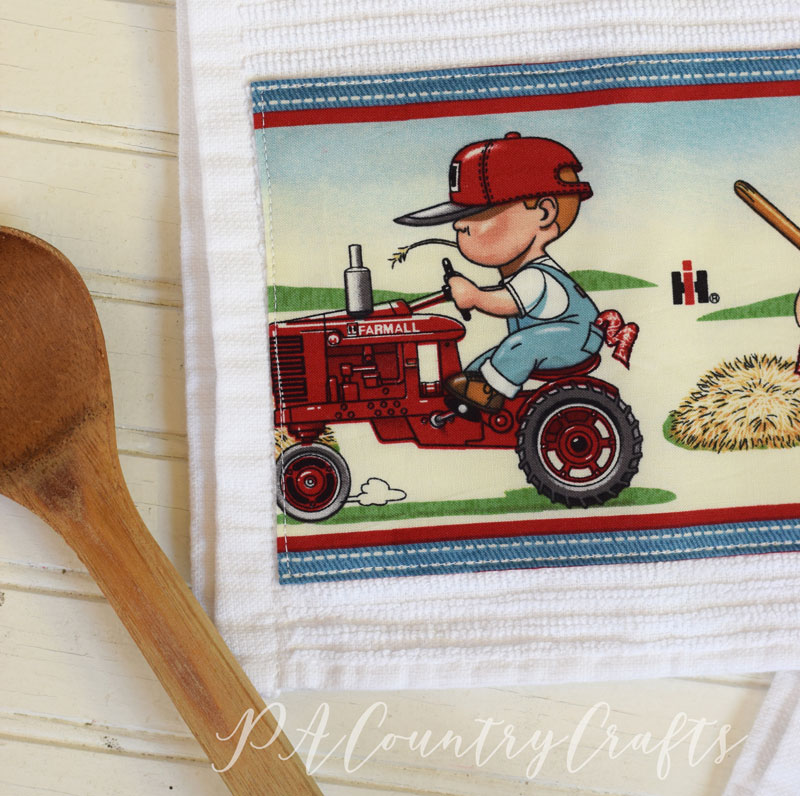
I thought it was a cute gift idea and I think the groom will appreciate it. :)
You may also want to check out these posts:


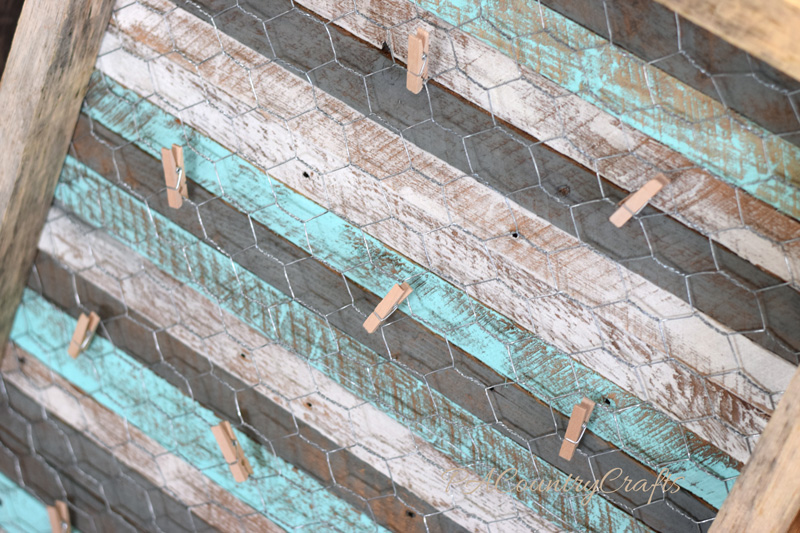
I think my 17yo son inherited some of my crafty genes. When I took him school shopping he asked to go to craft stores to get inspiration for his girlfriend's birthday gift. I didn't mind. ;) They are renovating her bedroom, so he wanted to make something for her new room. He combined inspiration from a few different pieces that we saw, made a small tray for a practice run, then built the final product.
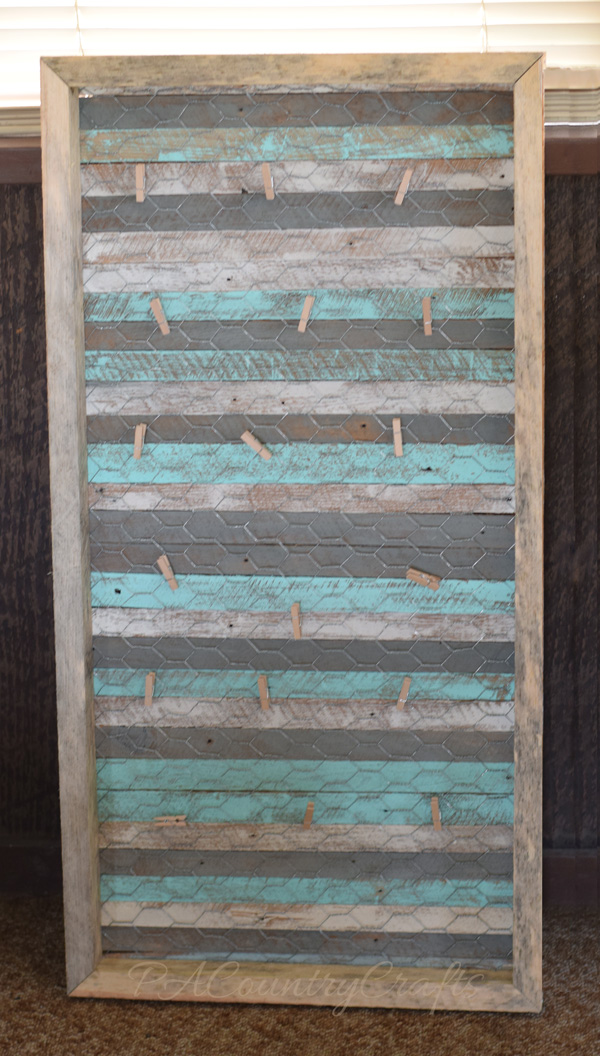
He chose the paint colors (the aqua will match her decor) and did everything by himself. The back of the display is made of plaster lath so it has a rough texture that looks really rustic when painted.
His sisters also wanted to make something for her birthday. They insisted that I was not allowed to help them, but somehow blamed me when things didn't work. (You can't hot glue shells to wet sand!) On the third attempt, after much fighting and drama, they finally succeeded.

Hopefully she likes to decorate with pictures. :)
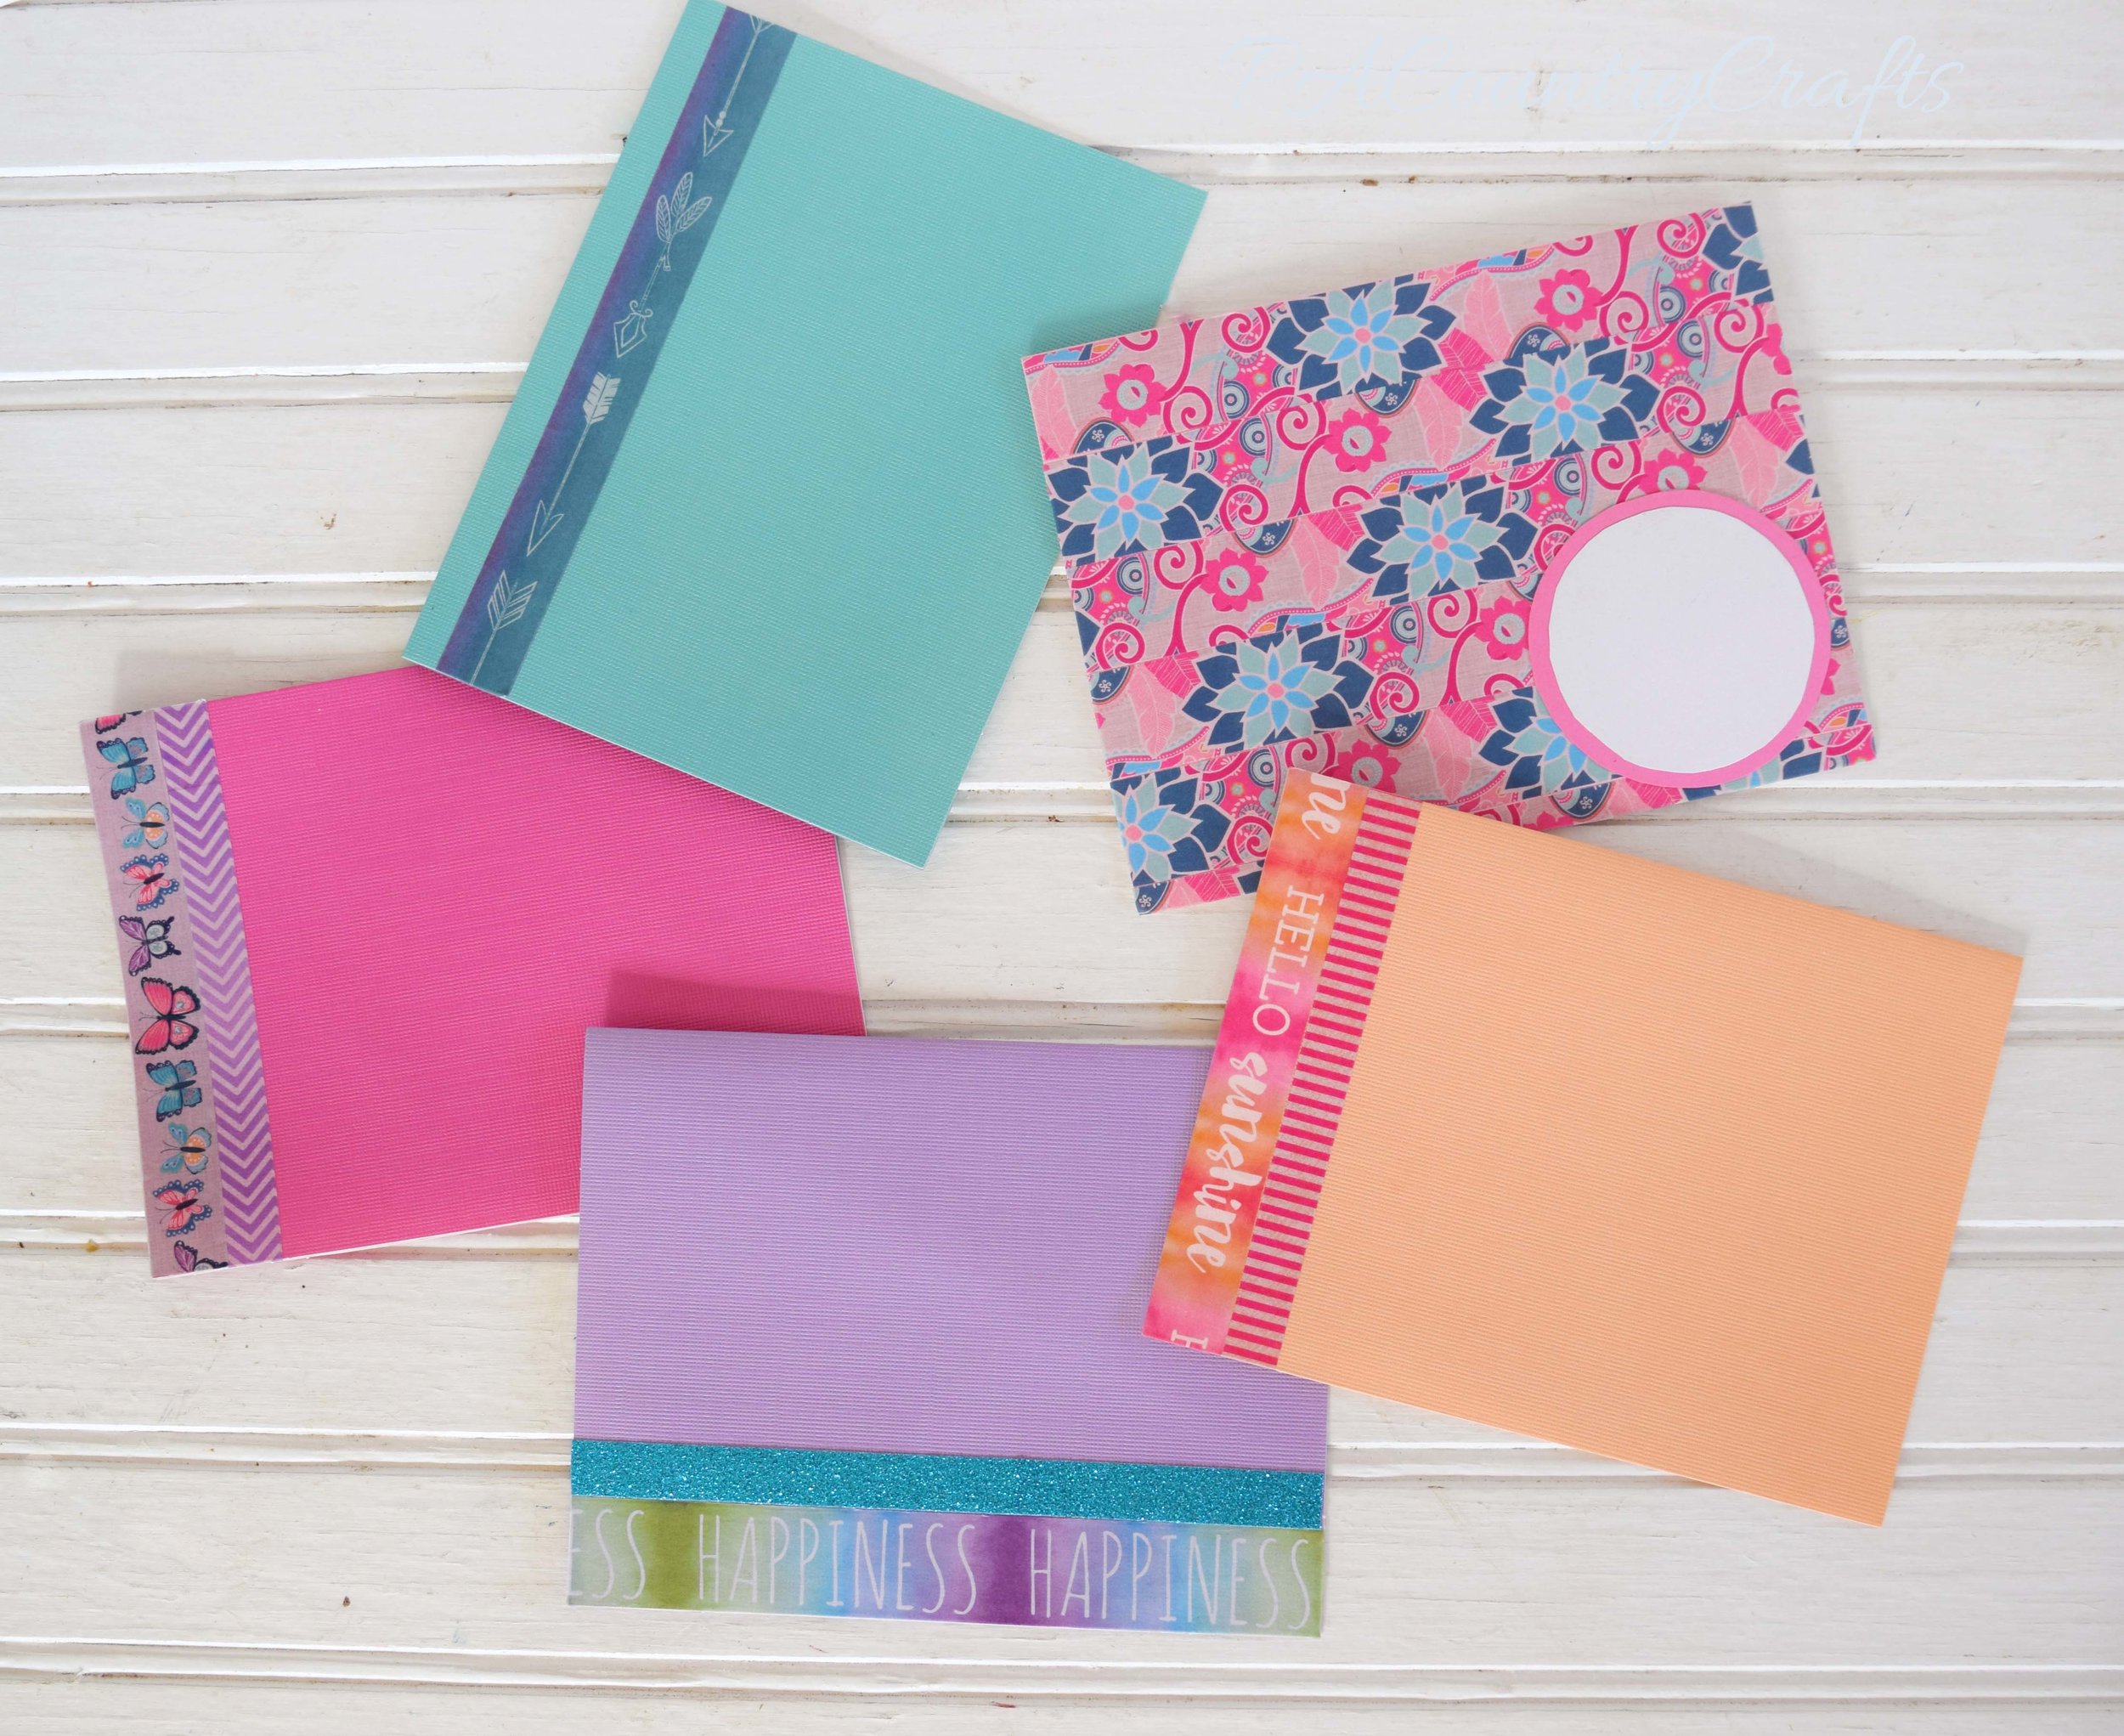
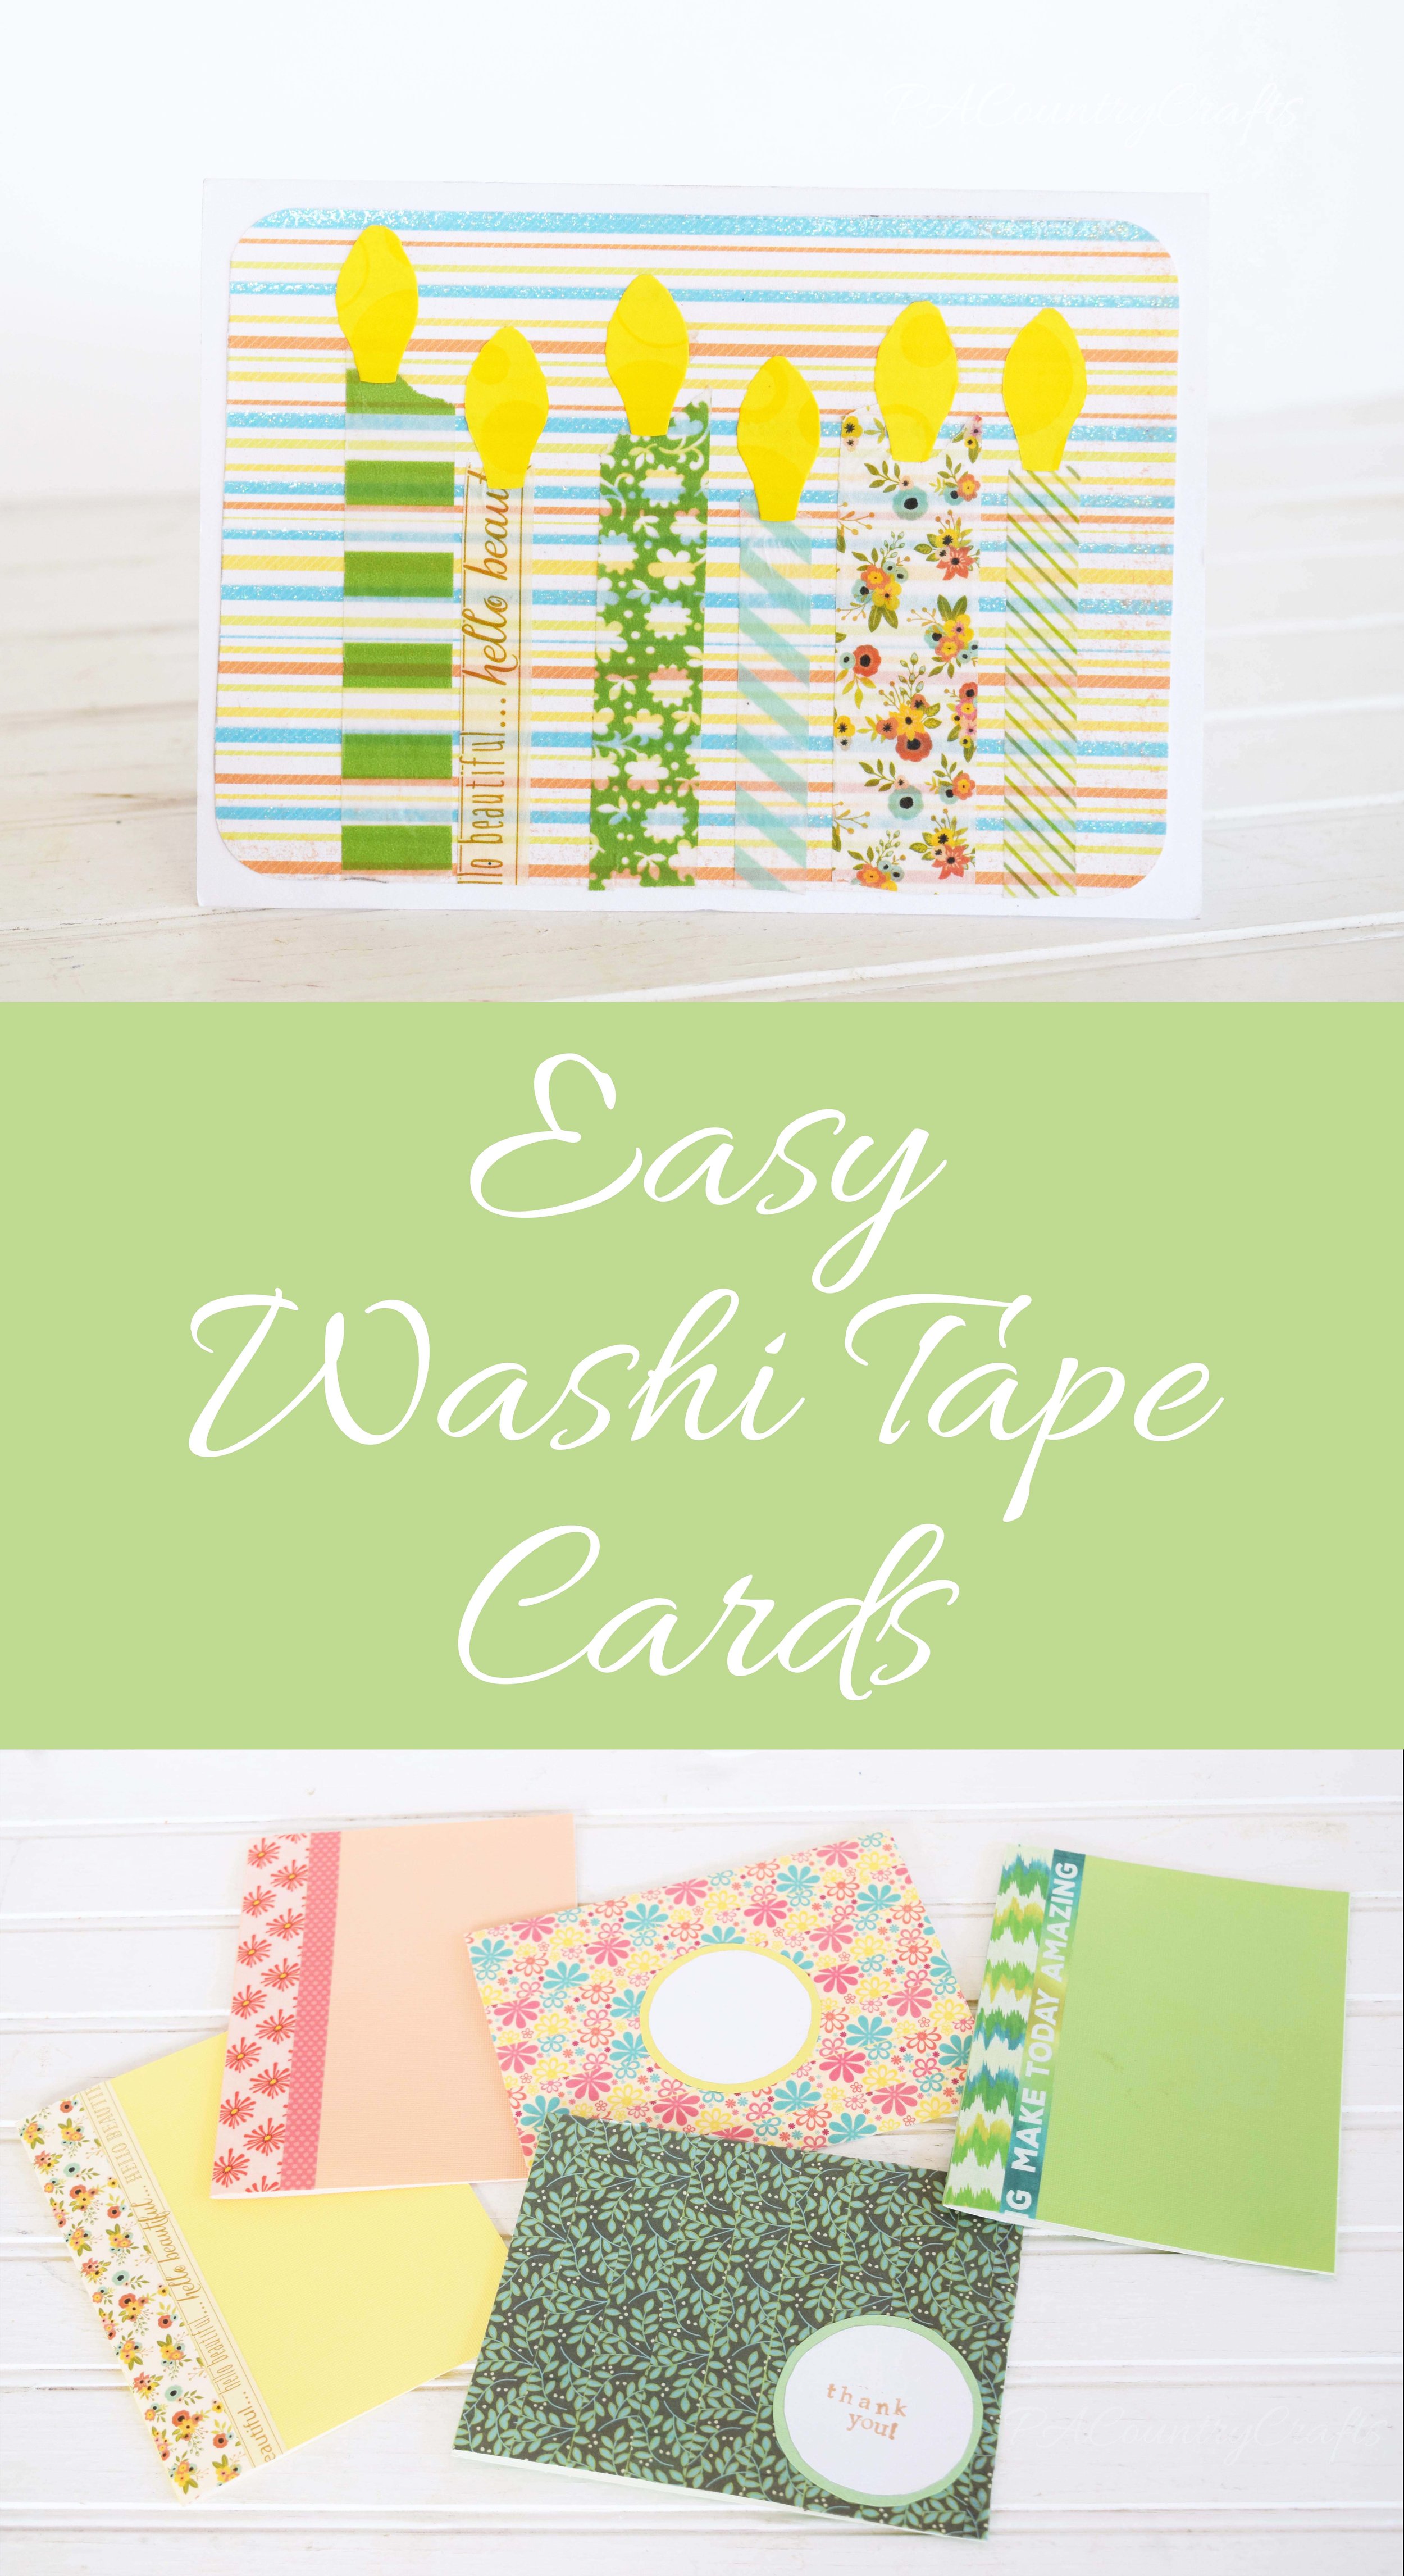
Hi! I'm Halley, and I'm here for Washi Week. Since I know many people have absolutely no idea what washi tape is, let me explain: washi tape is decorative paper tape that comes in SO many different sizes and prints, and you can do just about anything with it. I am basically the expert of washi tape in the family. I can't tell you how much I love this stuff. I may or may not have an obsession :) My parents (mostly my dad) say I have a real problem. I started with only 2 rolls from last Easter, and now I have A LOT! I counted 79 this morning but I know I am missing at least 15. Anyway, I am super excited to tell you about my best Washi creations, and we're going to start the week off with my favorite... CARDS! The thing I love about making cards is there is so many things you can do with them and so many occasions you can make them for! Christmas, birthdays, weddings, thank you cards, or even just random cards to give to friends (those are my favorite!). Just like my amazing mom, I love Pinterest!!! Many of my cards are Pinterest-inspired.
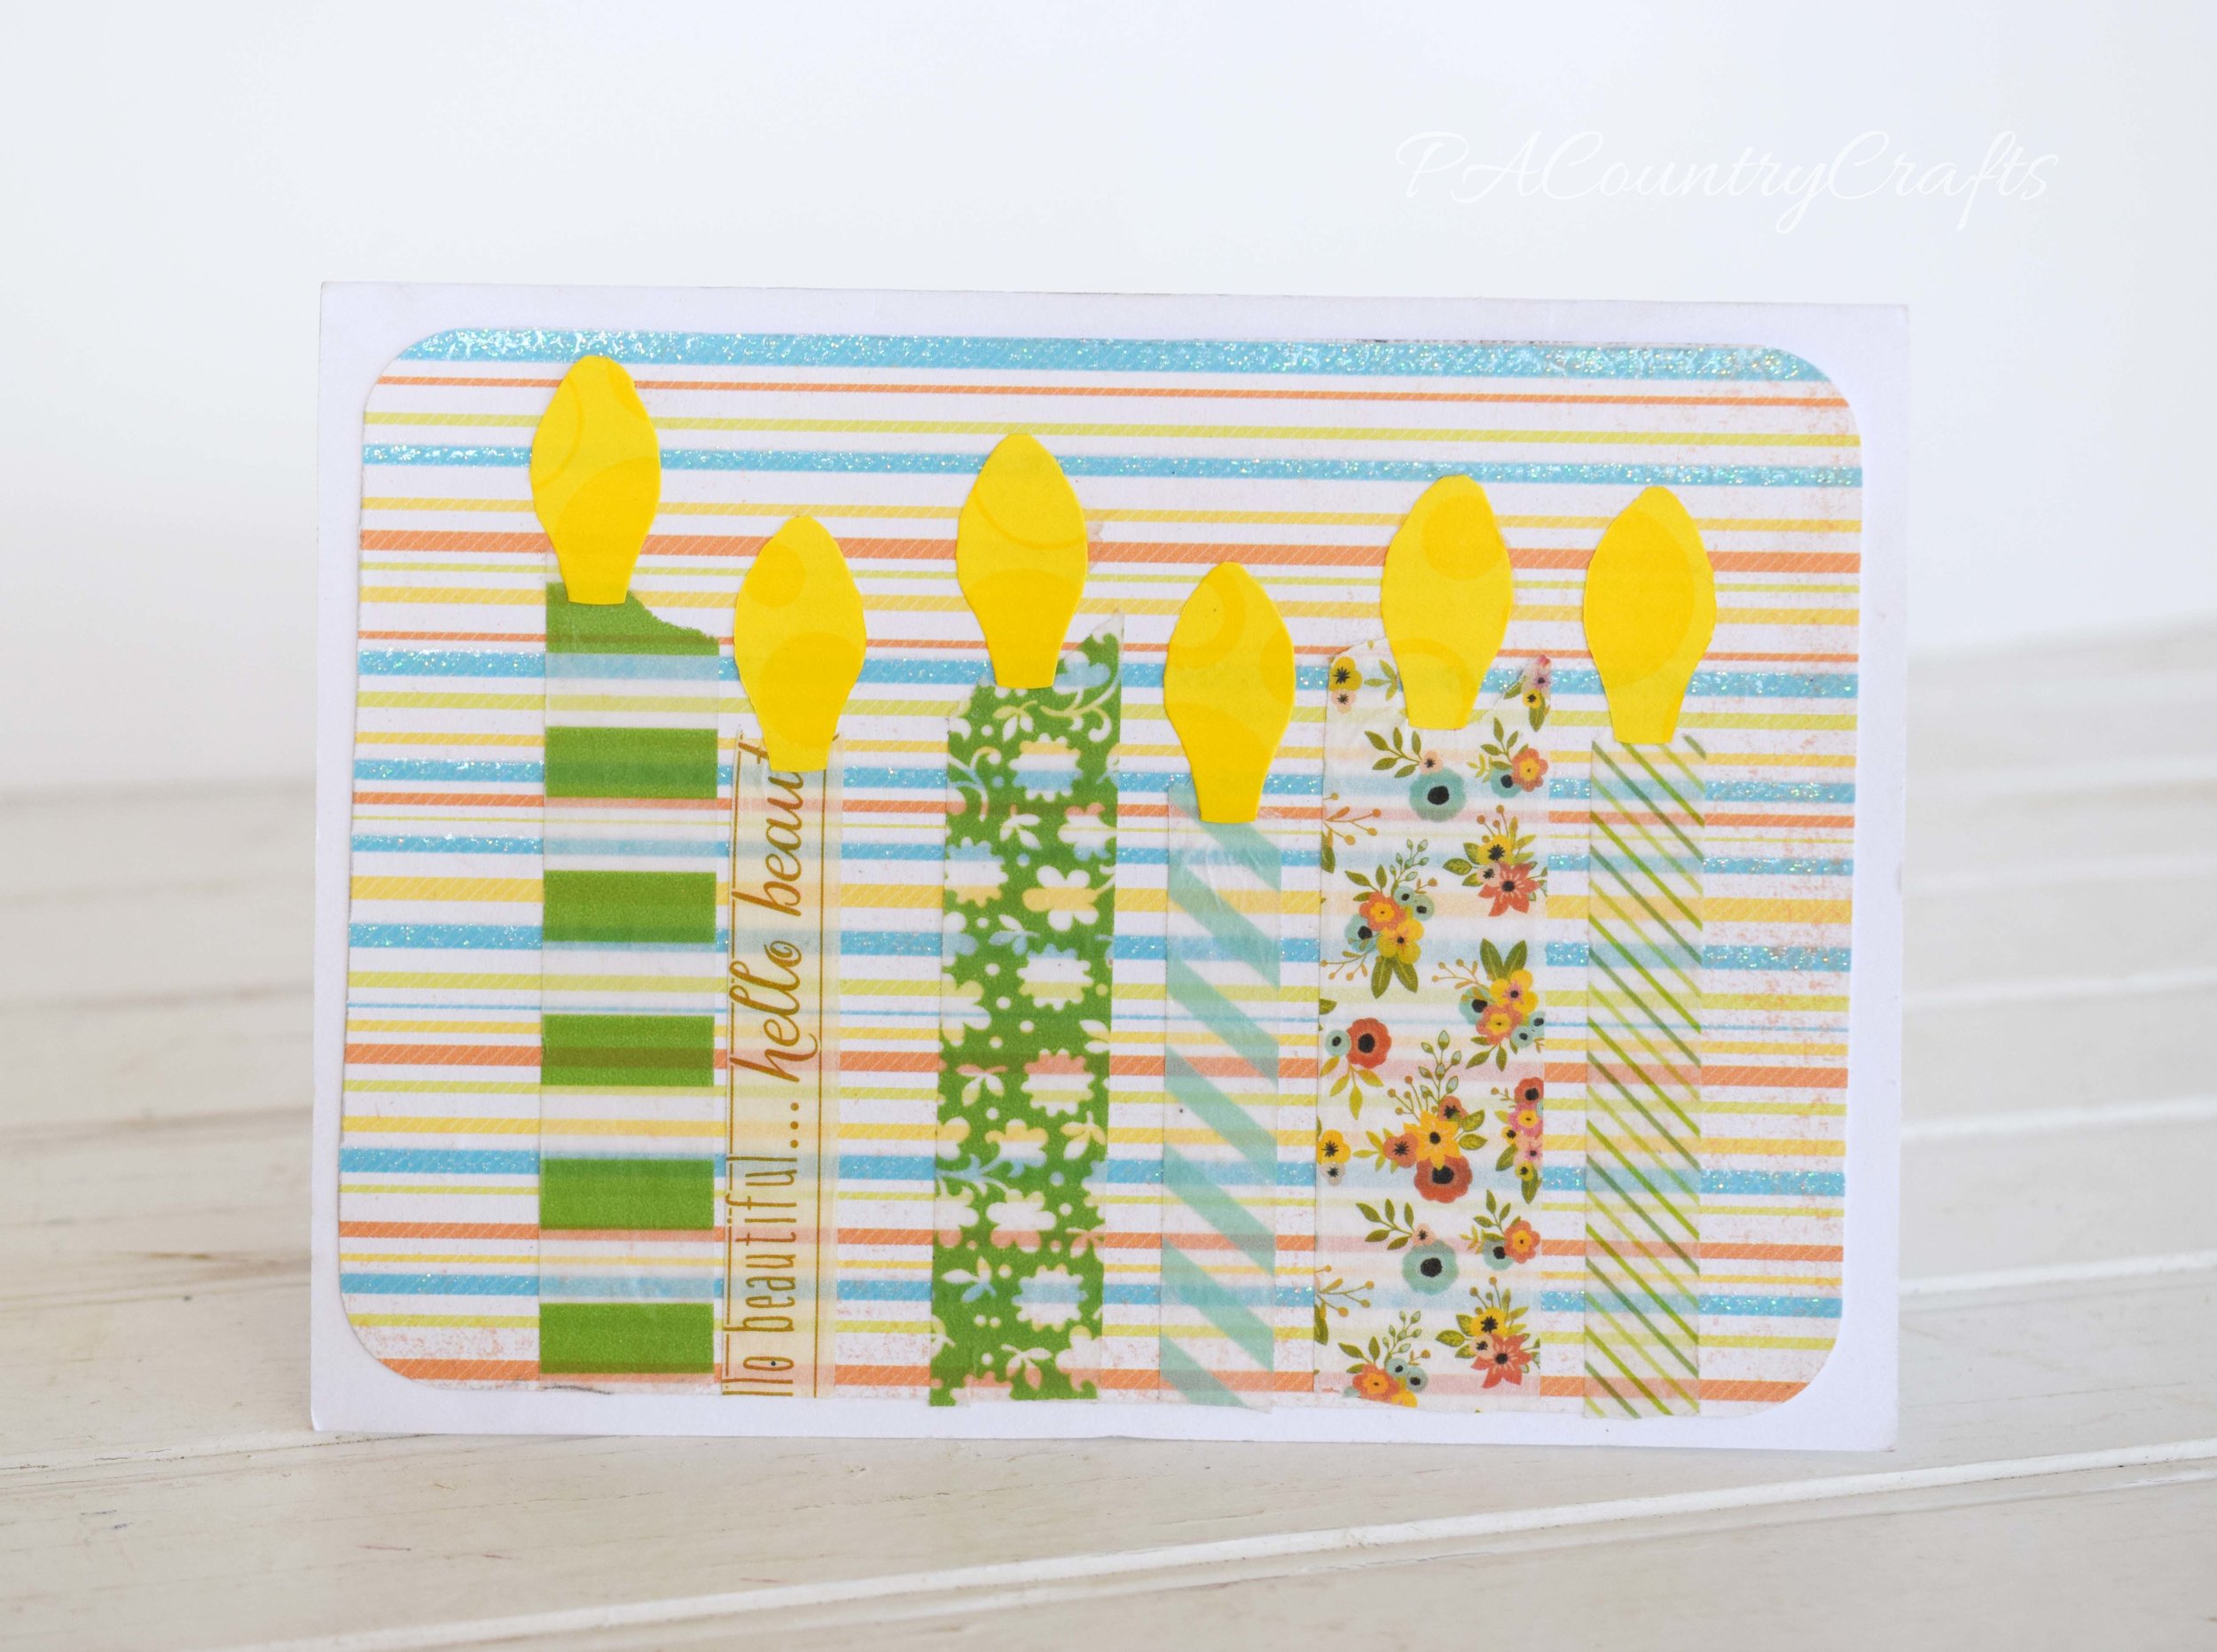
With this card the sparkly card stock background gives a "happy" look to it, perfect for a birthday card.
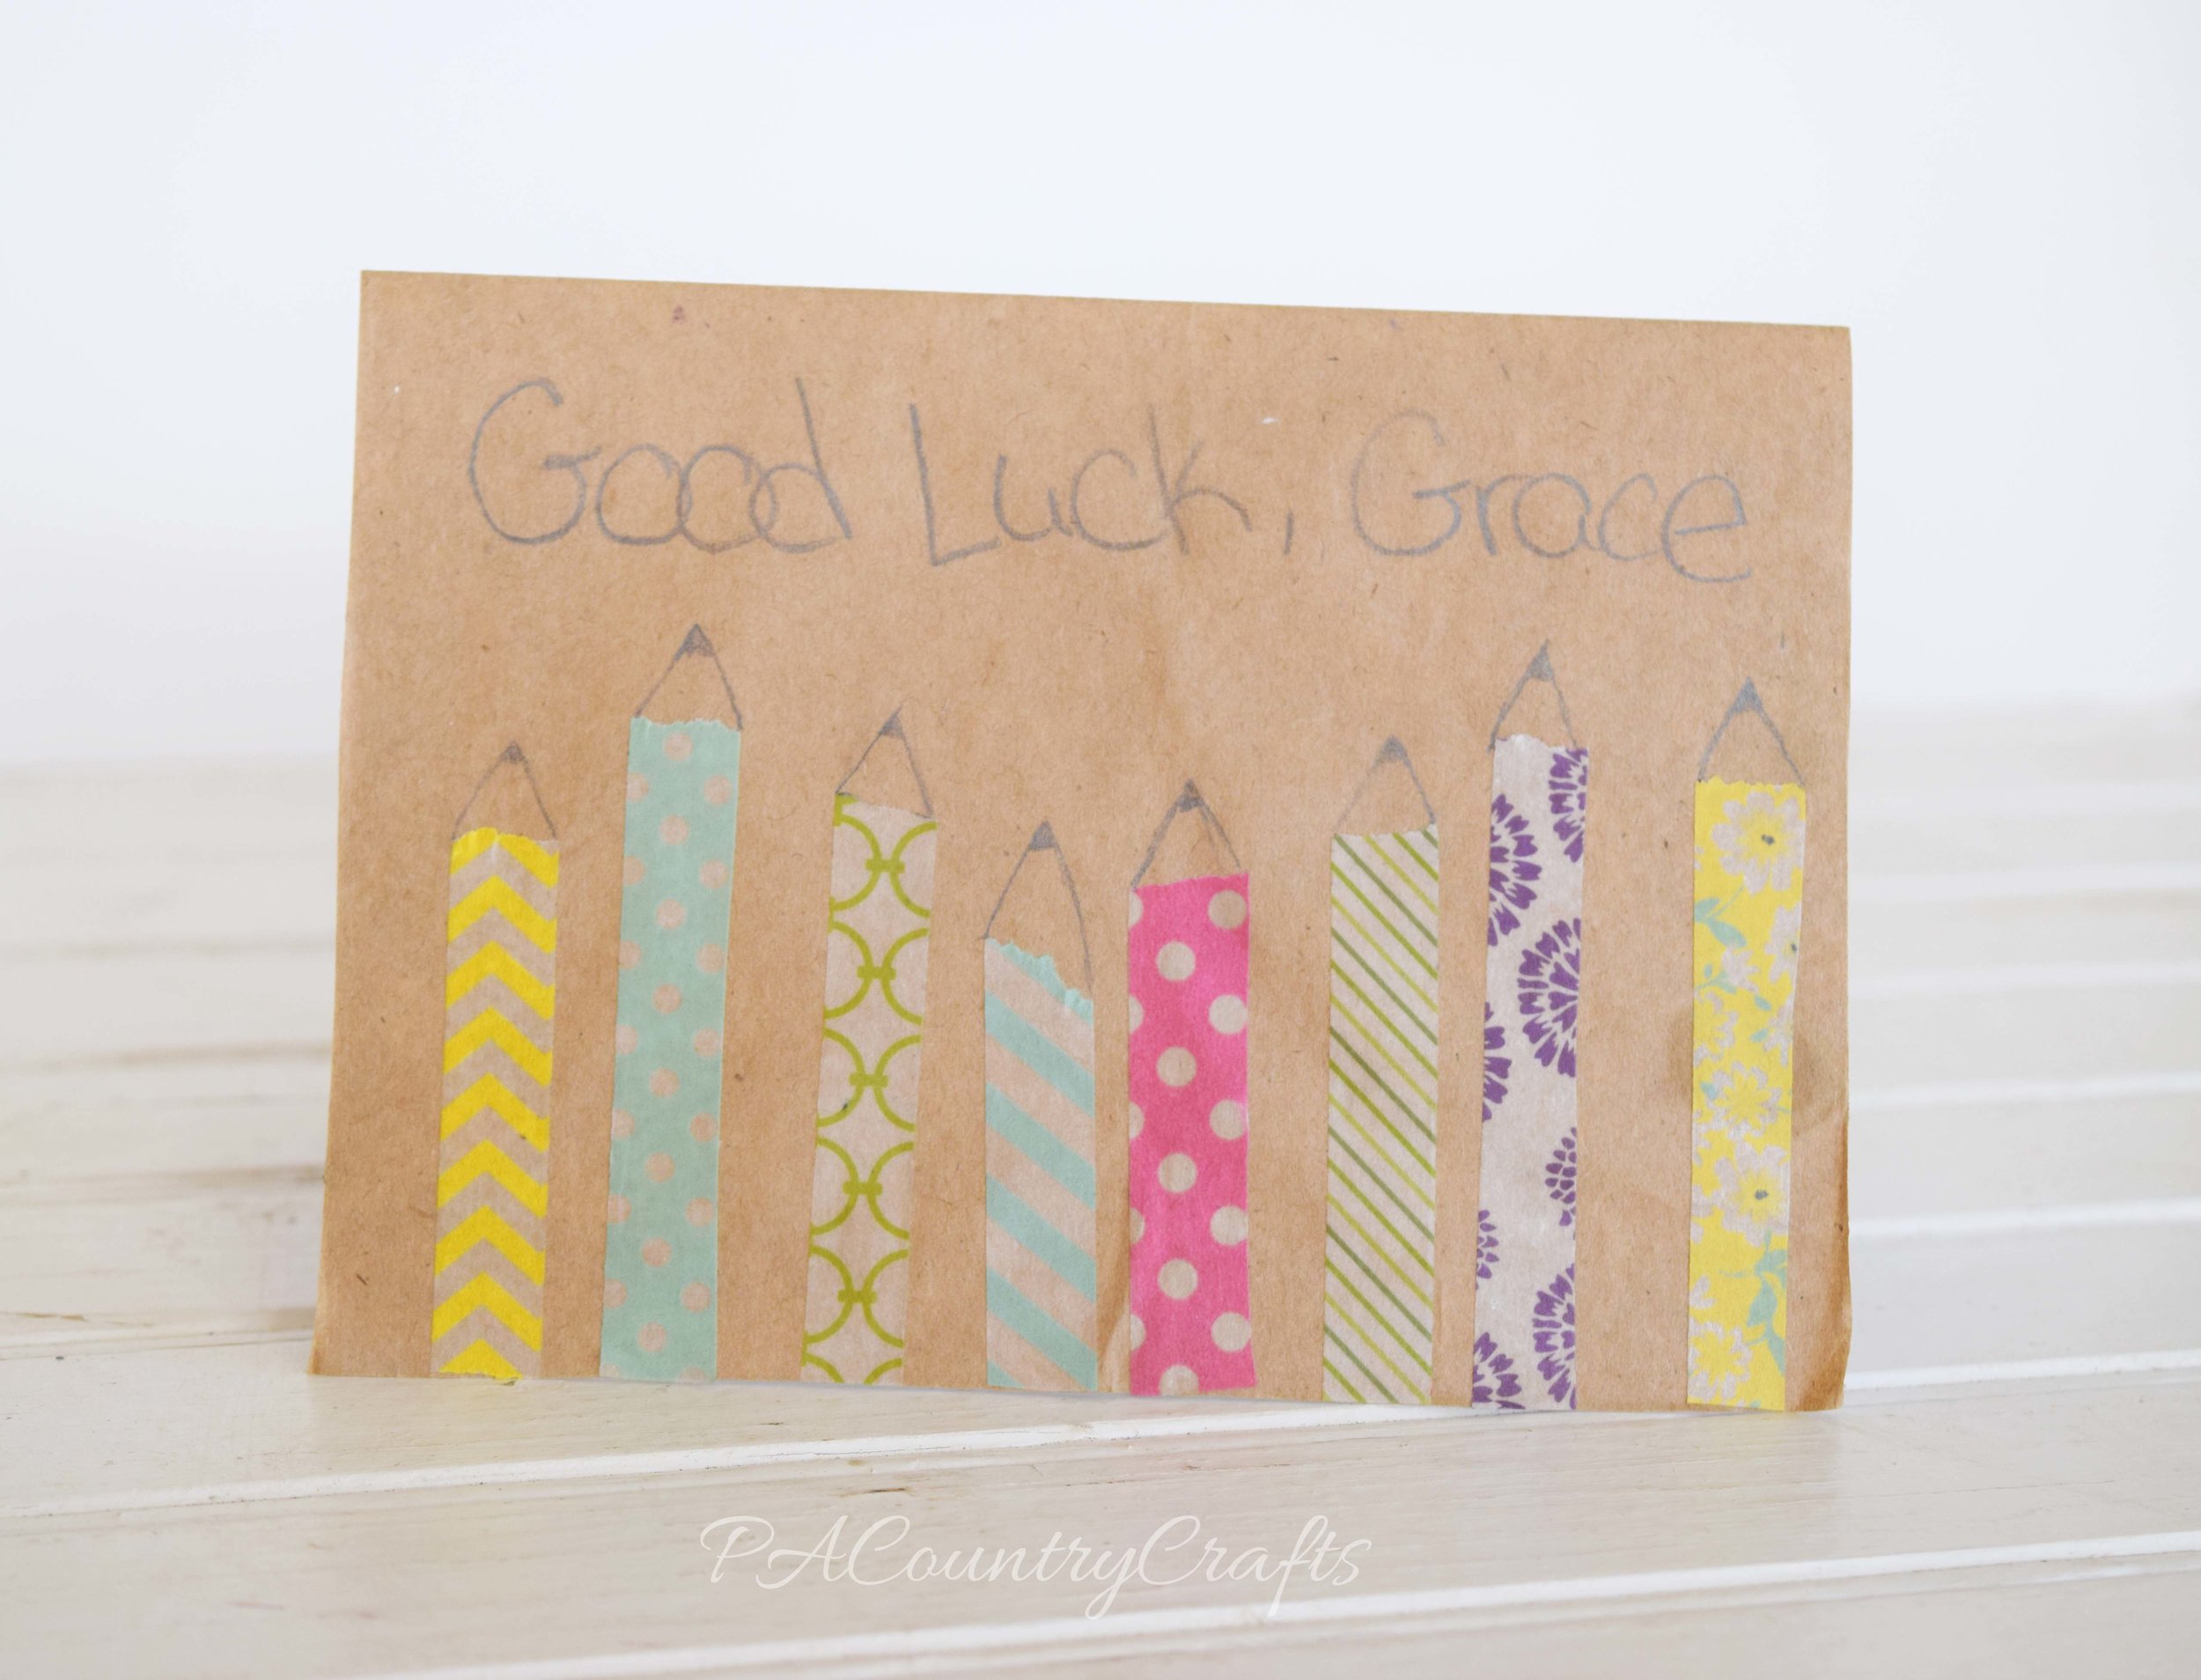
I love this card! It was made for my sister who was going to be starting kindergarten, and she needed to get pumped up about it. What better way then using a card!?! All I did was cut a paper bag to size and glued it on. Then, using thin washi tape, I ripped off pieces to look like pencils then drew the tips So simple, yet so cute!
This card was my first, but I don't like it because I can't decide which way to hold it!
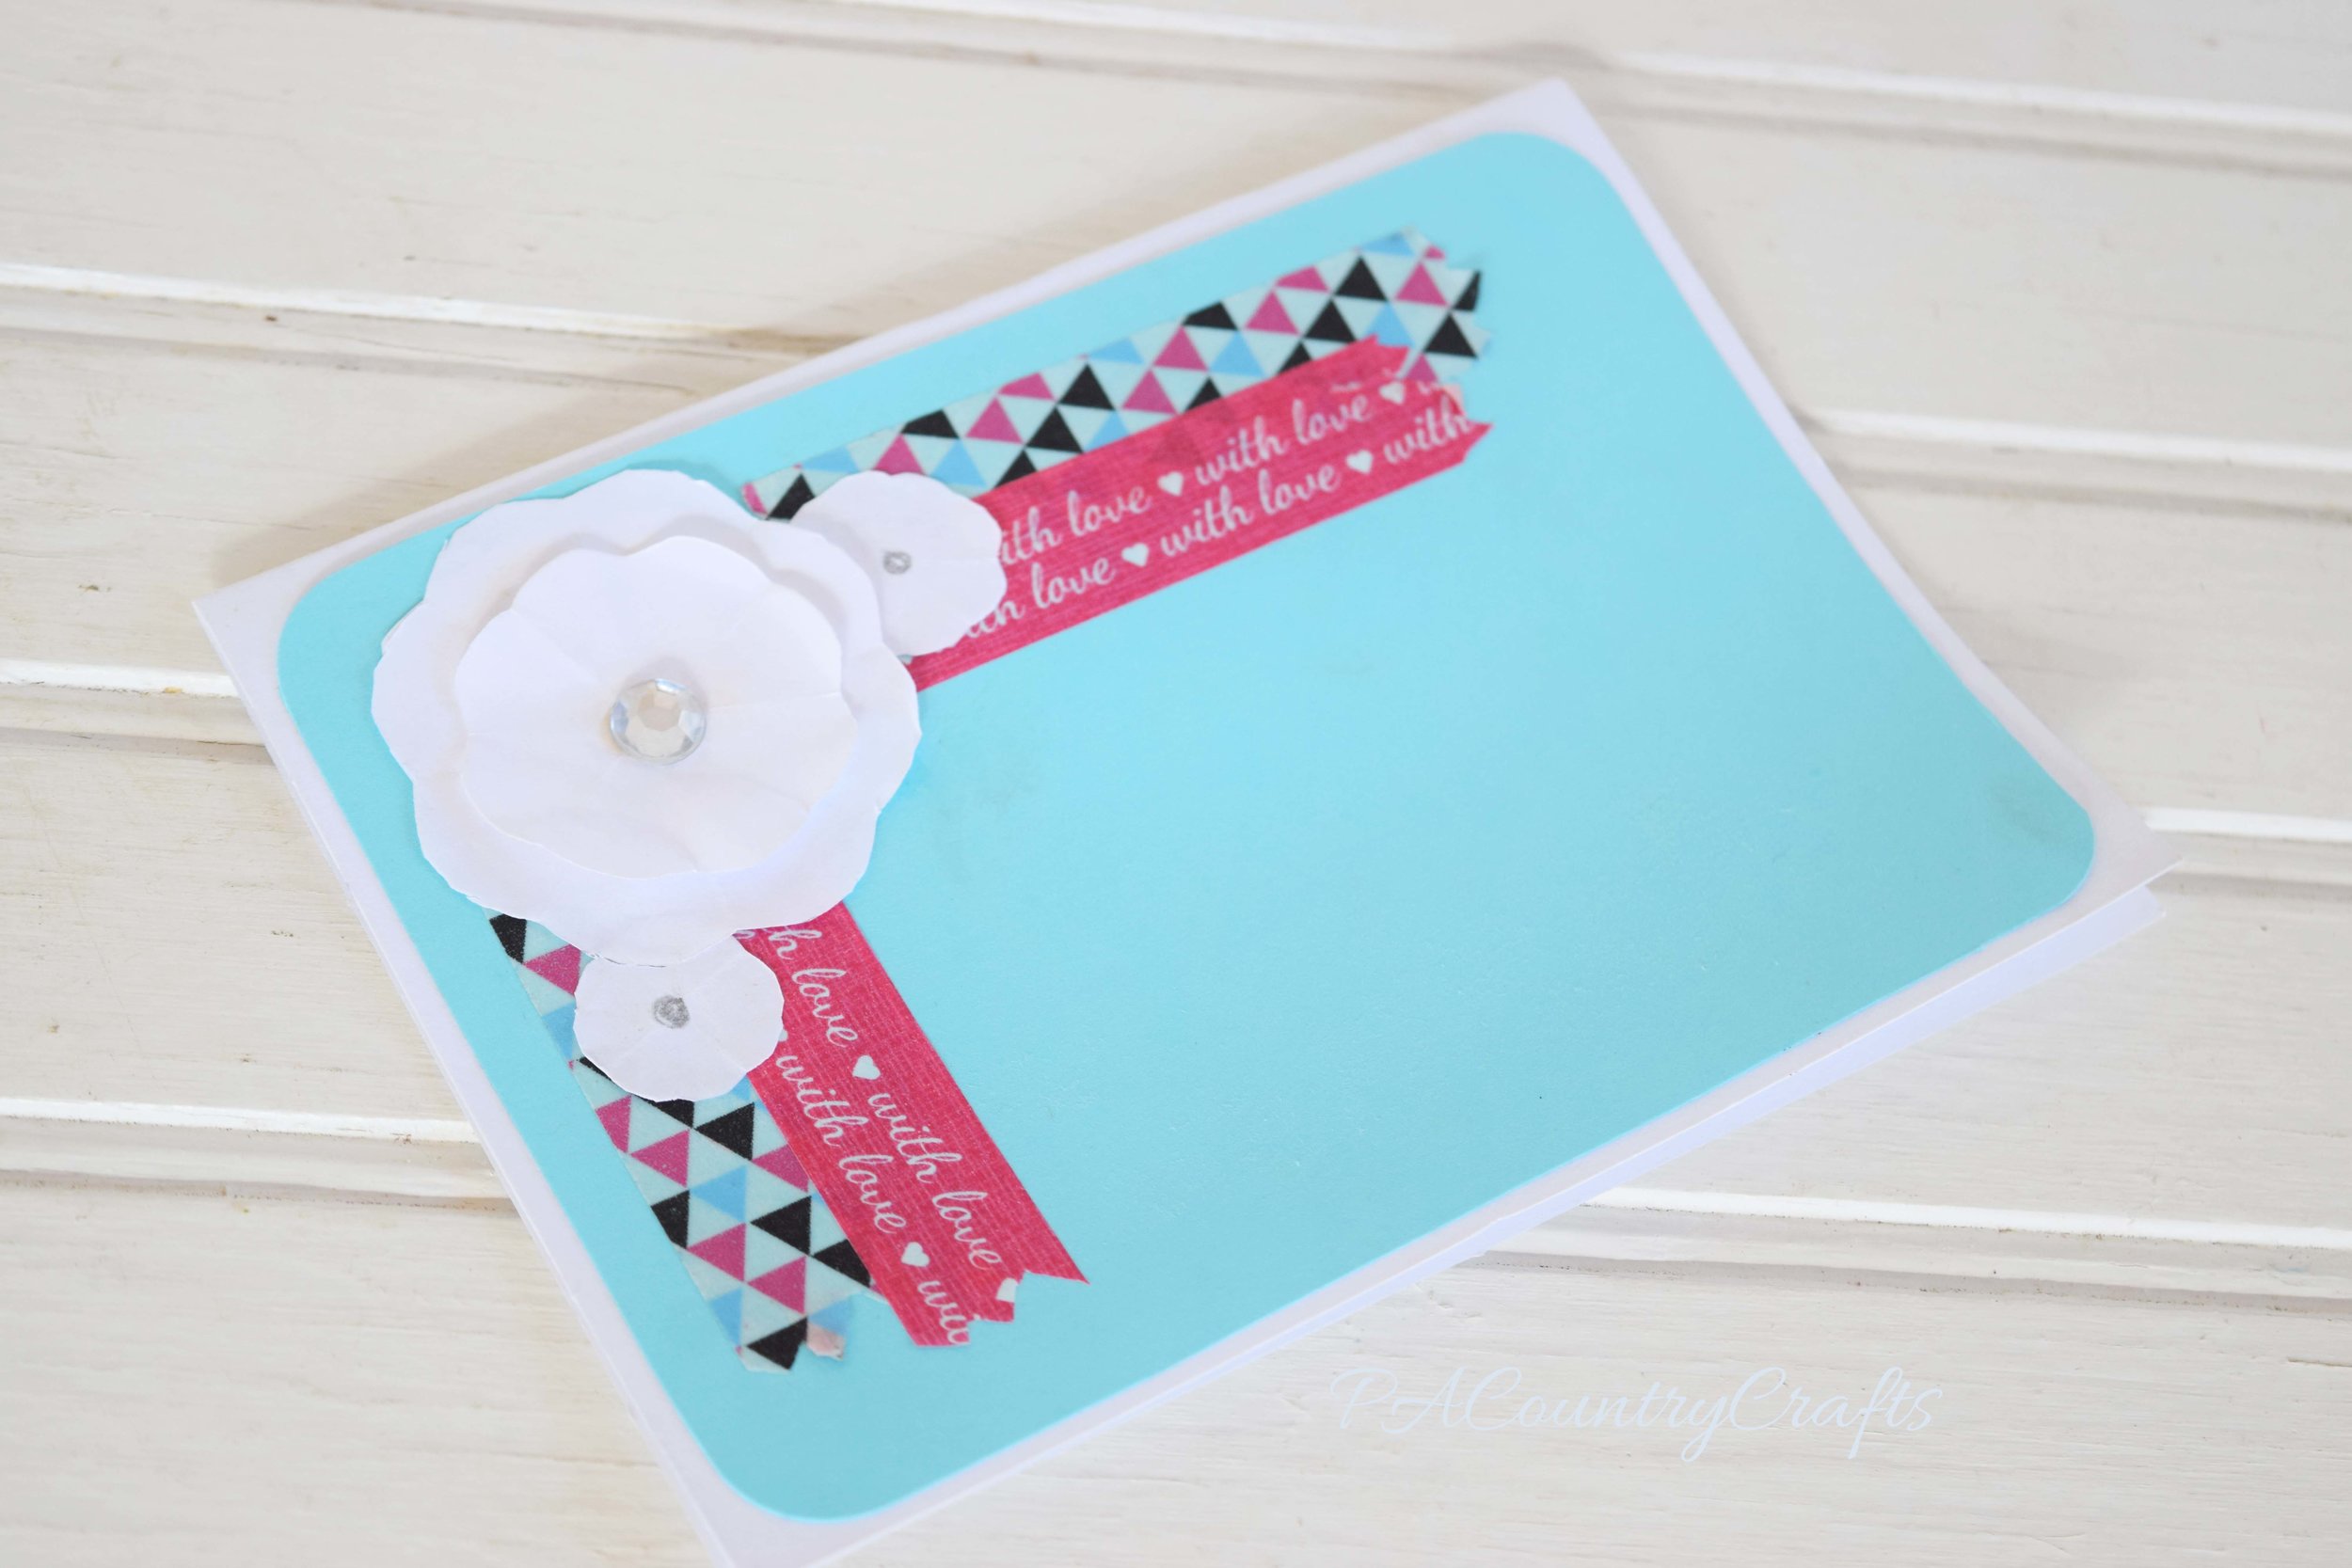
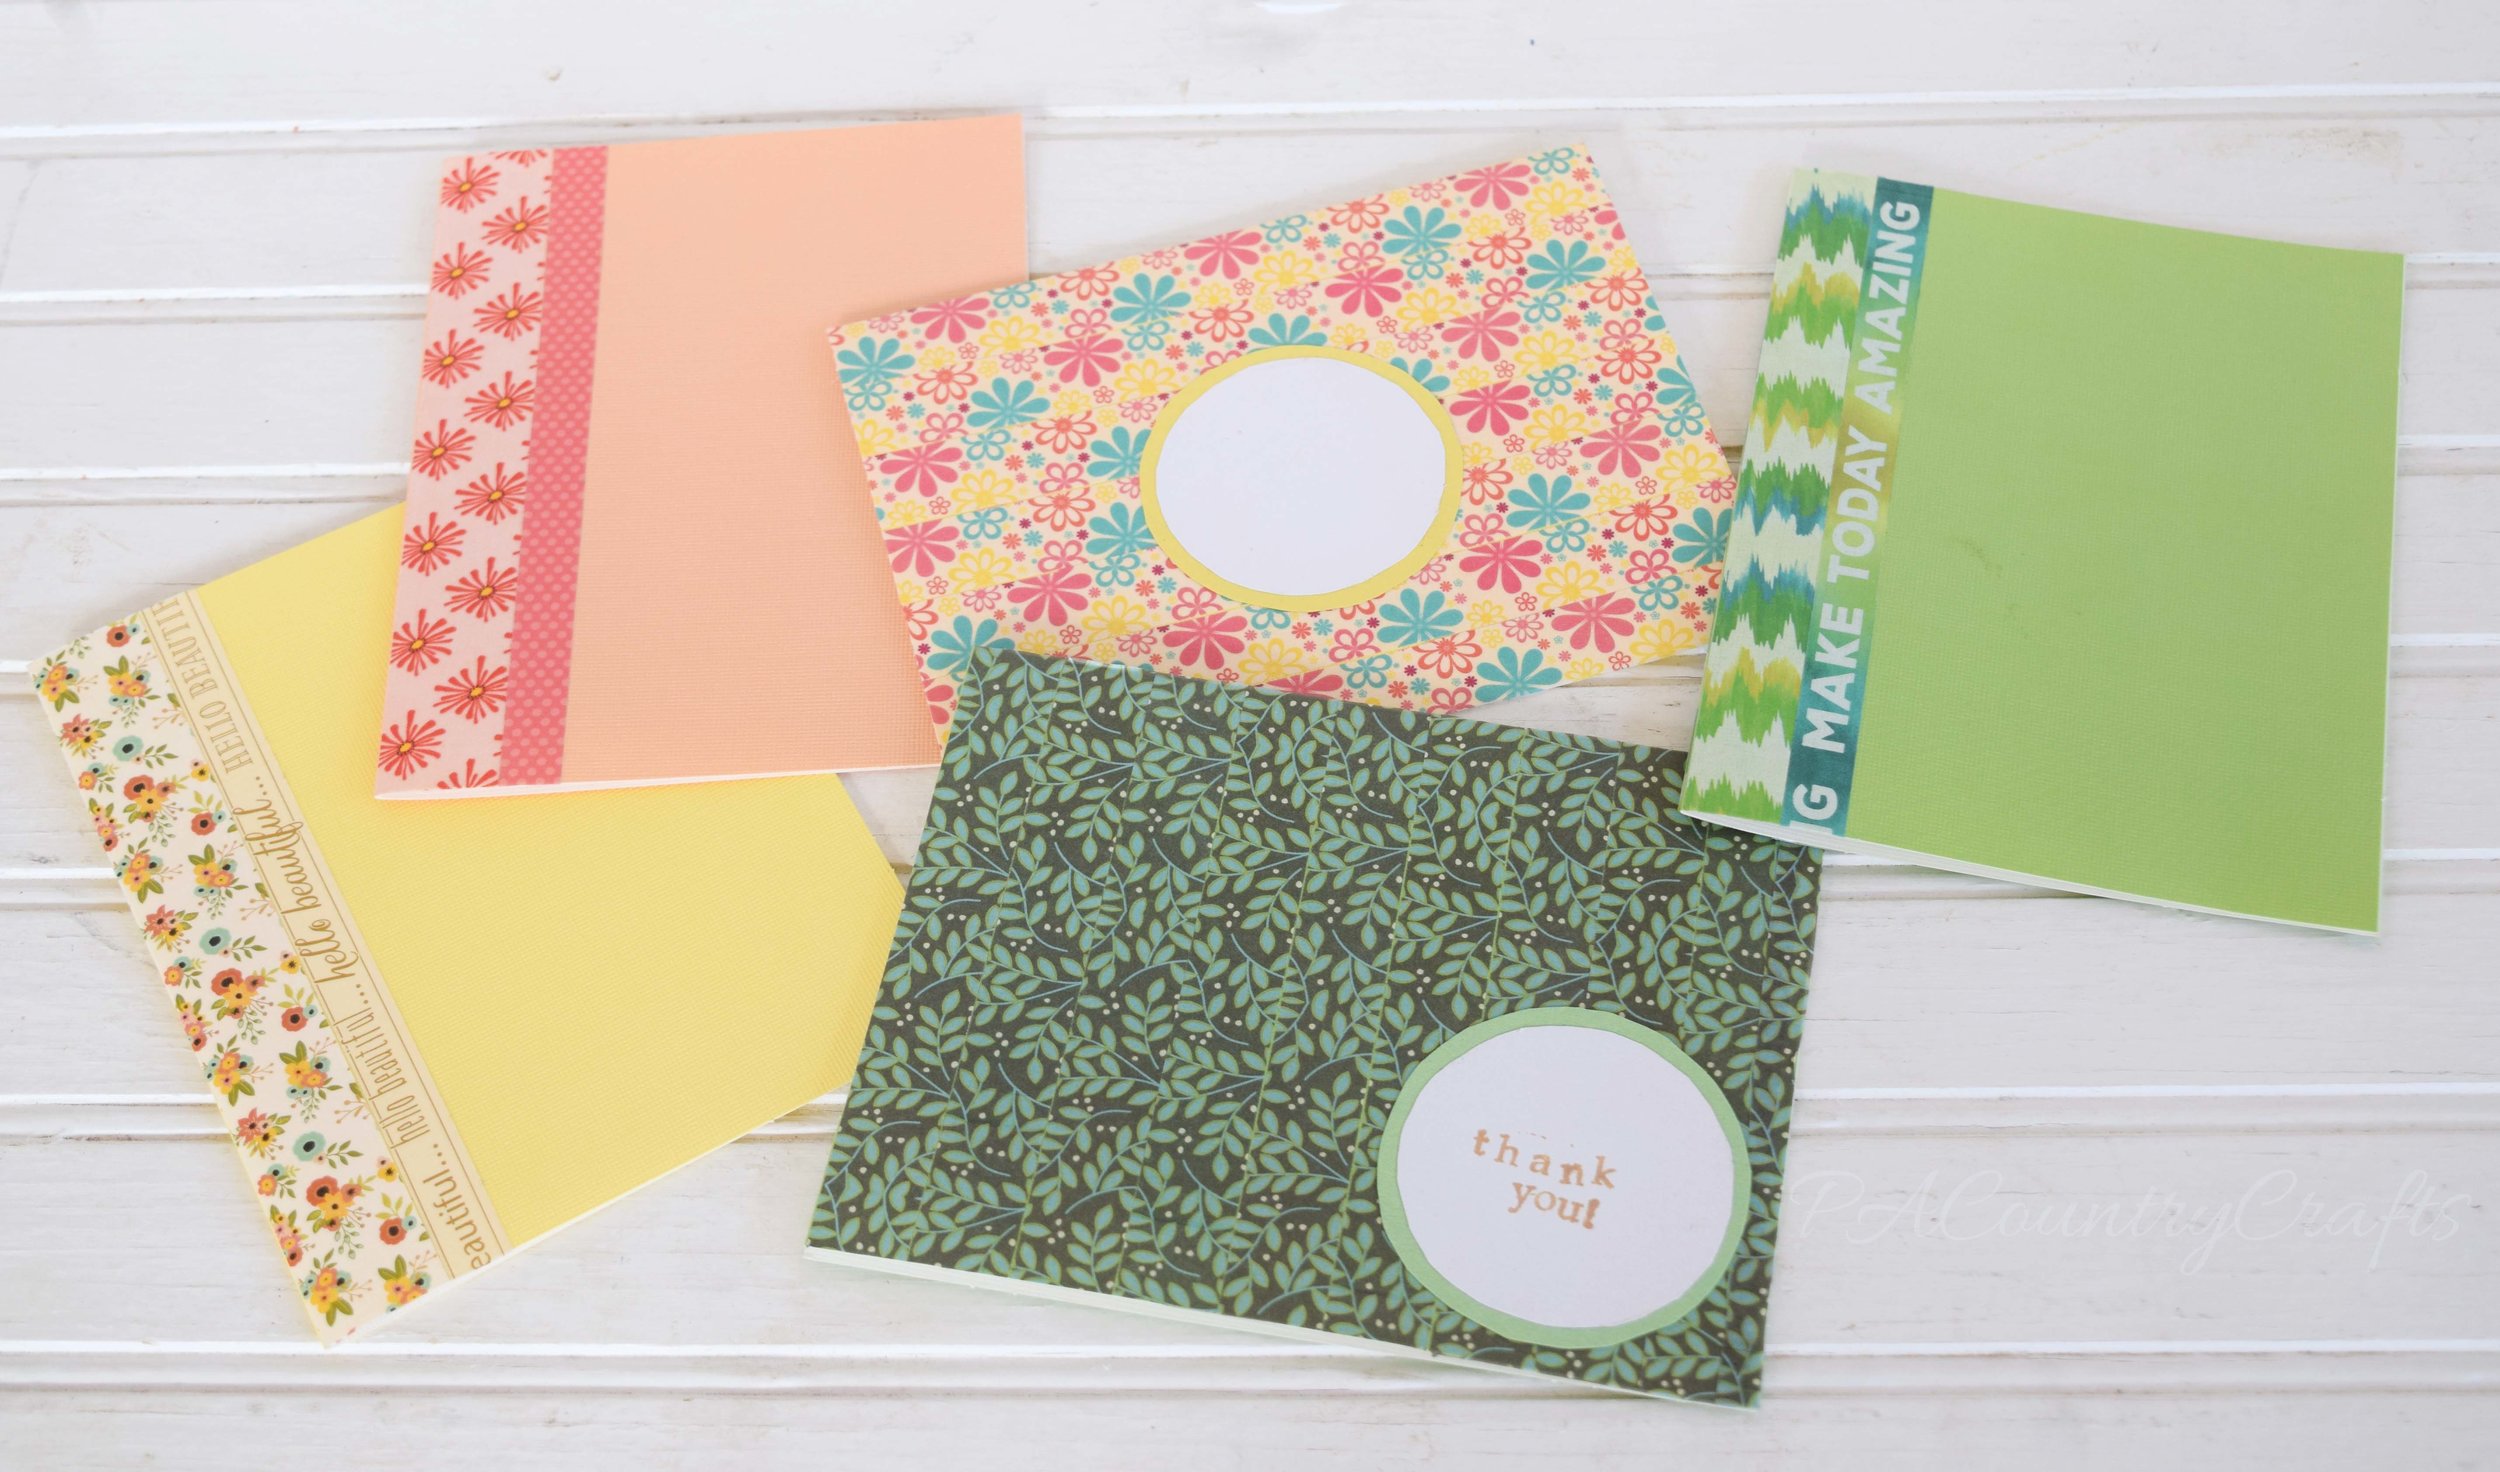
A lot of times when I buy my washi tape, they come in matching sets of two or three. Below are some of the tapes I matched together and and used on the cards. Some of them don't have their "caption boxes" yet, but usually if it's a taped background, I use a solid colored circle to surround the caption box, and if it's a solid background I include one of the tapes on the card to surround it.
And Some More Cards...
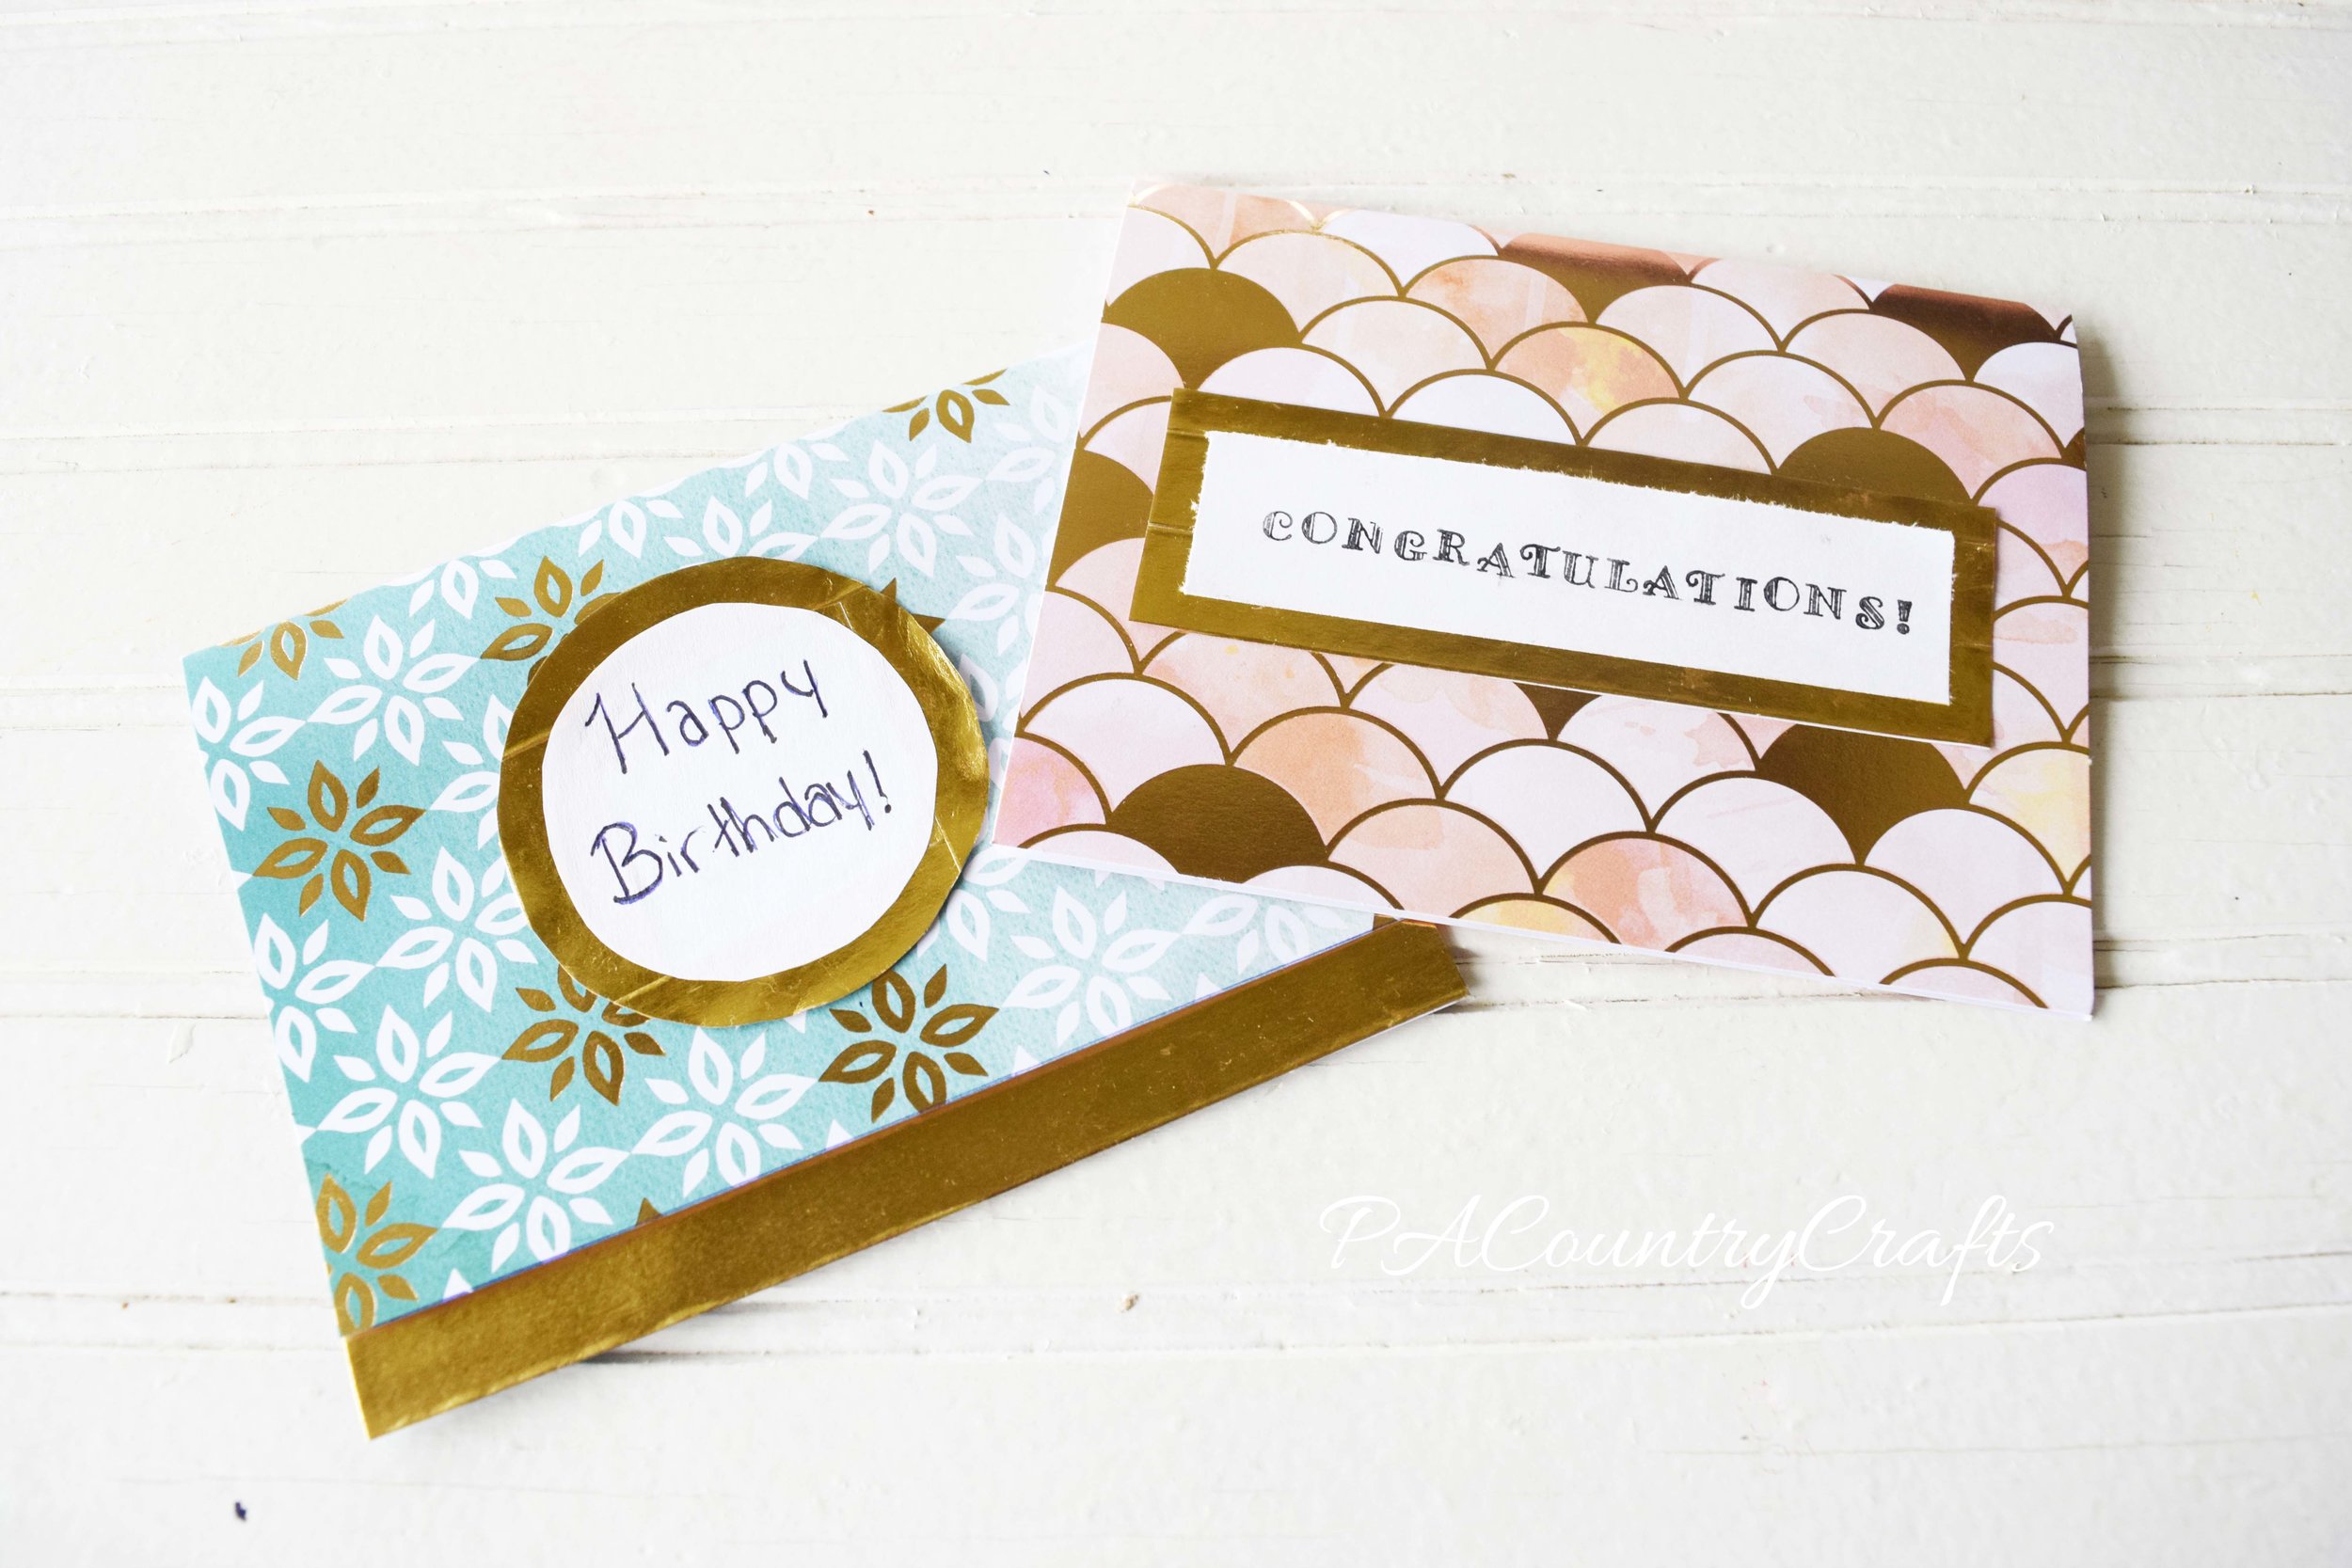
I made these cards just recently using cards that I bought and, some metallic washi tape to really set them off.
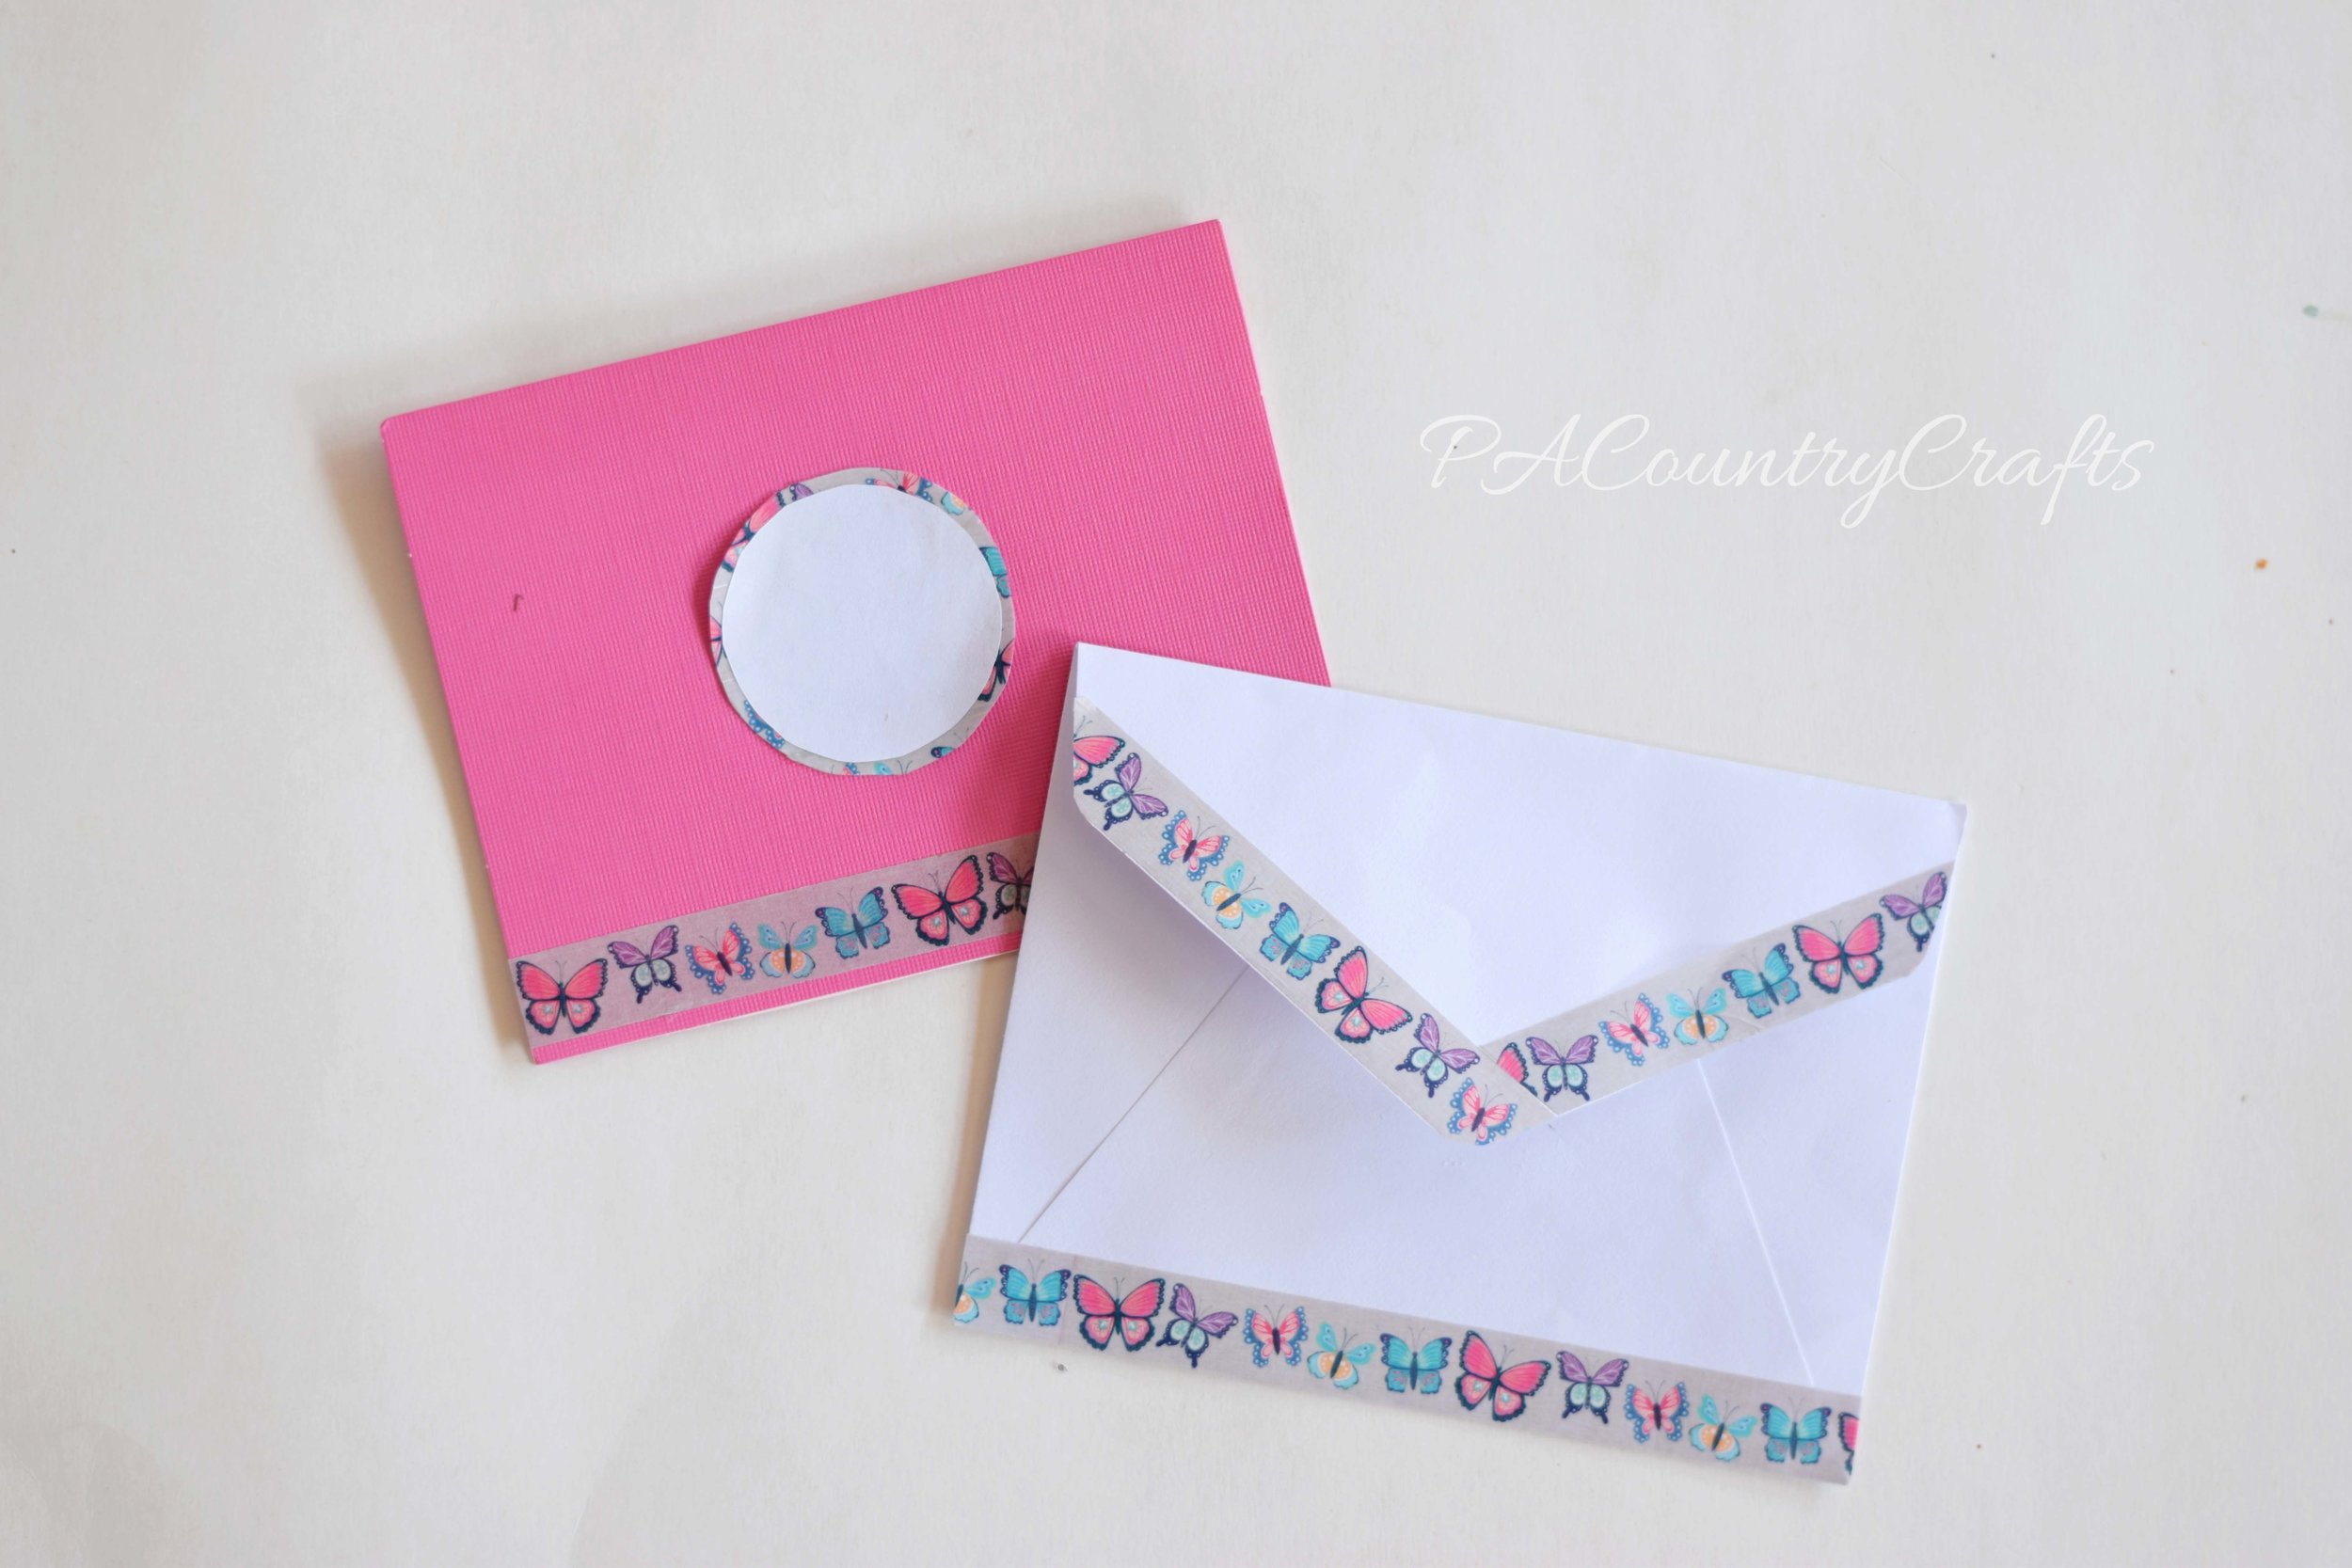
If the card isn't cute enough already you can add something simple and adorable to spice things up. All you have to do is border the envelope with one of the washi tapes used on the card. You can even add a strip on the front of the envelope to add a little extra cuteness to it. It just makes people more excited to get it in the mail!
Thanks so much for reading my post. I hope you liked it! Be sure to stay tuned for the rest of Washi Week!
If you want to pin it for later...
Tutorial for making a neck warmer rice bag and a free printable card for teacher appreciation gifts.
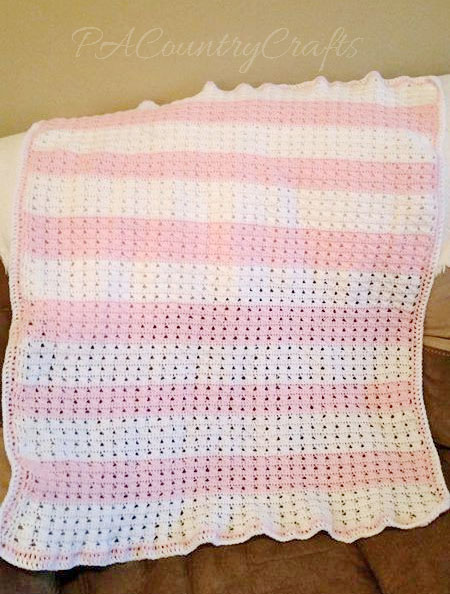
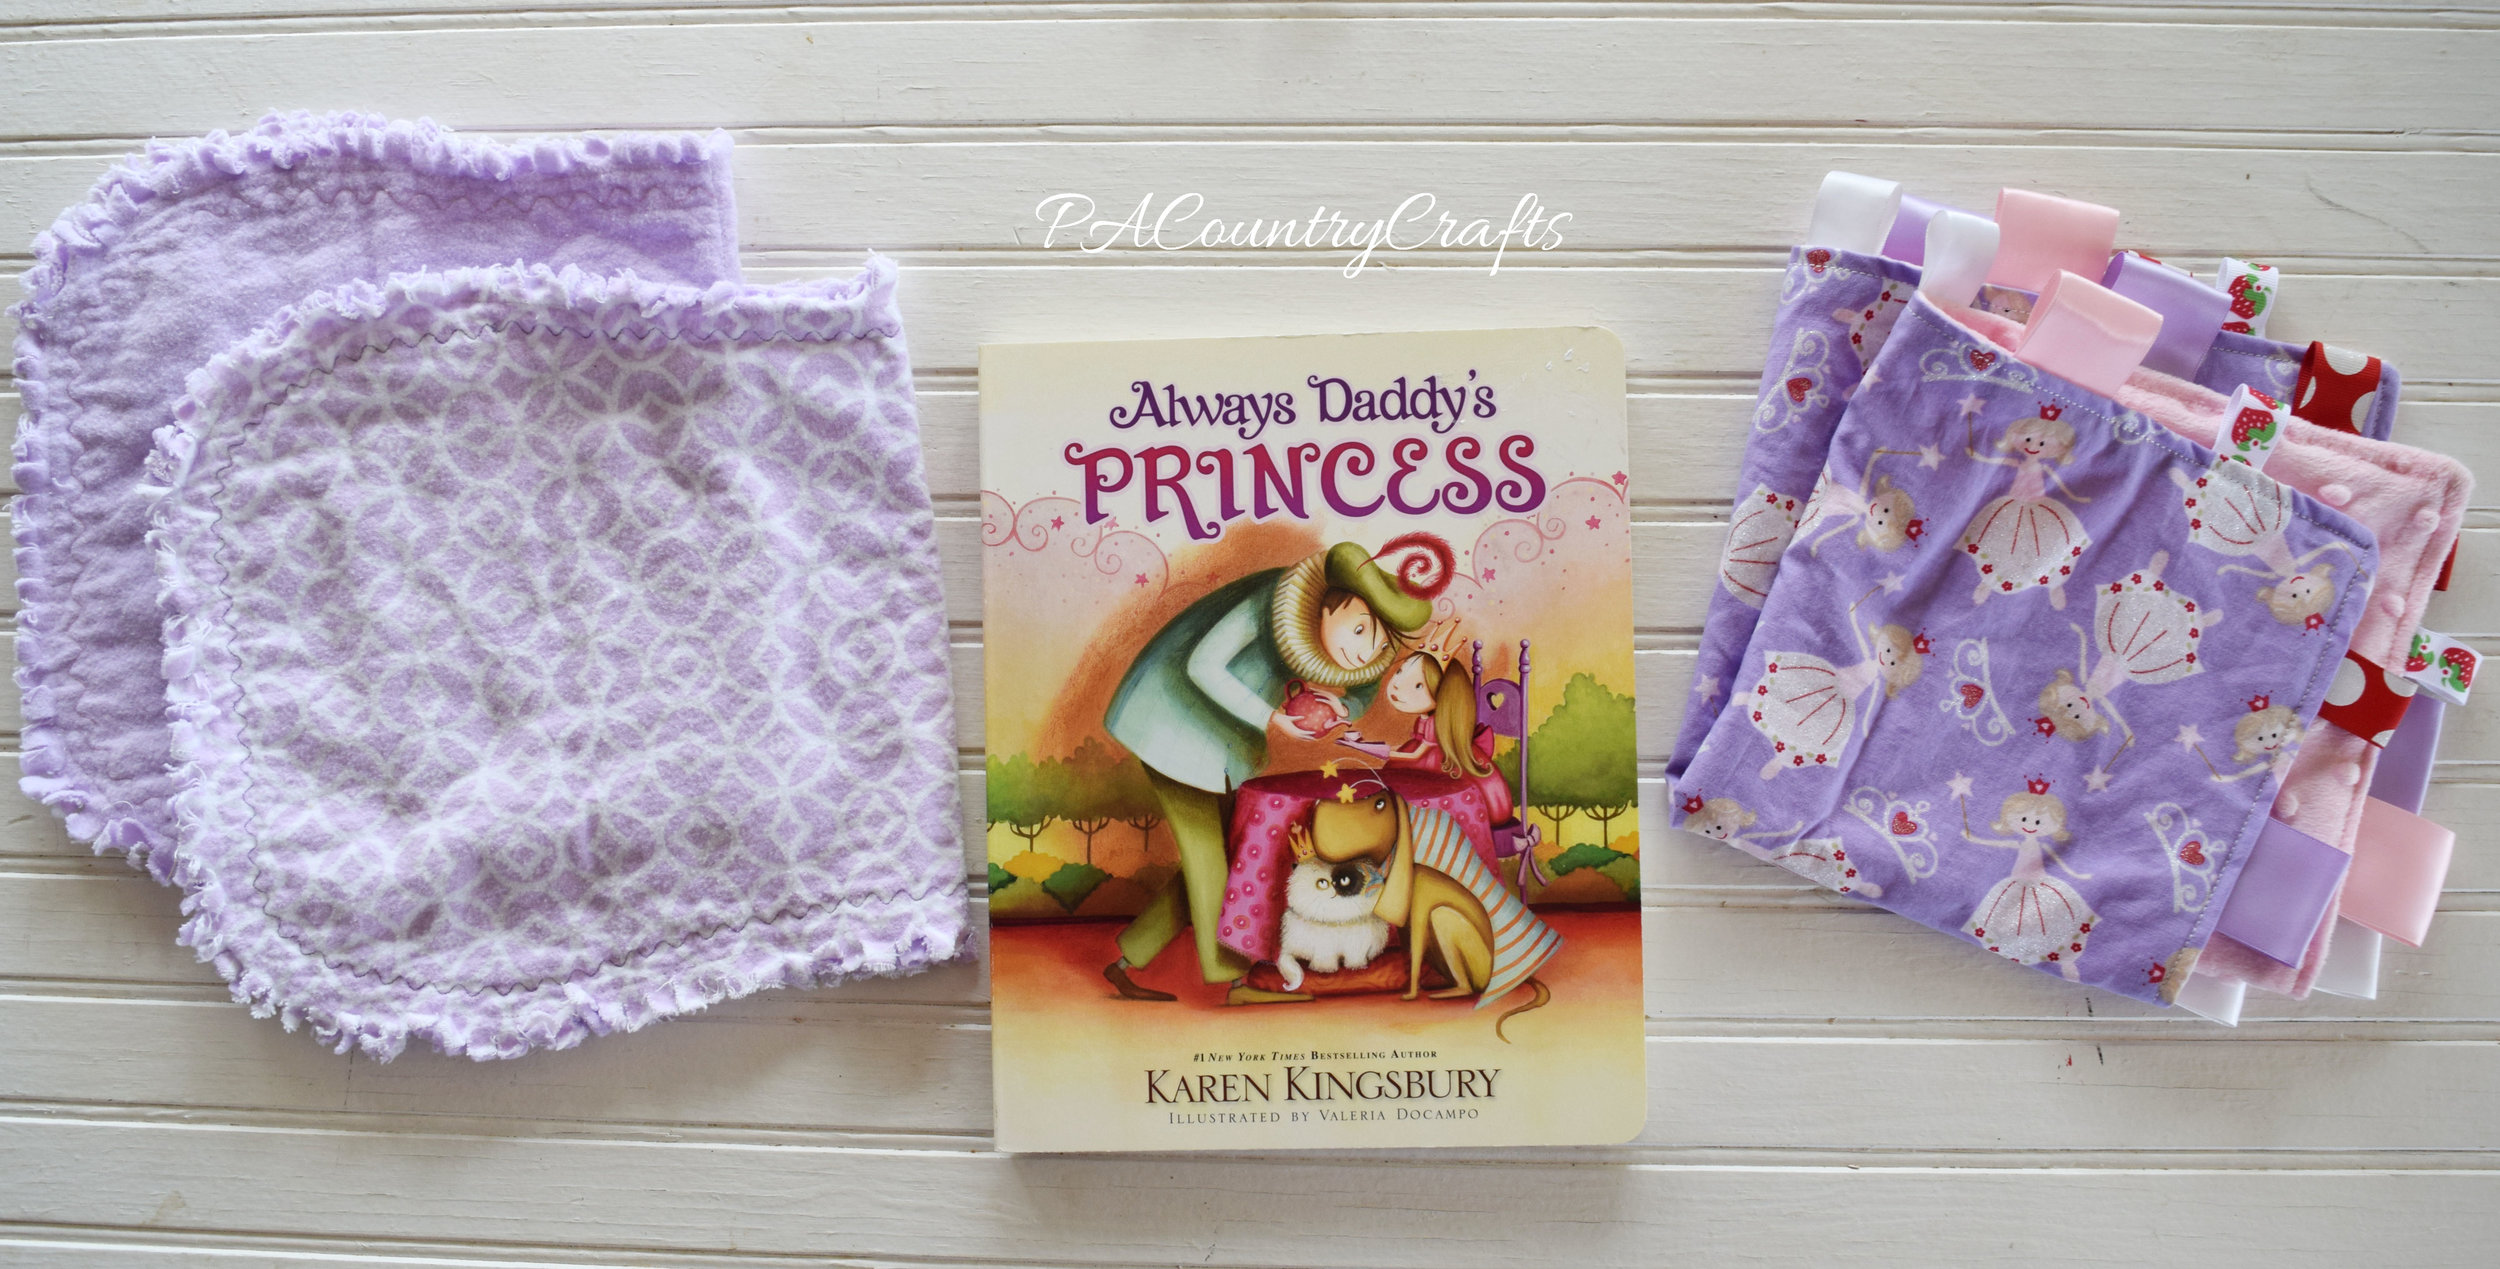
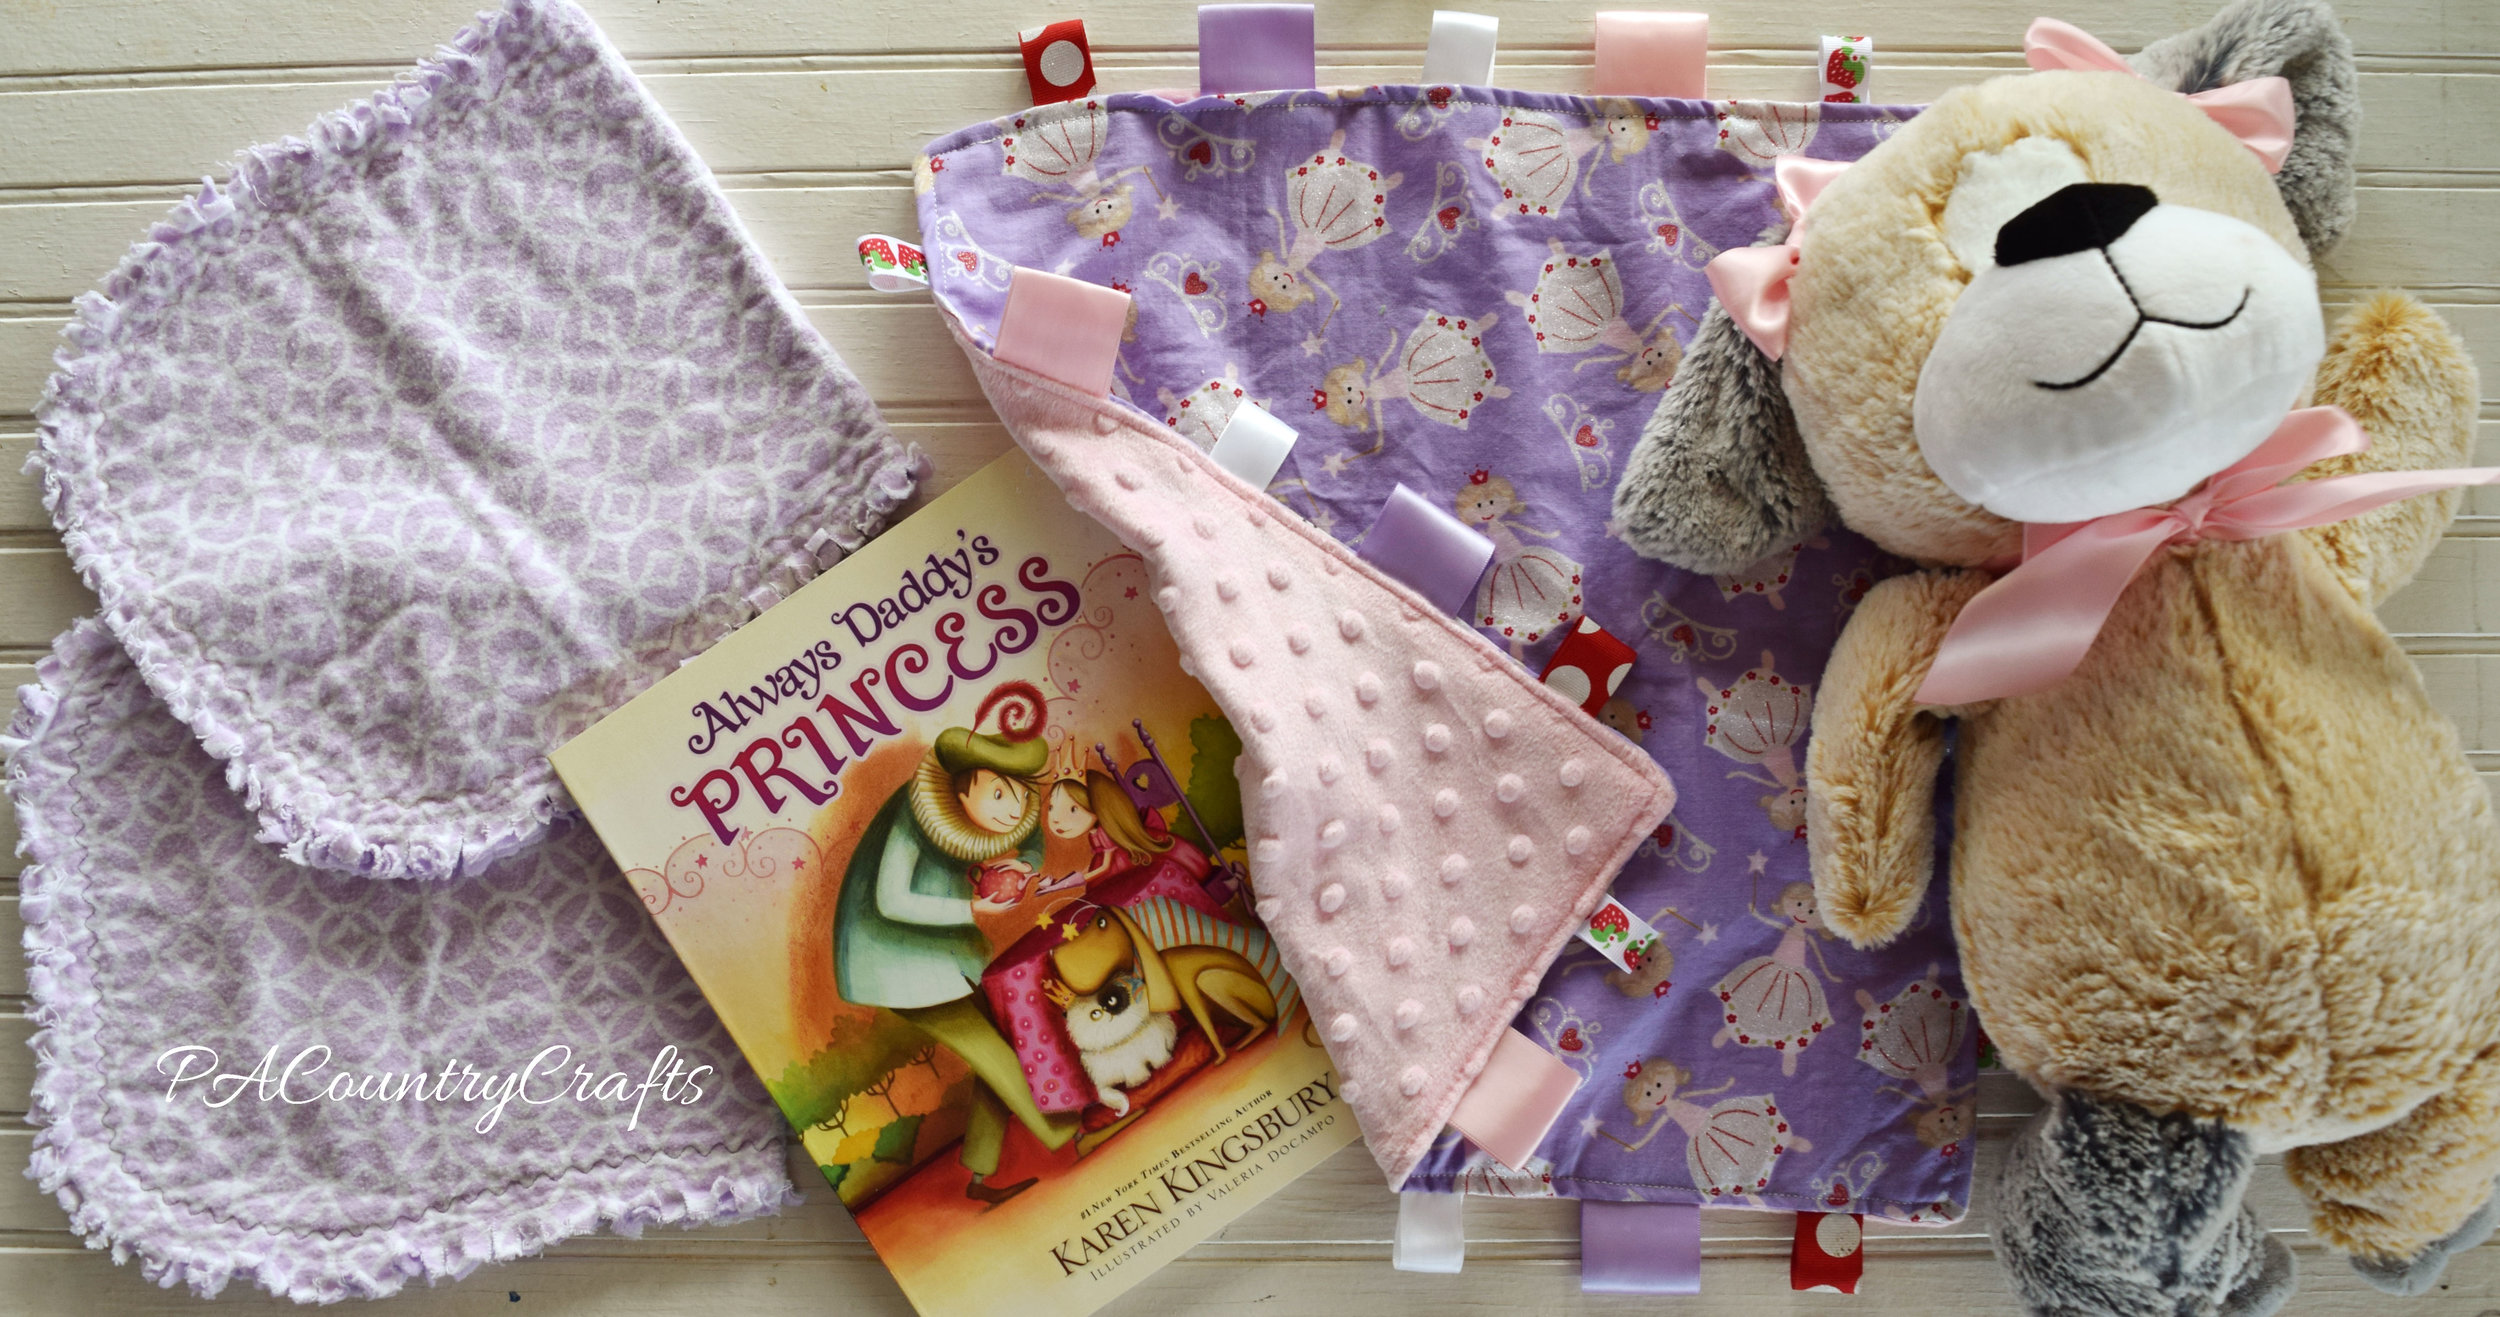
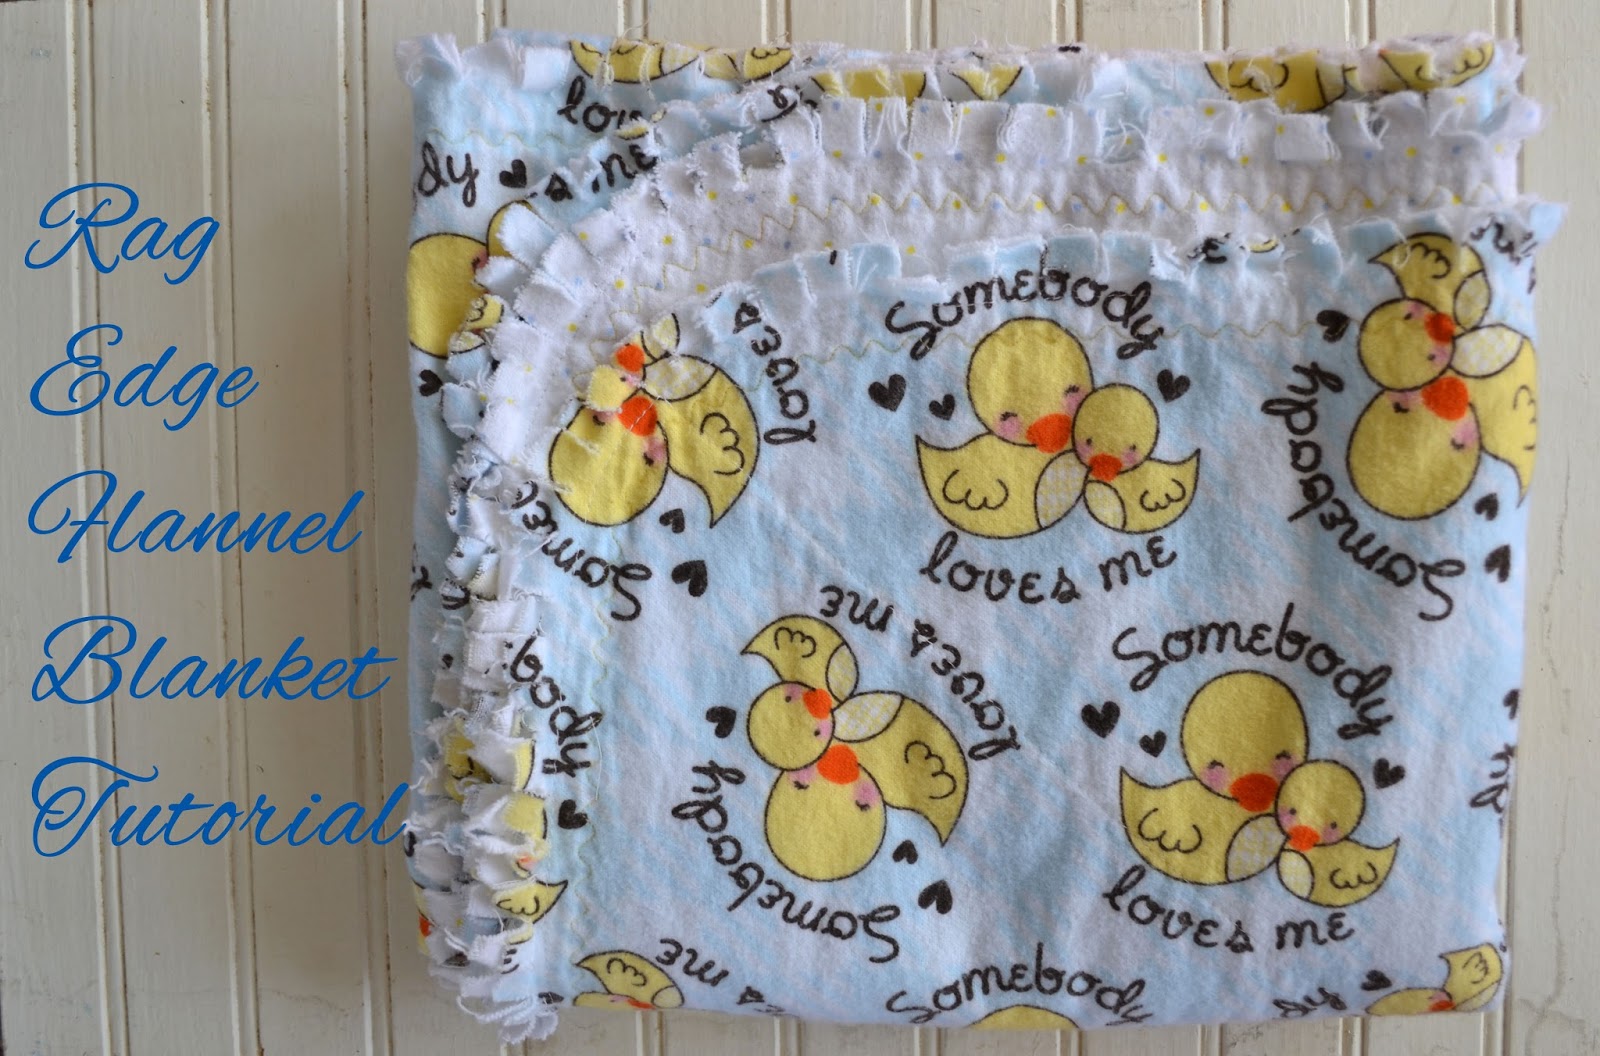
Read MoreI have mentioned before that I LOVE sewing for baby girls! I was invited to a baby shower for my cousin and I am just so excited for them!!! My family does a joint gift in either a wagon or a lamper (yes, that is a real thing- it's like a big laundry basket/hamper) and I wanted to sew some things to put inside. My mom made a beautiful crocheted blanket, so I didn't do my traditional rag edge flannel blanket (tutorial HERE).
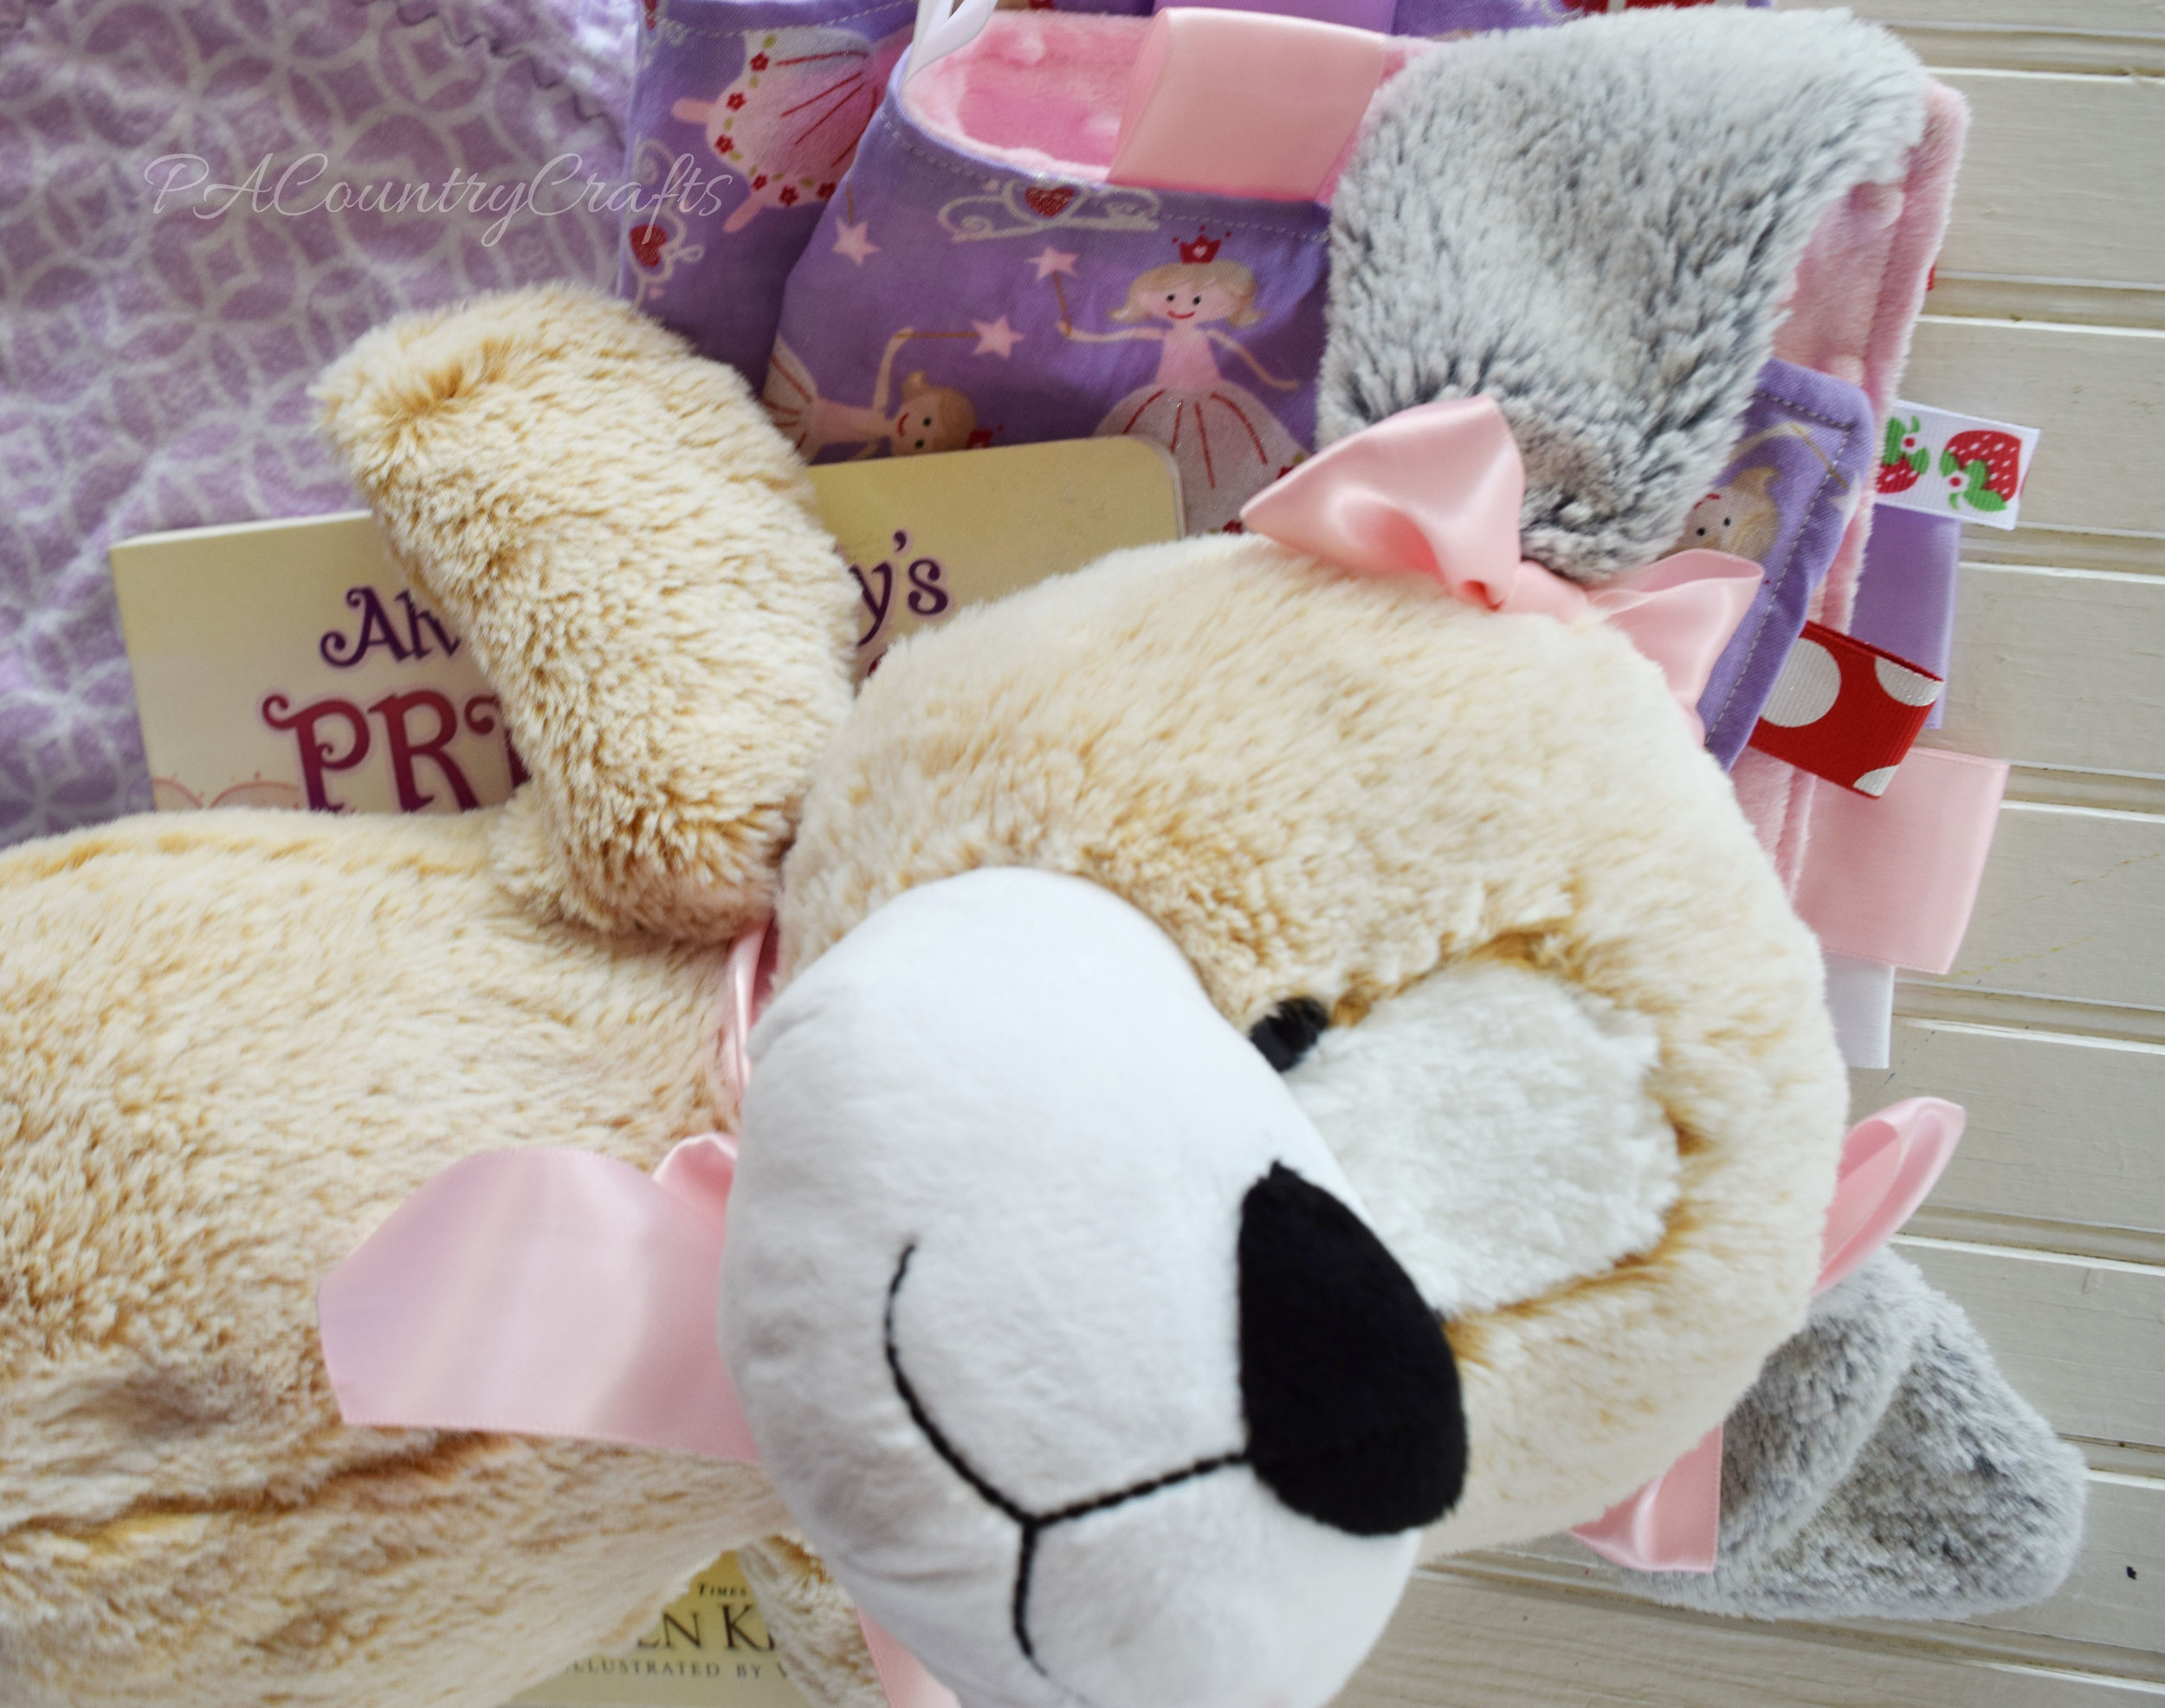
Her nursery colors are pink, purple, and red. I was really excited when I found this princess fabric in my stash! We were asked to bring a book instead of a card and my traditional girl baby shower gift includes Karen Kingsbury's Always Daddy's Princess. (Seriously, it makes me tear up every time!) Everything just coordinated so well!!! I made a ribbon taggy blanket and backed it in pink dot minky fabric.
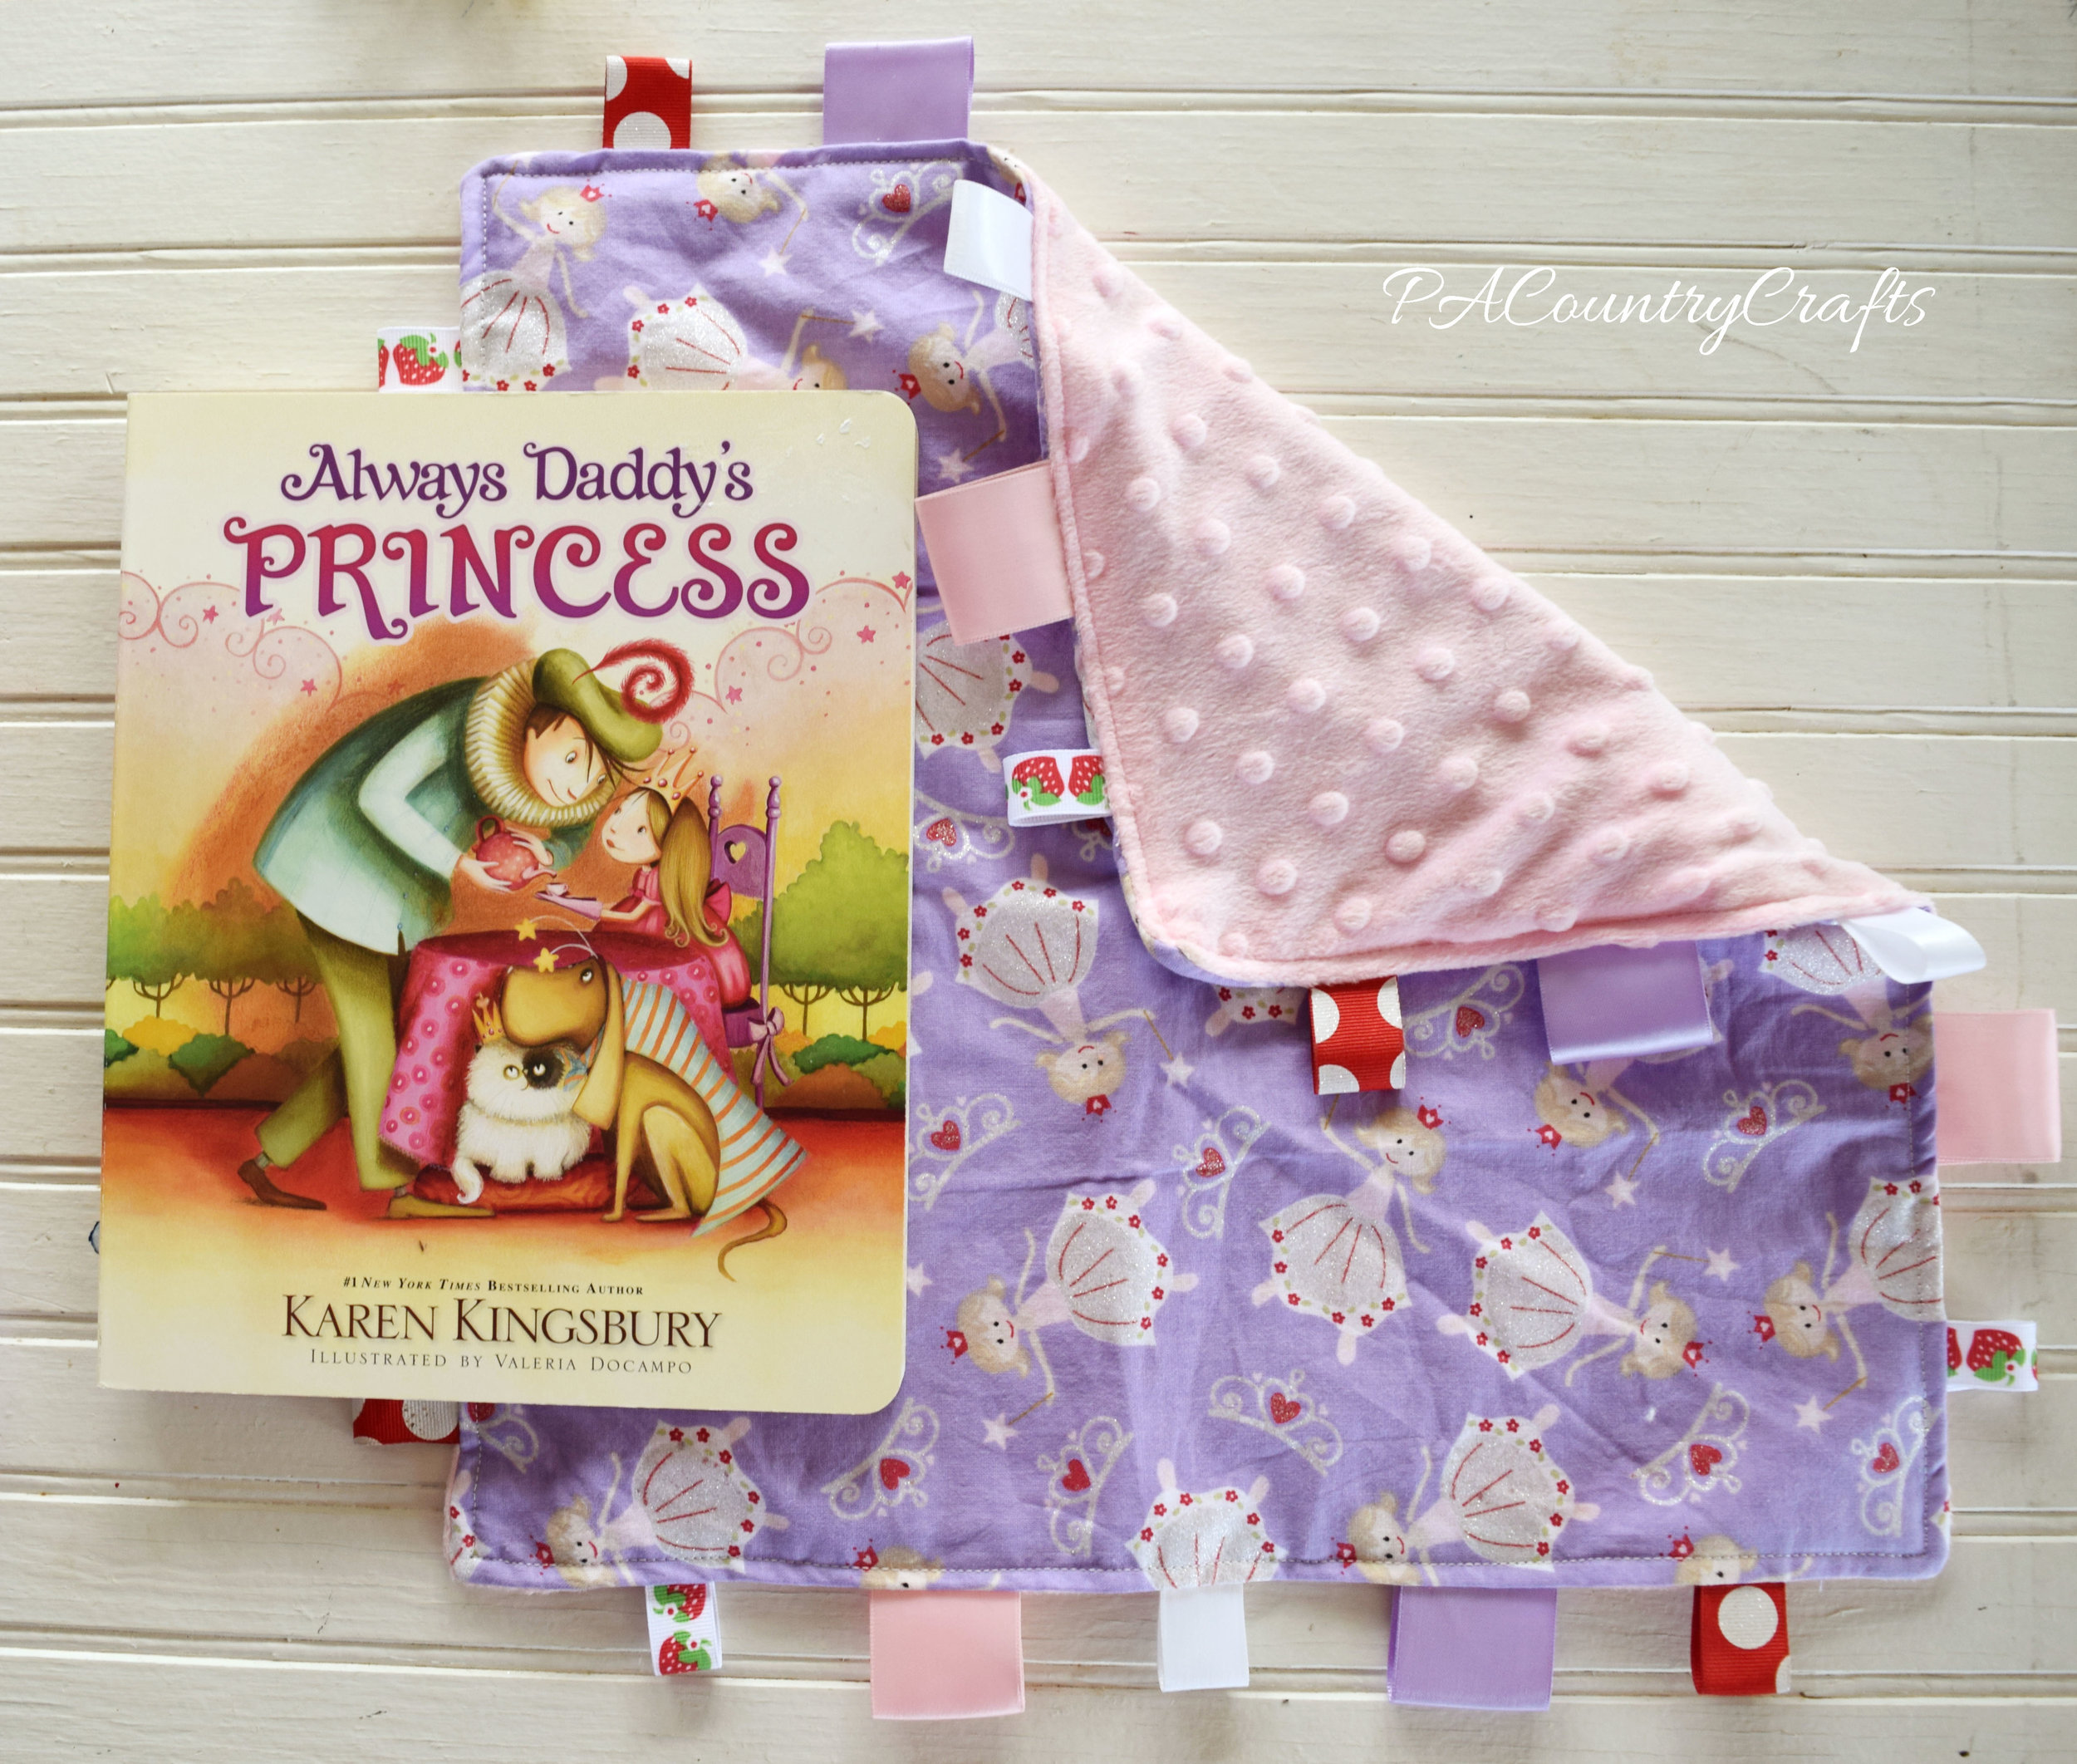
I just want to take a moment to point out that if I ever sew something for you using minky fabric, you are really special. I hate working with that stuff! It is so slippery and a huge pain to work with.
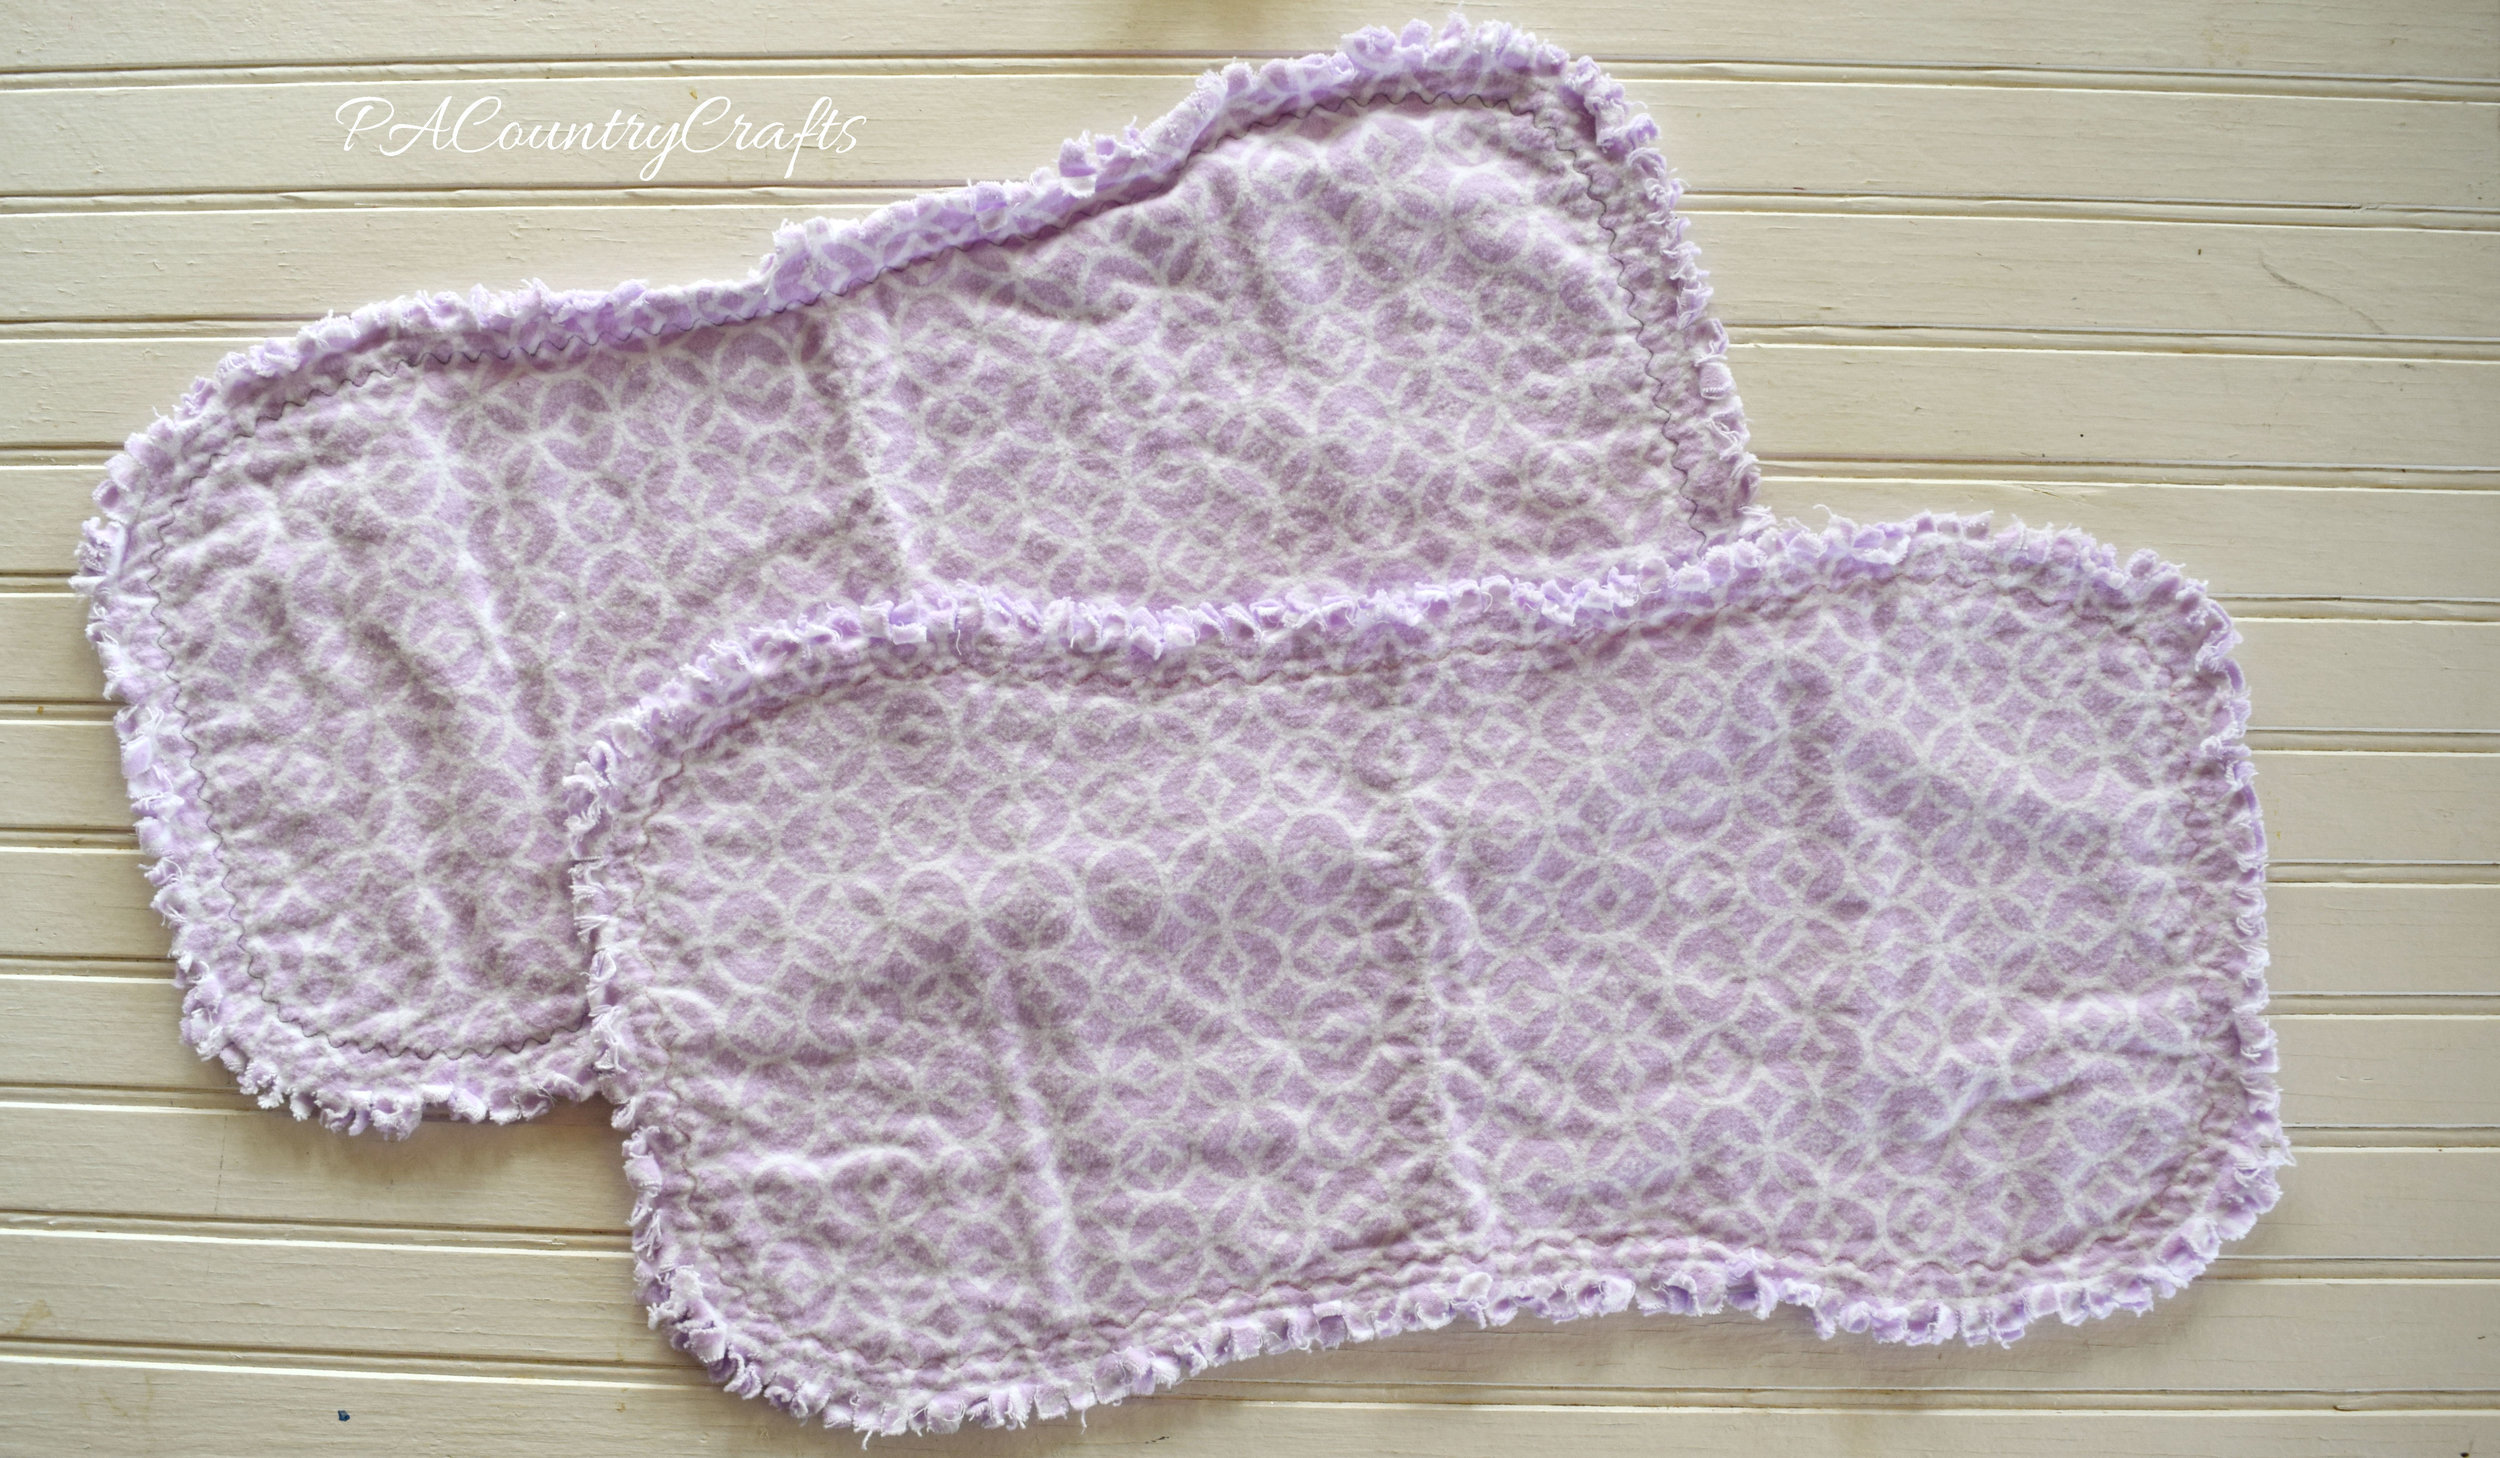
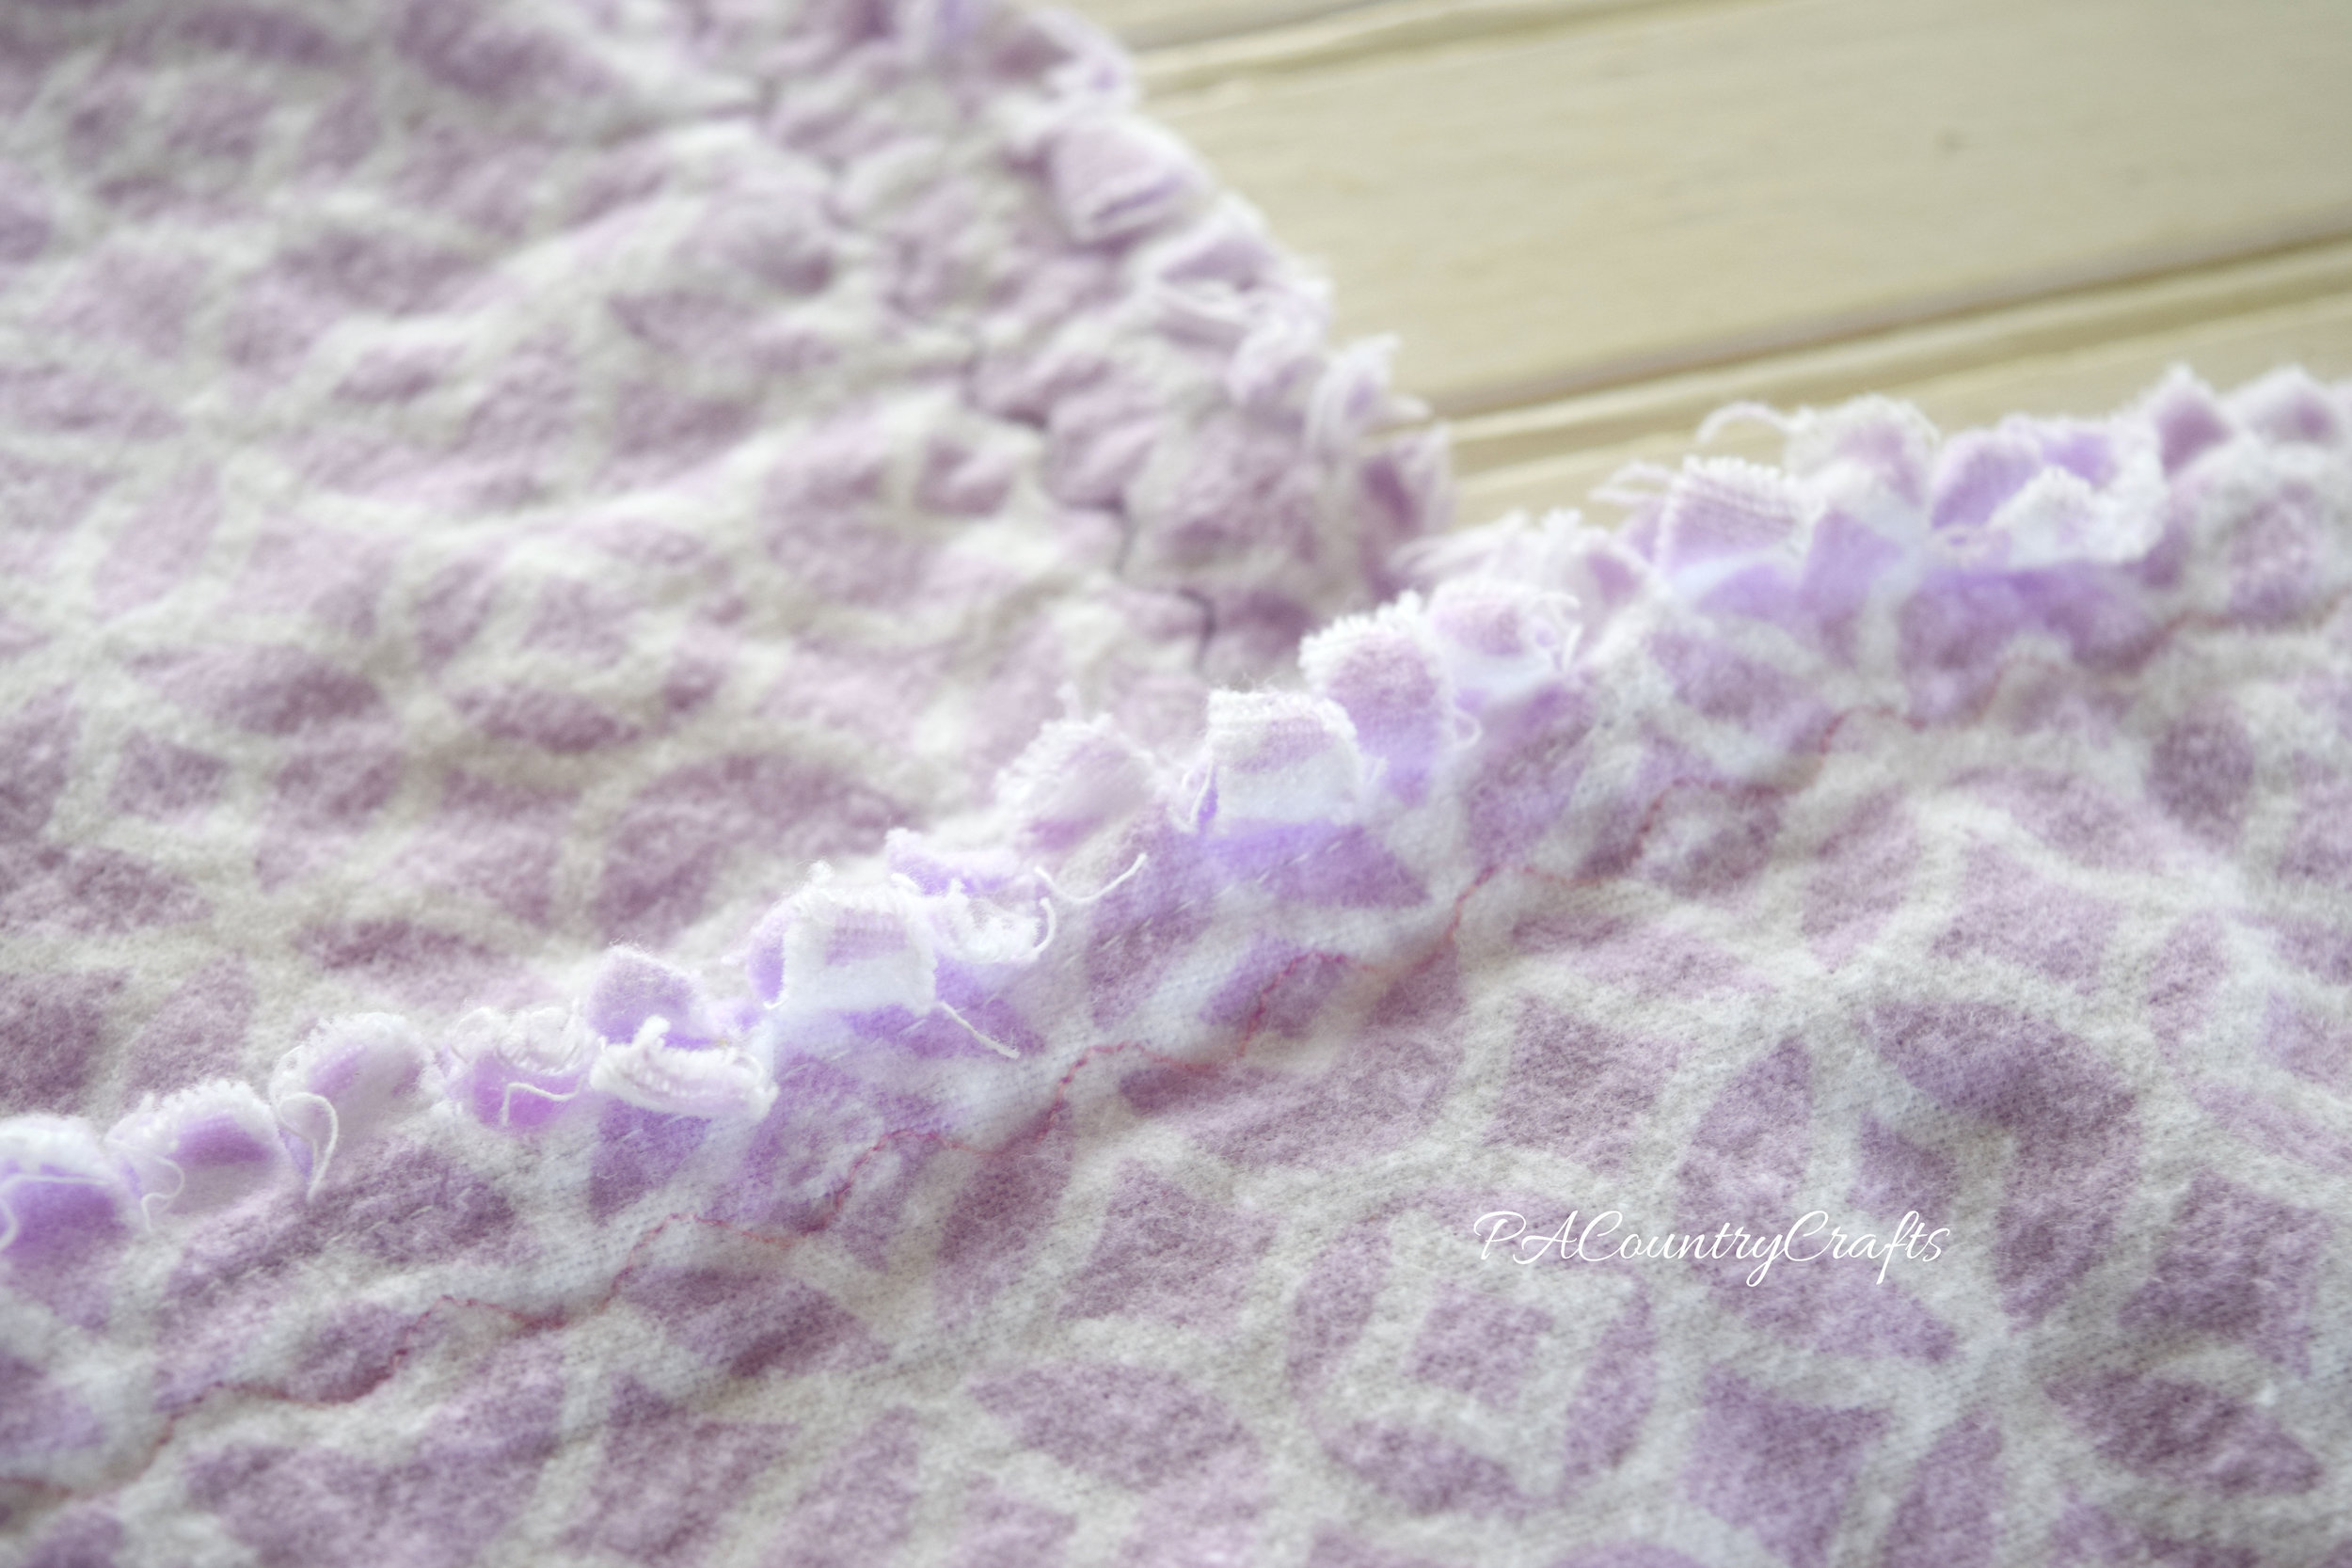
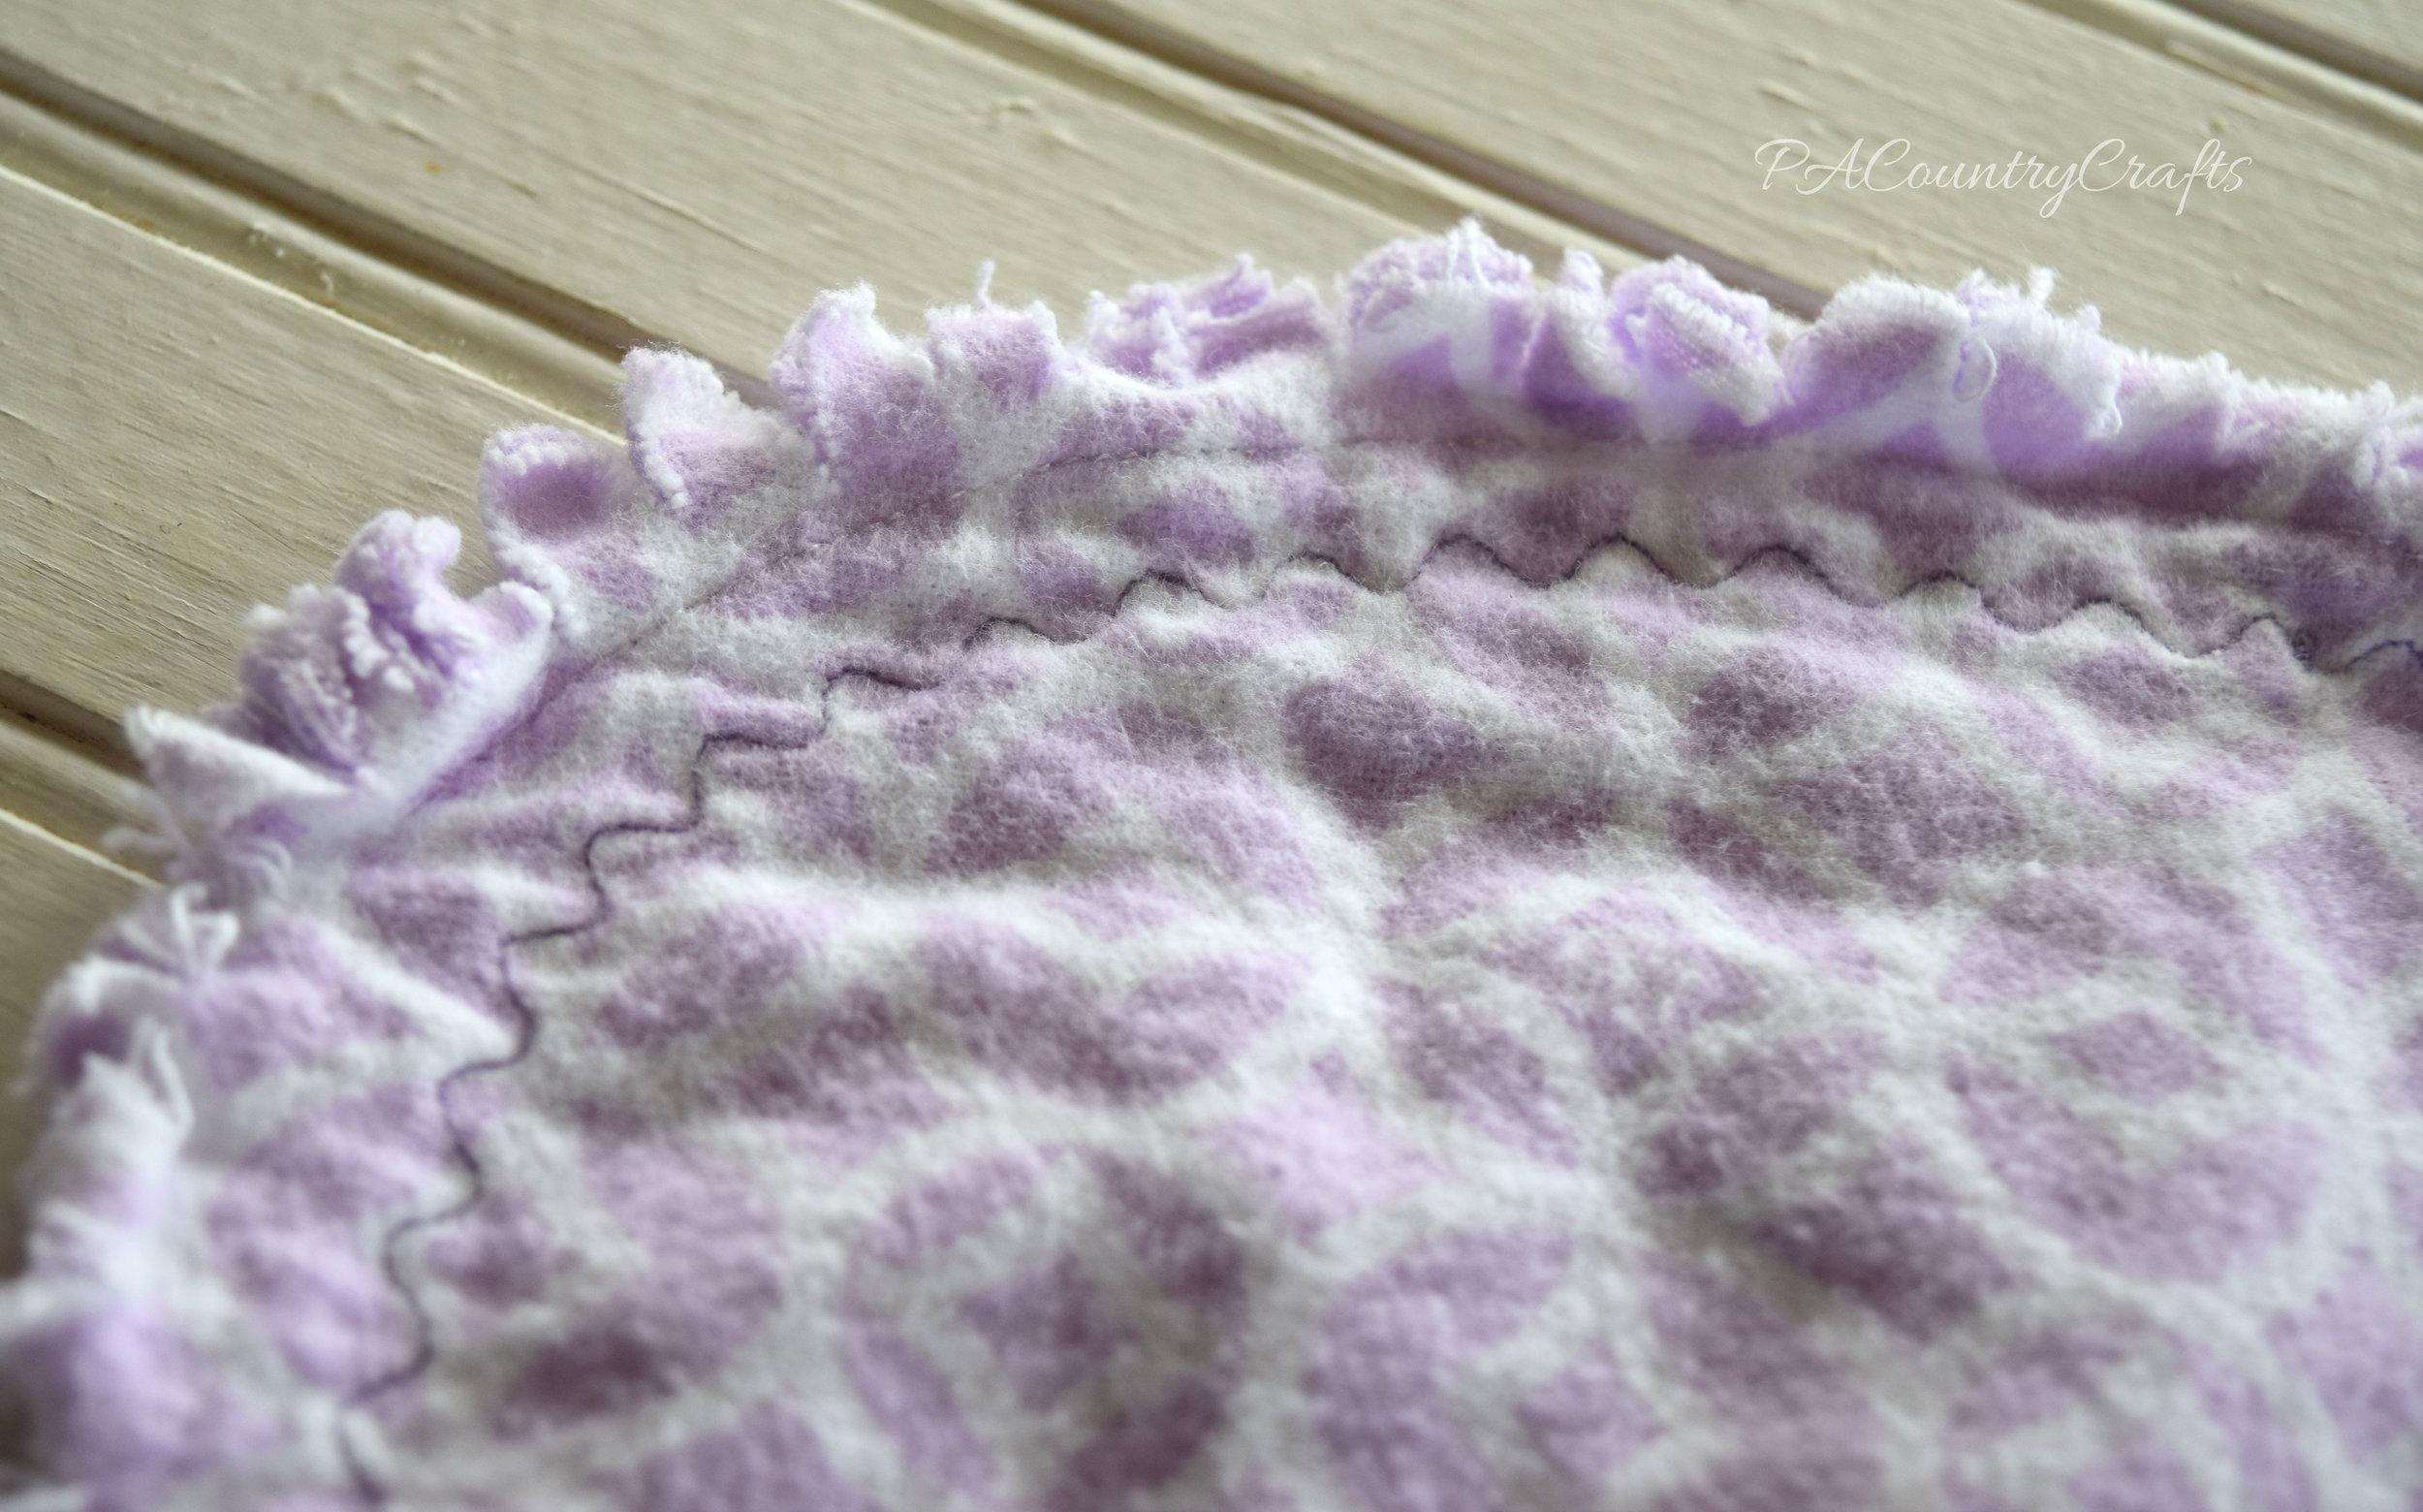
My 11yo wanted to sew something, too. So, we made these flannel rag edge burp cloths. I did the quality control work and the decorative stitching around the edges.
Finally, I got a stuffed dog and added pink bows to make it more girly and coordinate with the gift and sit on top of the lamper.
Everything went together so well, so I was really happy with it. It made a nice gift combined with the lamper, mom's blanket, books, some of our favorite tried and true baby products, diapers, and more. We are really excited about this baby girl!!!
As I said, I really love making things for babies. Here are a few posts you might also be interested in...


Sewing, crafts, tutorials, recipes, and a little look at our life in the country - raising half a dozen children.

Hi! Thanks so much for stopping by! My name is Lindsay and on this blog you will find sewing, crafts, decorating, recipes, and tutorials with a little bit of honesty and encouragement.


