Kids' Sewing ~ Doll Peasant Dresses

I mentioned last week that I have been sharing my sewing machines with my daughters. I want to make sure that my girls know how to sew because I want them to be self-sufficient adults one day and not bug me to do their mending. I hate mending. These doll clothes were sewn by my daughters. Doll peasant dresses are a really good beginner sewing project! It is one of the first things I teach my girls to sew. I usually have to help them with the elastic casings around the neckline until they are more experienced, but the rest of the dress is simple enough that they just need a little coaching.

Once you get the basic peasant dresses mastered, you can increase the difficulty with details like bows and trims.

Elastic sleeves at any length change the dress up with one simple addition. If you shorten it to a tunic length it is really cute with leggings, too.

Here are the patterns/tutorials if anyone wants to give it a try!

Doll Peasant Top Free Sewing Pattern

A free printable pattern for a doll peasant dress with elastic sleeves!

They can easily make a matching girls' dress, too!

You can also see more of the doll clothes my daughters have made HERE and HERE. For the full list of  my doll clothes tutorials click HERE.

Key Fobs

My 14yo daughter has a shopping addiction. Unfortunately, I cannot afford to fund it. As a mean mother, I force her to earn spending money. One of those ways is through sewing. She has made doll clothes in the past, but now that she is a little older she is transitioning to new sewing ventures. Her first product line is key fobs. I have them listed in my shop if you are interested. If you click on the pictures it should take you straight to the listing as well.

So, now it is your turn...

What was your first source of income? Did you have a babysitting job? A lemonade stand? Mow lawns? I did a tiny bit of babysitting and I also tutored students in English after school.

EASY Dark Chocolate Truffles

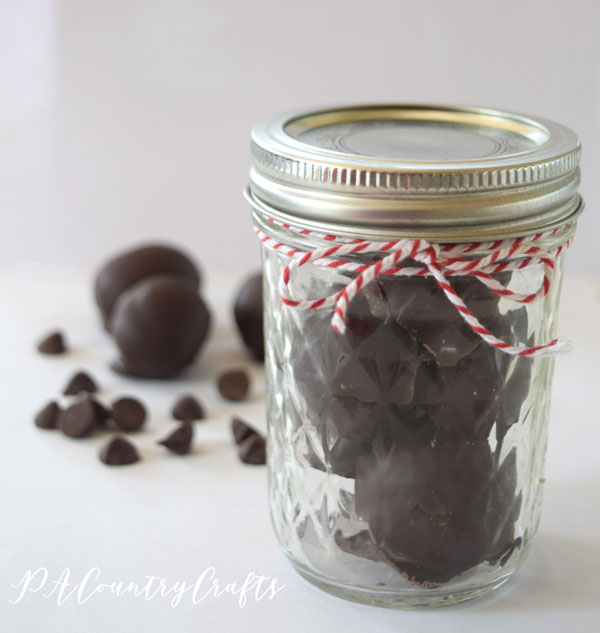
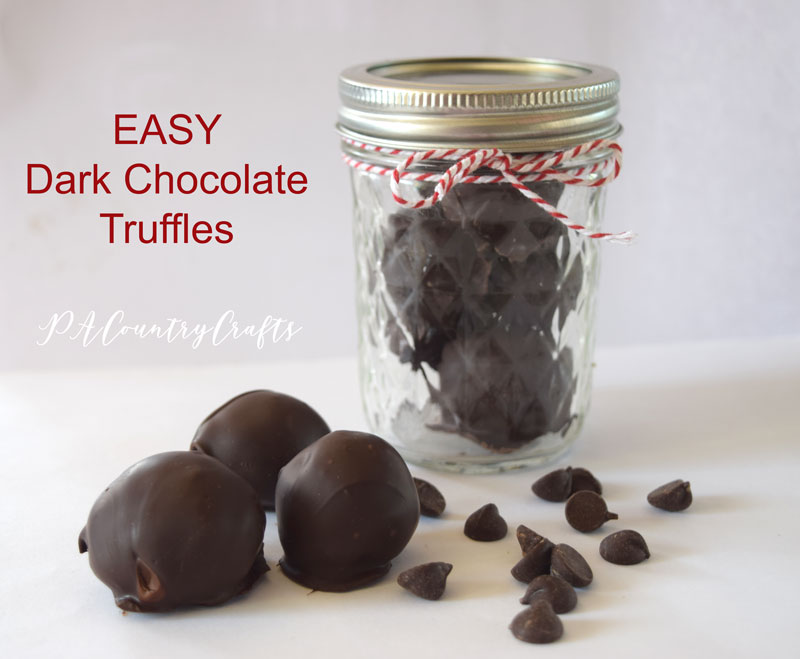
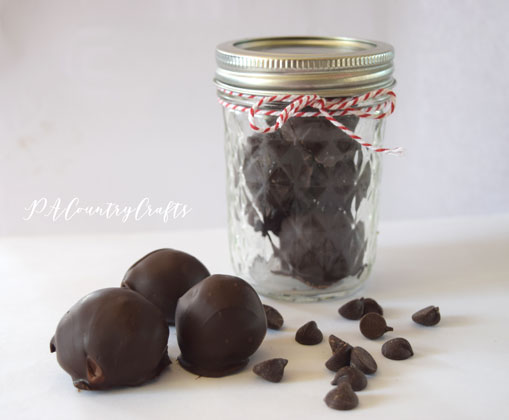
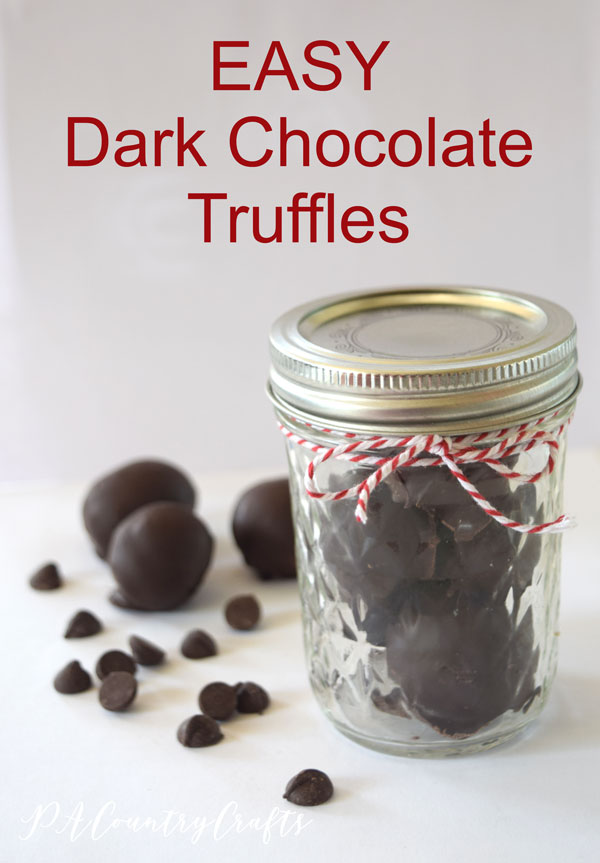
I love truffles! Especially dark chocolate truffles! I have made truffles several different ways and these are definitely the easiest. I am almost embarrassed to share this recipe because it is so easy!

These are seriously the easiest chocolate truffles you will ever make!

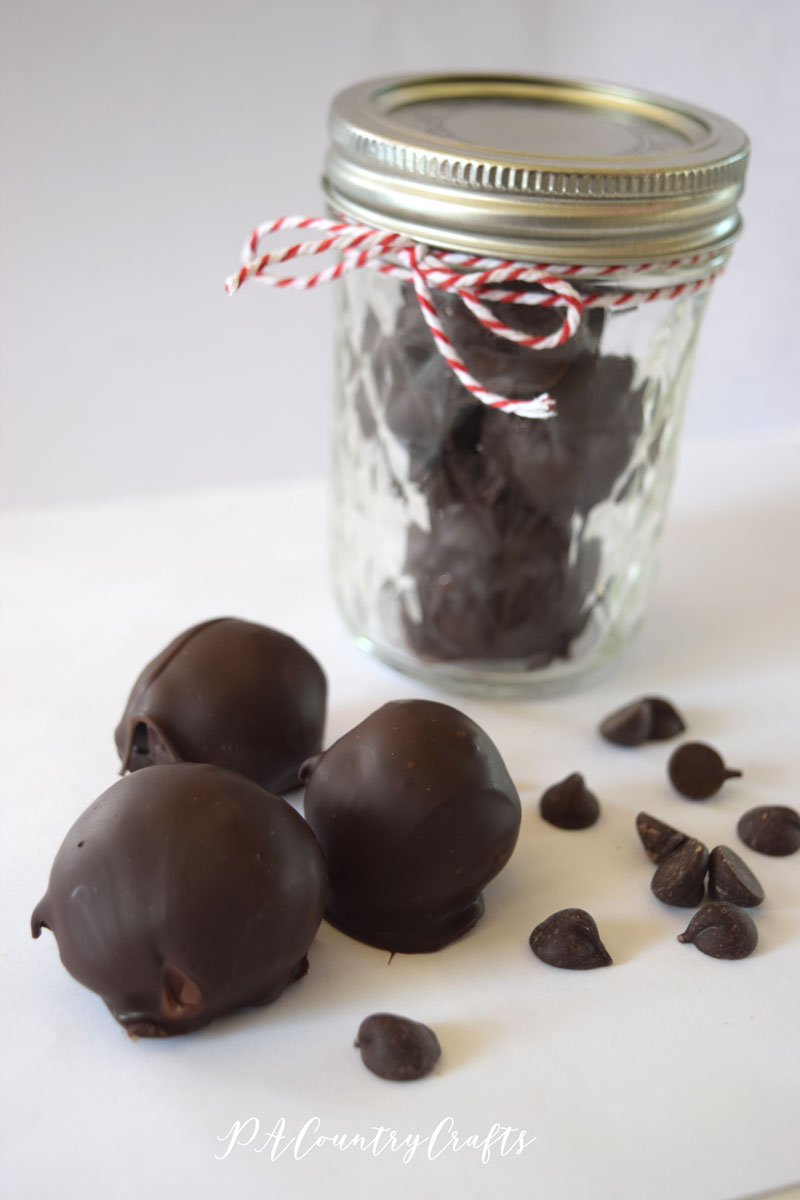
I make these for teacher gifts (some teachers have even requested them) and put them in a cute little tin or jar. The minimal effort in making these does not mean I appreciate them any less, but I do feel a little guilty when anyone is impressed by them.

Homemade truffles in a jar- great little gift idea!

Ready for the recipe with step by step pictures? It took me longer to edit pics and blog about these truffles than it did to make them.

Special Dark Chocolate Truffle Recipe

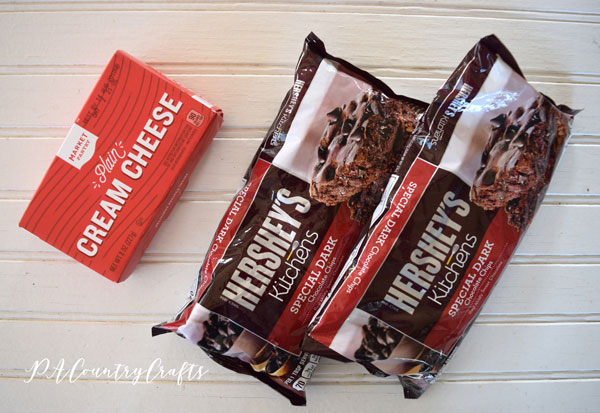
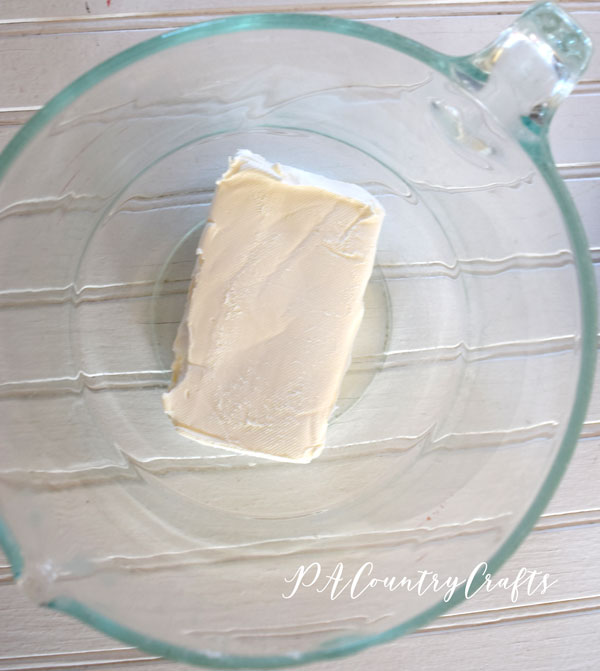
These are your ingredients. Yup. That is it! One pack of cream cheese (I think I do prefer Philadelphia just a bit) and two bags of Hershey's Special Dark chocolate chips. You can use other chocolate if you prefer, but this is my favorite.

These truffles are embarrassingly easy to make! No one will know!

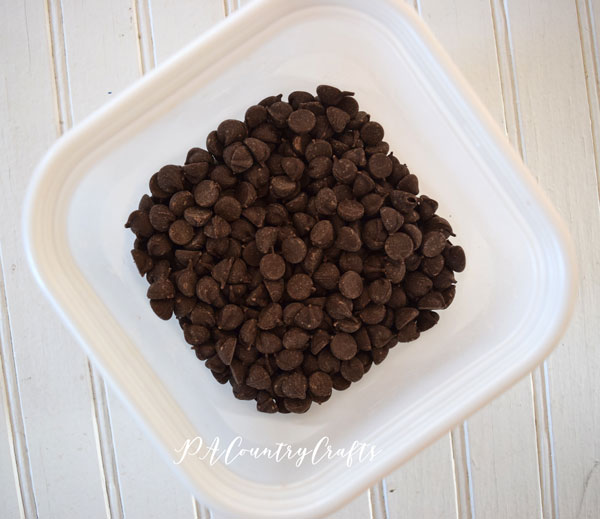
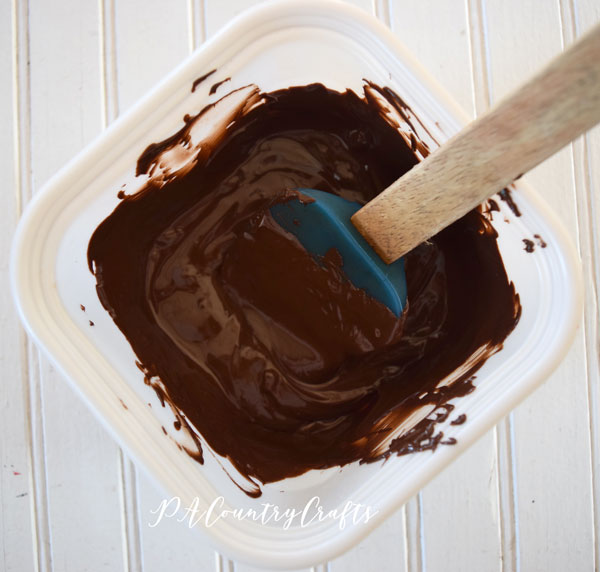
Melt one bag of chocolate chips. I used to have a chocolate melter, but the kids broke it. My other tactic is this one: pour a bag of chocolate chips into a plastic, microwave safe container. (I use plastic because after it is empty you can put it in the freezer and then squeeze the container so the hardened chocolate bits pop right out. Easy clean up!)

Melt the chocolate for one minute at 50% power. Stir. Place chocolate back into the microwave at 50% power and stir every 30 seconds until melted.

Put the cream cheese in a medium mixing bowl. I guess you could soften it, but it always seems to be soft enough for me to work with. Your call.

Pour the melted chocolate over the cream cheese.

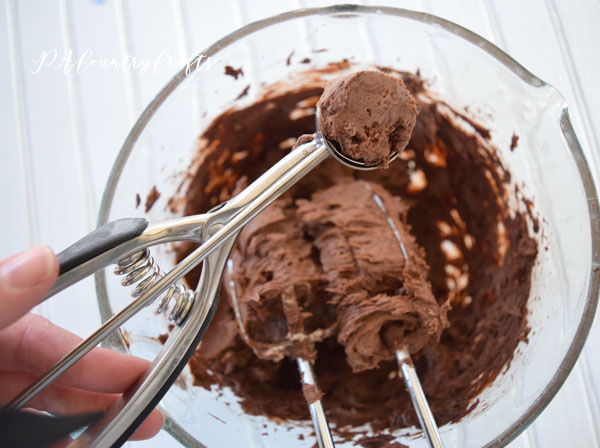
Mix the chocolate and cream cheese together.  You are going to need some sort of mixer for this one, especially if you didn't soften the cream cheese.

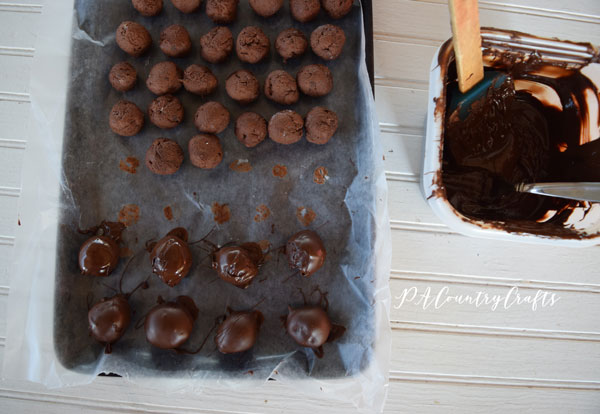
Roll the truffle mixture into little balls. I have a small cookie scoop that is the perfect size and keeps them pretty uniform. Place the truffles on a wax paper covered cookie sheet.

Place the truffles in the refrigerator or freezer until they are firm.

Melt the second bag of chocolate chips as before. I like the chocolate a little thick so I do not add any wax or oil. I am not great at chocolate coating, though, so do whatever works for you! Dip the truffles into the melted chocolate. I just use a fork and tap off the excess chocolate before placing them back on the cookie sheet.

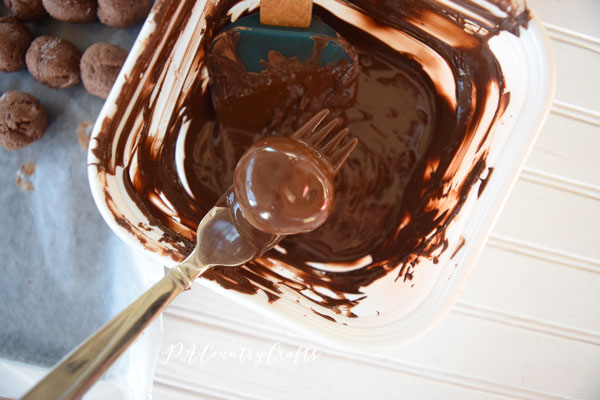
Since the cookie sheet should still be cold the chocolate hardens right away.

That is it! Easy, right? You don't have to share the recipe. No one will know.

These chocolate truffles are really easy- only 2 ingredients!

If you want to pin it for later...

Make these easy dark chocolate truffles with just 2 ingredients!

Here are some more chocolate recipes that you might enjoy...

Zucchini Chocolate Cake

DIY Spring Moss Wreath Tutorial

It is not too often that I actually make something for myself. I actually do not have a great place to display this wreath, but I made it anyway and I really love it!

moss-floral-wreath.jpg

I had some foam wreath forms a friend had given to me a long time ago and I just hadn't found a use for them. Recently, I was browsing Pinterest and saw some cute moss wreaths I thought I could make. For myself!

moss-spring-wreath-with-flowers.jpg

The wreath form was free, but they do carry slightly smaller ones at the Dollar Tree. I also got a bag of moss at the Dollar Tree. The flowers came from Michaels. I actually wanted coral ones, but there was a sweet older lady who asked my 12yo which flowers she recommended (I guess we have similar taste, my daughter and I) so I found something else. Anyway, this was a really cheap project!

So, gather all of your supplies...

A ribbon to hang would be helpful and is not shown. You also need hot glue sticks, a glue gun, toothpicks, and green floral tape.

spring-moss-wreath-tutorial.jpg

Now, the moss part was a mess. I made this on my kitchen counter, but anticipate snibbles of moss everywhere!

Just take small bunches of moss and hot glue them onto the wreath form. It takes quite a few sticks of hot glue. Check for any thin spots and add more as needed.

how to make a moss covered wreath

It is actually still pretty cute plain!

Dollar Store Moss Wreath

Next, add the flowers. Cut them apart and lay them on the wreath until you get an arrangement you are happy with. My flowers had enough stem to poke into the wreath but I added some hot glue around the bottom of the flower just in case. Attach the leaves to toothpicks using hot glue and green floral tape. Stick them into the wreath as well.

how to add leaves to a foam wreath form
spring-moss-wreath-with-flowers.jpg

Pretty easy, right? Hot gluing the moss is a little messy and tedious, but I priced similar wreaths at $30. The moss sheds a little, so I don't want to hang it on a door that is opened and closed a lot, but on a wall it is pretty!

If you want to pin it for later...

diy-spring-moss-wreath-tutorial.jpg

You may also like these posts...