Red Tractor Dish Towels

Most people do not understand, but there is a lot of disagreement within the farming community. Red vs. Green

There are other tractors, but the main rivalry exists between John Deere and International Harvester users. I married into the red side. (My dad was just happy for a working tractor- color did not matter.) Snarky t-shirts are often seen at family picnics. My youngest daughter refuses to wear green or yellow. The kids argue at school with classmates about "Junk Deere" tractors.

I thought it was perfectly appropriate to welcome a new bride into our family of red tractor fanatics with embellished Farmall/IH dish towels.

I had some fabric with rows of red tractor designs left over from THIS quilt back. So, I carefully cut strips and sewed them to some bar mop dish towels for an accent border. These were fairly simple to make.

I cut the rows apart with my rotary cutter and cut the width a little more than a half inch wider than the dish towel. I pressed the top and bottom edges under 1/4" and pinned them to the towels, following the textured rows of the towels. Then, I folded the ends under (saving it for last because the fabric can shift) and pinned them in place just inside the towel edge. I slowly and carefully stitched all the way around the fabric 1/8" from the folded edge.

I thought it was a cute gift idea and I think the groom will appreciate it. :)

You may also want to check out these posts:


Farm Animals Quiet Book Page


Hole in the Barn Door Quilt


Naomi's Quilt


Guest Book Quilt

the-guest-book-quilt.jpg

Last fall we had a 70th anniversary party for my grandparents. My Meemaw and Pappy are just so spunky and we are so blessed to have them in our lives and in great health! My Pap makes quite an impression. He says the wildest things and tells the funniest stories. He has a knack for finding amazing deals and making a quick profit. He also makes wooden crosses in his workshop and carries them in his pocket to give away. My Meemaw is such a sweetheart and, although she might flare her nostrils at him from time to time, she tolerates his antics with a little smile. She still sings in the choir and volunteers at church. She comes to as many of her great-grandchildren's sporting events as she can. (Her senior admission card is falling apart but she is so proud of it!) She pretty much just radiates sweetness and love.

70th anniversary guest book quilt

We celebrated their anniversary (and Pap's 90th birthday) with a party last fall. As an alternative to a guest book, I offered to make a quilt. I had several charm packs (sets of assorted 5" squares of fabric) that I had won in giveaways and I cut some additional 5" blocks from solid white. The guests used fabric markers to sign the squares or add a special message.

Then, after letting them sit on my desk for a few months, I finally got around to making the quilt. I just did basic patchwork, arranging the squares pretty randomly and even using the unsigned squares in case anyone wants to sign it later. I added a white border and then did free motion quilting. I am not very good at free motion quilting. I need a lot more practice. I basically just decided that finished was better than perfect.

It is just a lap size quilt. I probably could have added in some other quilt squares to make it bigger, but I kind of just picture this draped over Meemaw's couch or Pap covering up with it while sitting on his recliner. :)

I was running out of daylight to take these pics- and we had snow- but I am going to now bombard you with quilt pictures because this was a fun project and it has been awhile since I actually finished a quilt:

Scrappy Guest Book Quilt

70th Anniversary Autograph Quilt

Scrappy Guest Book Quilt Idea


Anniversary Party Guest Book Signed Quilt

How to make a guest book quilt...

Make a guest book quilt using charm packs!

Charm squares make an easy guest book alternative quilt!

Instead of a guest book have each guest sign a quilt square- great way to use charm packs!

If you would like to pin this idea for later... I mean, it isn't anything super original, but it will get much more use than a regular guest book and the charm squares did make it significantly easier!

Guest Book Quilt Idea- use charm packs and a fabric marker!

Doll Peasant Dress Pattern and Tutorial

doll-peasant-dress-1.jpg

Peasant dresses are a really easy beginner sewing project. When I teach my daughters to sew doll clothes, this is our first lesson. I have to help with a few of the steps, but they can handle most of it.

doll-peasant-dress-tutorial.jpg

After you learn how to make this basic dress, there are a lot of options to change it up for a totally different look. I also have tutorials for making peasant dresses in girls' sizes. Matching girl/doll sets are always a pretty big hit!

These dresses have a lot of variations, and I hope to expand on this pattern in the future. For now, though, I am starting off simple with a basic, short sleeve peasant dress. I have picked up some tricks over the years to make sewing them a little faster and easier.

doll-peasant-dress-free-sewing-pattern-and-tutorial.jpg

You will need:

  • a fat quarter of fabric or 1/3 yard of fabric if bought from the bolt

  • 8 1/2" of 1/4" wide elastic

  • thread

  • pins or wonder clips

  • sewing machine and needles

  • printed free pattern- available HERE

First, let's prep the pattern. Print it out in actual size and cut it out. To fit the longer main dress piece on the page, I had to do it in two pieces. So, you will have to overlap the little bottom section and tape it together. It is off a little bit- about 1/8" but I am not a professional and it is a free pattern so center it the best you can and don't complain. OK?

doll-dress-pattern-piececs.jpg
tape-dress-pieces-together.jpg

These dresses require very little fabric. A fat quarter works perfectly and I always seem to have a lot of those hanging around.

fat-quarter-doll-dress.jpg

You want to make sure to place the width of the fabric (the direction that stretches a little more) across the width of the pattern pieces. Just fold the fabric in enough to place both pieces on top.

how to cut a doll dress from a fat quarter

If you want to be really efficient about it, fold it again, accordion style, and cut two of each pattern piece.

How to double fold to cut two pattern pieces
how to cut two pieces on the fold

(If that was confusing, just ignore it and cut two pieces out individually!)

You will have four pieces total- a front, a back, and two sleeves.

doll peasant dress pieces

One trick I learned through experience is that it is easier to hem the sleeves before sewing the dress together. Fold it under 1/4" twice and sew 1/8" from the edge. (My girls usually need help with this when they are first learning because it is such a small hem.)

hem doll dress sleeves

Next, line up the curved edges of one sleeve and one dress piece as shown. Make sure to line up each set on the same side.

how to sew a doll peasant dress

Sew the curves together with a 1/4" seam allowance. (I also use a shorter stitch length to make those curves tighter.)

Then, sew the opposite side of each sleeve to the other side of the dress. This part used to confuse me, so I will show it at a couple of different angles.

sew-front-and-back-together-at-sleeves.jpg
how-to-sew-a-peasant-dress.jpg

Again, use a 1/4" seam allowance. It is kind of like sewing everything together in a loop or a rectangle.

how-to-sew-a-peasant-top-or-dress.jpg

Next, fold the right sides together and line up the side seams. Make sure the ends of the sleeves and armpits line up.

(Normally, I would nest the armpit seams so that one goes in each direction. It would lay flatter and be easier to sew. However, on this particular project, I like to face both of the seams towards the dress pieces, away from the sleeve hem. I just don't want more bulk in that area. You can do whatever you like.)

line-up-armpits-of-peasant-dress.jpg

Pin and sew along each side with a 1/4" seam allowance.

sew-sides-of-peasant-dress.jpg

Now, I happen to have an overlock machine, or serger. If you don't have one, go buy one. They are awesome. If that isn't an option or desire for you, you can finish the seam another way- pinking shears, zig zag stitch, etc. Google it.

finish-side-seams-of-peasant-dress.jpg

Now, I happen to have created a separate tutorial for how to tuck in those serger threads. You can see it HERE.

Next you have to sew the elastic casing for the neckline. This is the hardest part, in my opinion. It just seems to take a little practice. The most important thing to remember is this: KEEP THE SEAMS ALL PRESSED IN THE SAME DIRECTION! Did that seem like I was shouting at you? Good. I was. Trust me. It is very frustrating to get the elastic stuck at a seam and this will prevent it.

press seams in one direction

Fold the raw edge down 1/4" to the inside.

press-down-neckline.jpg

Next, fold it in 1/2" (and watch those seams!) You can iron and pin. You can use wonder clips (those rock!) You can just eyeball it up and fold it as you sew (maybe after some practice). So that I could take a picture... I pinned this time.

fold-neckline-down-again.jpg

Start sewing somewhere on the back. I like to start just before a seam. Sew about 1/8" from the folded edge all the way around. I keep my needle to the left and line up the outside folded edge with the edge of my presser foot.

sew-elastic-casing-neckline.jpg

Do NOT go all the way around! Leave the last inch or so open so that you can put the elastic into the casing.

leave-opening-in-neck-for-elastic.jpg

Cut a piece of 1/4" elastic 8 1/2" long. Pin a safety in onto each end. One will guide it through the casing. The other will keep the end from getting pulled in. (You can pin it to the dress if you want to be really sure!)

use-safety-pins-to-thread-elastic.jpg

Make sure that you push the safety pin towards the seam so that everything is going the same direction.

how-to-thread-elastic-into-a-neckline.jpg

Push the elastic all the way through the casing, being careful not to twist it.

make-an-elastic-neckline.jpg

Overlap the ends of the elastic about 3/4" or so.

overlap-elastic-ends.jpg

Use a small zig zag stitch on the machine to hold the ends together.

sew-elastic-ends-together.jpg

Stretch the casing to pull the elastic inside. Sew the opening closed.

sew-elastic-casing-closed.jpg

Finally, turn the bottom under 1/4" twice to make a small hem.

fold-hem-under.jpg

Stitch 1/8" from the edge.

hem-doll-peasant-dress.jpg

Hooray! It is finished!!!

doll-peasant-dress.jpg

To put it on the doll you will want to pull it up from the legs, not put it over the head. They are sort of disproportional so it is easier that way. Plus, you don't mess the hair up.

free-doll-dress-sewing-pattern.jpg

Don't forget to save the printable pattern...

If you want to pin this post to save the instructions for later...

doll-peasant-dress-free-pattern-and-tutorial.jpg

Here are some more tutorials you might like:

How to Tuck Serger Threads into the Seam

tucking-in-thread-ends-800.jpg

I absolutely LOVE my serger! I have the Brother 1034D, which seems to be a very popular model. I have had it for 7 years and sewed hundreds of dresses with it (FOR REAL!) Today I thought I would share how I tuck in all of those thread ends when finishing a seam with the serger or overlock machine. Maybe it is just common sense stuff that everyone who uses a serger knows, but at one point I did not. It makes everything more secure, can help even out slightly uneven edges, and produces a nicer finish.

How to Tuck Loose Serger Threads into the Seam

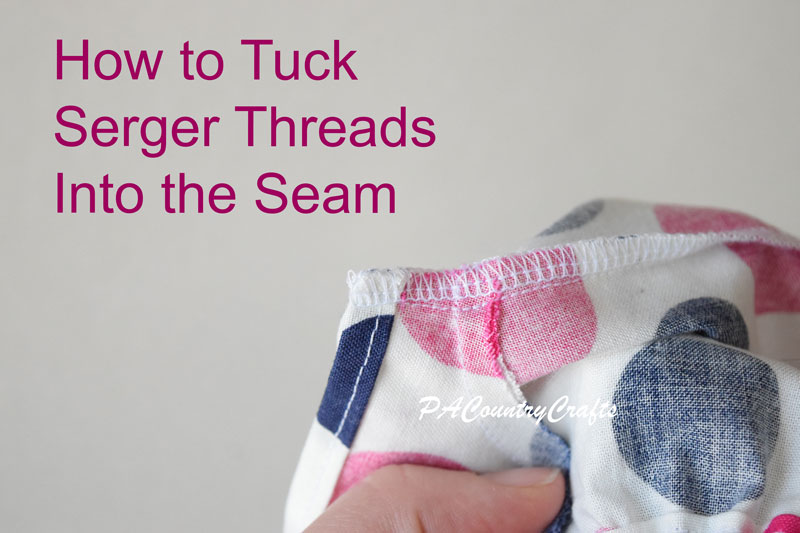
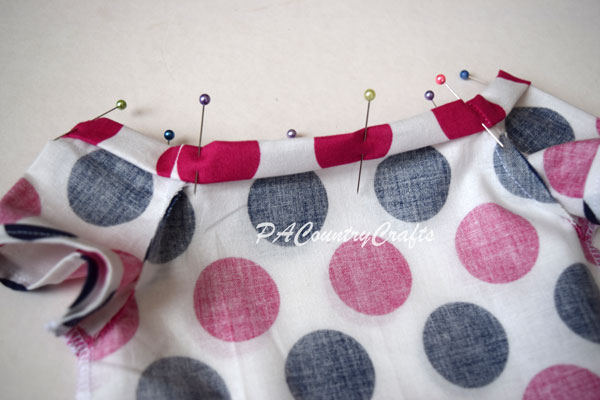
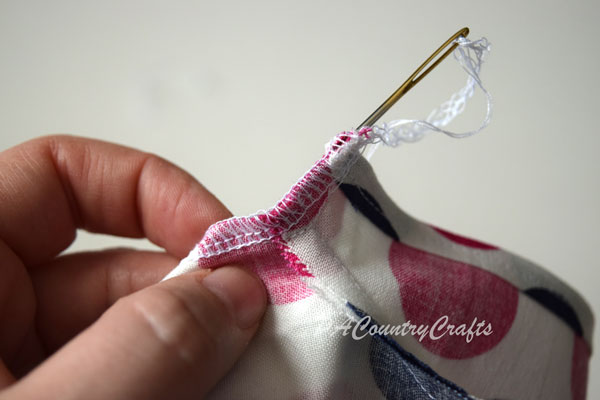
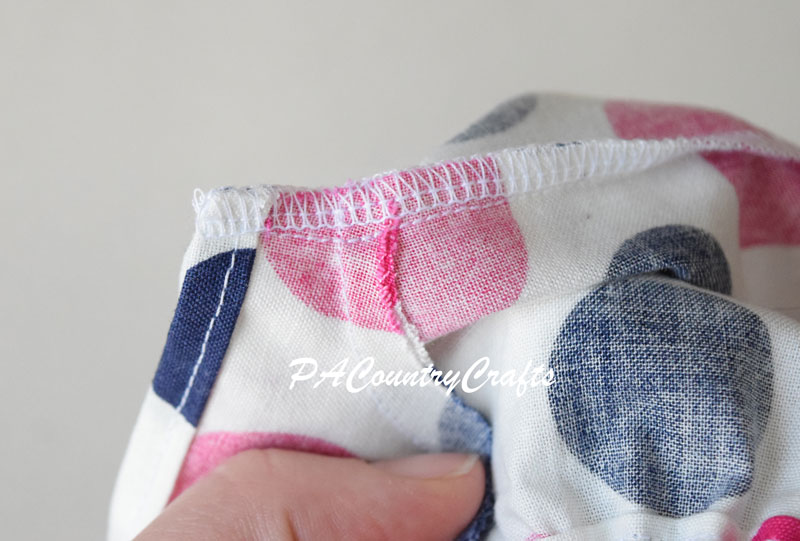
When you plan on tucking the loose ends into the seam, you have to leave a "tail" of serger threads after you sew. About 3 inches will usually work well. I start by gently sliding the threads between my fingers to even them out. The tail will start to stretch out, but two of the threads will be much longer. You want them all to be trimmed close to the same length so that they don't get bunched up. It will look something like this:

Trim off the two longer threads and thread the remaining section through a darning needle. My daughter calls this particular one the "magic needle" because it is a short needle with a wide eye. It works great!

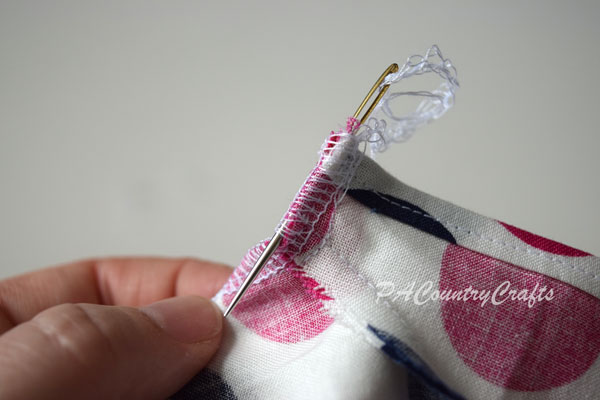
Next, insert the needle into the seam, preferably between the fabric.

Push it through about an inch or so into the seam (more if you would like).

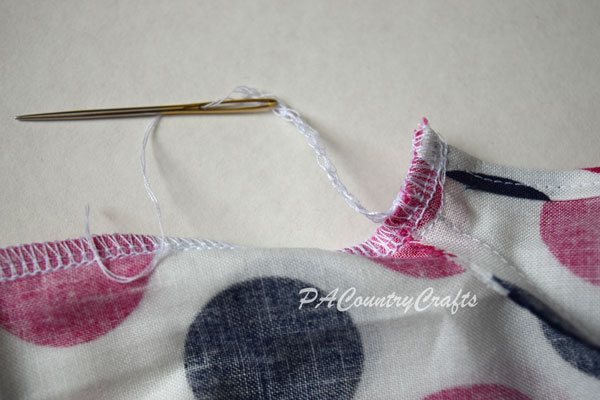
Pull the needle all the way through.

Finally, just trim the ends.

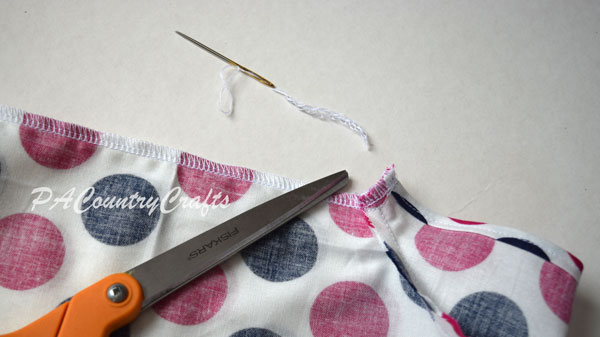
It really is a simple, little trick! It makes things look a lot neater, though!

How to Hide Serger Threads

If you forget to leave a tail for tucking, don't panic. You can trim the ends off and use fray check. It is not as good of a finish, but it is better than nothing.

how to neatly finish seams