All Spice Dress
/Project Run and Play has a new shop! I sewed up an All Spice Dress from a thrifted women’s skirt. It has long sleeves and is perfect for fall!
Read MoreProject Run and Play has a new shop! I sewed up an All Spice Dress from a thrifted women’s skirt. It has long sleeves and is perfect for fall!
Read MoreEarth Day is coming up! To be honest, I generally don't do anything to celebrate it, but I tend to do a lot of upcycling projects so I thought that I would do a round-up post of some of my favorites! I picked the top ten, but you can see more of my upcycle projects HERE.
Women's Dress to Girls' Maxi Skirt (and bracelets and headband!)
I got a women's dress at the local thrift store and turned it into a maxi skirt for my daughter. I even seam ripped off the beading from that jazzy medallion at the waist and helped her to make bracelets out of them. One of the waist ties became a headband. Triple upcycling! Do I get bonus points for that? You can see the full post and tutorial HERE.
Altoid Tins to Magnetic Playset
This is a non-sewing project that you can do with the kids. Some washi tape, stickers, paper, and old promo magnets transform these into little magnetic playsets that you can tuck into your purse to keep kids occupied in waiting rooms, etc. Full tutorial to make these available HERE.
Sweater Scraps to Hand Warmers
Got a hole in your favorite, softest sweater? These little hand warmers are really cute and I have a little trick to sewing these! See the tutorial HERE.
Men's Shirt to Girls' Vintage Style Dress
Upcycling with Men's Dress Shirts is actually a fun project. There are a lot of possibilities. I have a mini-tutorial showing how I used this shirt as an efficient fabric source to make the dress HERE.
So, this is a pretty popular post on the blog. It is a really sweet way to preserve a special baby outift, though! Full tutorial and pattern available HERE.
Three Ways to Mend Holes in Jeans
One daughter in particular is really, really hard on her jeans! Which style is your favorite? Details on how to do each one are available HERE.
Vintage Sheets to Easter Dresses
I made five Easter dresses from a couple of vintage sheets that had belonged to my Nana. I was strategic so I didn't even have to hem some of them! This was my absolute favorite year for Easter dresses and I have tutorials for each of them. They are all linked at the bottom of THIS post.
EEK! I was so big here (at only 29 weeks)! Trust me, this shirt stretched out WAAAAAAY further until the end and surprisingly still covered my watermelon belly. Full tutorial HERE.
Hey! Look! Something for the boys! (Although my girls play with cars, too.) Using old jeans legs for the base of this made it sturdy and more durable. Full tutorial HERE.
Now, for my all-time favorite upcycle project. Drumroll, please! .....................................................
Collage Wall from Thrift Store Frames
I love this wall so much! It still looks pretty much the same, except the girls put some things on the tops of their beds and block the stuff on the bottom sometimes. We got a bunch of frames at yard sales and thrift stores (plus a few from Michaels) and we turned them into this cute collage wall. See all of the details (and get free printables) HERE.
If you want to pin this for later...

Don't forget to check out all of my upcycle projects HERE!
Refashion a thrifted women’s dress into a girls’ maxi skirt! Step by step tutorial pictures to upcycle stretch fabric in a few simple steps.l
Read More
My great-grandmother, Caroline, was Bohemian; so "boho" means a little something different to me because I think of her. I remember her fierce hugs and the stories of her spunk and determination. Widowed, with three young children, she moved from the city to rural PA and married a bachelor farmer. I have always thought she was brave, and I wouldn't be here if she hadn't taken a chance. Characteristic of her generation, she was very resourceful. My baby quilt is pieced from flour sacks and her quilt templates were cut from old cereal boxes. One Christmas, we all got stuffed pigs made from polyester scraps. She also worked hard and never gave up. She had to quit school to help at home, but got her GED in her 80s because it was something that she had always wanted to do. I still remember her showing us the certificate hanging proudly in the frame on her living room wall. She made the best out of any situation with creativity and determination. That is a bit of what I tried to do this week. We had 2 feet of snow and 3 snow days, so I had to "make do" with what I had on hand, although it meant a lot more work. In the end, both outfits cost less than $5 to make and all that I had to purchase when I finally was able to leave the house was some thread, embroidery floss, and buttons.
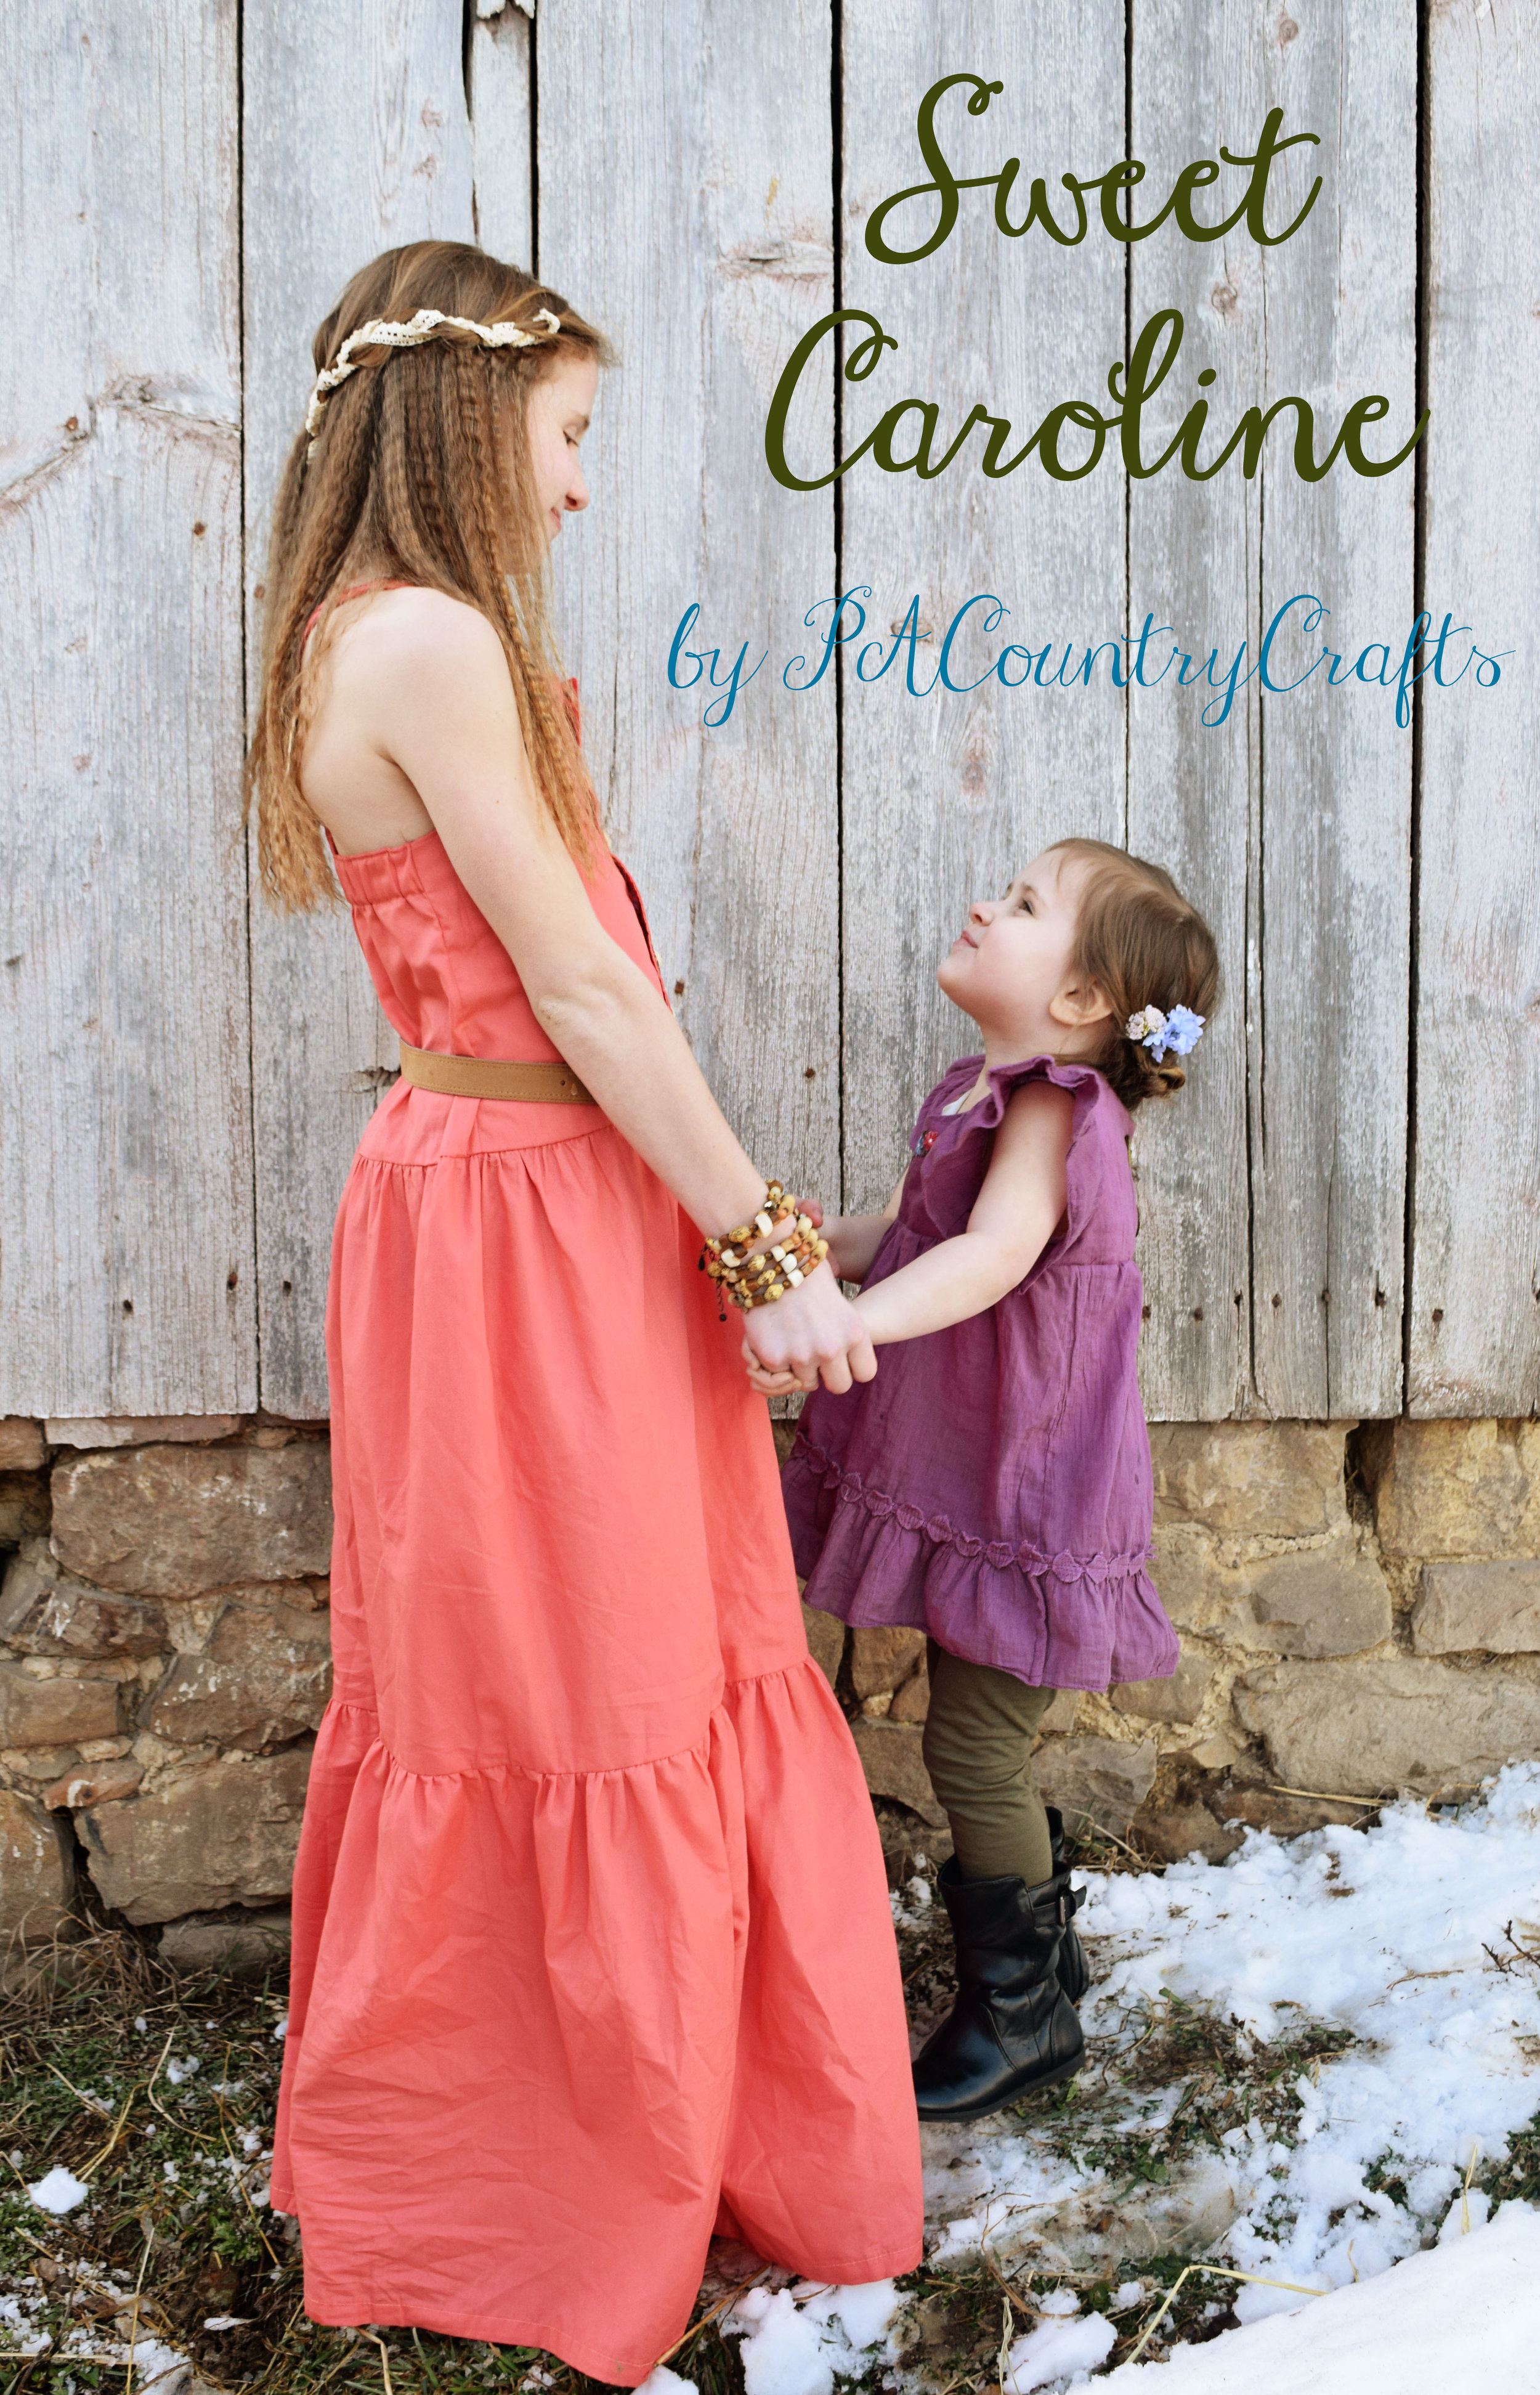
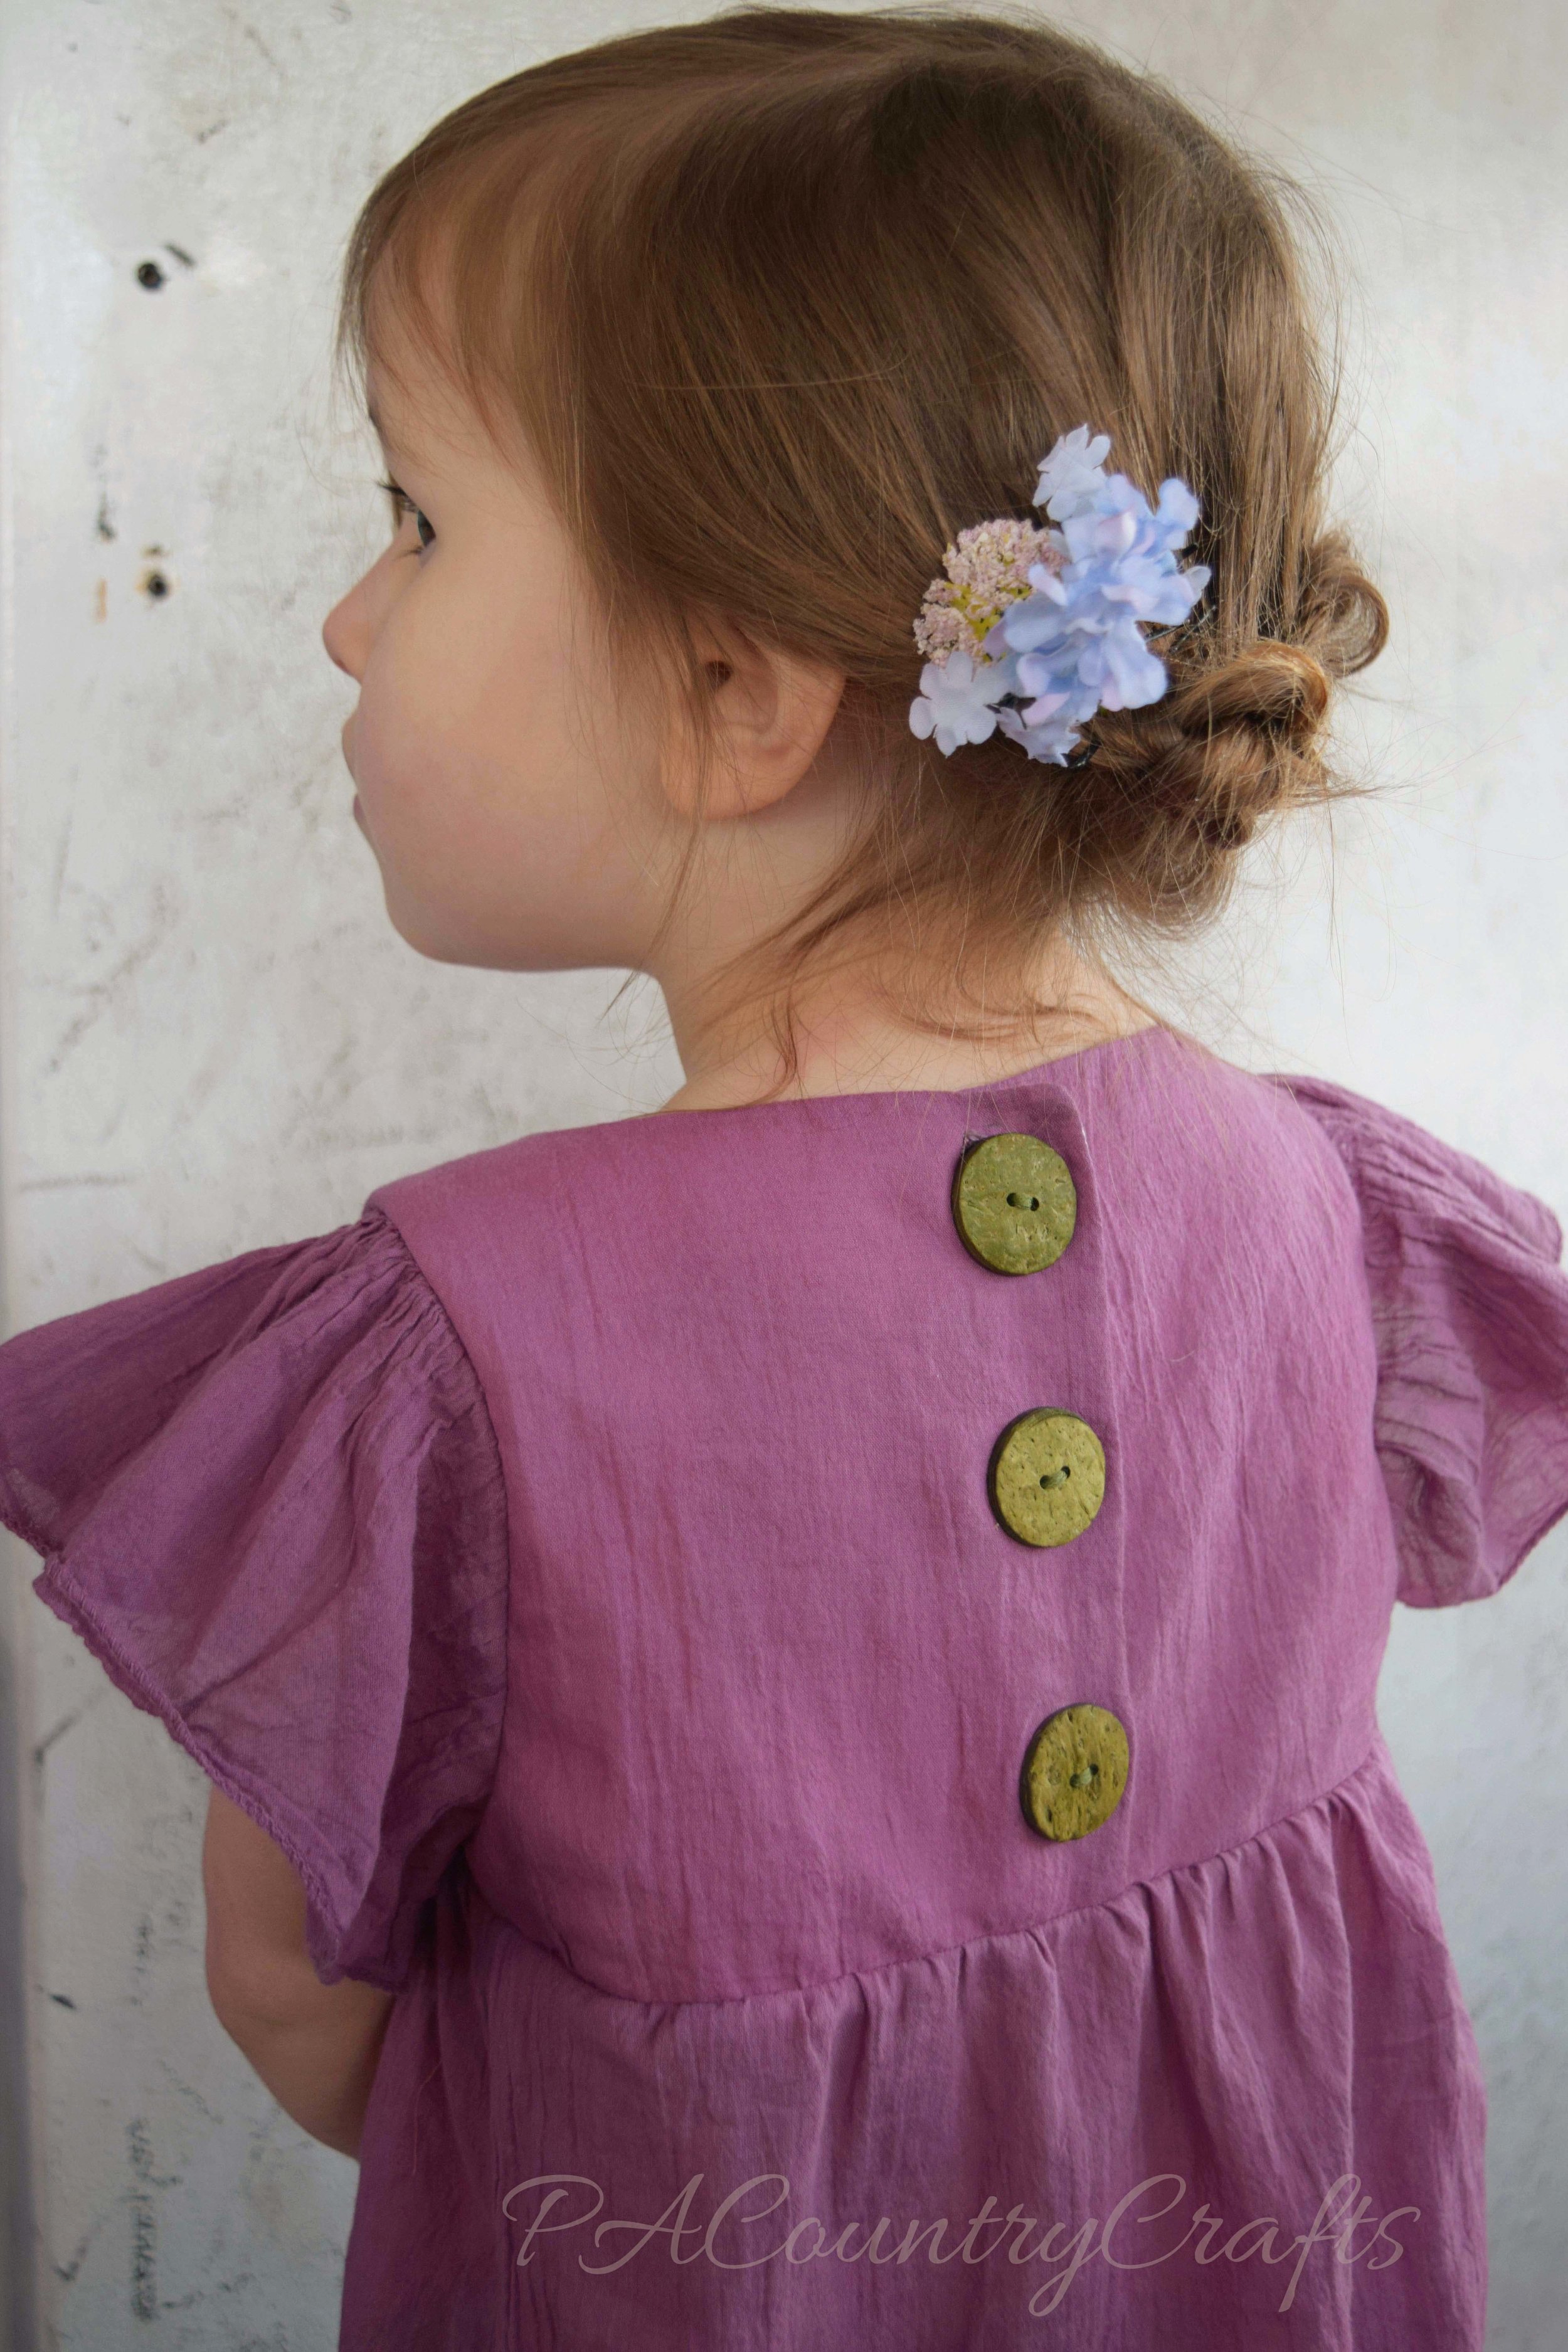
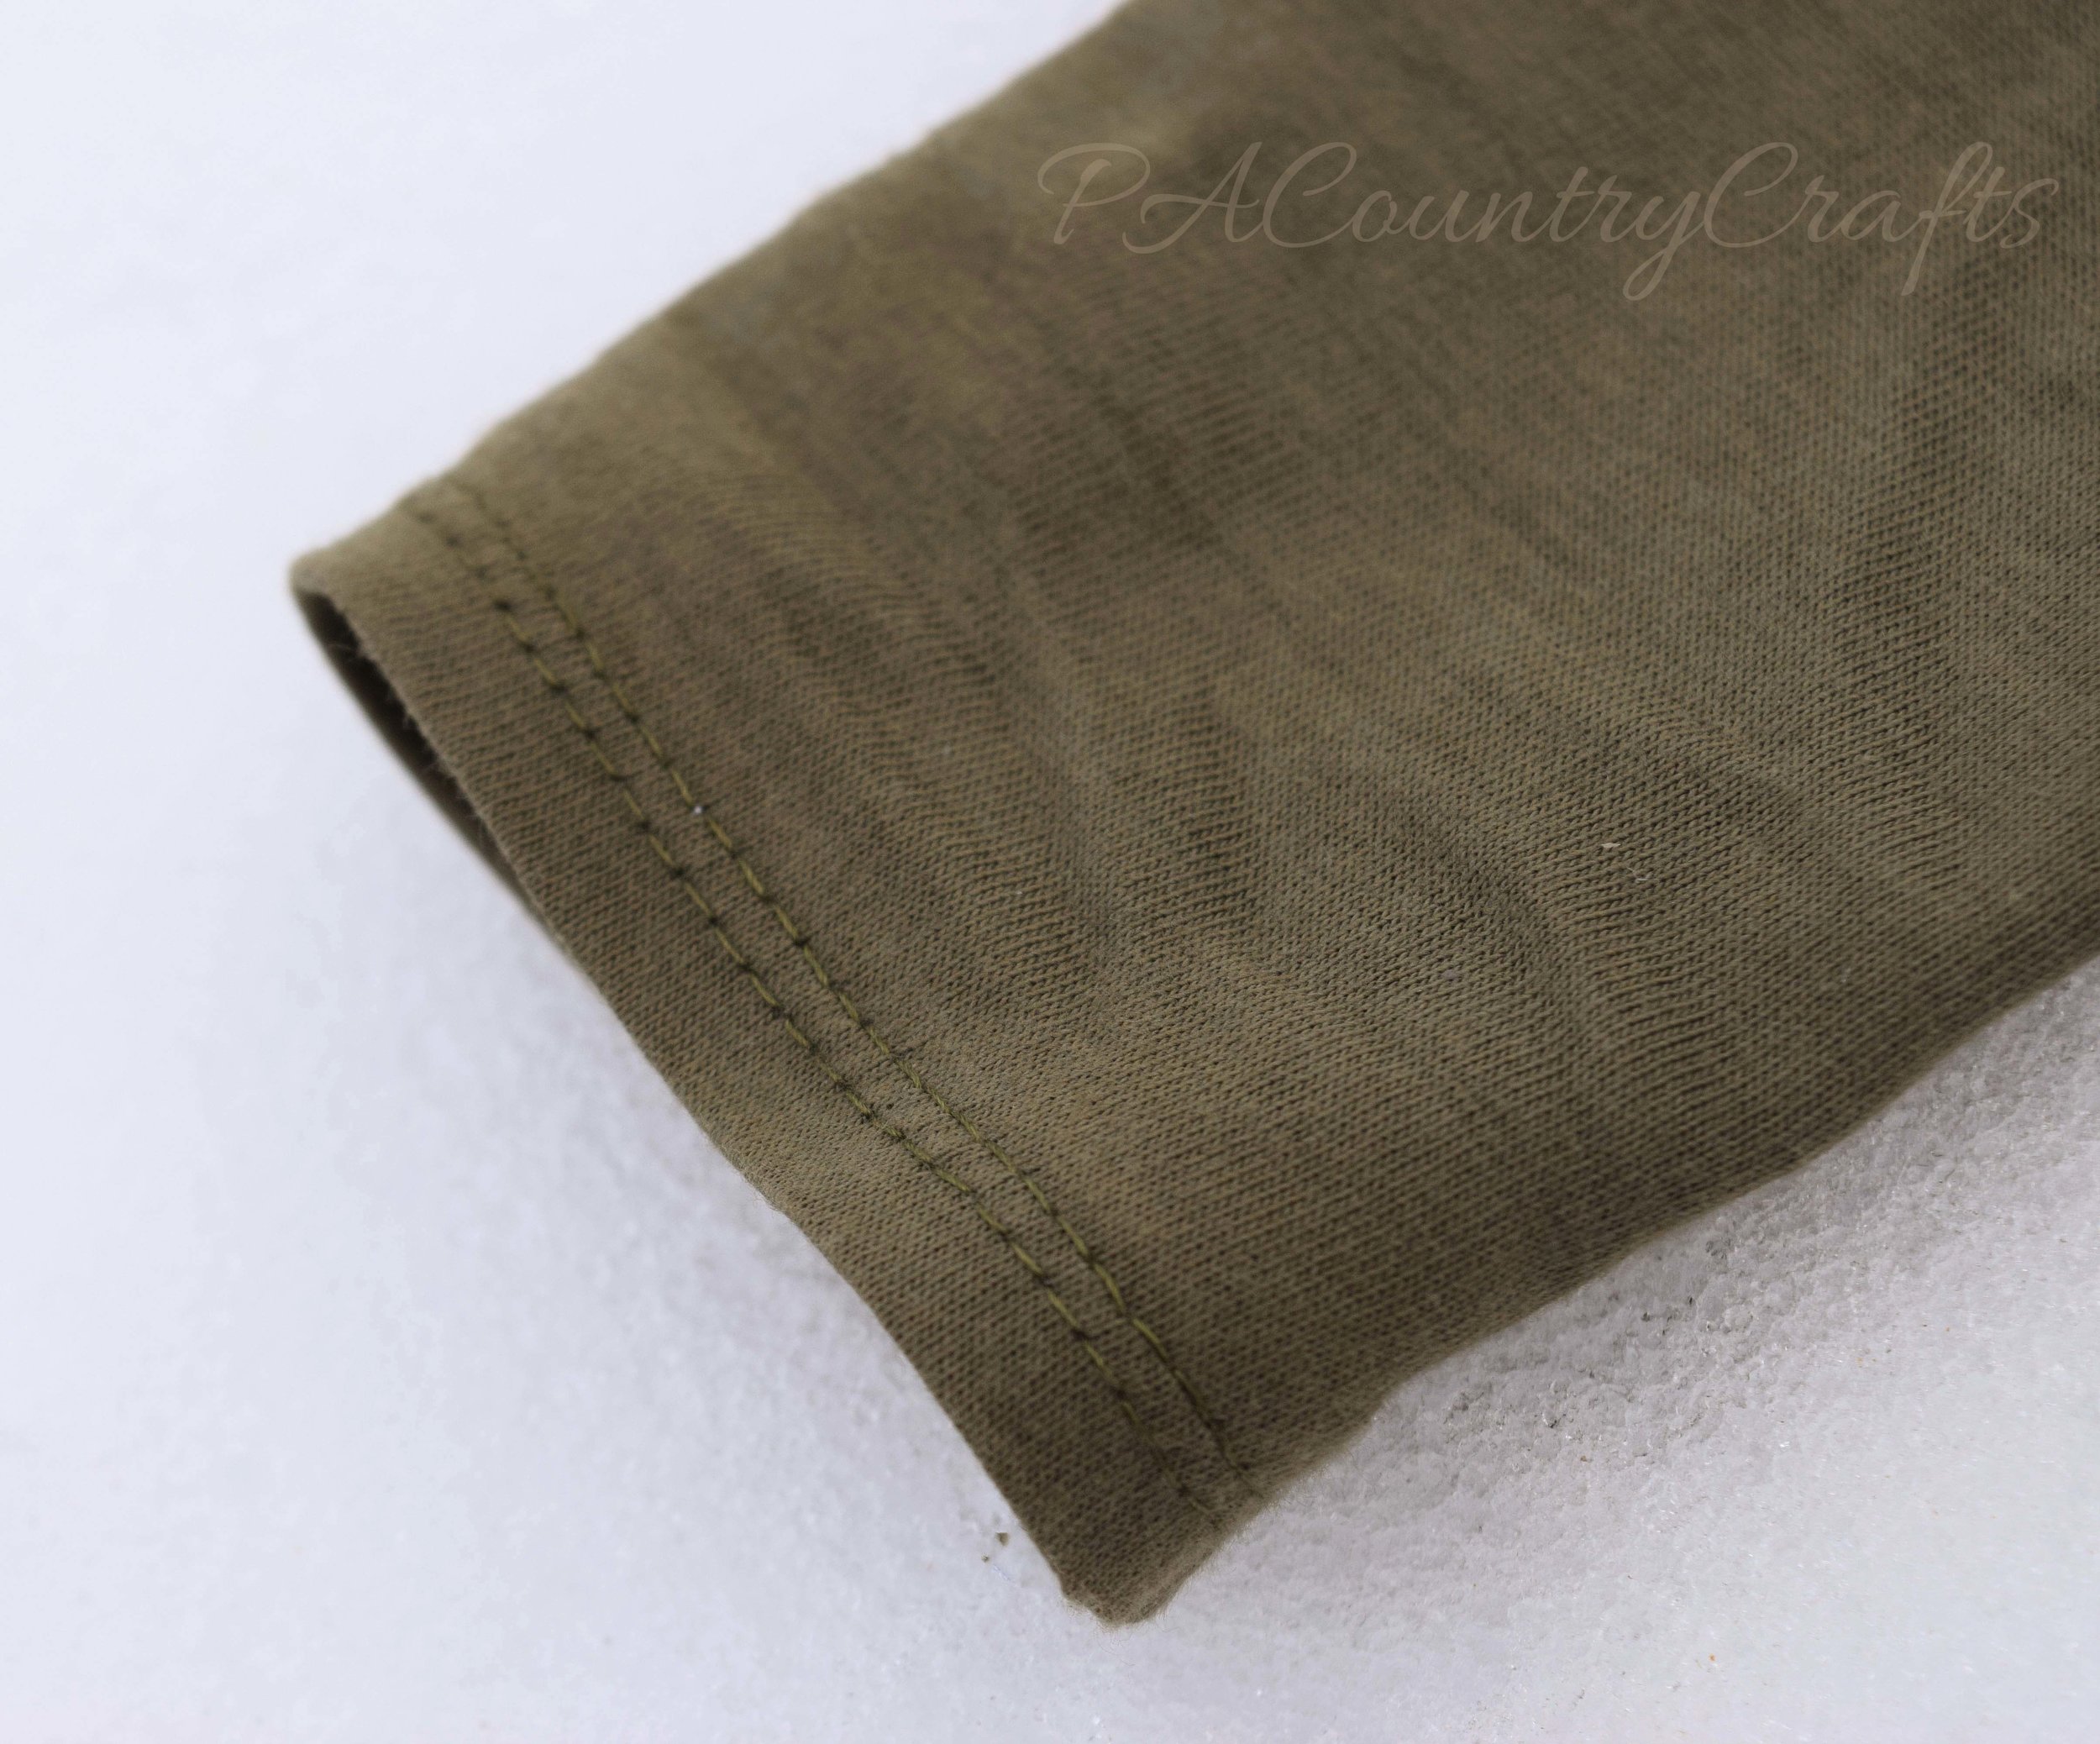
I still tried to incorporate the modern "boho" style in my designs. First, I made a tunic from an old shirt that was given to me. I loved the color (with a slightly uneven dye effect) and it was a thin, flowy fabric perfect for what I had in mind. I removed the bottom ruffle (the open part was badly torn) and the bottoms of the sleeves. Then, I carefully cut the rest of my pieces from what was left of the shirt. I drafted a bodice with a curved front and trimmed the front of the bottom skirt portion a bit to create a high-low effect. The original ruffle was resized and sewed onto the bottom of the tunic. I embroidered the neckline with some simple flowers and vines. It took awhile, but it was definitely worth it to add some lovely detail. The top is lined with remnants of a really soft sheet I used to line THIS dress and I understitched along the inside neckline. I reshaped the sleeves to create a loose, flutter sleeve with a bit of gathering at the top. Then, I sewed it to the bottom and added buttons on the back. I also made a pair of leggings from some olive green knit fabric that I found in a tote after digging a path to my storage shed.
Before...

After...




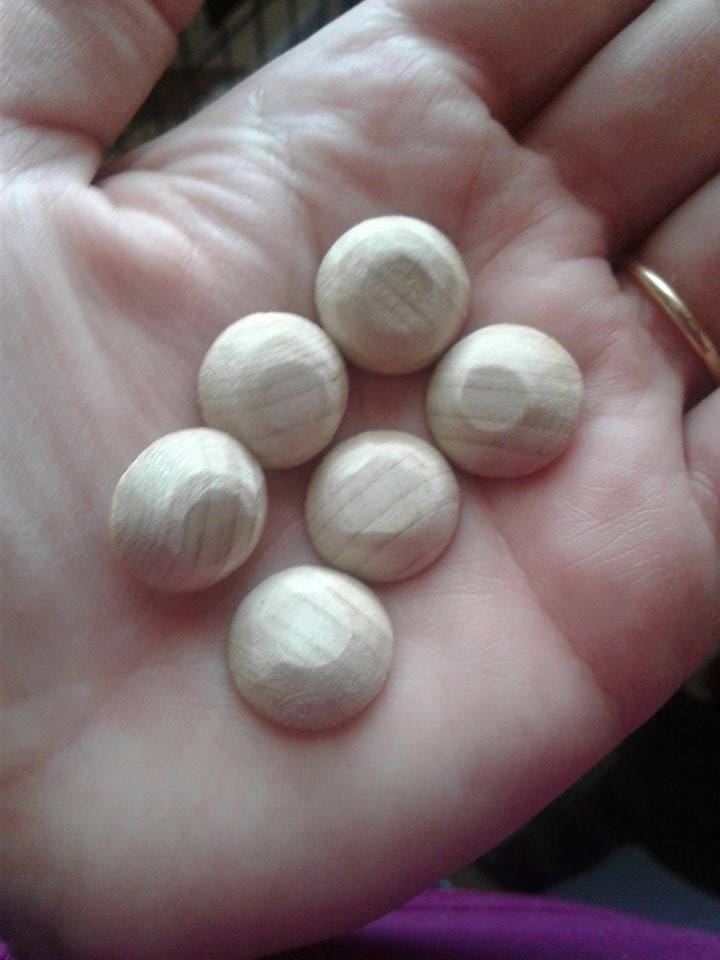
My other daughter wanted a maxi dress and I found a dusty coral sheet I had purchased years ago on clearance at Target and stuffed under my fabric table. I only used about half of the sheet to make this dress. I drafted the pattern to have a drop waist and long, gathered tiers. I was careful in my cutting and able to use the original sheet hem, too! Yay! This time, I put the buttons in the front and hand embroidered the button placket in the same intricate flowers and vines. Oh, and those buttons? My husband made them from a dowel rod! He sanded them on the belt sander to make them round and carefully sliced them off of the dowel. I sanded them by hand to smooth and even them out. After a last-minute trip for 1/16th inch drill bits, he drilled holes in them for me. The straps are made from braided strips folded like bias tape and sewn together. They cross in the back and I added an elastic casing so that it would fit well and not gap in the back.
Some more before pictures...

After...
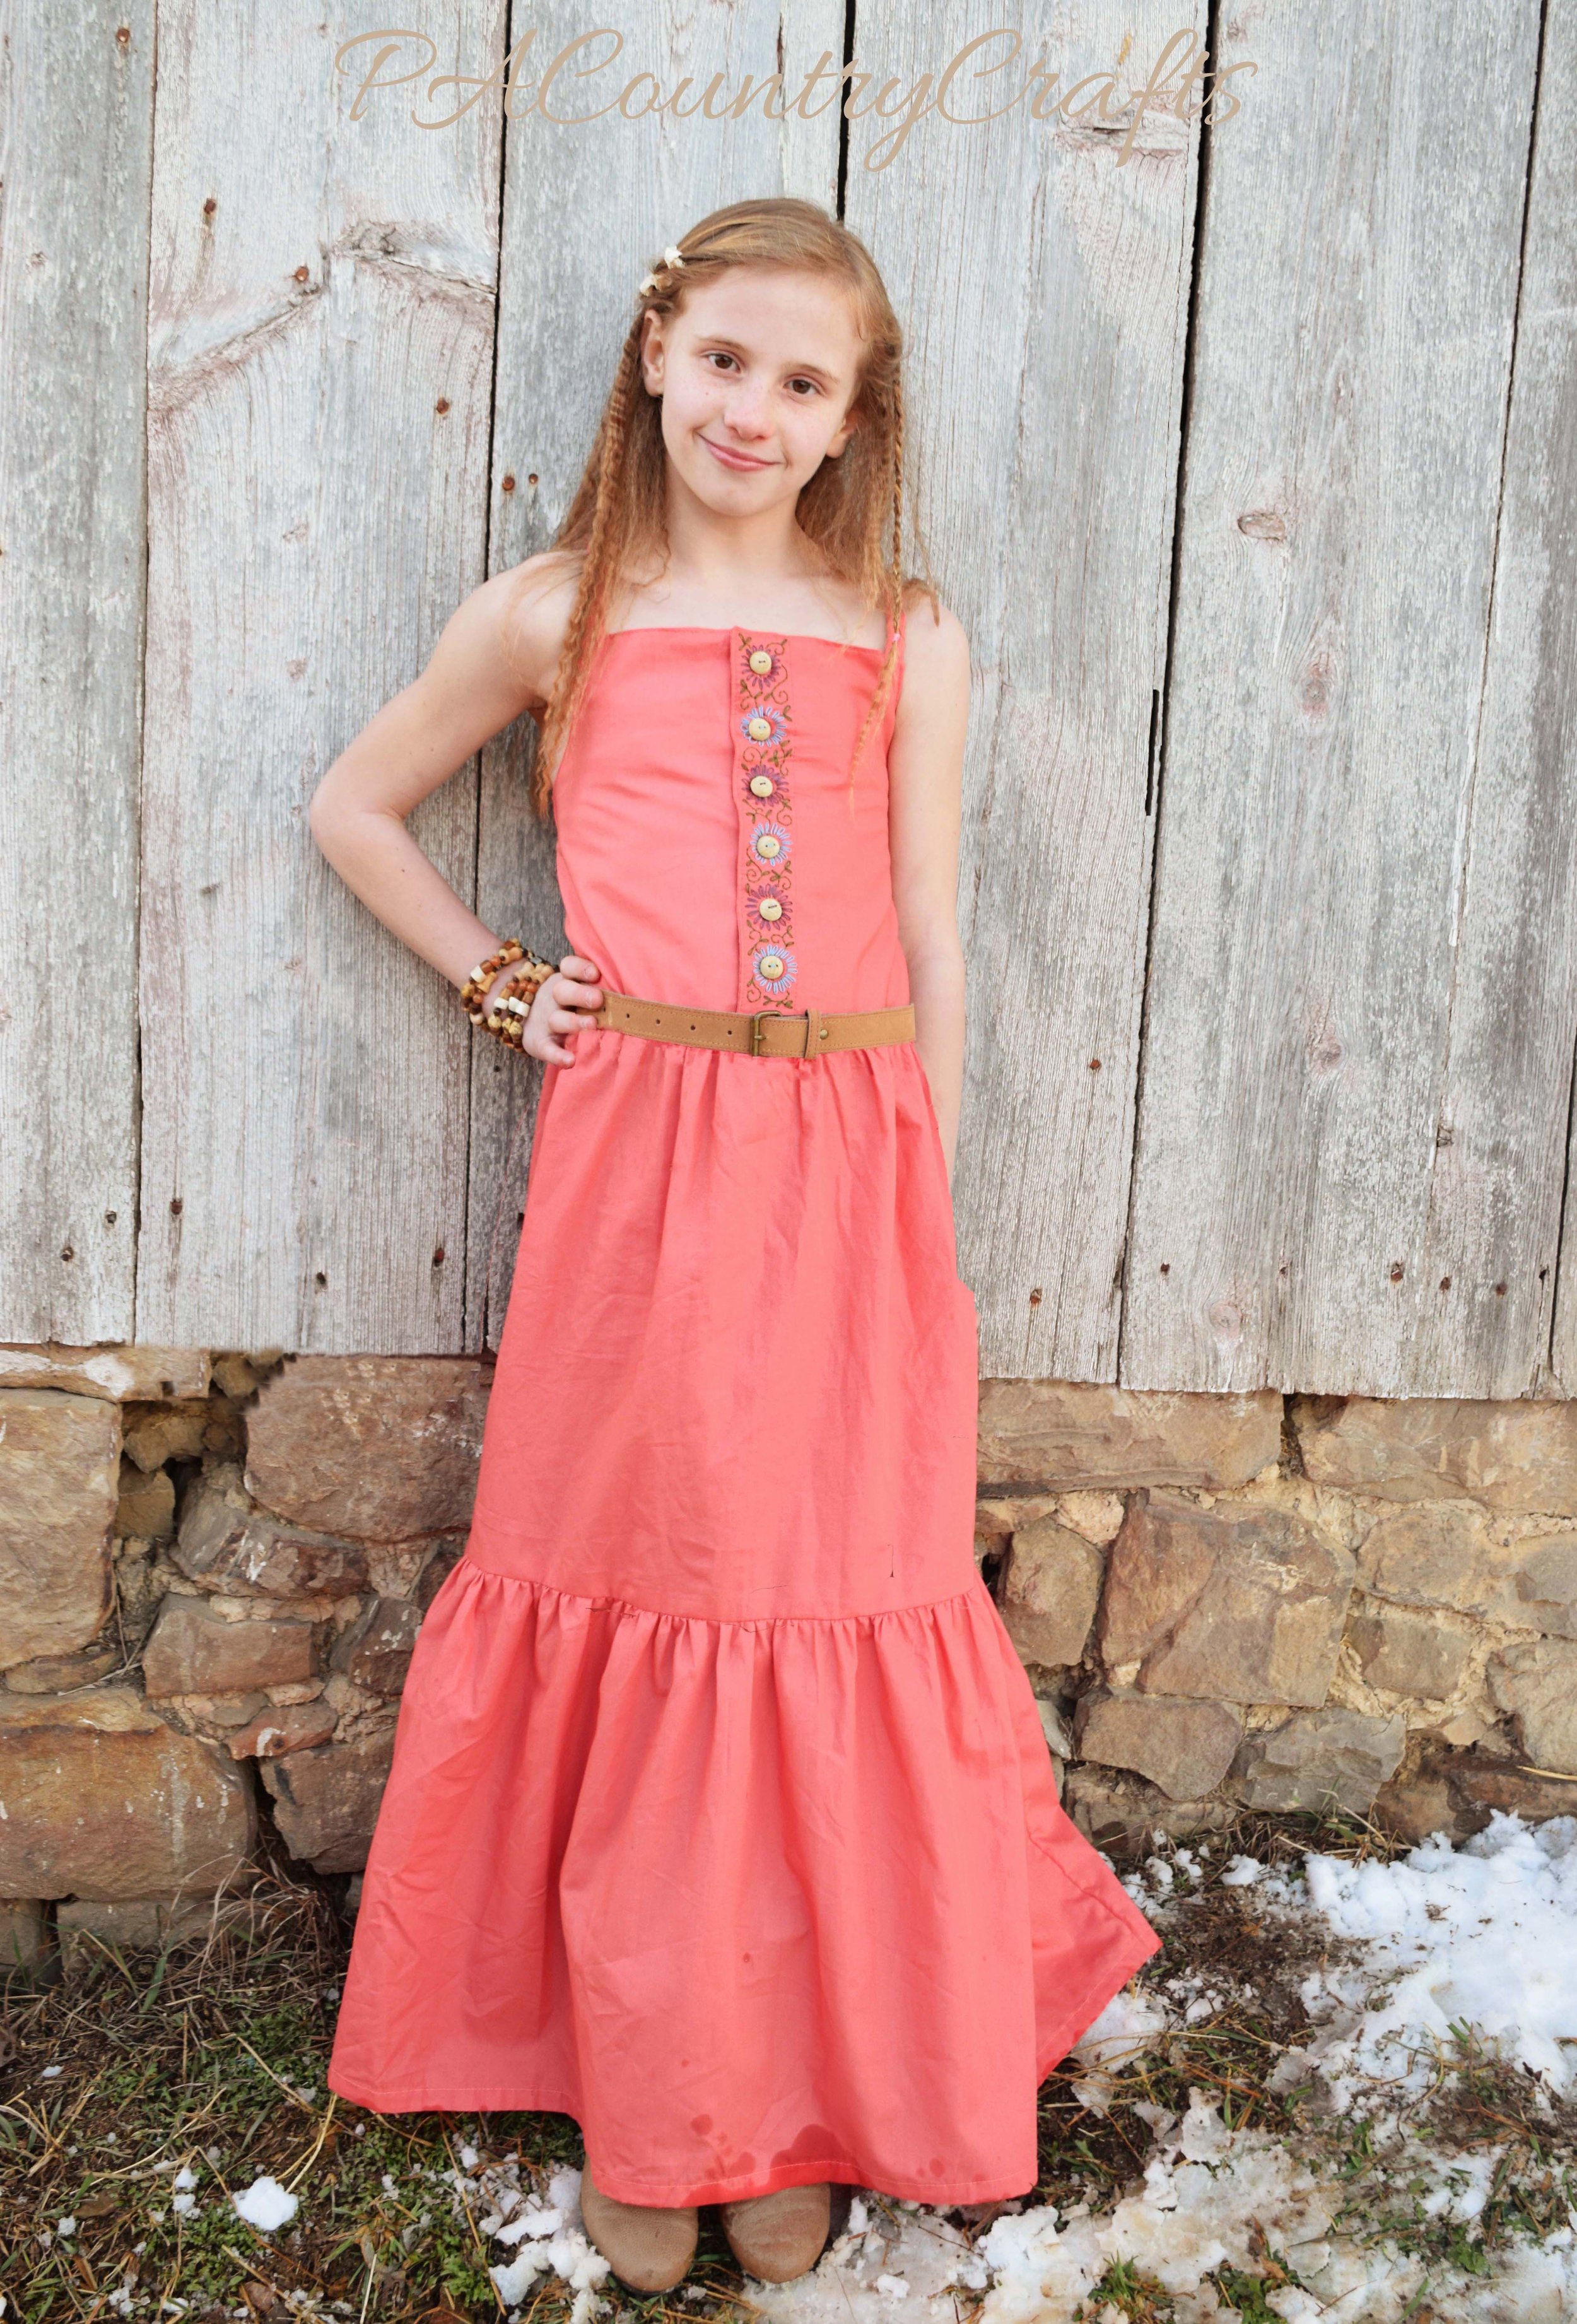

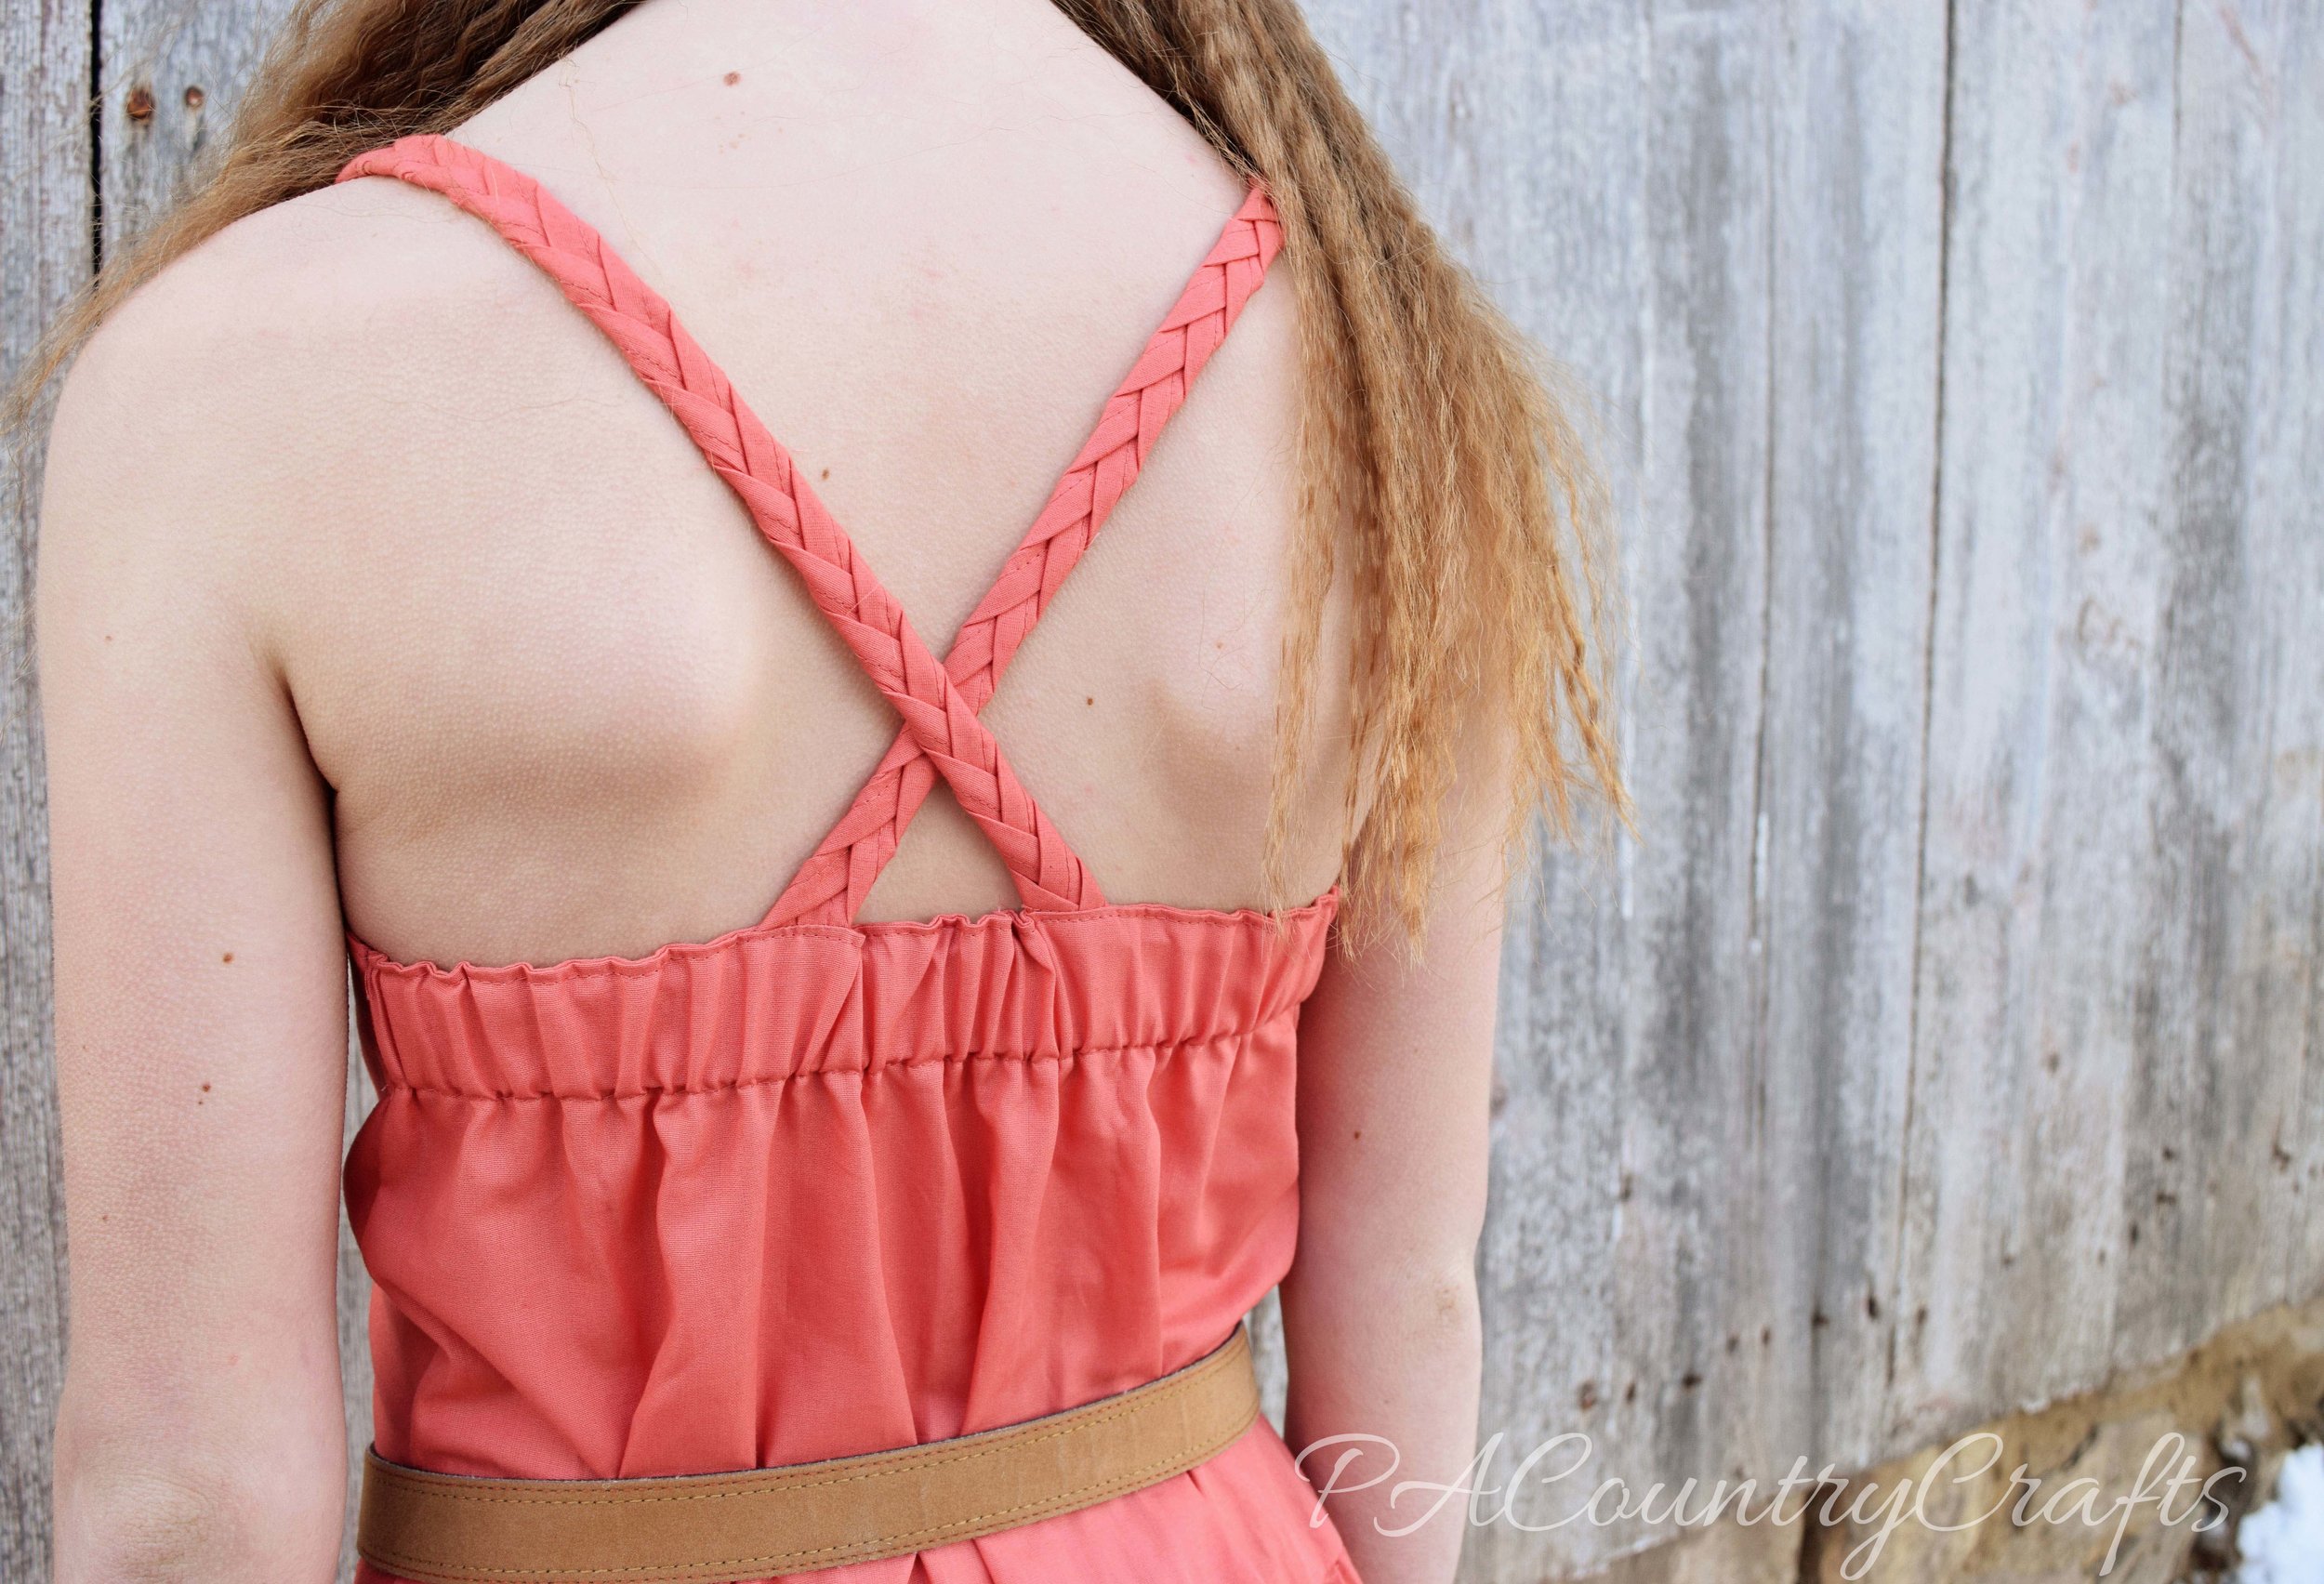

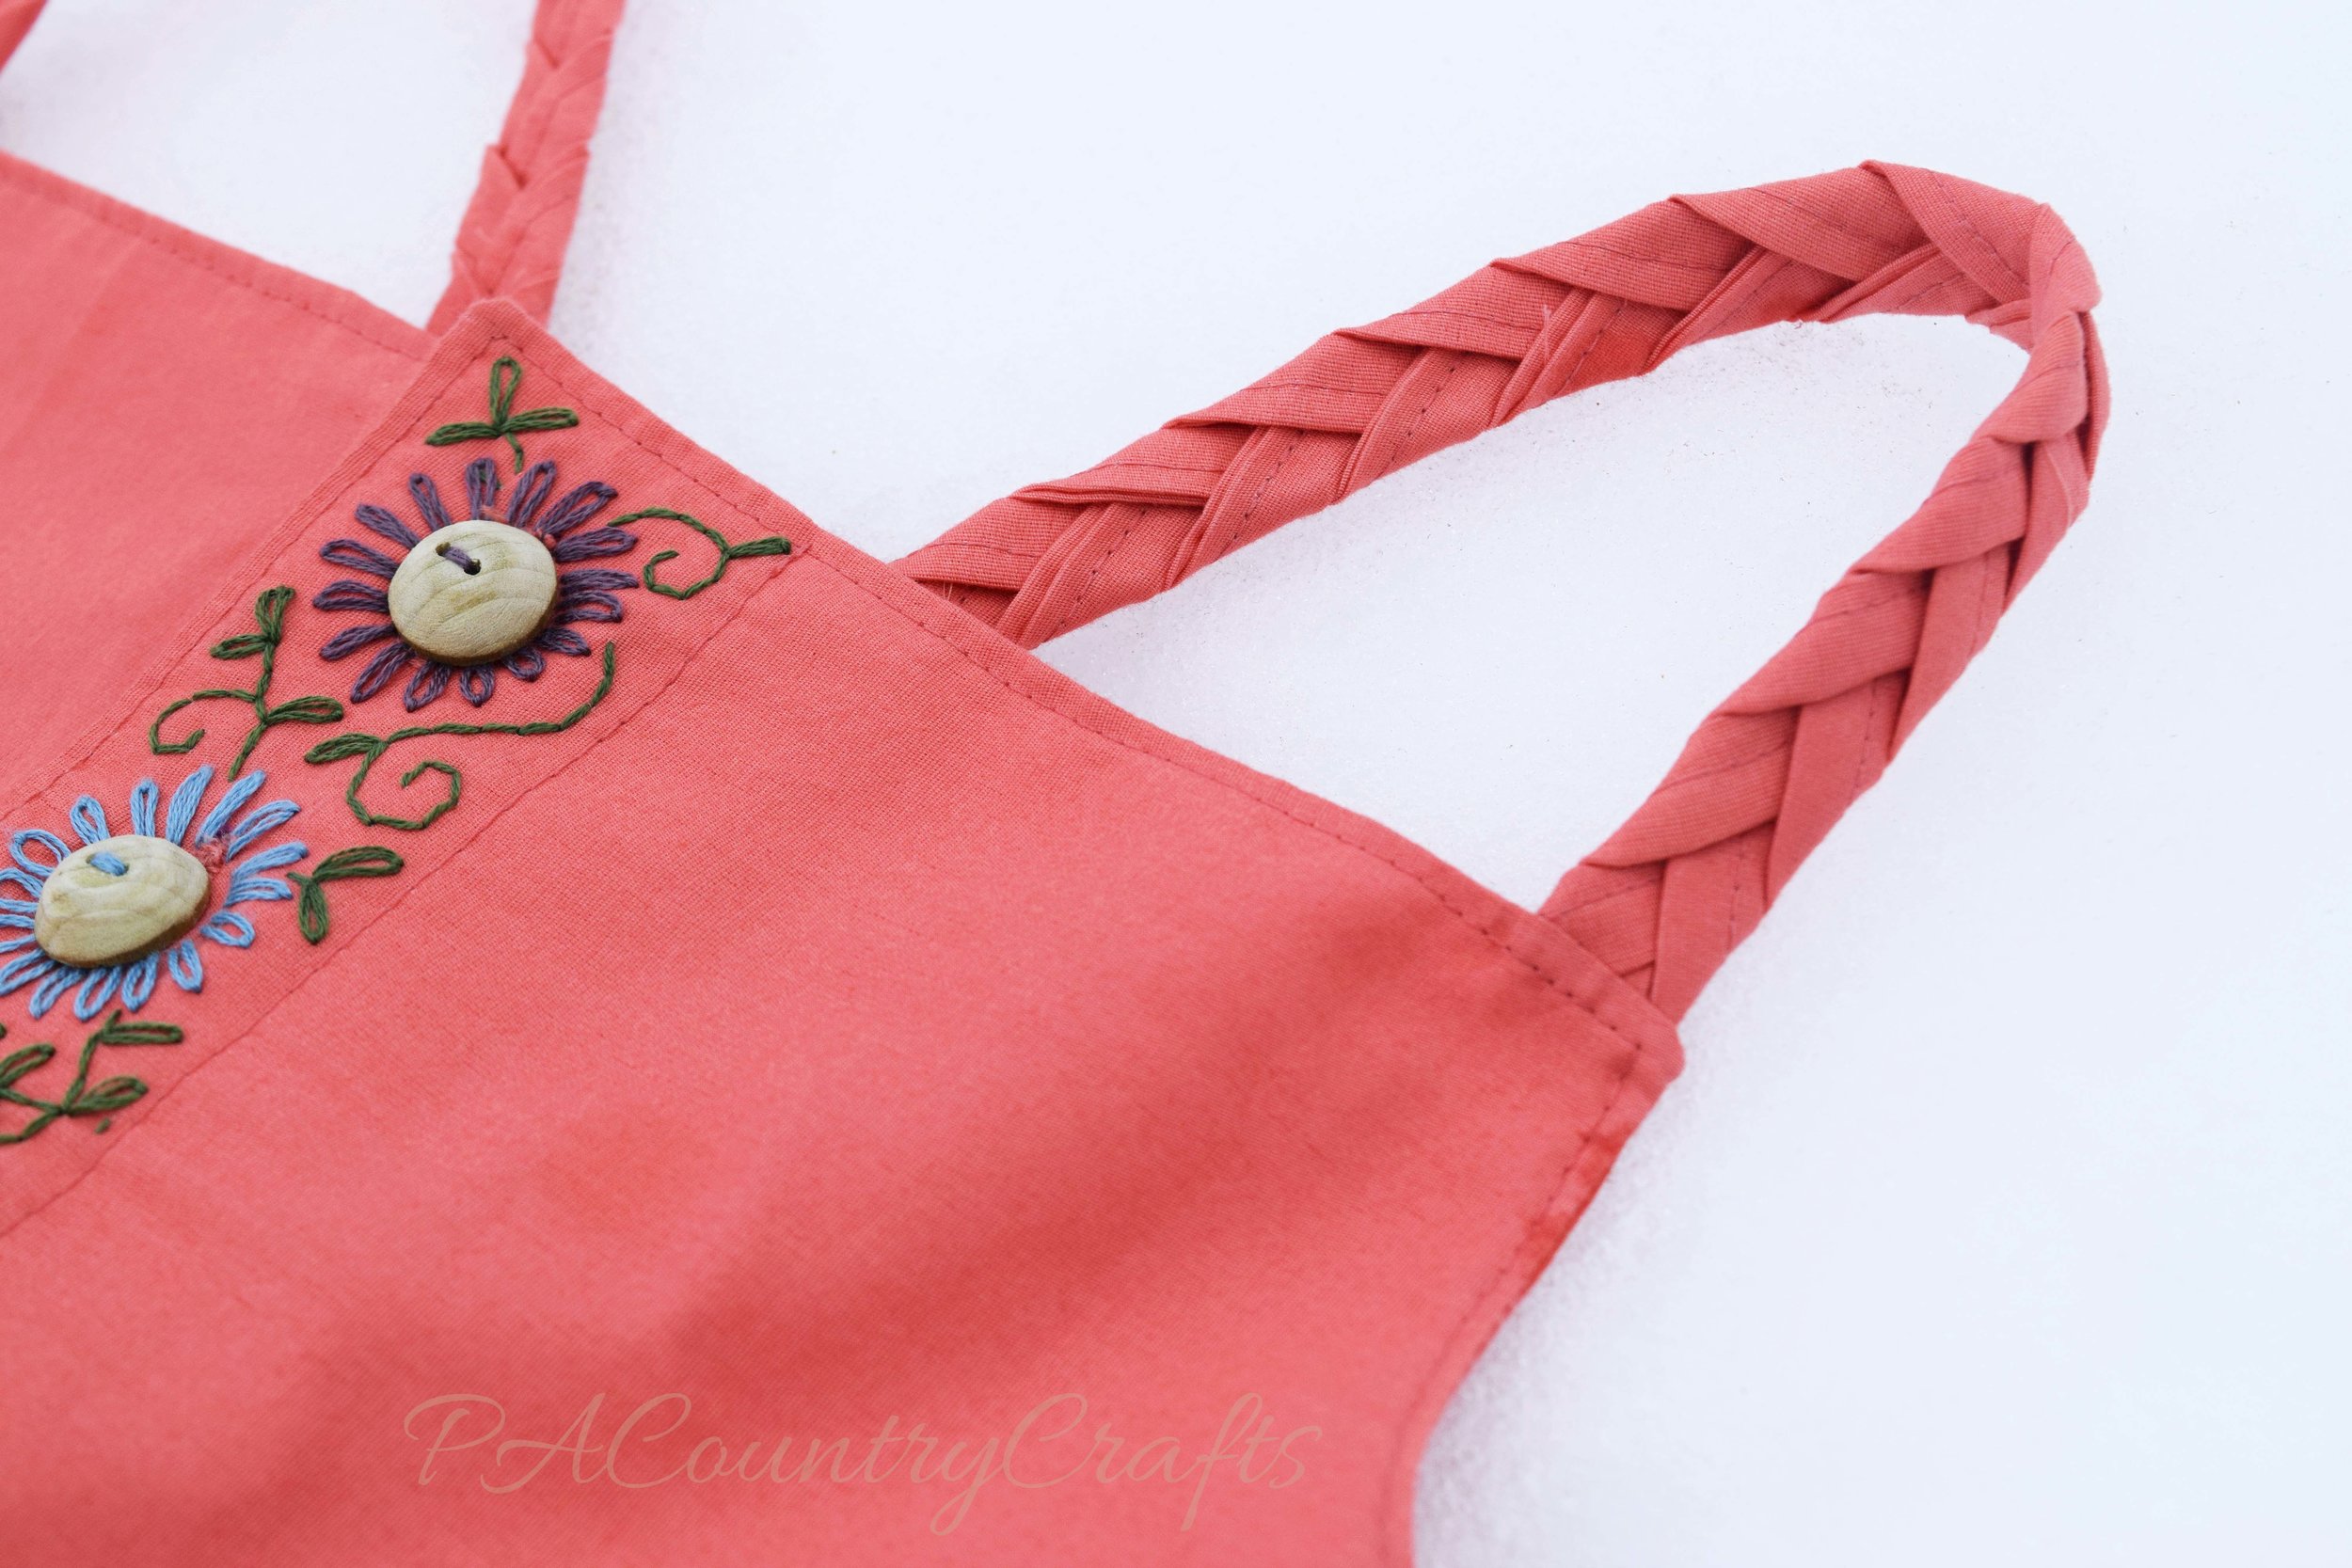
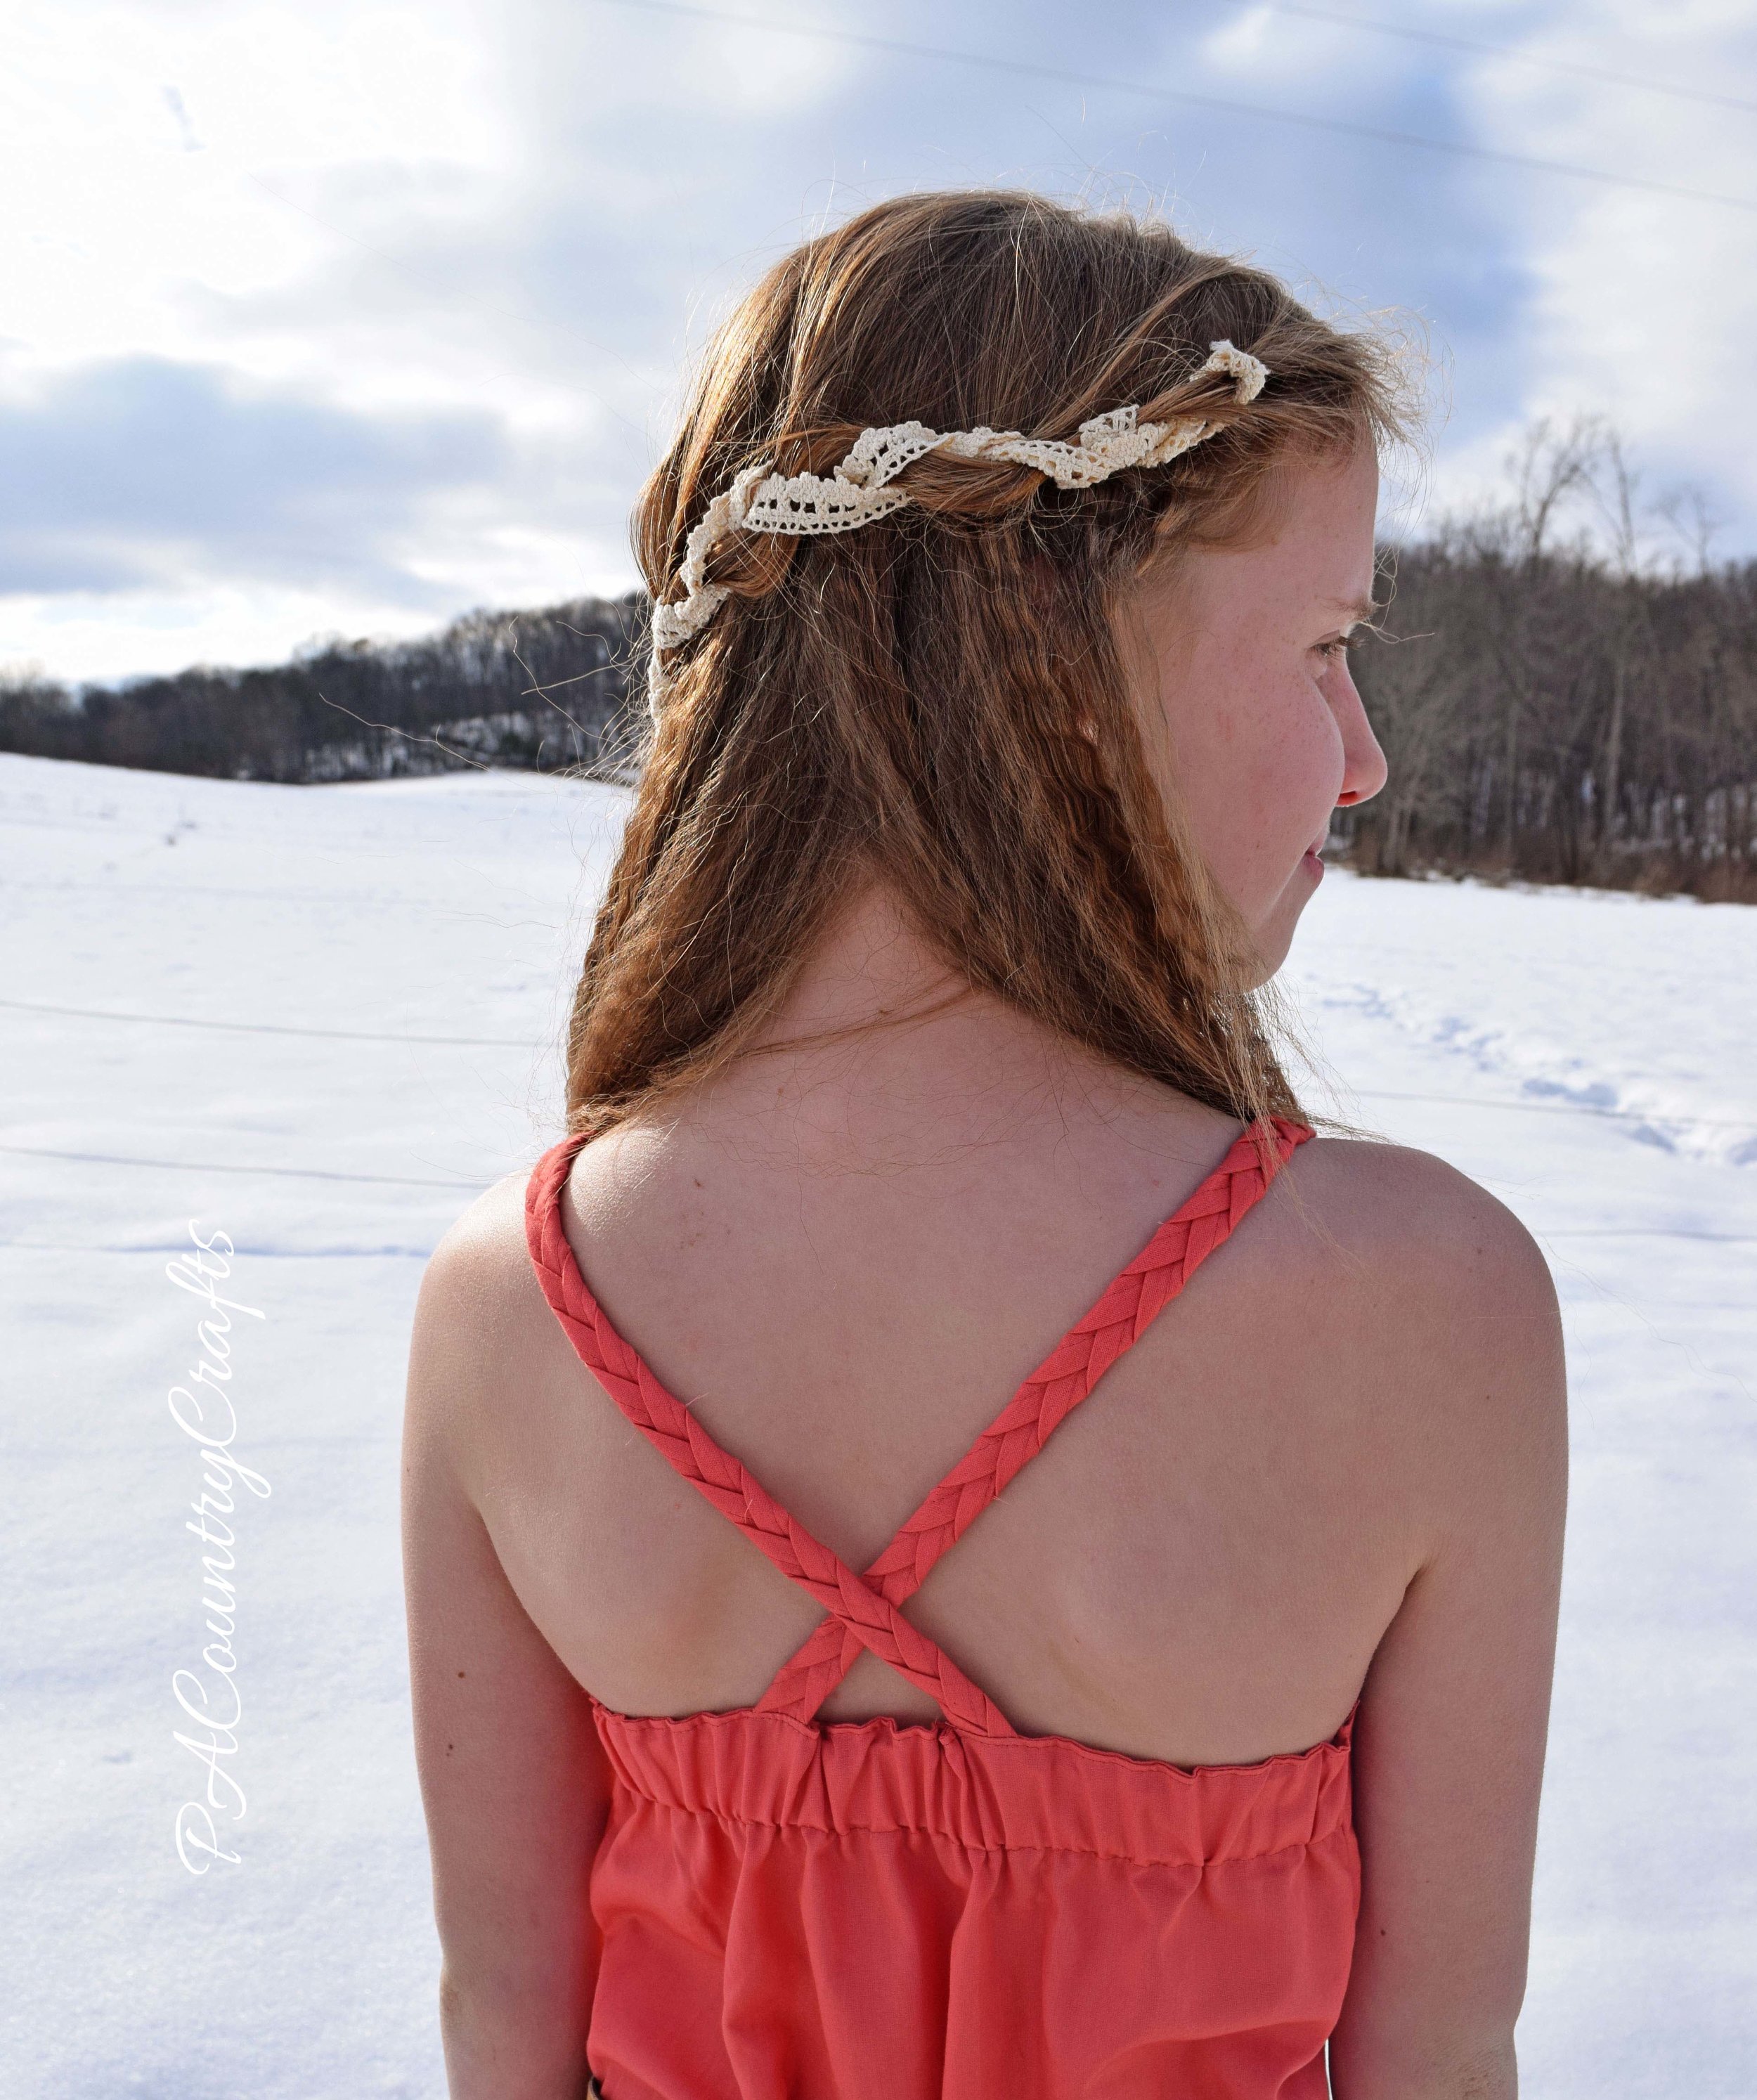

We tried to do a farm themed photo shoot, but it is hard because our options right now are: a) snow or b) mud. At the end, I decided to try to take some pictures with our new chicks, but it was clearly a bad idea. Let's just say that this was the second week in a row that an outfit had to be washed right after the pictures. Ew!!!


You can vote for your favorite "boho" look HERE over at Project Run and Play!
Thank you again to all of those who have voted and shared and supported me!!! Thank you to Aunt Karen for the purple shirt. A very special thank you to my sisters this week! Loni, you did an awesome job as my hairstylist and ironer. (Also, thank you for returning my vintage crimping iron.) Thank you to my husband for those awesome buttons and for carrying girls over the mud for pictures! Thank you most of all to my grandmother and other family members who pass down stories and leave a legacy to inspire future generations.


main-pic
You can vote for your favorite "greenery" inspired design HERE at Project Run and Play.
The challenge for Project Run and Play this week is "greenery" which is Pantone's color of the year. It is symbolic of spring, rejuvenation, and reconnecting with nature.
We are in the middle of a potentially record-breaking blizzard in PA today.
I was having a hard time connecting with the theme and figuring out how to take some pictures of the outfits, especially with the smaller snowstorm we got on Friday while I was freezing and sewing my little heart out in the sunroom. Then, I realized that the weather perfectly mirrored what I was trying to create. Like the bright blue skies and bits of green grass and daffodils peeking up out of the cold snow to bring new life, I aimed to create something beautiful out of things that were unwanted.

daffodils in the snow

project run and play week 2 outfits
When I looked at Pantone's website to learn more about the color "greenery" I immediately pictured a piece of vintage fabric that I had stored in a box in my shed. It came from someone's attic and had been sewed and used for something else a long time ago. I pictured a full, vintage style skirt with a crisp, white, sleeveless swiss dot blouse.
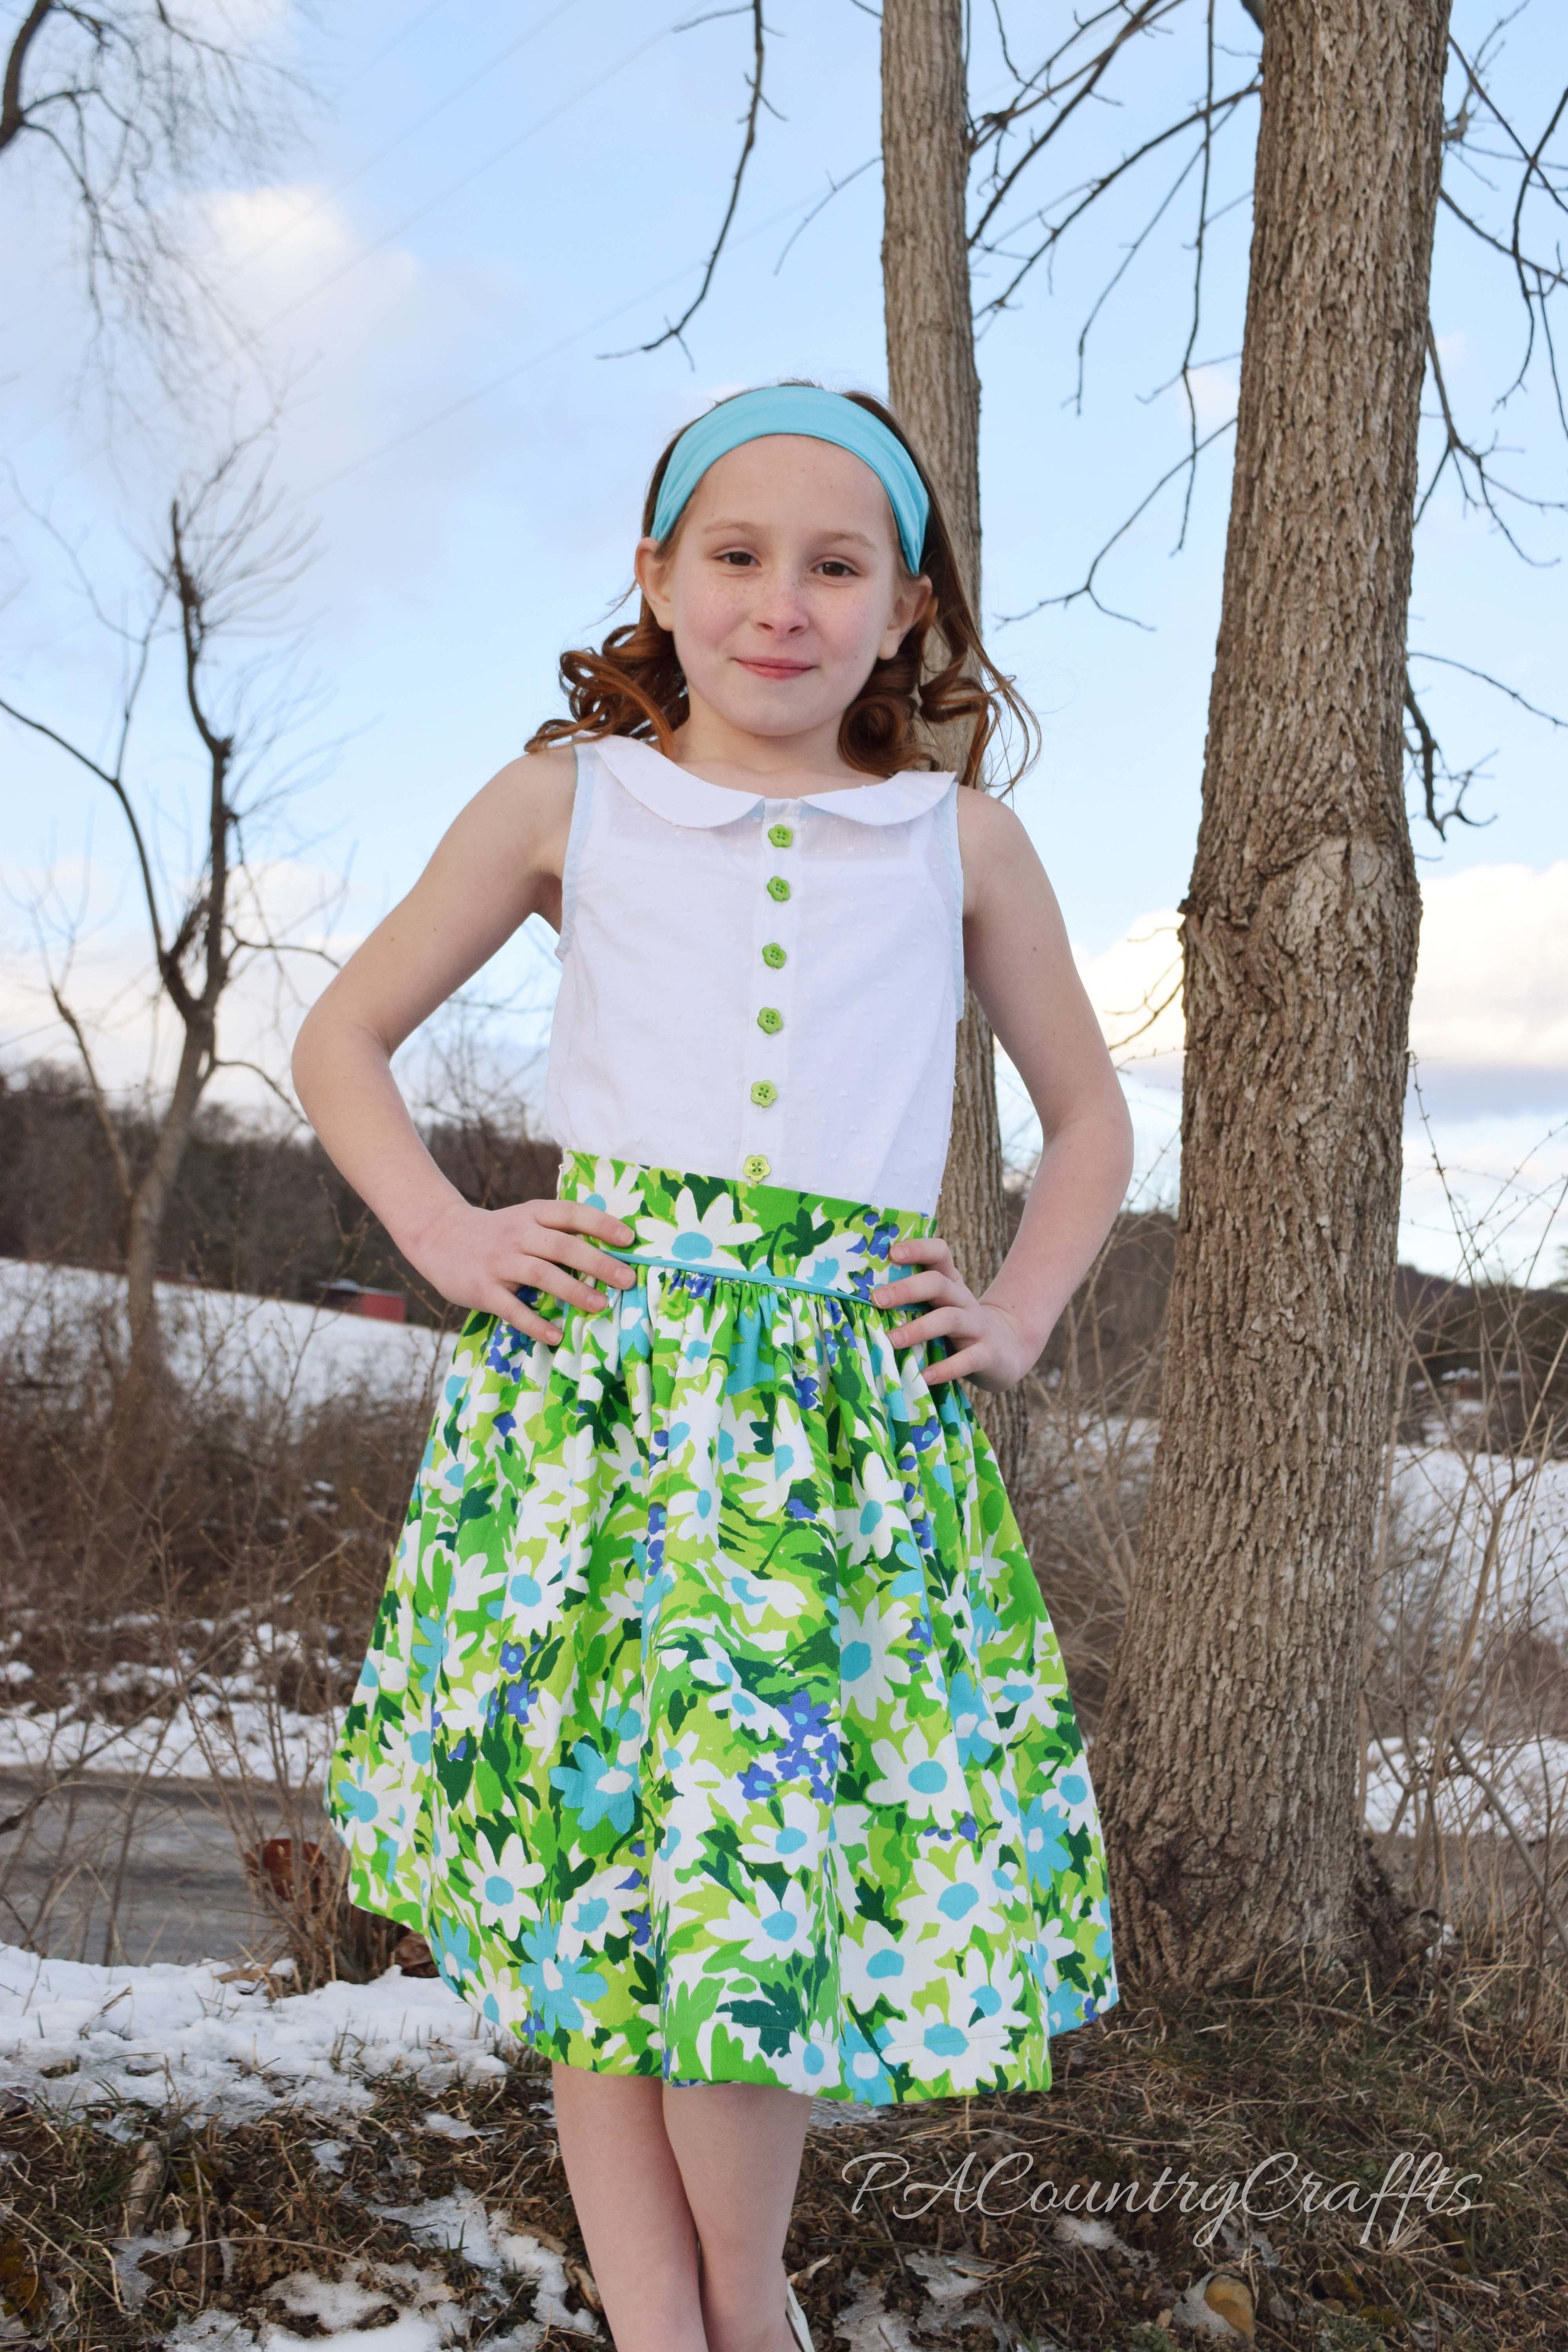
Vintage style girls outfit
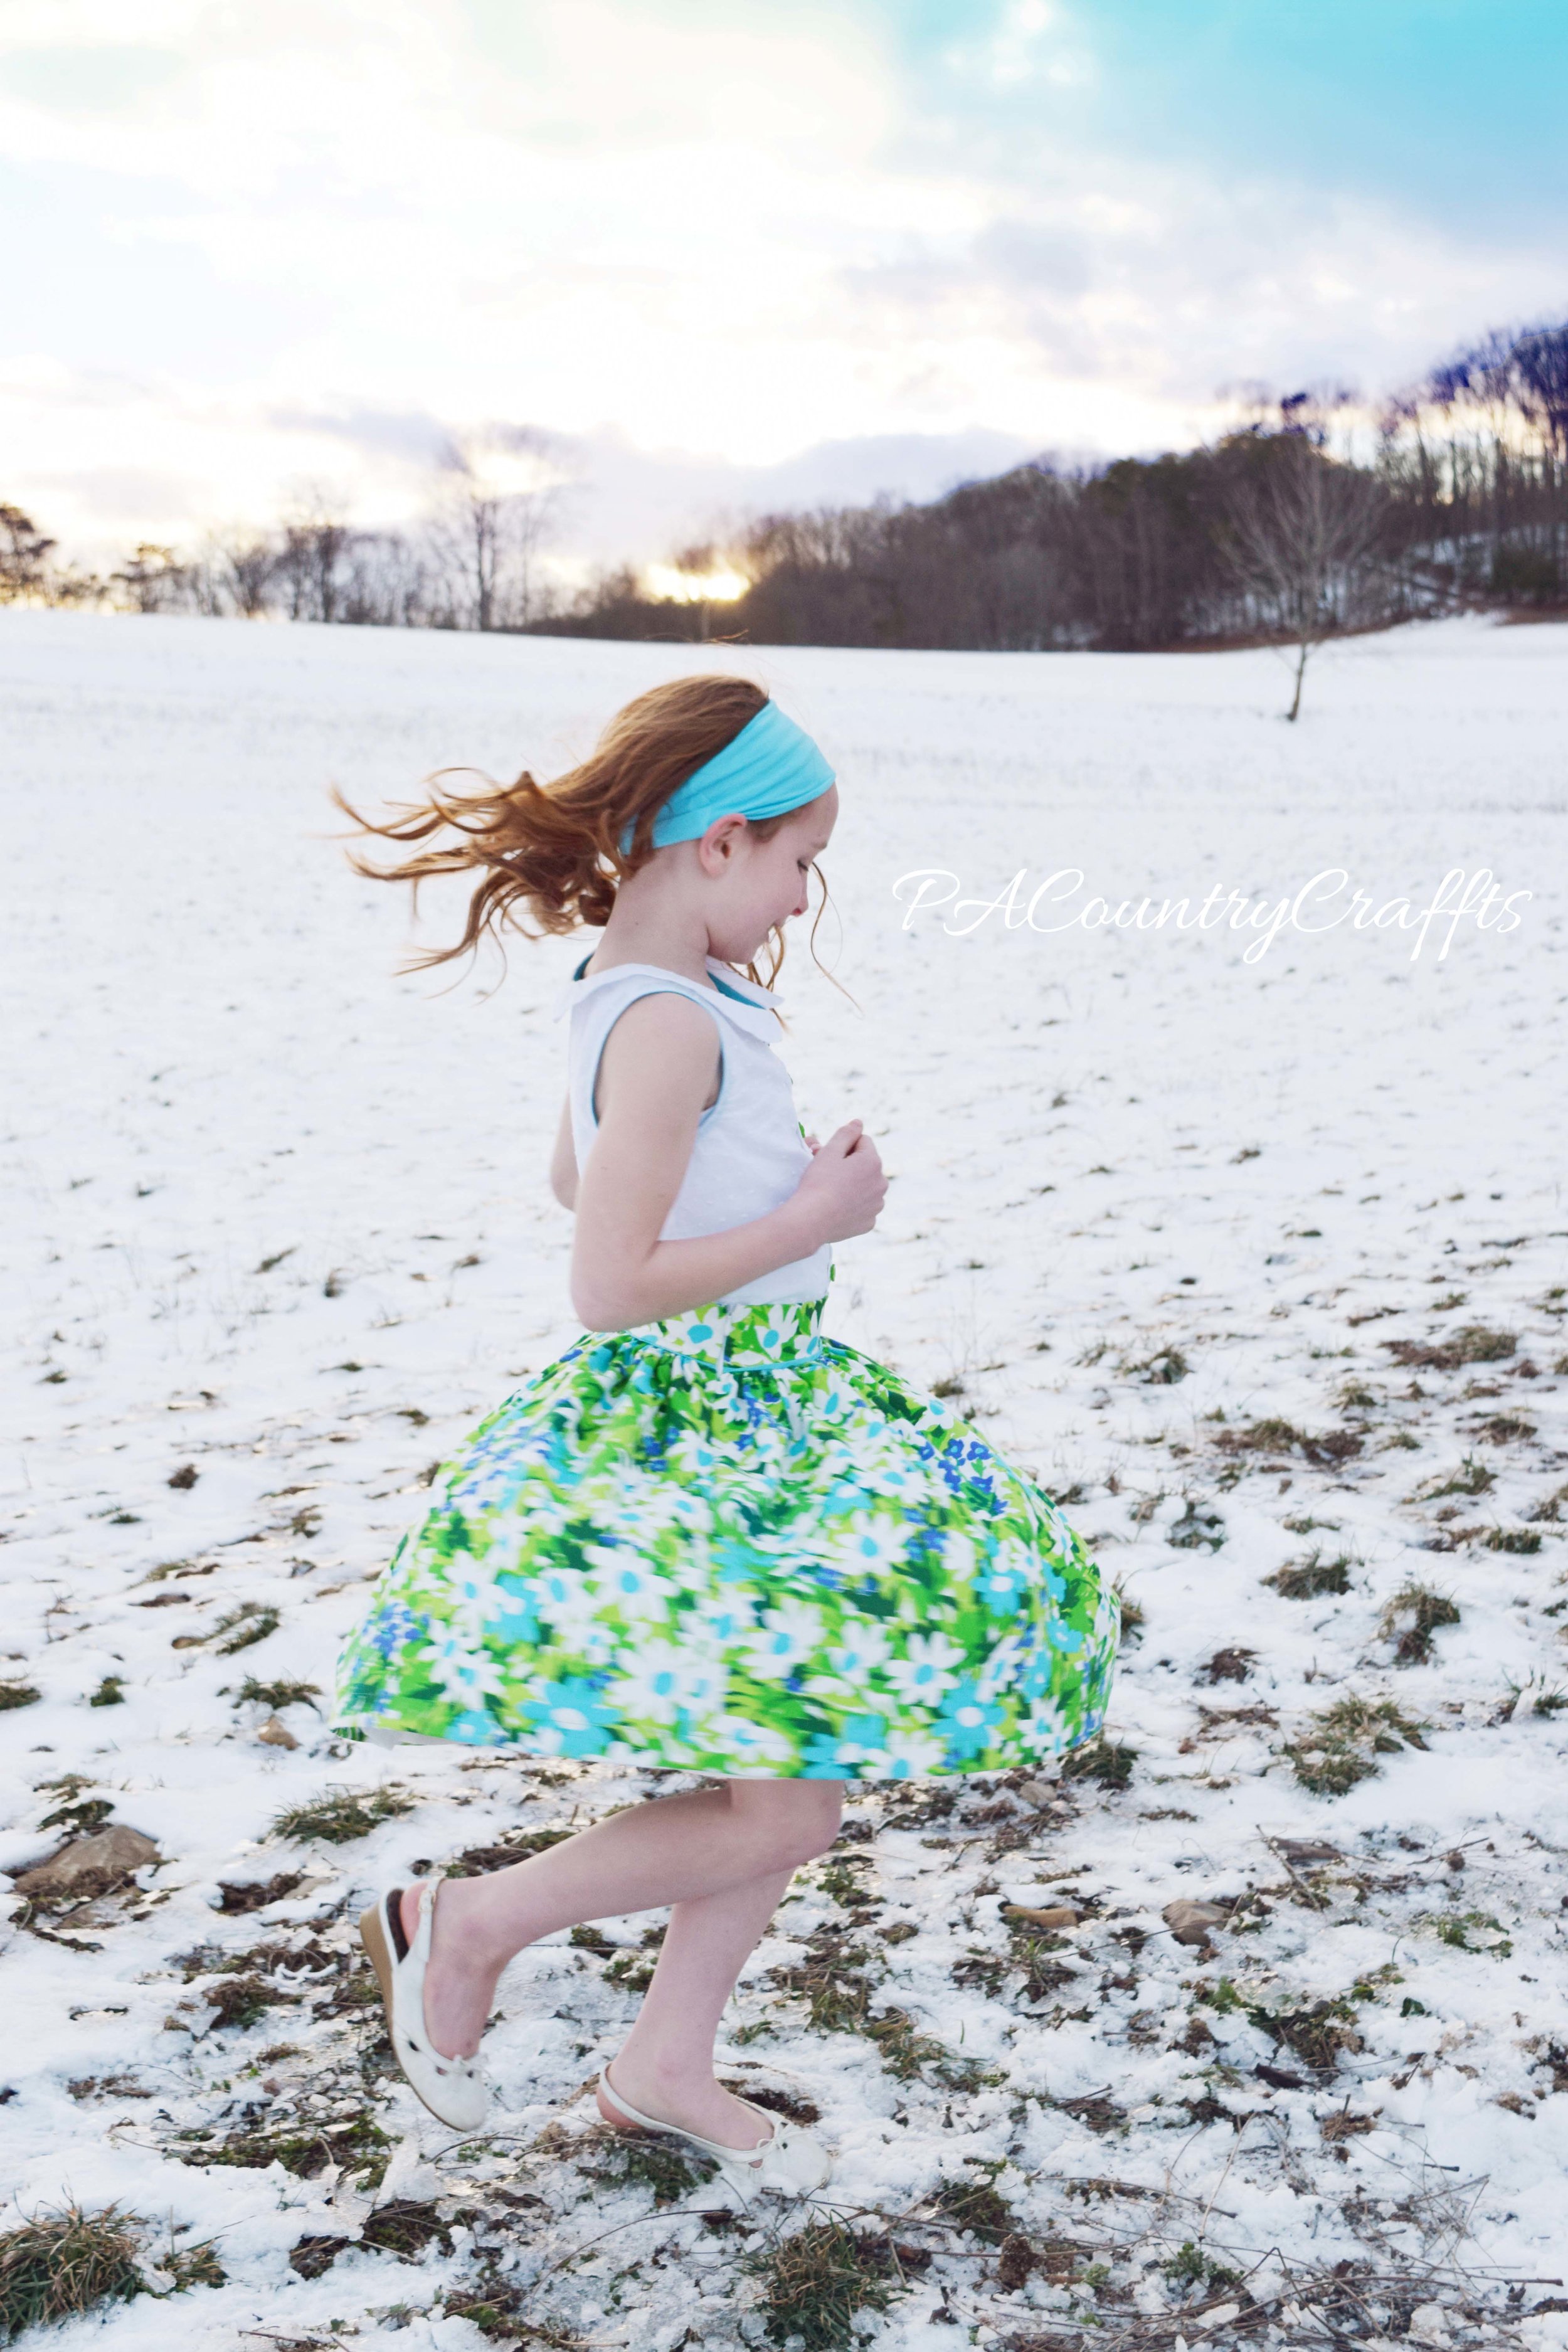
vintage style girls outfit
The skirt is so full!!! The fabric is heavier than quilting cotton, so it holds it shape very well. I added lining and a built in petticoat layer, so this skirt has 552 inches of gathering!!! I used some vintage bias tape as flat piping under the waistband, too.
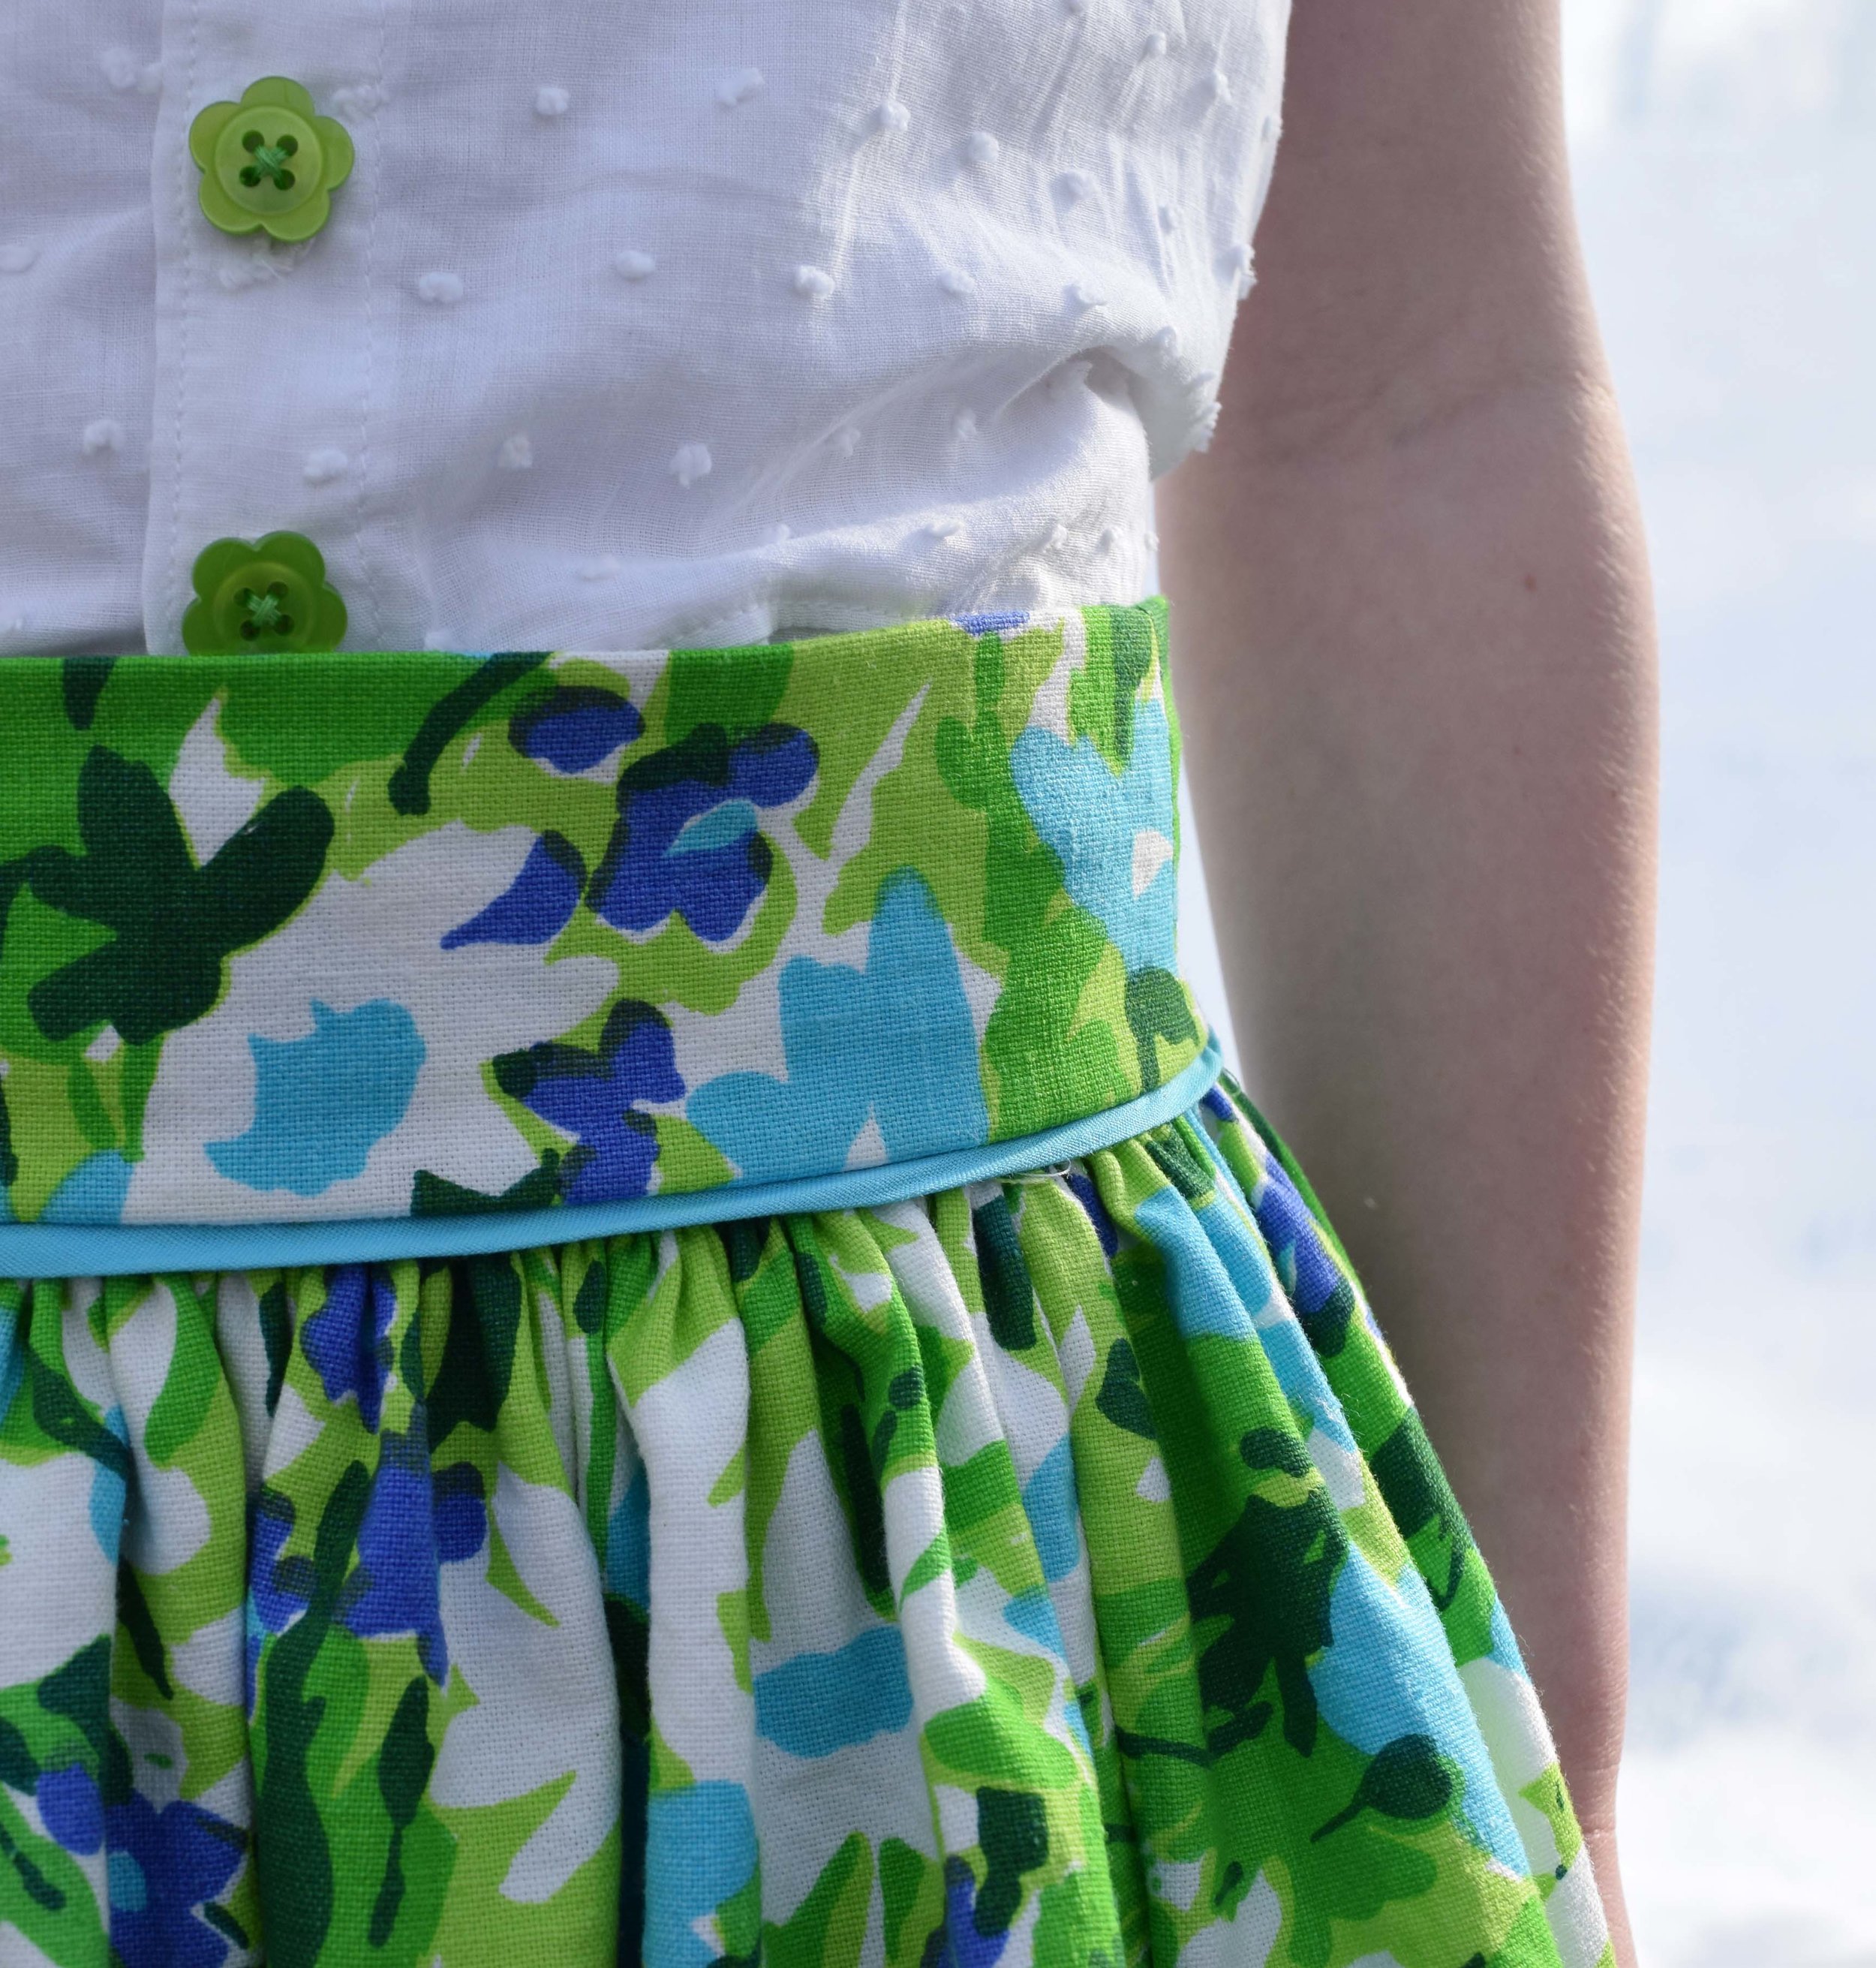
flat piping made from bias tape
The shirt was a bigger challenge for me. I drafted my own pattern and used some more of that vintage single-fold bias tape around the arms and neckline. The fabric is somewhat sheer, so it adds a hint of color to the edges. I hand stitched the button holes since my sewing machine started snapping needles again. The buttons are from Joann and I was excited because they matched perfectly!

swiss dot sleeveless blouse
To take it a step further, I created a matching doll outfit from the scraps. I made my own patterns for these, too. It is lined, so I just used aqua topstitching around the edges.

matching vintage doll outfit
For the second outfit, I used two old t-shirts to create a new shirt in the same color scheme. I have never made a knit neckband before, so I was really happy with how that turned out. It has sheer, vintage lace under the arms.
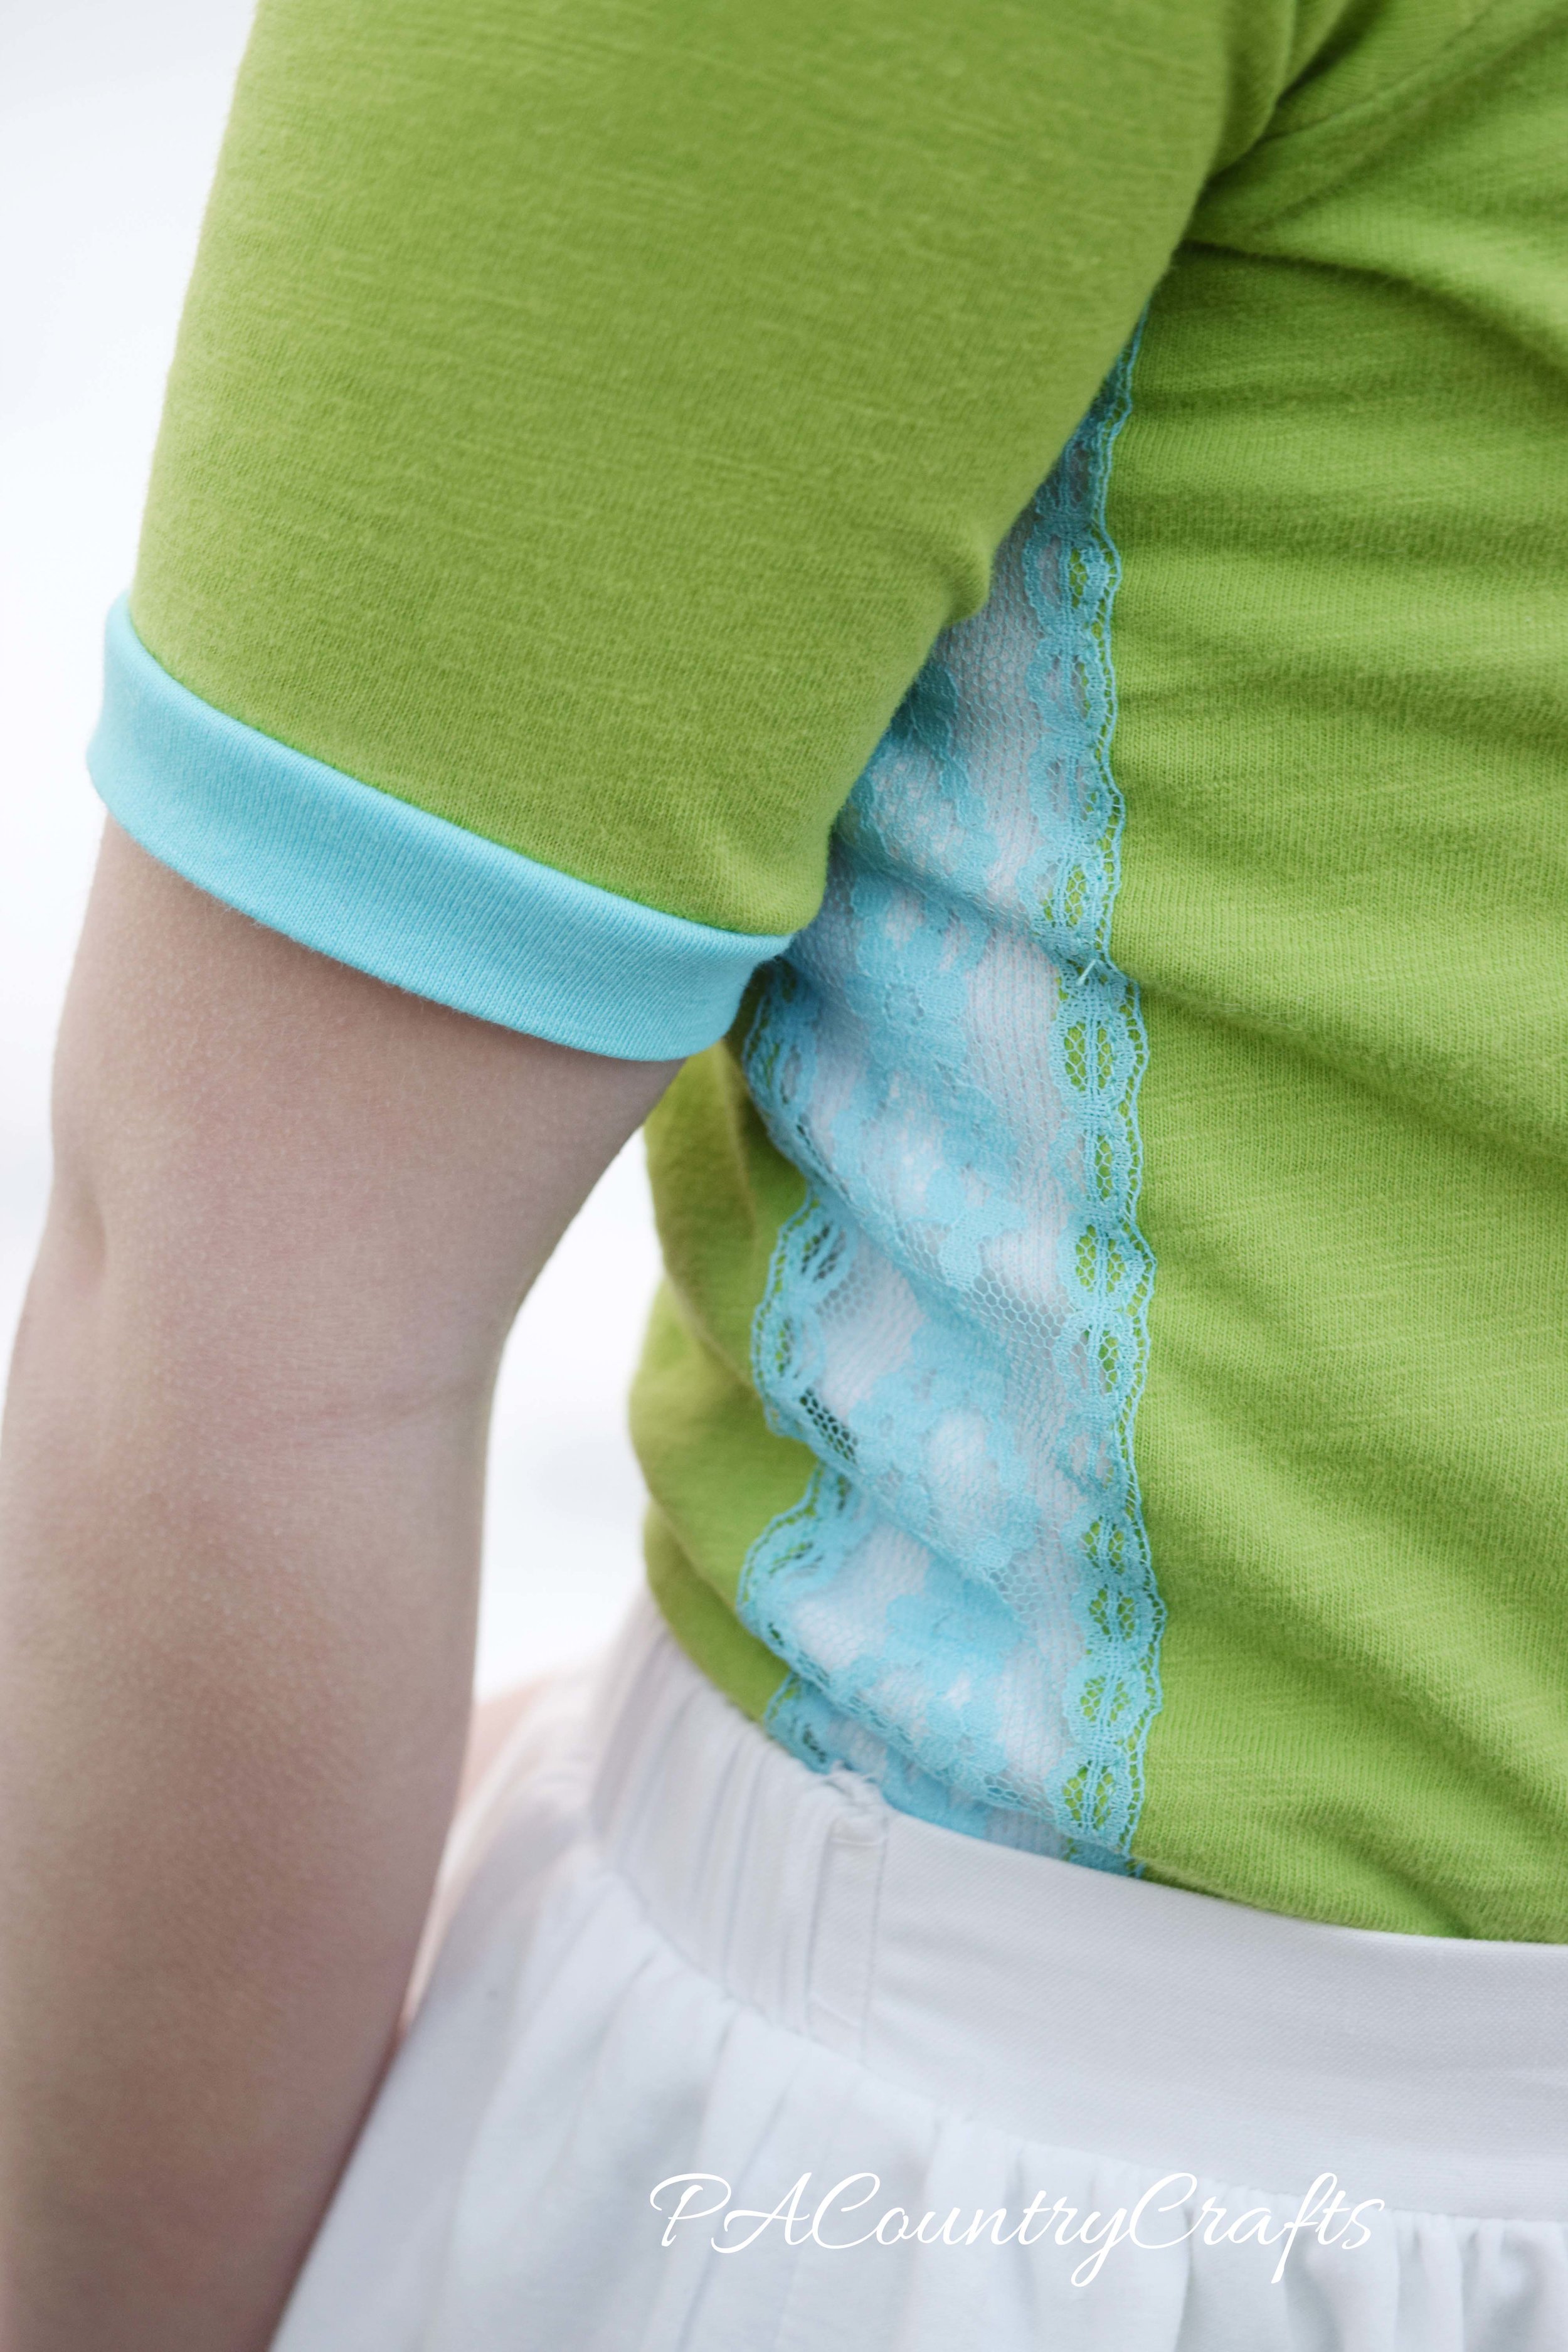
lace inset sides
(Yes, I know she has goosebumps. Poor girl! We took most of the pictures in our greenhouse so that it would be a little warmer.)
The beautiful lace eyelet skirt used to be part of a dress I found at the thrift store. I added some quilting cotton scraps to make a waistband that is elastic in the back. I know white is dangerous, but I figure there is always bleach. Something gross and awful happened to it after this photo shoot, so I will probably be testing that out soon. #keepitreal
I whipped up a few headbands to match from more lace and t shirt scraps.

greenery project run and play week 2 outfits
Oh, and the bright blue playhouse is an upcycle project, too. It used to be a chicken pen with weathered wood and a leaky roof! Sometimes, all it takes it a little bit of hard work to bring new life to something that was unwanted. So, even though things may be looking like a winter mess where I live today, I know that it is going to be OK: spring and all of the beauty that comes with it will be here soon.

Cute vintage style girls clothes made from repurposed materials- there is even a matching doll set!
You can vote for your favorite "greenery" inspired design HERE at Project Run and Play.
Thank you to everyone who voted for me last week! I am so excited to stay in the competition!!! Thank you again to the friends and family, even those with terrible fashion sense, who help me figure things out and give me honest opinions. Thank you to my Aunt Karen who forgot to vote, but gave me one of shirts I used. Thank you to Vicki for saving that wonderful, old fabric for me. Thank you to my friends and family who help me with my vision. Thank you to my husband for finishing the greenhouse before the snow came and being my photography assistant. As you can see by the picture below, one of my models was not as cooperative this week.
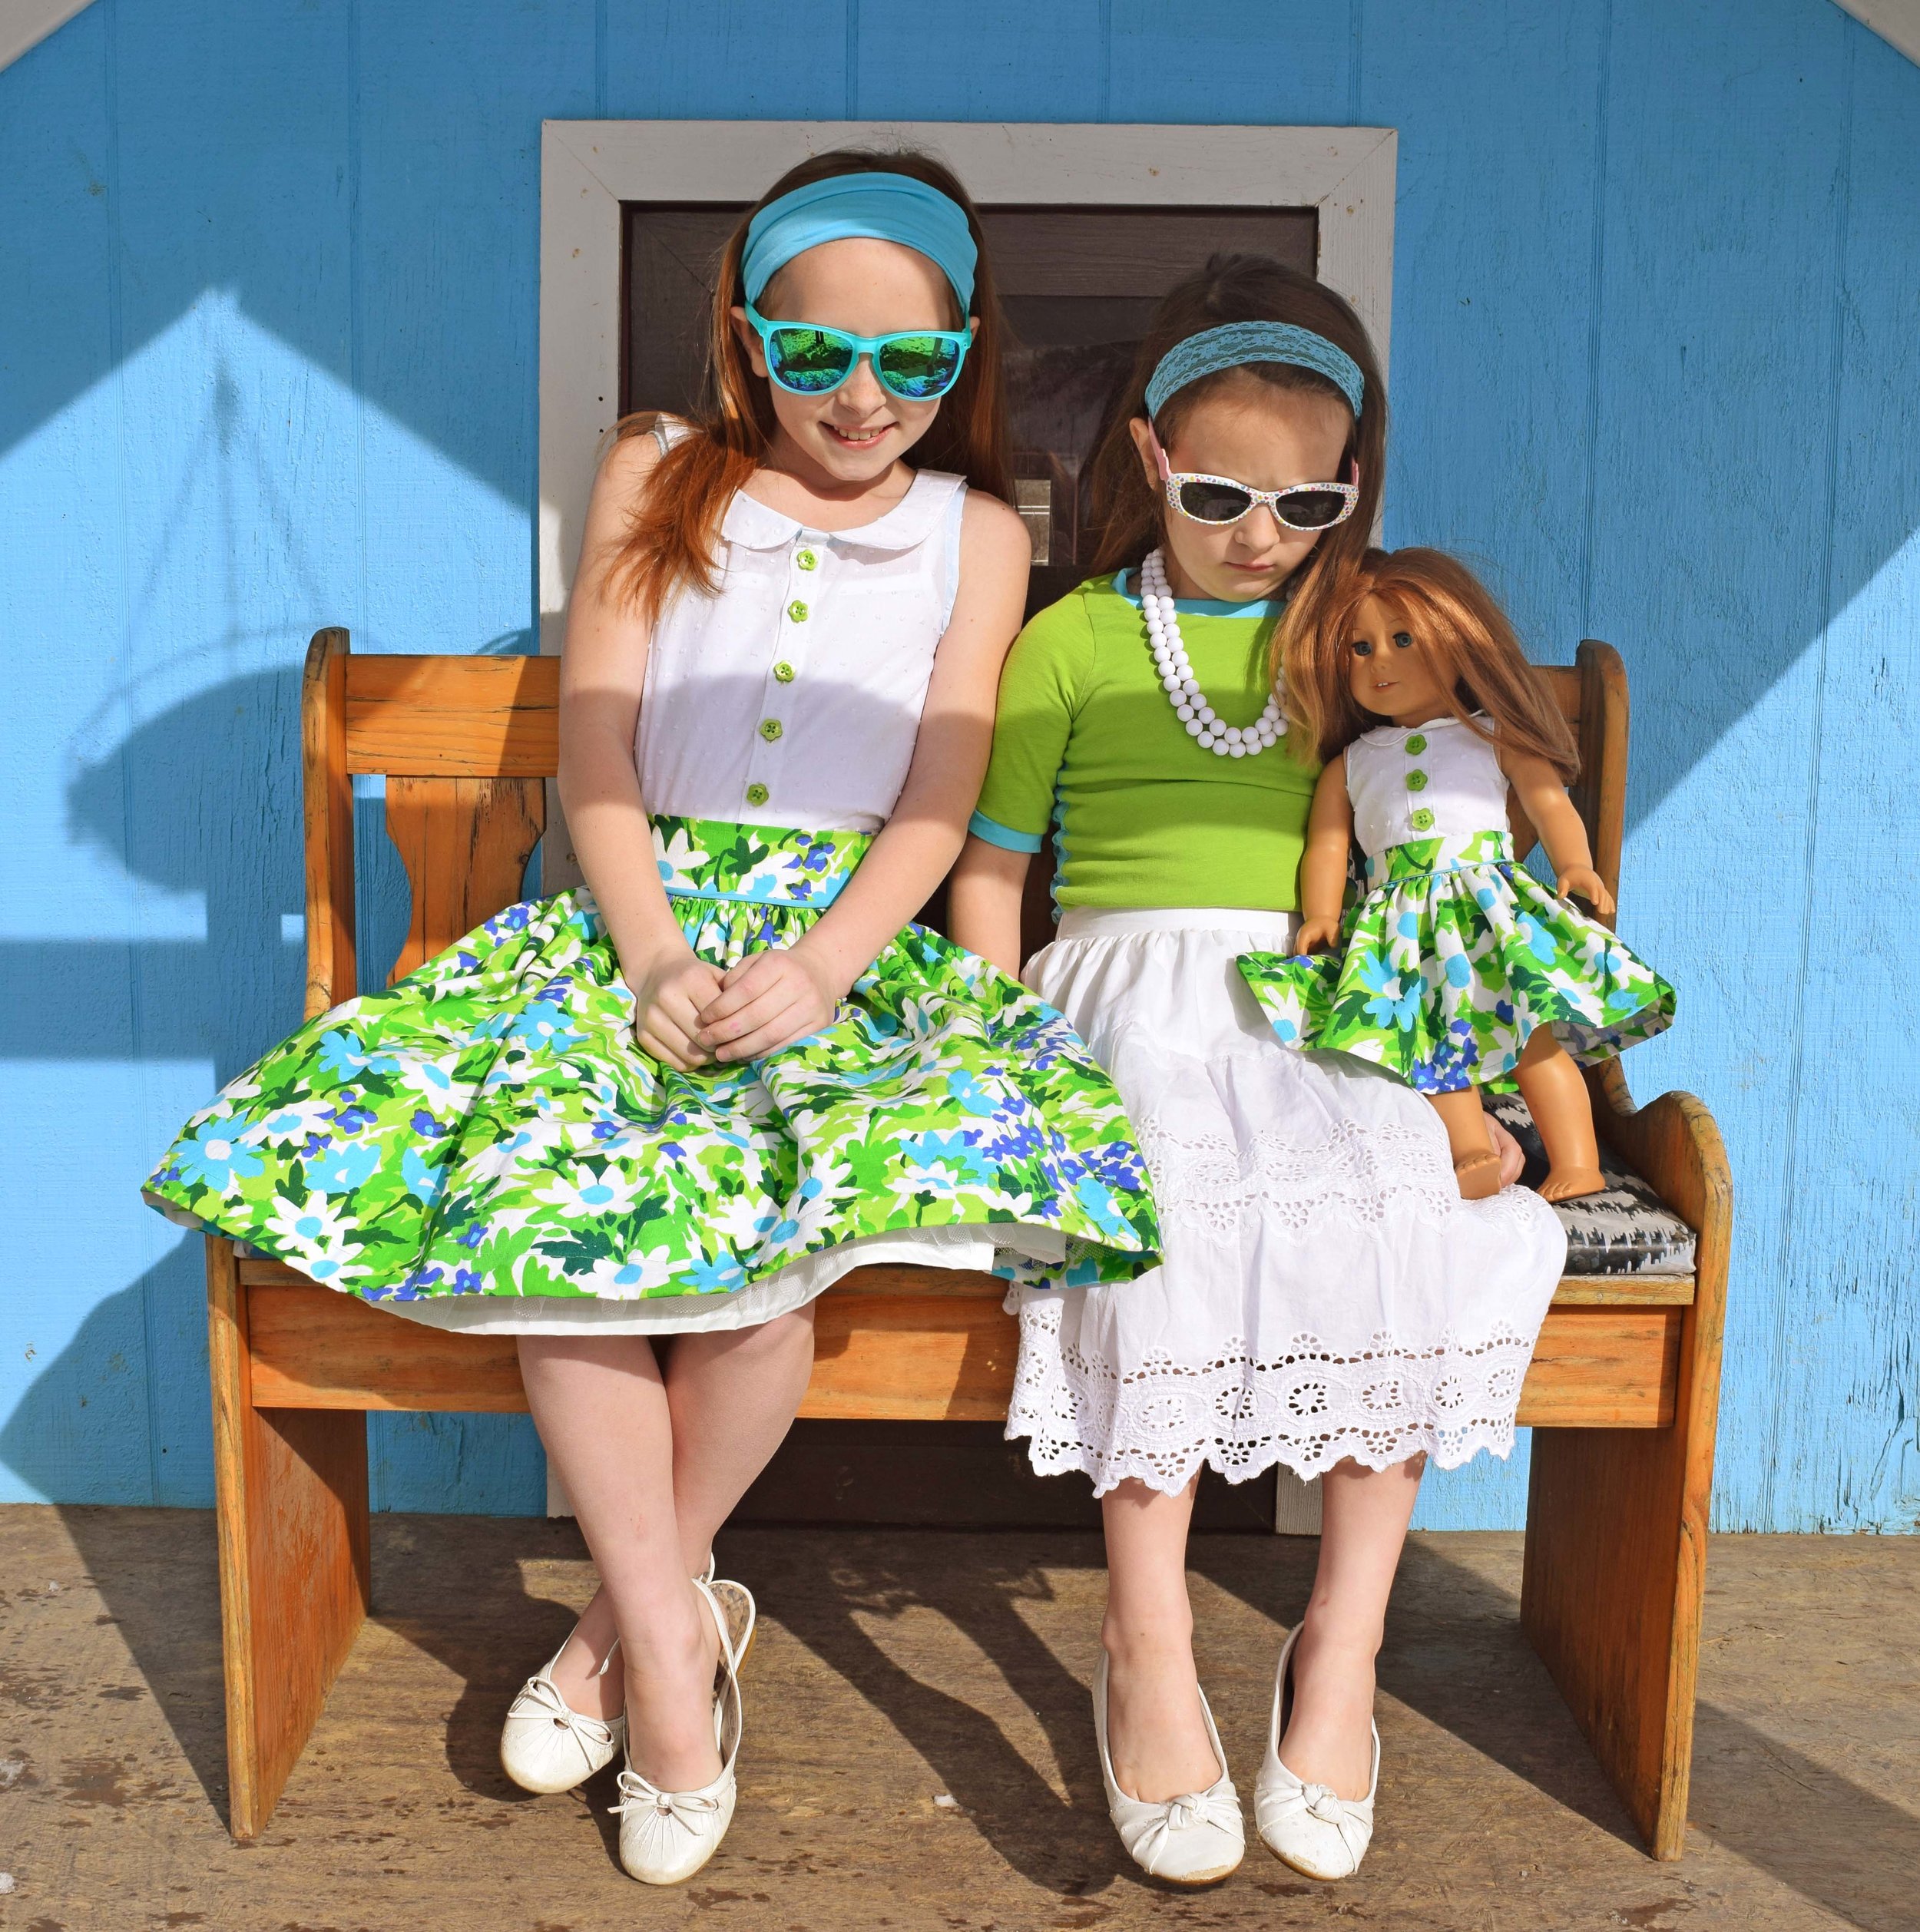
Adorable vintage style girls outfits made from upcycled materials
Sometimes I get these overly ambitious ideas and that is as far as they go. Just big ideas.Sometimes, a year or so later, I actually act on them. And, more often than not, it was a lot easier than I anticipated.
This particular big idea: I wanted to make hand warmers from sweater scraps. I made some sweater pillows (some are still not finished, so I will blog about them eventually) and I have a pile of sleeves laying around. Originally, I was going to make hand warmers for my kids' classmates for Valentine's Day, but I really don't have that much ambition. I realized that they are best in pairs, so I would have to make 80+ hearts. No, thank you! Instead, I gave them out as little thank you gifts for some friends and family.


They are soft and lavender scented and pretty. Just microwave them for about 30 seconds and tuck them in your pocket. They make a really pretty little favor or thank you gift. I just tied mine with baker's twine and made little tags to go with them.

I took some pictures to show you how to make them, and I even did it two different ways to make it even more beginner-friendly!
Start with your fabric- I used scraps from a sweater sleeve.

Make a template- mine are about 3" across. I used an old receipt from the grocery store. Place the sweater scraps right side out and pin the template to them. You want to leave some extra fabric all around the template so that there is wiggle room if/when it shifts.
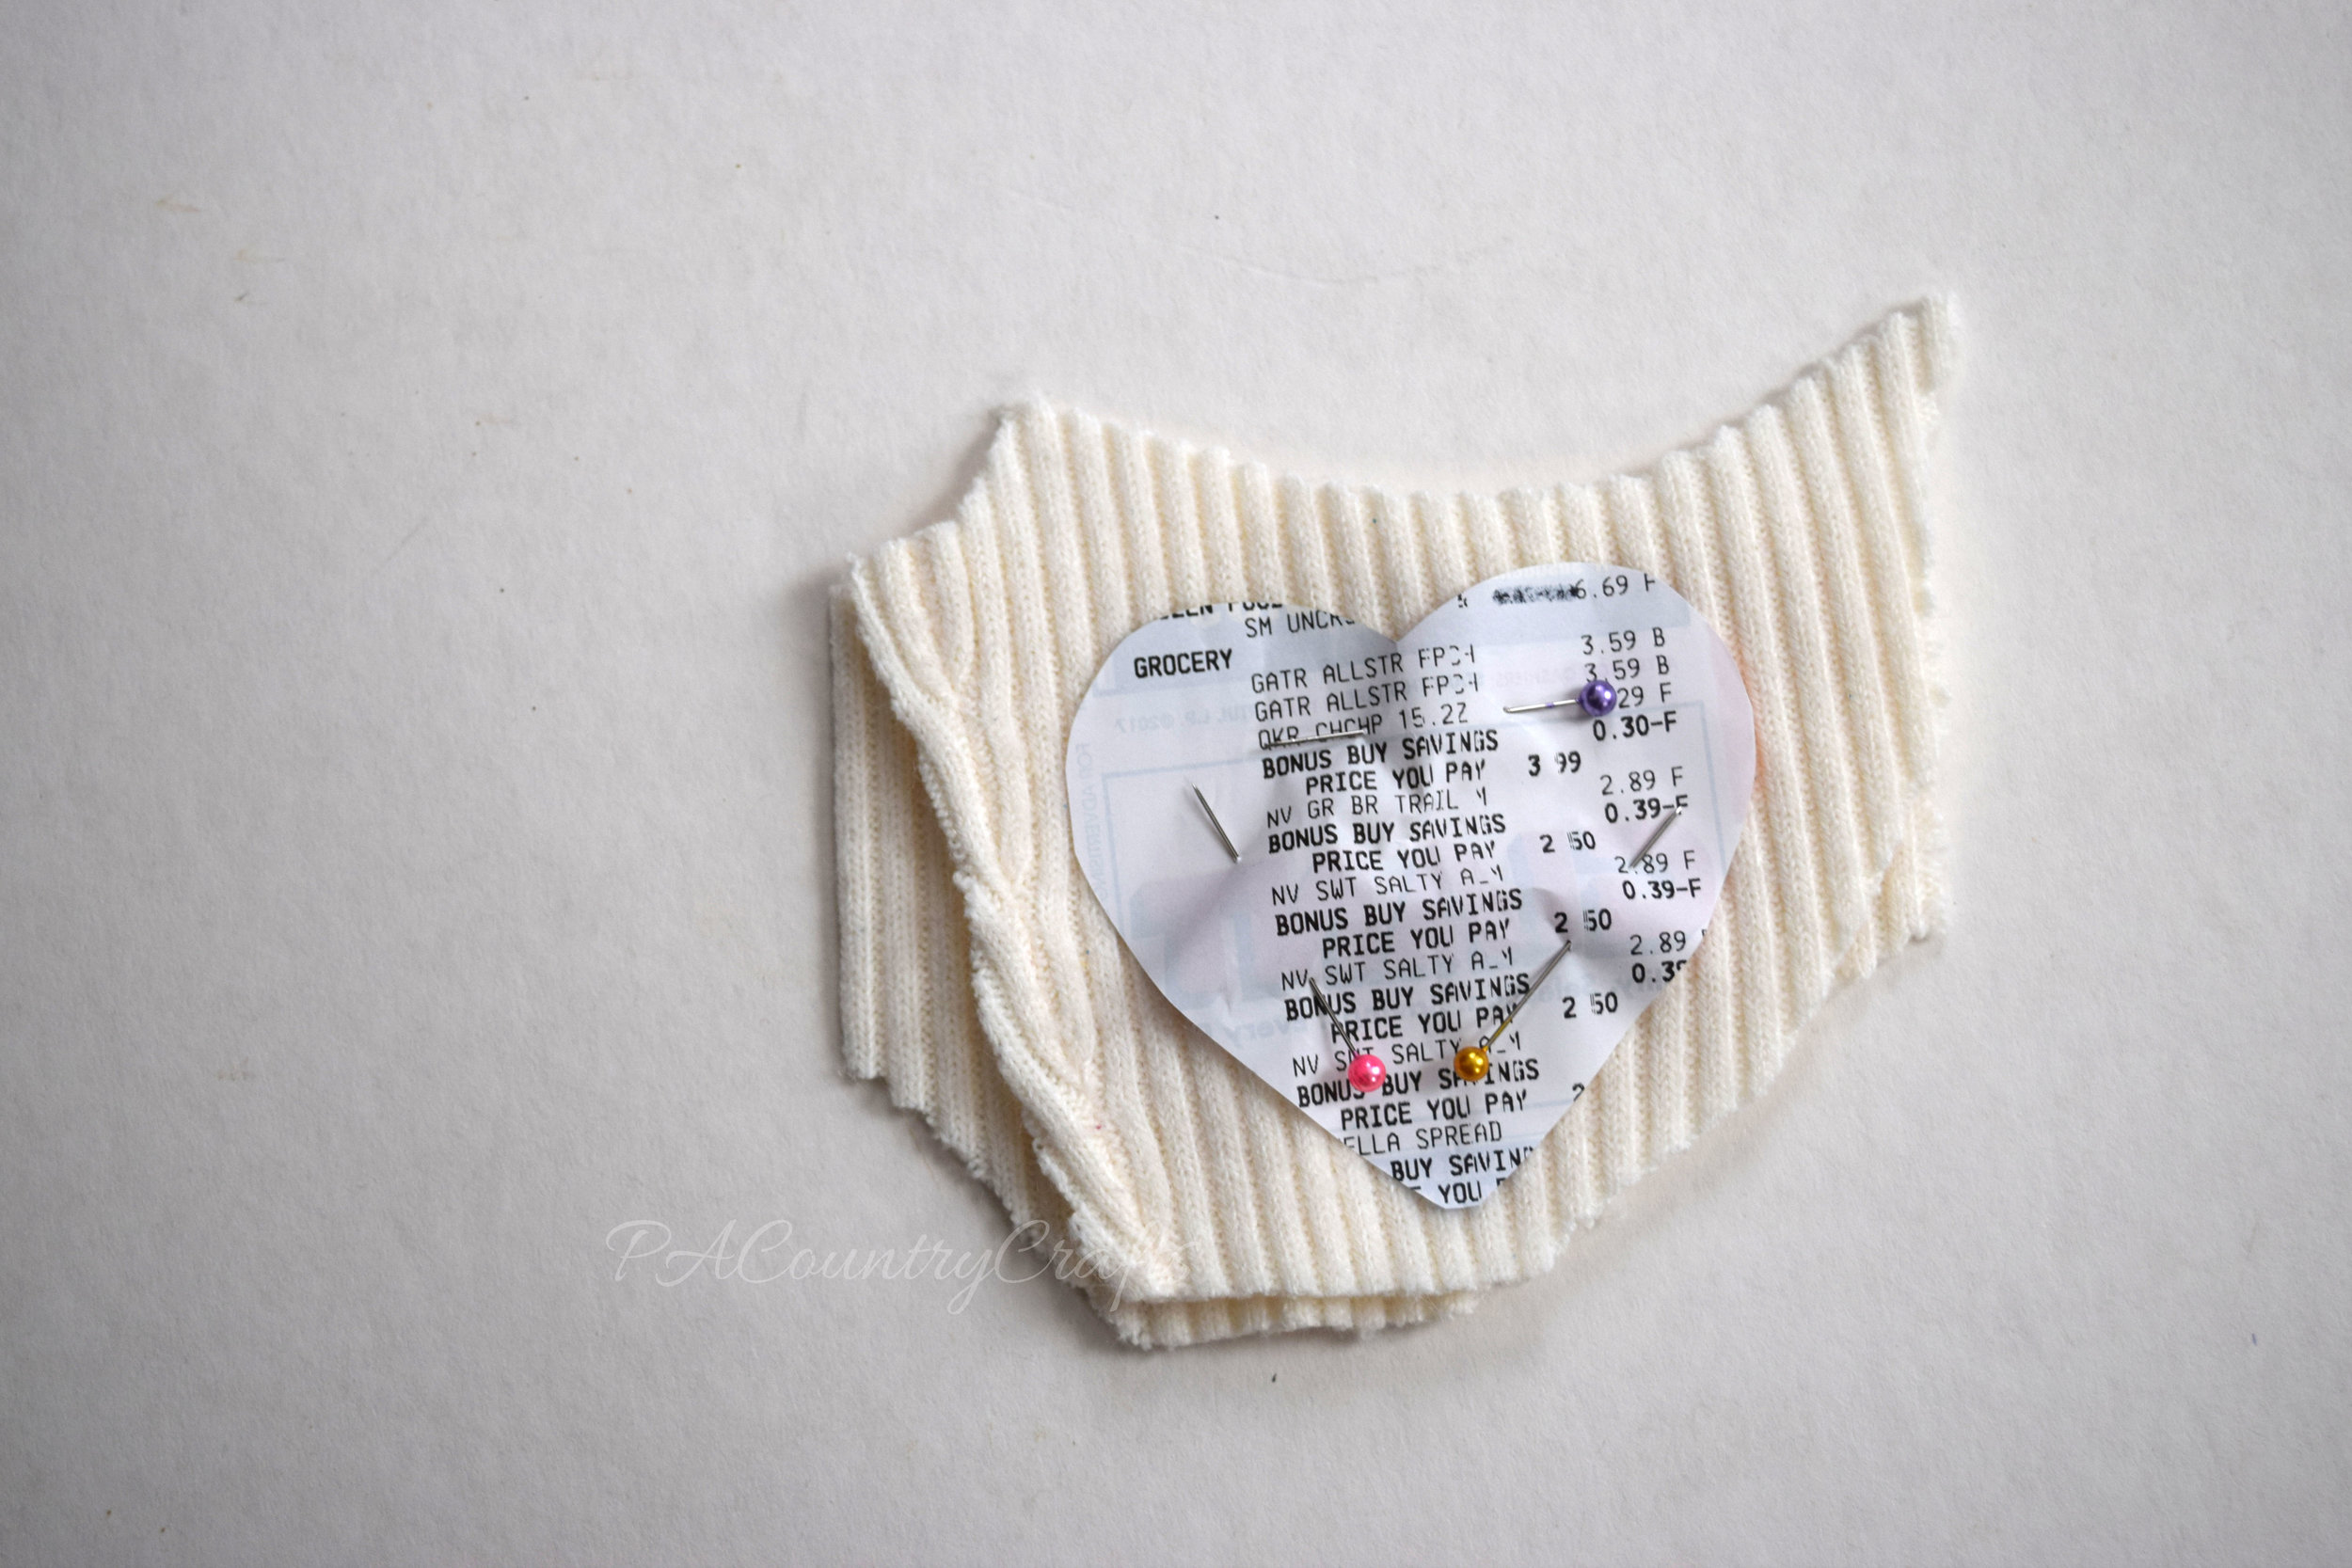
Start on the straight side of one heart just before it starts to curve. Backstitch, then sew all around the template, leaving a small opening on the straight side. I used a receipt because if I caught the edge of the paper it didn't matter- it tears away easily.

Take our your pins and remove the template.

Fill the hand warmer with rice. (A funnel is really helpful!) I mixed mine with some lavender essential oil.

Sew the opening closed. It is a straight line, so it is pretty easy!


Use pinking shears to trim all the way around the heart.

Easy, right?

But there is another way to do it that I found to be even easier...
Draw a template on a piece of tissue paper.

Pin the template to your sweater pieces- I just folded the bottom of the sleeve in half, keeping the right sides out.

Now, here is the even easier step... sew right on top of the tissue paper, following the lines you drew on the template. Again, start on the straight side right before the heart starts to curve and leave an opening at the end, stopping a half inch or so after the point at the bottom of the heart.

See? The tissue paper just tears right off!

Now, the only downside that I found was that the pencil from the template made my threads darker. So, if this bothers you, don't say that I didn't warn you. I put it in bold AND italics. Maybe a Frixion pen would work and iron out? If you try it, let me know! I can't find mine.


If you want to pin it for later…

Here are some more ideas you might like…
I have so many crafty things to share on the blog, but I just haven't had time to edit pics and type up posts. I don't things will ever settle down around here. Here is another MOPS craft projects. We did this at our open gym gathering. Usually the kids just run loose and we can chat while we let them burn some energy. I just set up a table off to the side with this extra craft project to do with the kids if they were interested. It seemed to go really well and the kids had fun choosing items to put in their bottles.

I-Spy Bottles MOPS craft

I Spy Bottles for MOPS Creative Activities- fun to do with the kids
You will need...
~plastic bottles ~rice ~funnel ~scoop ~sharpie marker ~hot glue gun ~assorted trinkets
For the trinkets to include in the bottle, some of us just collected assorted choking hazards and craft supplies. We had alphabet beads, seashells, buttons, toys, feathers, colored beans, metallic confetti (this looked great in the bottle!), animal beads, charms, etc.
They were really easy to make...
Choose a clean, dry, plastic bottle. I brought small Gatorade bottles, but some people had some really nice bottles from other beverages.
Fill the bottle partway with rice. We used a funnel and a scoop.
Choose small trinkets to place in the bottle.
Add more rice until the bottle is nearly full, but leave plenty of space to roll the rice around.
Hot glue the lid onto the bottle.
The step we skipped... write the child's name on the lid with a Sharpie.
I love craft projects with kids that are actually useful and last more than a few days!
Sewing, crafts, tutorials, recipes, and a little look at our life in the country - raising half a dozen children.

Hi! Thanks so much for stopping by! My name is Lindsay and on this blog you will find sewing, crafts, decorating, recipes, and tutorials with a little bit of honesty and encouragement.