Mend Holes in Jeans 3 Different Ways
/Mend holes in girls’ jeans three different ways! Iron-on patches, machine stitching lines, and embroidery with fabric!
Read MoreMend holes in girls’ jeans three different ways! Iron-on patches, machine stitching lines, and embroidery with fabric!
Read More
I thought I would do another WIP Wednesday post to share what I have been doing around here lately. I may not have blog posts up to prove it, but I have been super productive!
I finished up 2 out of 3 doll quilts, but did not get any pictures of them yet. Those sampler ones took so long that they deserve a full blog post. :) Plus, there is a piece on the doll bunk bed that needs fixed and nagging has not worked thus far. I may have to do it myself.
I made two stuffed bears from outgrown baby clothes (that was the sneak peek at the end last time!) and even a little blanket for one bear. I plan on posting the pattern I made for those, but I didn't get it perfected yet. I might even do another one just to test it out.
I started a crochet cow hat! It is almost done. I made one of those last year while I was on a blogging hiatus, so I never posted about it. Maybe I will show those pics when I get this one done, too. The first one is better because it is a brown cow. :)
Oh, and I am trying to do the 40 bags in 40 days challenge to declutter my house. Yesterday's task was my embroidery floss. It was all over the place, so my sewing table is much cleaner and the floss is super organized! I only got a sandwich bag worth to throw out, but I am counting it. :)
Speaking of organizing sewing stuff, I got this bobbin tower on clearance at Michaels a few weeks ago and it is awesome! I love being able to just reach up and grab the bobbin I need and the threads aren't hanging all over the place. I highly recommend it!

I was asked to make these special pillow covers in memory of the recipients' loved one who had recently passed away. He was known for wearing these button down shirts and patriotic suspenders.


They were fairly easy to make. I had to iron all of the shirts really well, then slip my rotary cutting mat inside the shirt. Being careful of the placement of the buttons and pocket, I cut out a 16 1/2"square. I then cut another square out of the back of the shirt. I made loops out of navy bias tape that I had sewn together and sewed those to the bottom of the shirt panel.

Then, I just sewed the front and back all the way around. I serged the entire edge for durability. It was easy to use the button front to insert the pillow form. Last, I just hooked on the suspenders. It really was not too hard. I actually made six of these pillows, but just had Mom snap these pics of one of them on her phone.
A picture and a poem were placed in the pockets. I think this was a lovely idea, and I can't take credit for that part. I was honored to be a part of something special to make this Christmas a little nicer for the family.
Link Parties where I sometimes hang out...
,
,
,
,
,
,
,
,
,
,
,
,
,
,
,
,
,
, and
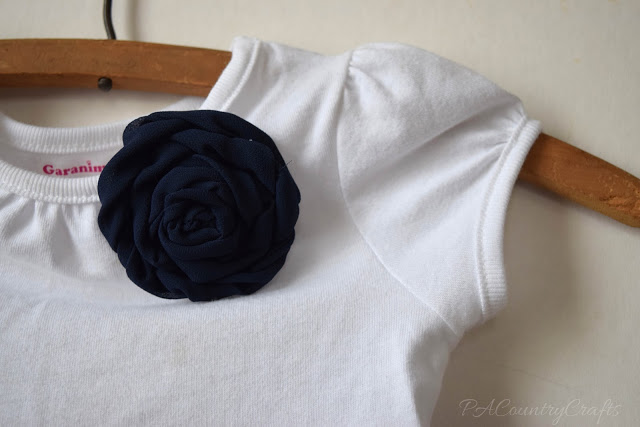
When I was making Easter dresses this year, I started to run out of ambition. I ended up making a cheater dress for the youngest. She can't voice her opinion yet and my best friend reminded me that there are no others to pass it down to later, so it would get less wear than the other dresses. I liked that logic.

It is just a simple T shirt dress. I got a basic Garanimals shirt at Walmart for the top. I found this navy wave texture fabric in the remnant bin at Joanns for the skirt.

I chopped a few inches off the bottom of the shirt, sewed the skirt in a tube, and then attached them with my serger. It was ridiculously easy.
To add a little something to the top I made a navy, chiffon flower out of some scraps from the
and sewed it on.

Even with my minimal effort, it is still a cute dress and it is a little more practical for a toddler, too.

So, that is it! These are all of the Easter dresses I made this year. I love the navy and white, which I have mentioned a few times already. You can see the other dresses by clicking on the pictures below.


Link Parties where I sometimes hang out...
,
,
,
,
,
,
,
,
,
,
,
,
,
,
,
,
,
, and

I should be getting ready for Halloween, but I am procrastinating. Instead, I am backtracking and blogging about another Easter dress.
This was one of the dresses that was completely dictated by my daughter's preferences. It also ended up costing me nothing to make! So, we both won.
A friend gave me this beautiful lace to work with- it is a heavier, stretch lace, but I didn't use the stretch factor in the design. I just drafted a basic bodice pattern and cut the lace. I left the shoulders and top of the bodice unlined for a sheer lace effect. So, I pieced the unlined and lined portions together and overlocked the inside seam. Then, I used some vintage navy bias tape around the neck and arms. Using wash-away wonder tape was key for holding that in place to sew. The back has an invisible zipper (which I already had from changing my mind last year and using buttons).
Make this DIY collage wall with thrift store frames and free printables!
Read More
The next Easter dress I made cost me absolutely NOTHING to make! Sweet!

Does anyone else save old bridesmaid dresses? I am pretty sure I am not the only one. I mean, you spend a ridiculous amount of money on them so it seems a shame to throw them in the donation bin. Even if you HATED the dress! (Sorry, Sis!) It wasn't an UGLY dress. It just wasn't flattering on me. (I have wide ribs.) Then, they ordered the wrong size and my other sister and I got in a big fight when she made a joke about mine not fitting. I really just hated everything about this dress. So, naturally, I hung it in my closet for 6+ years where I could see it every day.
Well, now it is not in my closet. Now, it looks like this:
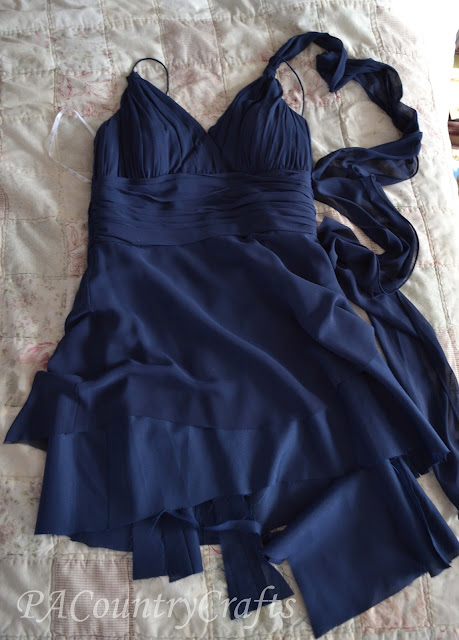
The rest of it has been transformed to create several of this years' Easter dresses including this one.
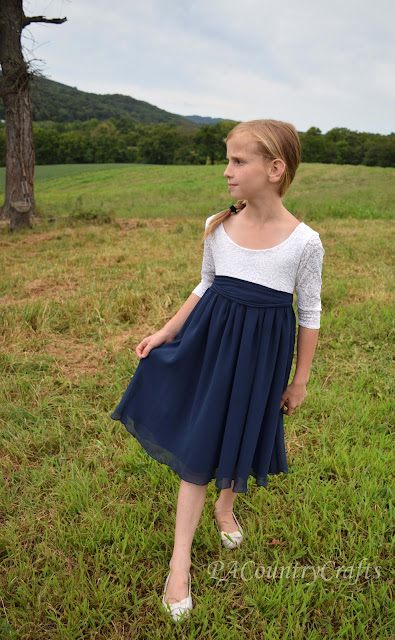
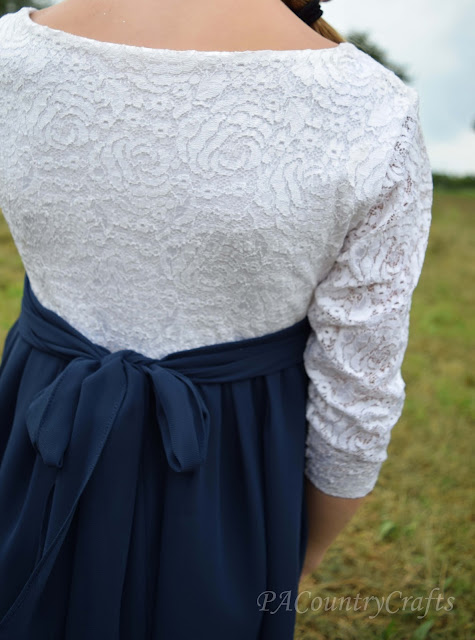
The bottom of the dress is made from the top two layers of the bottom of the bridesmaid dress. The sash is made using the strap from one side. The hardest part of making this dress was cutting the slippery, chiffon fabric to make it straight. The full skirt with lightweight fabrics makes for lovely twirling, though. The twirl factor is always appreciated by the girls.

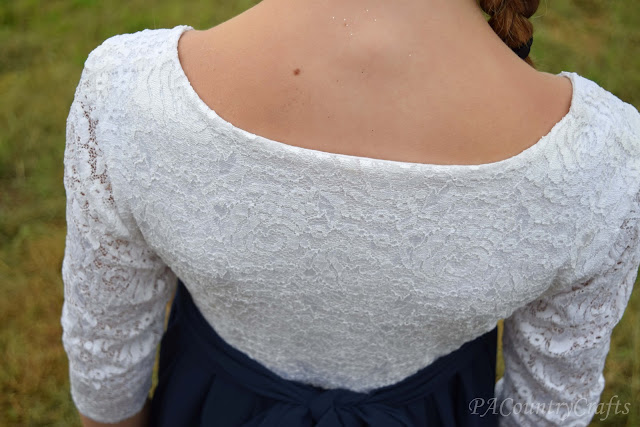
Isabelle drew me a picture of the dress she wanted. The sleeves were such an issue of contention between us. I didn't want to make long, 3/4 length sleeves from sheer lace. I really don't like to do sleeves. I ended up making the top out of some stretch lace from a friend and an old white T shirt.
I used the
to create the bodice.
It was actually very easy!
The pattern is on sale right now. I know, I usually talk about how I hate patterns, but
has so many variations and it is so versatile that it is worth it. I am not being compensated in any way for this endorsement.
Directions were included for a lace overlay version, which is mostly what I used. I just altered it to let the sleeves unlined. I hemmed the sleeves by hand sewing them.
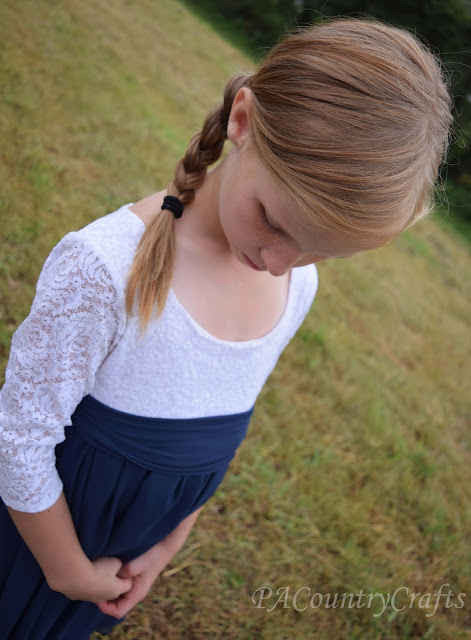
There was no hemming required around the neckline because of the lining.
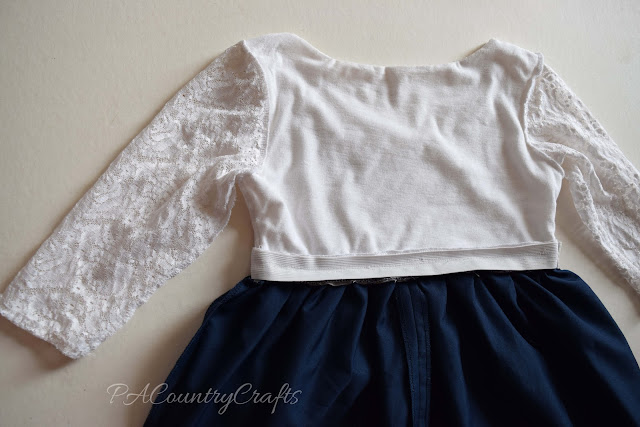
The trick to this dress was attaching the bodice to the skirt. I wanted to maintain the stretch of the fabrics so that it would easily slip over her head. So, I got some 1" elastic from my stash, sewed it in a loop and made Isabelle try the loop on to be sure the elastic would stretch enough to get the dress on. Then, I sewed each piece -top and bottom- to the elastic. Here is what the inside of the dress looks like.
One of the shoulder straps from the bridesmaid dress was converted to a sash to tie around the waist.
Now I have one less bridesmaid dress in my closet and my daughter has a lovely dress! Win win!

I used more of the bridesmaid dress on the next Easter dress I made, but we haven't had a "real" photo shoot yet. Right now I am super busy canning tomatoes and chasing the last bit of summer. So, when I get around to it I will show you that one, too. :)
Sewing, crafts, tutorials, recipes, and a little look at our life in the country - raising half a dozen children.

Hi! Thanks so much for stopping by! My name is Lindsay and on this blog you will find sewing, crafts, decorating, recipes, and tutorials with a little bit of honesty and encouragement.