Valentine's Day Home Decor

Please don't think I am actually early for something.

These are actually pics of my Valentine's Day decor from last year. We did some renovating last year shortly after I took these pictures and I haven't found a new spot to decorate yet.

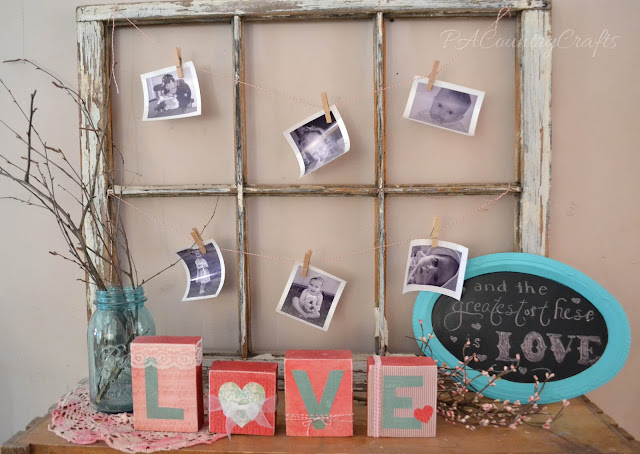
I love my old barn window frame and I always have it decorated with some of my favorite black and white photographs of each of the kids. They have been hanging around for a few years now and are starting to curl up.  I just used red baker's twine and mini clothespins to hang them.

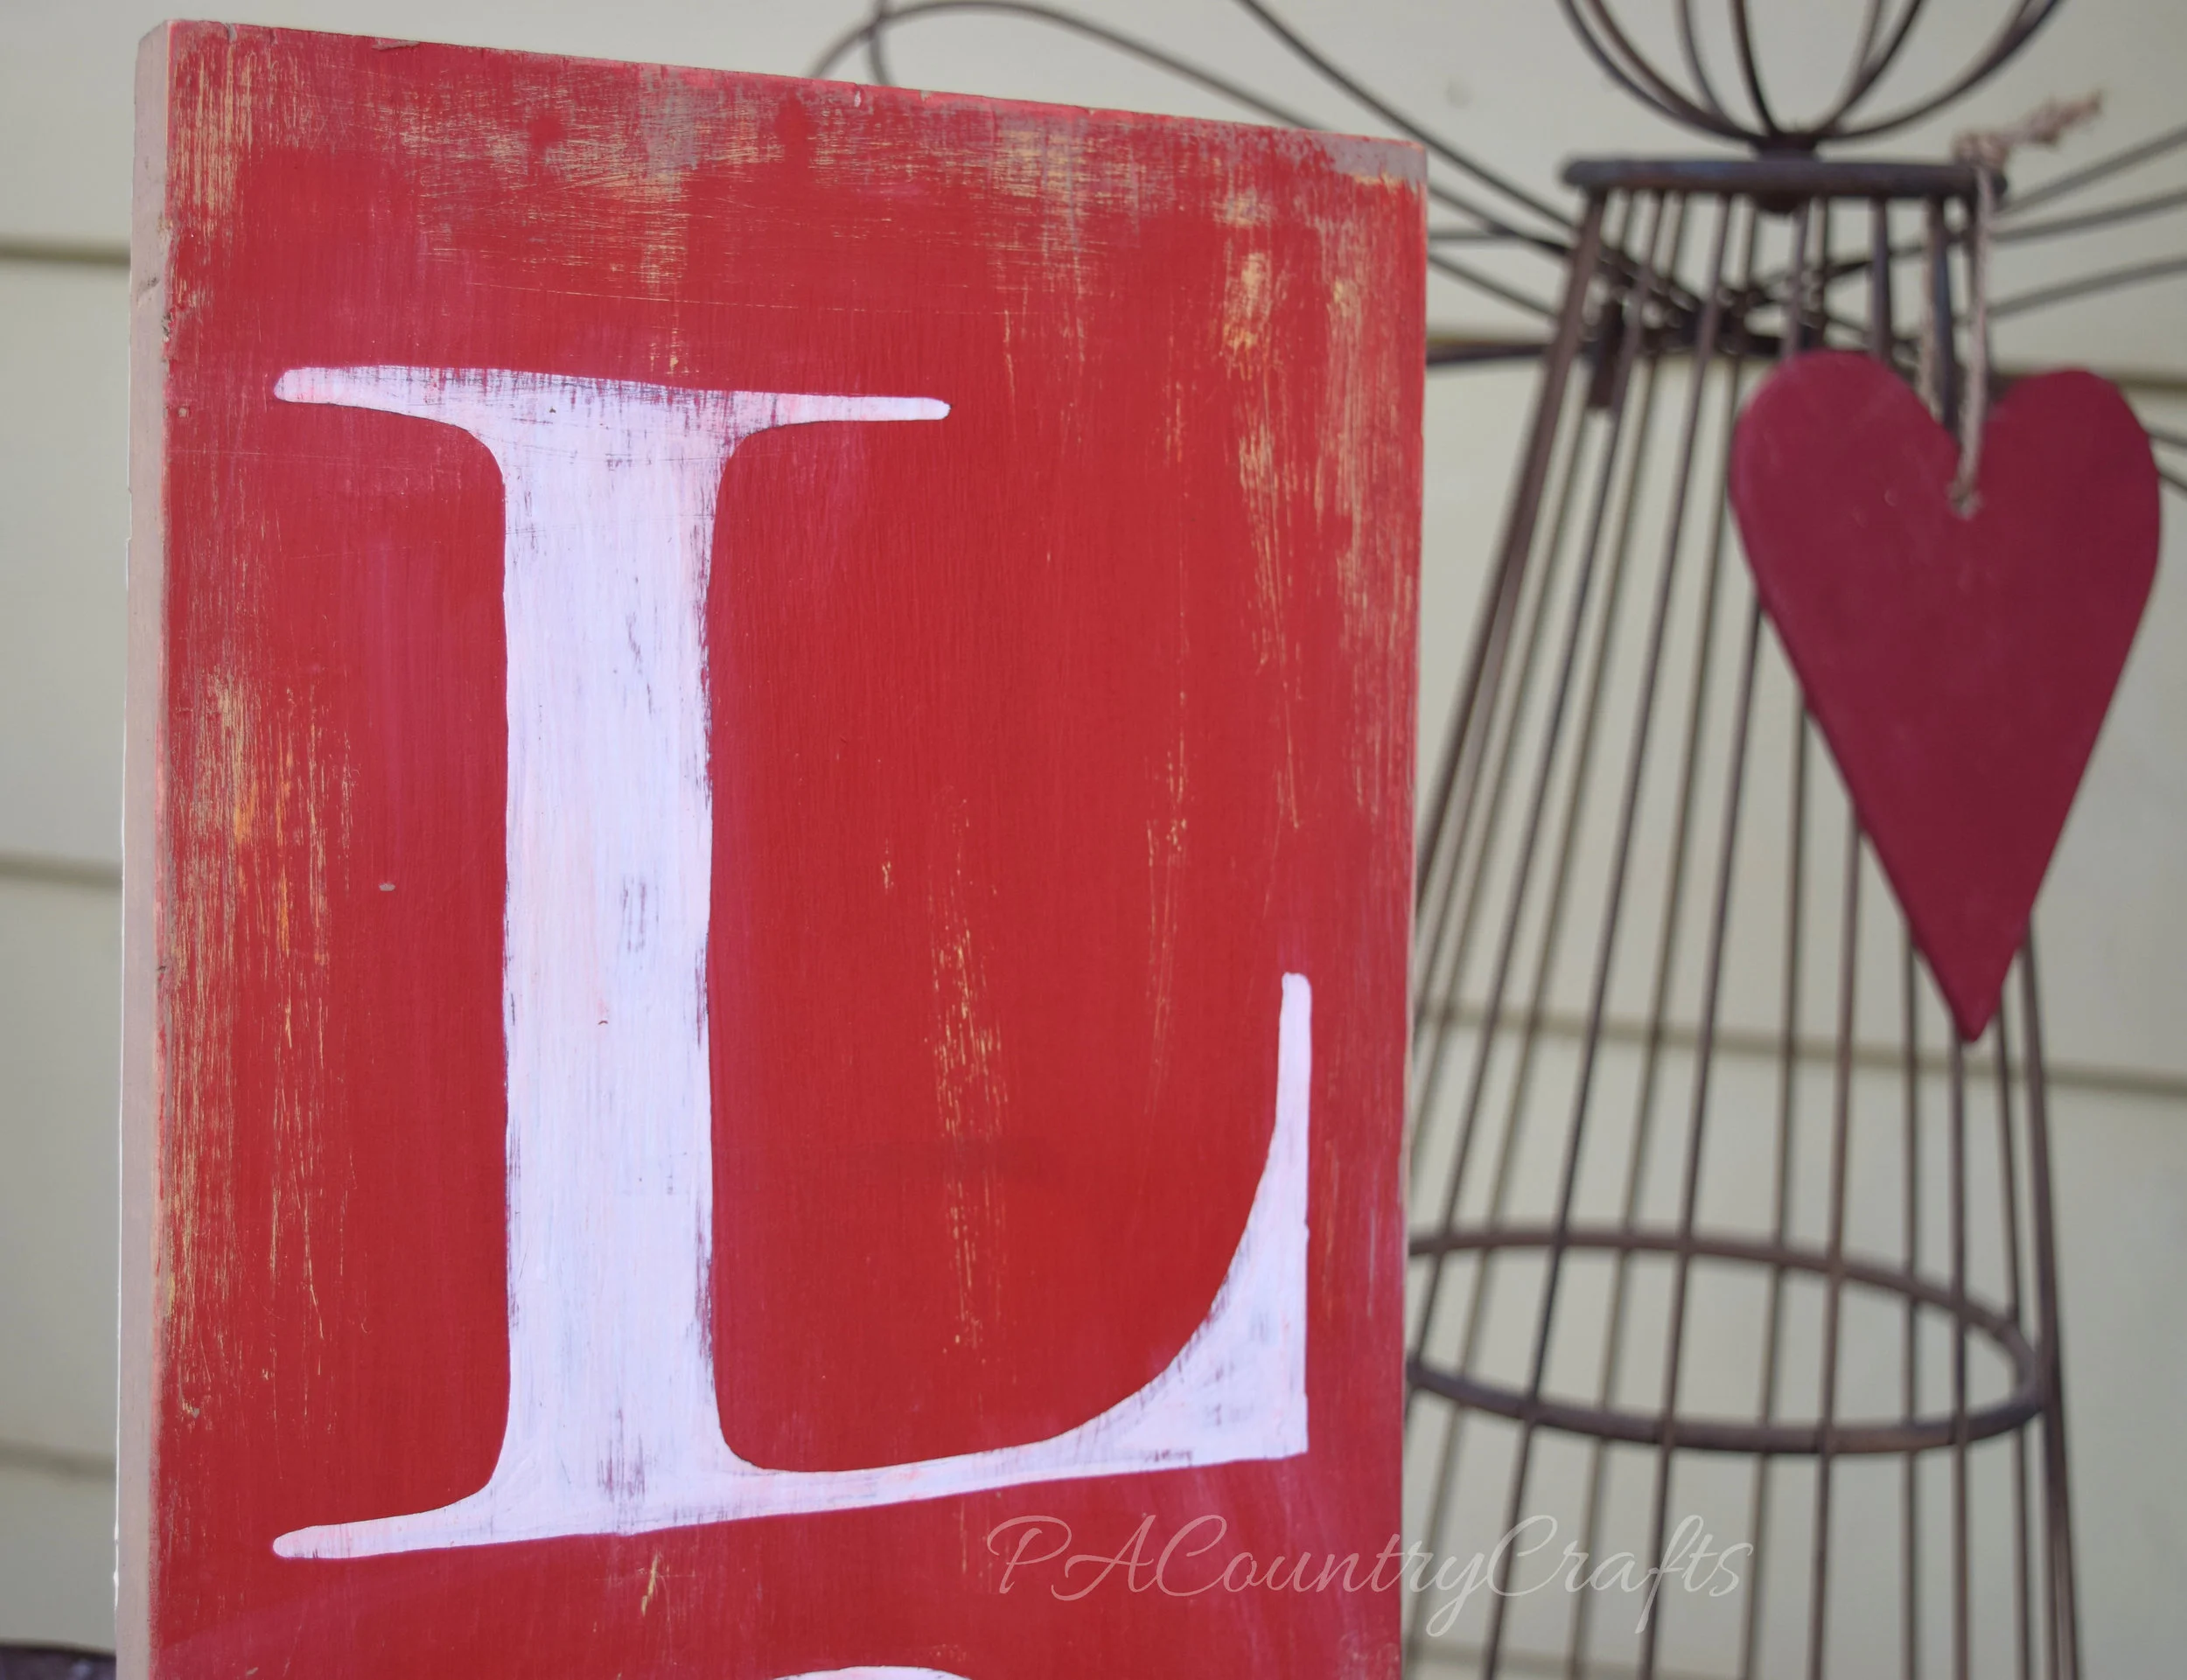
I made these LOVE blocks with some scrapbook paper and trims mod podged onto 2 x 4 scraps.

I made the tray, too. It is a metal serving tray from Dollar Tree with aqua paint on the edges and chalkboard paint in the center. The paint chips easily, so if you try this, be careful!

Last, the girls and I made this cute wreath for the front door. Red glitter paint was used to freezer paper stencil hearts onto burlap. I cut them into triangles and used jute to hang them across a grapevine wreath I already had. 

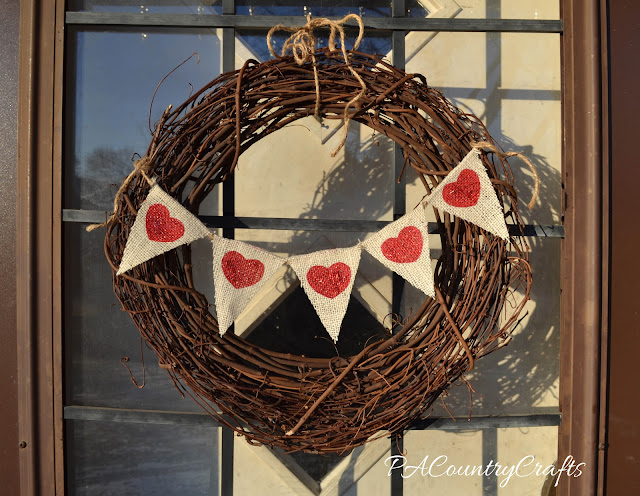
I love the pops of color these decorations add to the cold, winter months. The $1 tray was my only expense, too. I need to figure out where I am decorating this year because it has been so dreary and I could definitely use something cheerful around the house! 

Do you decorate for Valentine's Day?

Finish-A-Long Goals Q1

sampler2Bdoll2Bquilts.jpg

I have been proudly showing off all of the things I have actually finished lately, but for each one, there is probably 2 things that are unfinished and 10 things in the grand ideas stage. That is how it is for me in this stage of life. One day I will have lots of time to sew, but that day is not today.

However, there are some things that my girls are waiting on, and I want to get them done before they grow up any more than they already have. It would be nice if I could just hit the pause button on that growing stuff while I get some stuff caught up around here, but I can't.

My youngest is almost 2 1/2 and her baby quilt is still not finished. I actually made it larger because I know myself better than that. I want to quilt the top by hand and that will be a great project for winter- snuggling under a warm quilt on cold days!

My 4yo is waiting on a new apron. She has been using her sister's old one, but that one is getting small and is ready to be passed down to the youngest. She wants to match my apron, so I will share pics of both when I get it done.

Last year, my 7yo got a doll bunk bed for Christmas and I let her choose fabric for the sheets and pillowcases. I am also making two sampler block quilts to match and I want to get those finished up, too.

I am linking up with the 2016 Finish-A-Long so that hopefully I will be a bit more motivated to get these things done! I have a lot more unfinished projects, but I am just focusing on these three for now!

Shirt and Suspender Memory Pillow Covers

bottom2Bof2Bsuspender2Bshirt2Bpillow.jpg

I was asked to make these special pillow covers in memory of the recipients' loved one who had recently passed away. He was known for wearing these button down shirts and patriotic suspenders.

They were fairly easy to make. I had to iron all of the shirts really well, then slip my rotary cutting mat inside the shirt. Being careful of the placement of the buttons and pocket, I cut out a 16 1/2"square. I then cut another square out of the back of the shirt. I made loops out of navy bias tape that I had sewn together and sewed those to the bottom of the shirt panel.

Then, I just sewed the front and back all the way around. I serged the entire edge for durability. It was easy to use the button front to insert the pillow form. Last, I just hooked on the suspenders. It really was not too hard. I actually made six of these pillows, but just had Mom snap these pics of one of them on her phone.

A picture and a poem were placed in the pockets. I think this was a lovely idea, and I can't take credit for that part. I was honored to be a part of something special to make this Christmas a little nicer for the family.

Link Parties where I sometimes hang out...

Sew Can Do

,

 Monday Funday,

Motivate Me Monday

,

 Inspiration Monday,

Take a Look Tuesday

Naptime Creations

,

 The Gathering Spot

Carolyn's Homework

The Winthrop Chronicles

,

 Handmade Tuesdays

,

Your Whims Wednesday,

Weekly Homemaking Party

,

Create It Thursday

Treasure Hunt Thursday

Thursday Favorite Things, 

Wildly Original

Thriving on Thursday,

Grace at Home,

The 36th Party

Freedom Fridays

Feathered Nest Friday

Simple and Sweet Fridays

,

 Craft Frenzy Friday

Think Pink Sunday

, and 

Threading Your Way

Barn Sale Sign

barn2Bsale2Bsign.jpg

The biggest project that I made this Christmas was a custom made "BARN SALE" sign. It is for someone who sells antiques, and I really wanted this to look authentically worn and aged. For real... these pictures don't do it justice. I was super happy with how it turned out!

My husband put three, 36" long, 1 x 6 boards together with strips on the back to hold it together. This sign is HUGE! It is a "pallet" effect, but with solid, better quality wood that will last a long time.

The layers underneath contain mustard yellow and robin's egg blue- both very "vintage" paint colors. The background is several layers of barn red paint. The letters are white, but I did them with about four coats of paint using a tiny brush. It is hard to get a crisp, white color over a dark background and I didn't want thick brush lines. I also used the little paintbrush to give the letters a black shadow and it really made it pop!

It was difficult to find hangers that were not shiny and new, so we ended up using these fun, decorative, gate hinges. Flat, black, tractor paint was used to take the gloss away and the end hole was drilled out a little bigger to make it possible to use rope to hang it up.

The lettering isn't perfect, but it is authentic and this piece took a lot of work! 

Thank you to my sister for modeling this piece. :)
Link Parties where I sometimes hang out...

2015 Year in Review

ana2Bwhite2Bfarmhouse2Btwin2Bbeds.jpg

Until halfway through 2015 I was still on a blogging break. I came back so that I could share tutorials and tips for the peasant dresses that we make for charity.

I also did a doll sized version of the teen dress and posted a free pattern.

Of course, I made Easter dresses for my girls this year, although photographing and blogging about them was quite delayed. I did some upcycling and kept everything in a navy and white color scheme.


The girls got new dresses for the 4th of July again this year. They were peasant dresses like we make for charity, but with added bows.

In other sewing, I did two quiet books...

The biggest project this year was the girls' bedroom. We did a collage wall using a lot of thrift store frames and my husband built them farmhouse twin beds.

Yeah, their room is not nearly that clean right now. I think we need to work on that. ;)
There were a lot of other projects that I didn't include here. It is good to reflect like this. Sometimes it feels like I don't get anything done around here- the cooking, cleaning, and laundry all need done again. It is nice to accomplish something permanent. In 2016, I will show you the rest of the Christmas crafts we made and I have some recipes and free patterns and tutorials still in draft mode. Yes, I am holding out on y'all. I also have a lot of projects that need to be finished, so I am hoping to get some of those finished. Yeah, I think I said that last year.
Happy New Year!!!

Scrapbook Paper Collage Canvas Art ~ Hippo and Tiger

tiger.jpg

The next Christmas gifts were these canvas art pieces my daughter and I made together for her to give to her friends. Since this is her thing, I am going to let her tell you about them while I go make breakfast...

~~~~~~~~~~~~~~~~~~~~~~~~~~~~~~~~~~~~~~~~~~~~~~~~~~~~~~~~

Hello! I'm Halley, and as my mom said above I will be telling you all about these "Art Pieces".

First of all, I want you to know these were easy to make, and are worth any trouble you go through to make them. We started off by finding an adorable template for the animal on Pinterest. We traced the pieces that we needed onto paper and cut them out. Of course we didn't want an all-white hippo or tiger, so we picked a patterned  piece of paper for both the body and body pieces. (We used scrapbook paper, but you can use anything.) 

We did a collage for the background to make the animals really pop! I suppose it would work with a single piece of paper, but it definitely would not be as cute.We picked 3 pieces of scrapbook paper that  I think complement each other very nicely. We ripped them up into random shapes and used Modge Podge to make them stick to the canvas. We used the matte Mod Podge halfway through the hippo canvas then then decided that  the glossy would just give it "that look".
We again used Mod Podge to attach the actual hippo. Black buttons were hot glued on for eyes and nostrils. (It was very hard to let go of the hippo canvas, by the way!)  We just did all of these steps again for the tiger. The face and stripes were painted on with black paint. We thought we were done, but then we realized there were staples on the side. That was an easy fix- we just hot glued coordinating grosgrain ribbon onto the sides for a clever and cute way to hide the staples.  
Now, I know I'm not very good with instructions but I hope you can translate them and get results as good as ours, and possibly better! Overall this is pretty easy, and guaranteed to make the person who receives it VERY happy! 
Now, back to my oh-so-crafty mom!
~~~~~~~~~~~~~~~~~~~~~~~~~~~~~~~~~~~~~~~~~~~~~~~~~~~~~~~
Thank you, Halley! I think these turned out really cute! One of her friends LOVES hippos and the other is soon getting her own jungle themed bathroom. These would be really cute for a nursery, but they are also a good kids craft, too. Besides scrapbook paper, you can use tissue paper or fabric. A friend of mine made me one of these and she used rubber stamps to add more dimension and pattern to the background. There really are a lot of possibilities. I was just glad that this was something she could make for her friends.
Link Parties where I sometimes hang out...

Jelly of the Month Club Christmas Gift Idea

jelly2Bof2Bthe2Bmonth2Bclub2Bgift2Bidea.jpg

My family likes to do some homemade gifts and food is usually a good option because then the guys are happy, too. This year, for a few people, I decided to up my game a bit and do a "Jelly of the Month Club" with 12 assorted jams and jellies.

The ideal game plan was to do them throughout the year and eliminate stress in December. Well, I did half of them and then life happened. Things got busy and jam making was lower on my priorities list. I threw the last 6 together at the last minute, but WOW did my house smell good!  They are just the 4oz. jars, because that way, if they didn't like it, there was only a little. I hope that doesn't happen, though.

I love the assortment of colors and textures!I printed out little certificates, tied baker's twine around them, and printed out labels (from HERE).

Here is what I made (recipes linked as available):

Sour Cherry Jam
Gingerbread Jelly
Blackberry Jam
Blueberry Preserves
Orange Marmalade- I didn't really follow this- I zested the peels and didn't leave many of the thicker edges in. I hear they are good for you, but I just didn't want to do it.
Strawberry Lemon Marmalade
Cranberry Orange Pear Jam
Apple Butter
Caramel Spice Pear Butter
Apple Pie Jam
Carrot Cake Jam
Christmas Jam

Because it drives me crazy that the labels weren't lined up in the first picture...

I think I might try this again next year. It was fun to try out some new recipes and, after all, it is the gift that keeps on giving... the whole year! ;)

Link Parties where I sometimes hang out...