Boutique Style Peasant Dress (and Ribbon & Pearls Necklace)

backofdress.jpg
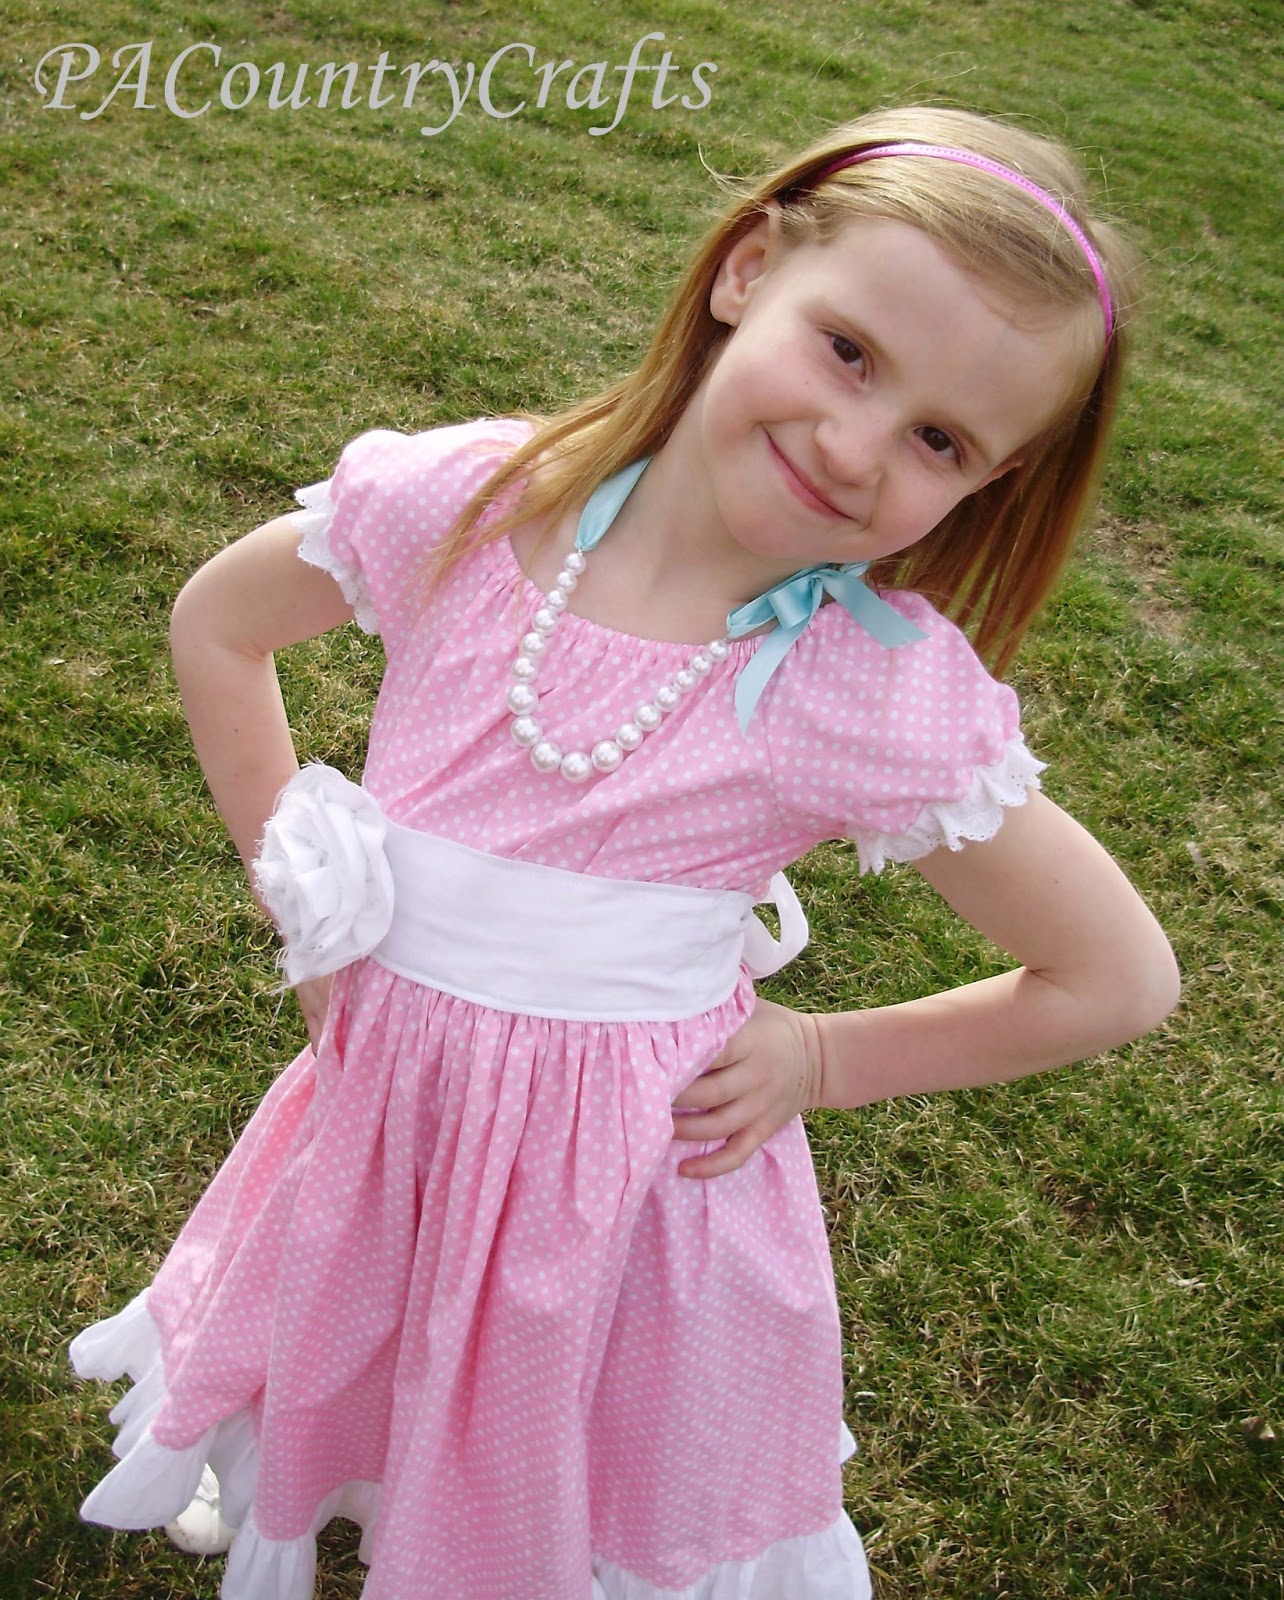
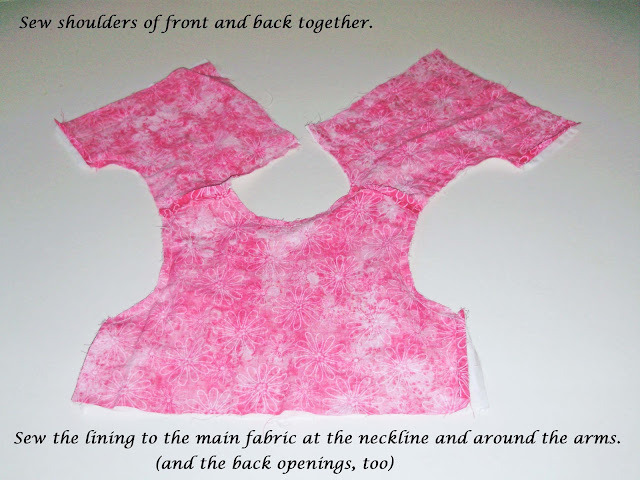
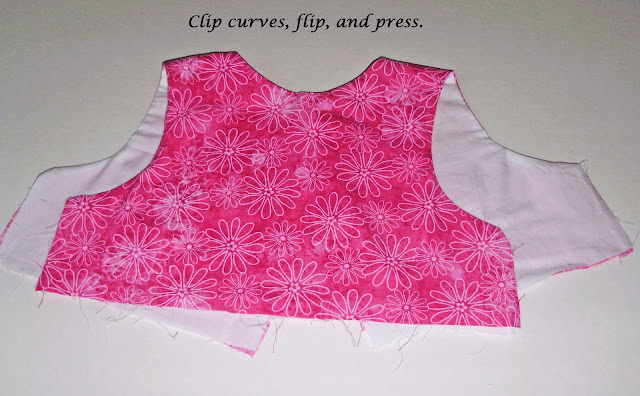
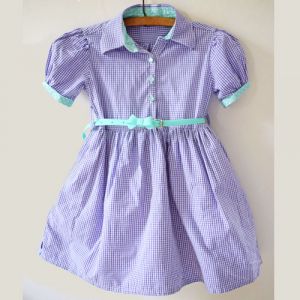
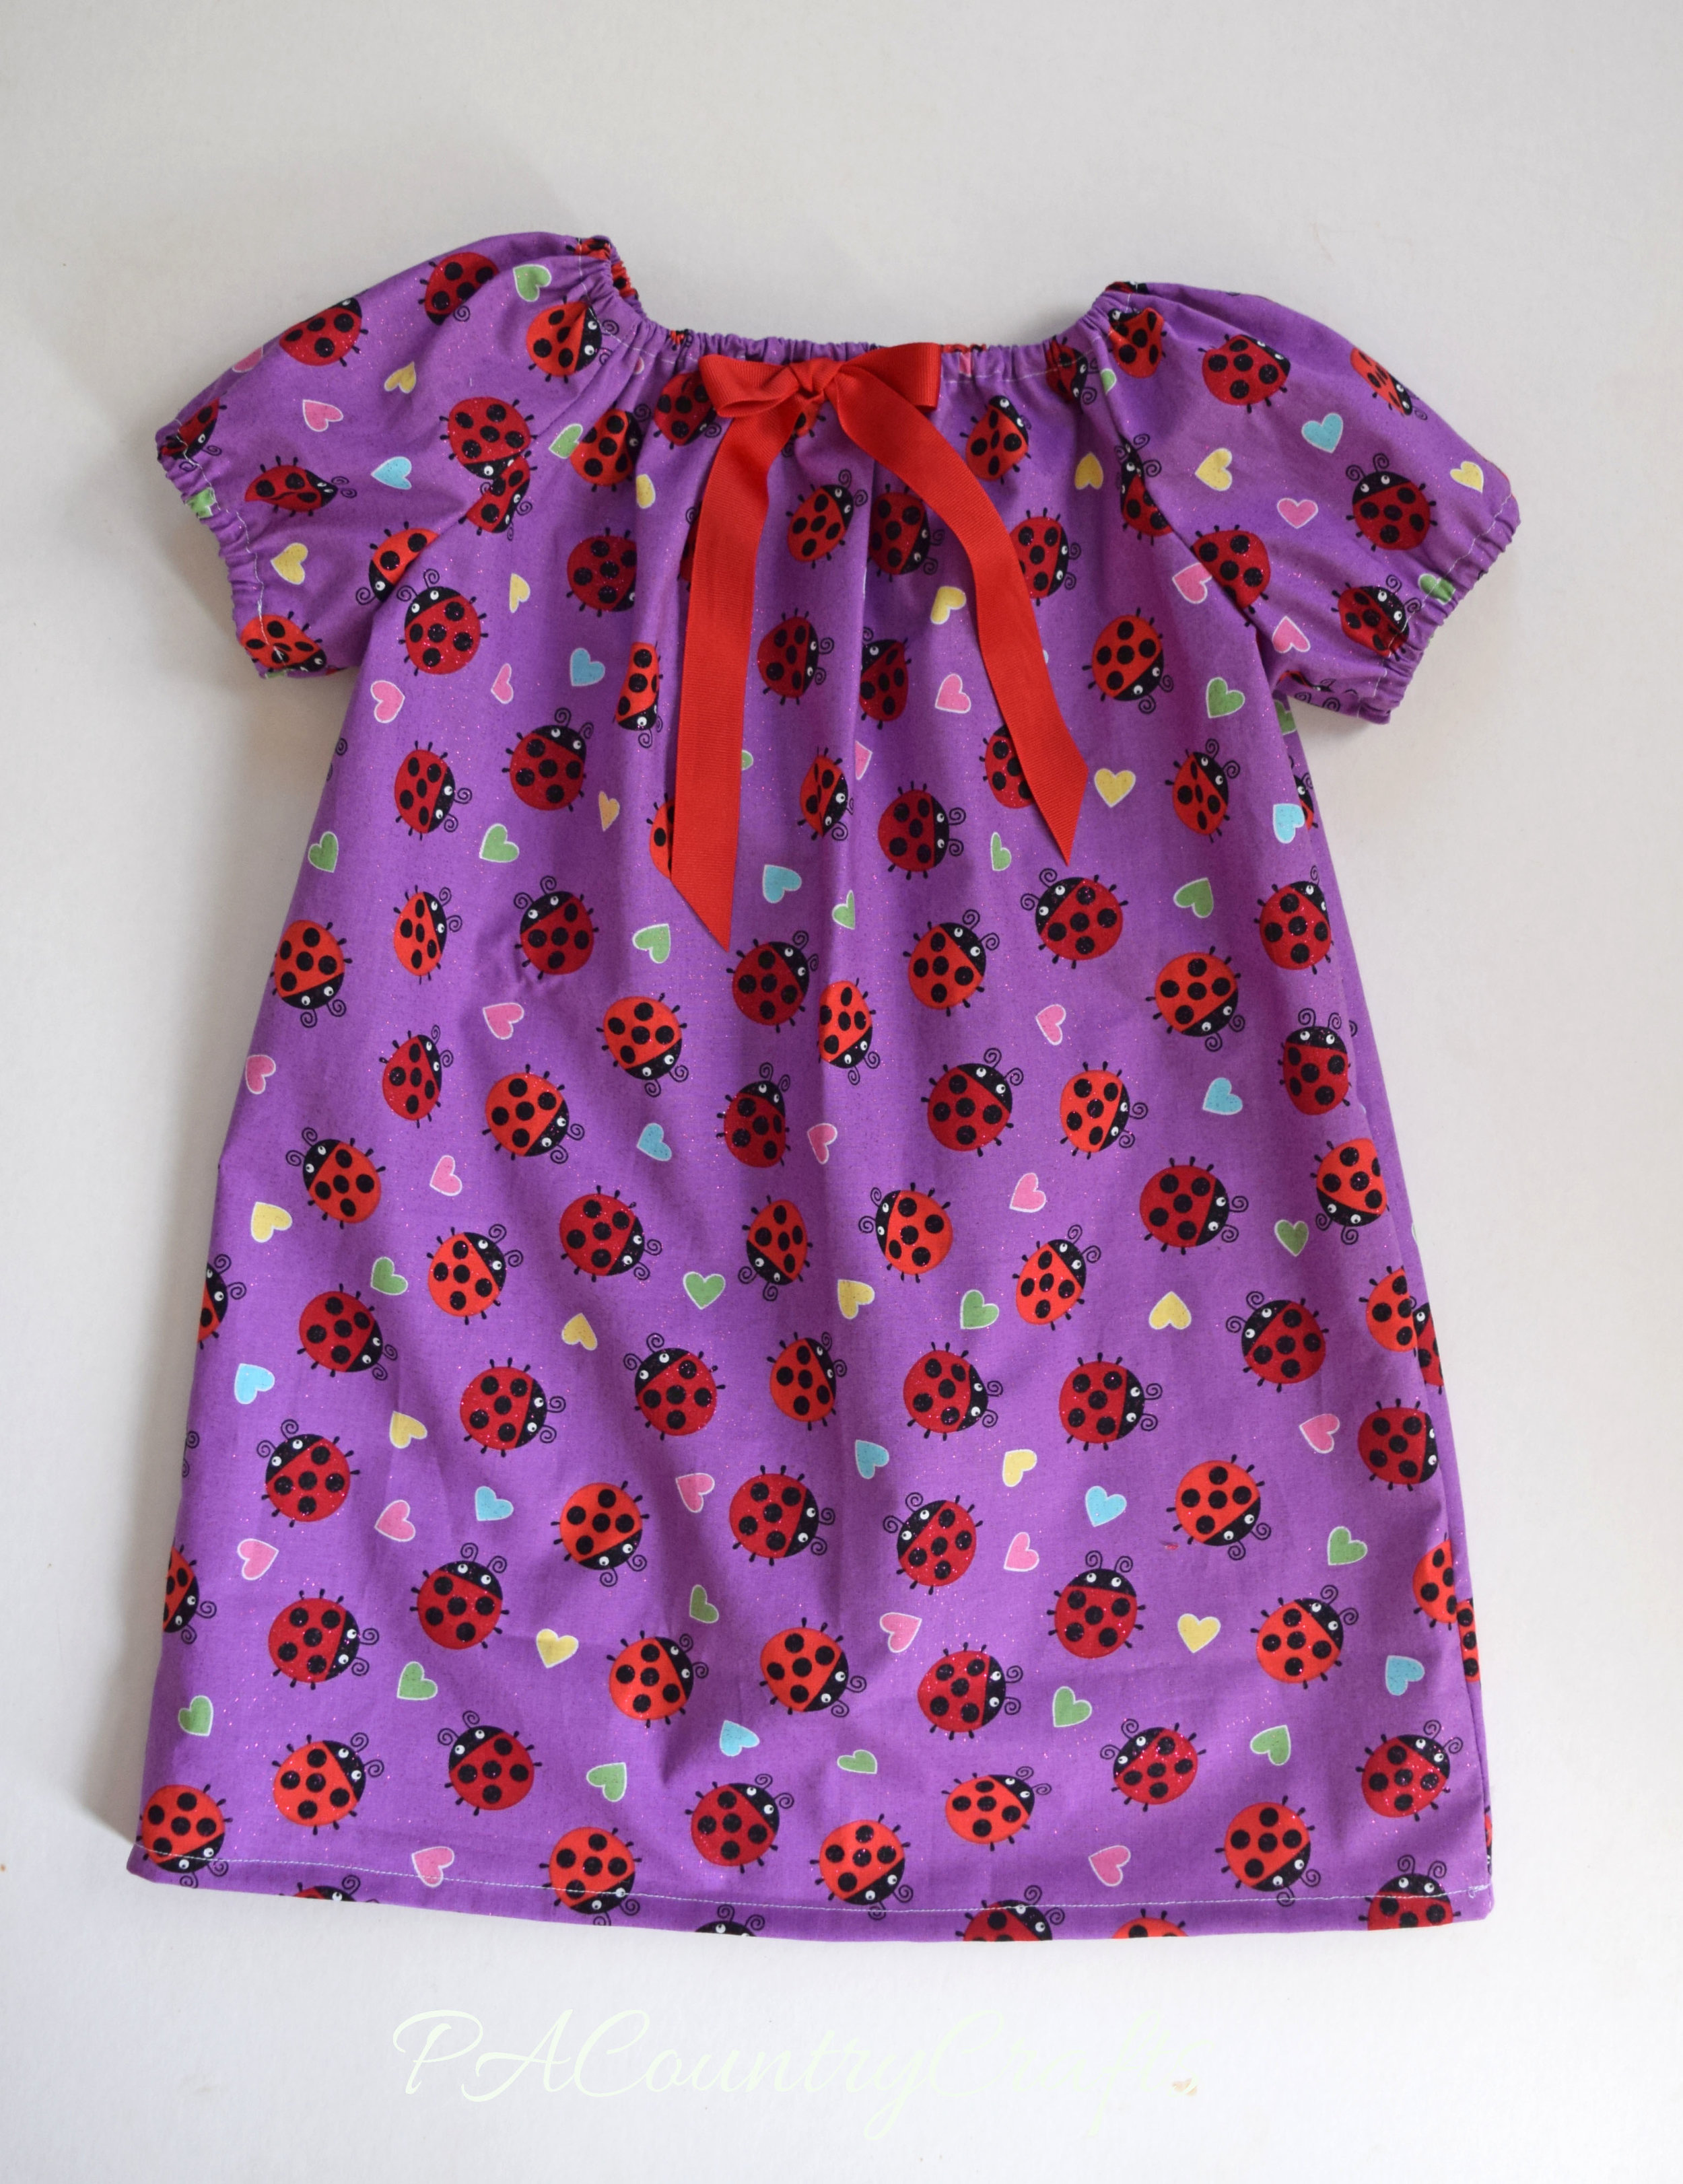
This dress was simple to make... in theory. :)   I didn't take pics of the whole process since I made changes along the way, but I will explain it a little bit here. I made the bodice in a peasant dress style (doesn't get too much easier than that!)
I trimmed the sleeves in eyelet lace after my first idea didn't work out. I had JUST enough on hand- only an inch to spare!
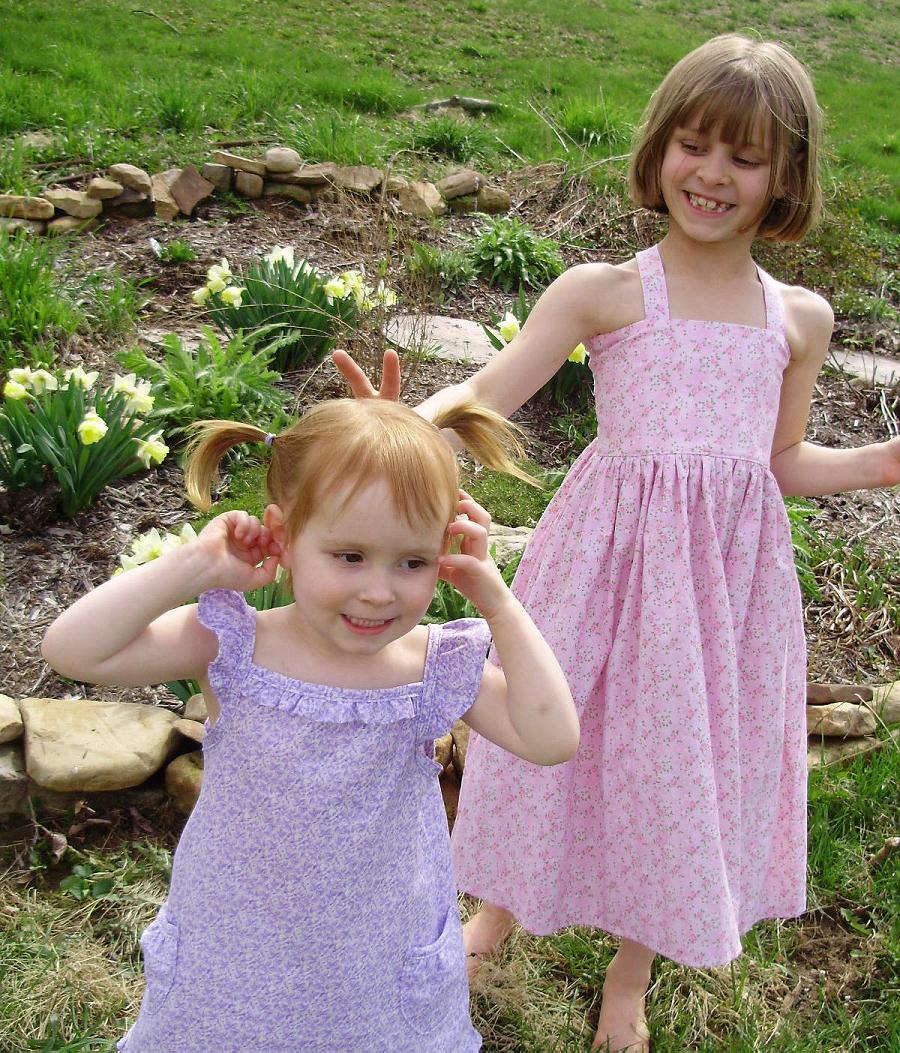
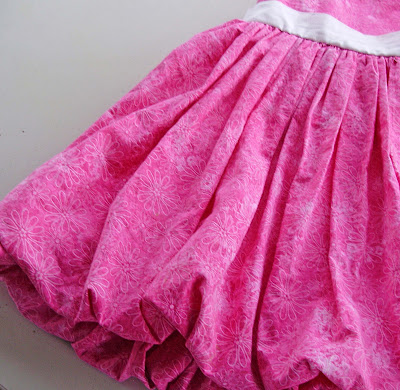
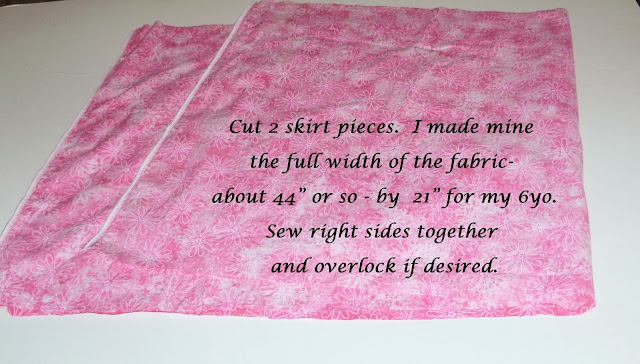
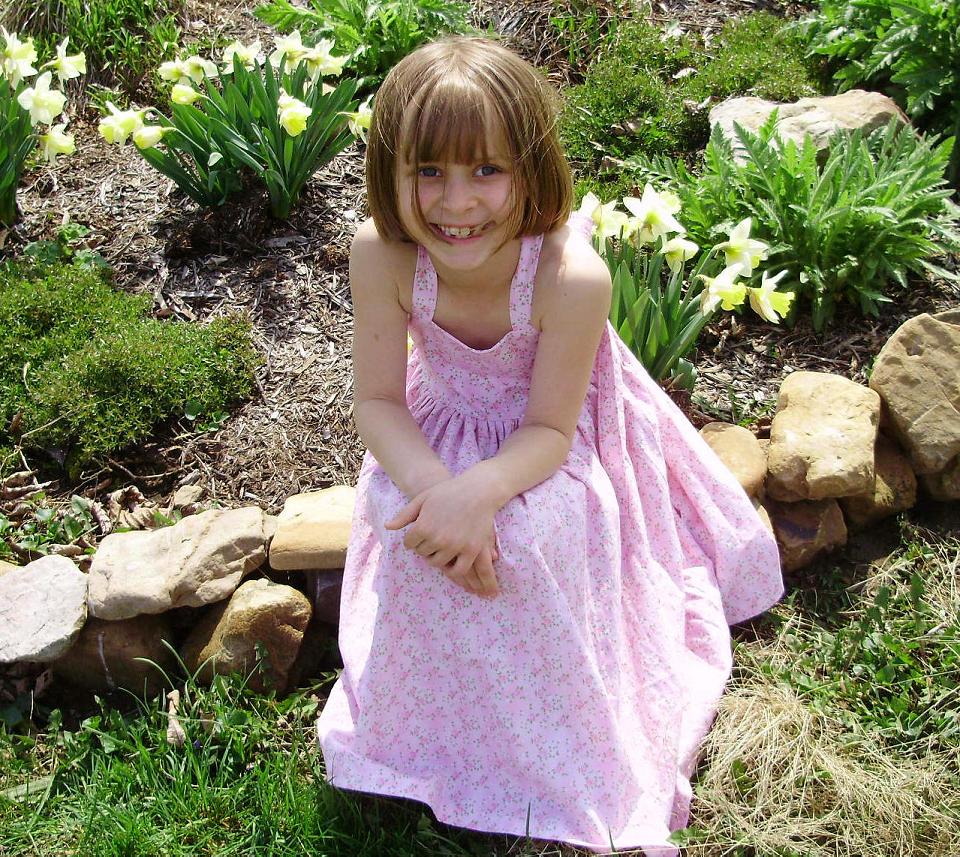
She wanted to be able to twirl around like here sister, so I made the skirt extra full. It is two full widths of fabric- that is a lot of gathering! But, it twirls...
...and this one is losing her shoe. I really need to work with these girls on their twirling.
So, two full widths of fabric to make the skirt meant that the ruffle was FOUR full widths of fabric! I gathered all of that by hand. It took FOR. EV. ER. I was going to make two ruffles at the bottom, but ran out of ambition after the first one. Oh, and I used pink thread to hem the ruffle for contrast. When I get a new sewing machine with fancy stitches I will try some of that on my hems for fun.
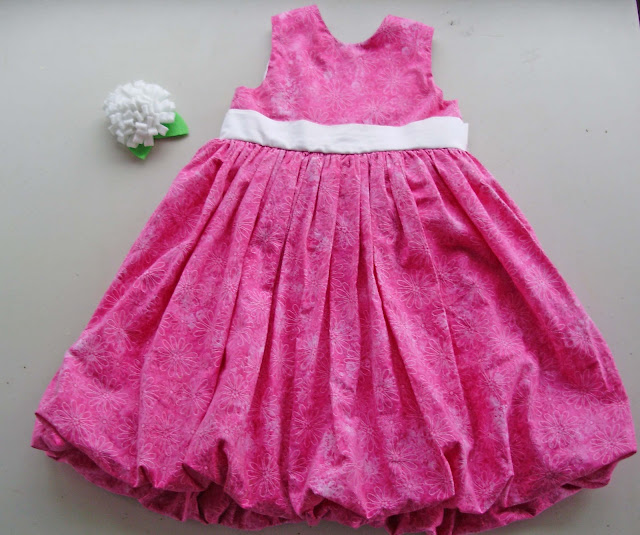
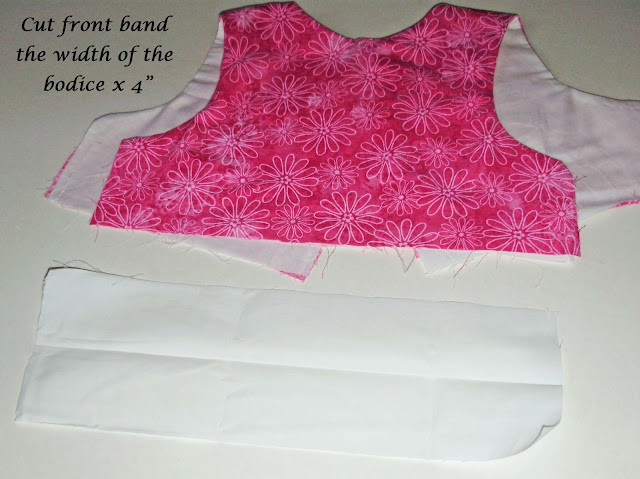
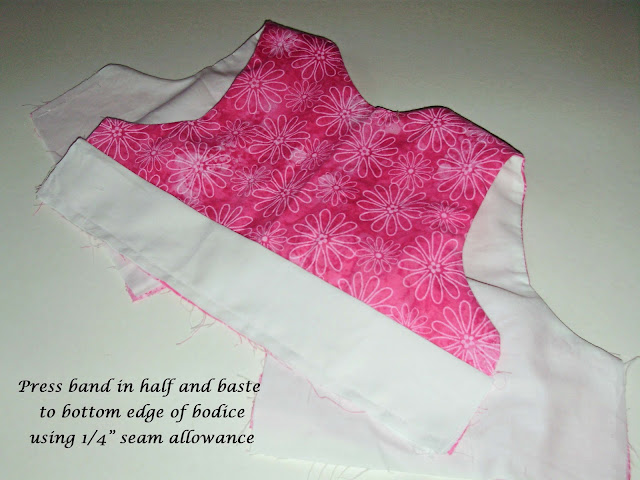
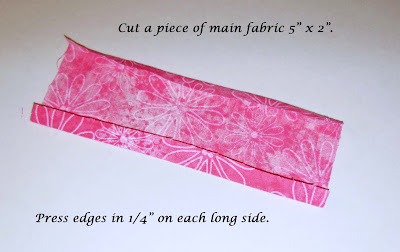
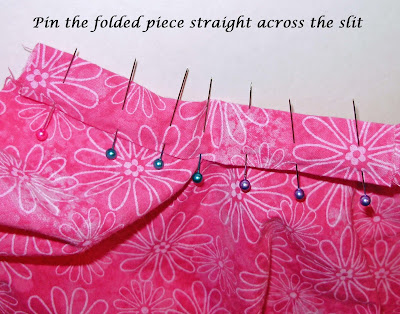
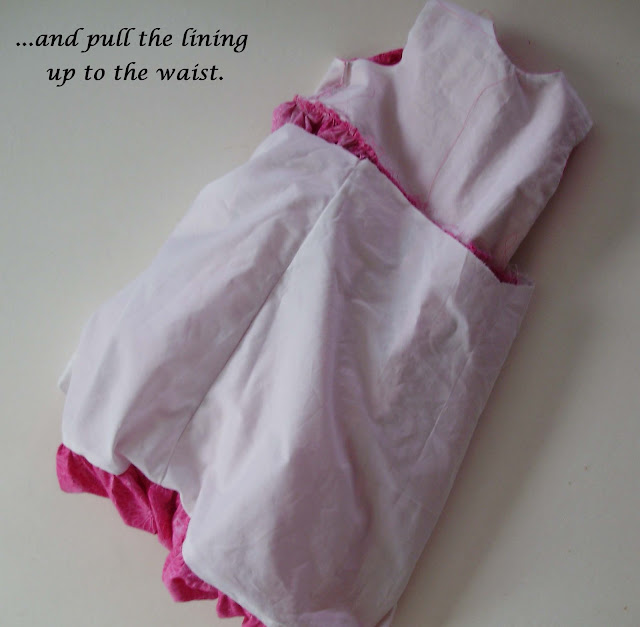
So, to pull all of that fabric from the loose-fitting peasant top together around the waist I added a contrasting white sash. It is sewn to the bodice with the topstitching at the top and bottom across the front of the dress. Then it doesn't wiggle around and pulls the bodice in more evenly. It just ties in the back so that it is still loose enough to be easy to put on and take off.
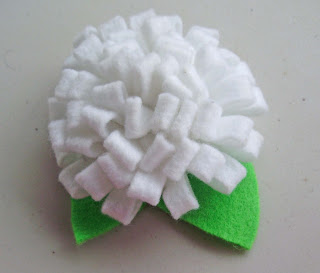
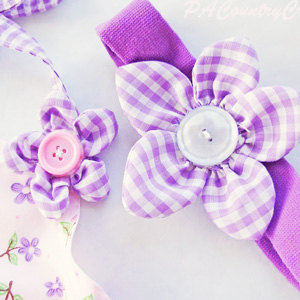
To really make it "pop" I added a BIG, frayed-edge fabric flower. I used THIS tutorial from Girl Inspired. It is backed in felt and pinned to the dress so I can still throw the dress in the washing machine.
I thought the dress still needed a little something and talked about it with my sister. She mentioned something about beads and suddenly a light bulb and a thought cloud with a ribbon pearl necklace were floating above my head. I was going to use pink or white ribbon, but didn't have enough on hand. The aqua gives it a nice contrast, though!
It was super easy to make and I already had the beads from something I was going to make years ago that I never got around to doing.
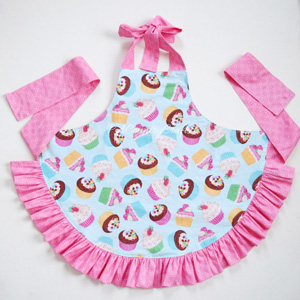
So, put it all together and this is what you get:

Two more Easter dresses to go! Stay tuned...

UPDATE: If you would like to see step-by-step pictures of how I made this dress, you can click HERE to see the matching doll-sized version. The process is exactly the same!

Linking up at:  Take-a-Look TuesdayYou InspiredShow Off Your Stuff Party, Make It Wear It Thursday, and Threading Your Way.

Sneak Peek at the First Easter Dress!

P3222199.jpg

I am busy sewing up a storm over here! One Easter dress is totally finished and two more are started.  The other one is still just a sketch and some random scribblings. I usually like to wait until they are all finished, but I am so excited about this one and I also wanted to audition for The Sew Off, so I only have a few hours to spare before auditions close. :)

I designed this dress for my oldest daughter from various elements of other dresses I have seen and liked.  I am still thinking of a name for it, too.  I will give the full tutorial later, but in the mean time, here are some of her modeling shots.

It has a cross-front bodice, just because I have never made one and wanted to try it.  I also fell in love with the idea of a wide band overlaid with crochet lace trim.

What little girls wouldn't love a pretty laced up back?

The challenge was getting the lacing to work with a full circle skirt.  She specifically asked for one that twirled, which meant that I had to make a dash to the store for more fabric last night.


Oh, but it twirls! I don't know how people get such cute pictures of their little girls twirling in circle skirts.  Then again, my girls are half falling over when they try to twirl so maybe it isn't all the photography.  I am going to have to make them practice twirling.


Hmmm... So if you can think of a good name for this one, I would love to hear your ideas!  
UPDATE: Combining a few of the suggestions, I came up with the Twirly Lace Dress and posted the tutorial HERE. Thanks for all of your help!!

I am also linking up at GirlInspired (love her blog, for obvious reasons!) and maybe some other places on my Link Parties page.  Then, it is back to sewing! Stay tuned...

Halley's Plan B Dress

ruffle.jpg
Halley's dress was not what I intended to make.  It was supposed to have a yoke across the neck and ties on one side, but I just could not get it to lay flat, so I ended up ripping it apart and going to Plan B!  It still has the big bow on one shoulder like she wanted, so it works. 
I also found a way to incorporate some extra white into the dress so that it would coordinate with her sisters' dresses. 
Here is a little tutorial of how I saved the day made it...
(Everything has a 3/8" seam allowance.)
I started with the main dress piece that I salvaged from the first idea- here are the top measurements (my daughter is a size 8).
It is cut in an a-line shape to be 24" high and 24" wide at the bottom.  You will need to cut two of the main fabric and two of the lining.  I already had the sides sewed together since I messed up Plan A, but you can do this before or after you sew the bands on the top... whatever.
To incorporate more white, I cut top bands 2" by 7" - you need four of them.
The shoulder strap is made from a yellow piece 4 3/4" by 9" - sew long sides together, flip, press, and topstitch edges.
To make the ties for the CUTE bow on the other shoulder, take strips measuring 4 3/4" wide by 28" long, fold in half lengthwise, sew, flip, and topstitch the edges.  I sewed across the bottoms of mine on an angle instead of straight across cause the "pointiness" just looked better for this style.
I gathered the tops and pinned a band to each one.
Sew the band on and then turn the lining inside out.  Stick the outside into the lining and put the right sides together like this...

Pin all the way around the top, lining everything up...

Sew in place.  If you flip it, now it should look like this...

But, wait!  We need the straps!  You probably could have put some of them in before sewing, but I figured it was enough to worry about getting everything lined up.  So, turned it inside out and seam ripped a little to put the strap and a tie in like so...

I tried the dress on her first to get the angles- you can do that or just estimate from this picture.
For the back side, I did the tie the same way, but the strap I just inserted from the right side.

Then I topstitched the back to hold it in place. (Don't look too close!  My totpstitching stinks!)

I added a ruffle at the bottom, too, for more length and more white to match the other dresses.  It is just a strip 6 inches by about 90 inches pressed in half, gathered, sewed on, and topstitched.  Kinda basic, but if you have any questions, let me know!

So, that is it!  Plan B Dress in a fraction of the time I struggled with the first idea.

I also used some scraps to make her a cute, rolled rosette fabric headband.  You can find tutorials on those everywhere... just do a search for it.

I hope this one is a lot more clear than yesterday's Bubble Dress Tutorial.  It is a totally different style. Just like my girls.
Well, that wraps up my Easter dress posts for this year... four dresses, four colors, four styles, four sweet girls!  Thanks so much for letting me show all of them off a bit! =)

Isabelle's Bubble Dress Tutorial

P4108231.jpg

As promised, I am showing you all how I made Isabelle's Easter dress.  I talked her into a bubble dress, but she chose the high bodice style with a highish waist and wide sash part herself.

And she picked the buttons out, too.

(Yes, it is missing one- I forgot the buttons when I used Mom's machine to make the holes and didn't listen to her when she said she thought the pack only had three buttons.  I'll add another one later.)

As soon as she saw the bubble skirt finished, she got so excited that I didn't even have to give her the bribe I had promised her to let me make it!

It was a lot of work, but I was really happy with the finished result.

I thought I would try to put together a tutorial of how I made this dress.  It was not super easy, so this isn't a beginner project.  In advance, I apologize if my pictures are not all that great-  I was sewing whenever I could get a spare minute over several days.  This is also long, and picture heavy, consider yourself warned...

As it says on the pattern pieces, for the front bodice cut one out of the main fabric and one out of the lining on the fold, and for the back cut two each out of the main fabric and the lining.

The raw edge is against the bottom, just to be clear.  You could topstitch the top of the band here if you wanted to.  I didn't feel like it.

I used a slightly different technique to make my ties, but this is how I should have done it (hence, no pictures of that step).

(Sew the right sides together at the sides- just to clarify.)

Now, moving on to the skirt...

This is a little tricky because obviously the slit does not want to open up straight... just do your best to make it work!

This crease will make it fold over and overlap flat like it is supposed to.  If it does not look perfect below this piece, it is not a really big deal because the skirt is so full and bubbly that you will not notice.

Now, let's make it bubble!  I was making this up as I went along.  You could cut the skirt out in three pieces (two for the back and one for the front), but I didn't think that far ahead. 

This is where I realized that it would probably have been better to cut the back in two pieces and make an extra seam, but it really doesn't matter.  Whatever...

TA DA!!! You are done!

She insisted on posing this way holding a tiny flower...

If anything is unclear, please let me know so that I can fix it!  Thanks!!!

One more quick shout-out to Jess at craftinessisnotoptional for this cute felt flower tutorial found HERE.  I used extra felt, so it is extra big, but I love how this turned out!

 One more dress left to show you!

Lydia's Easter Dress

P4108231.jpg
I was running out of time, so I again went over to craftinessisnotoptional for a quick rescue!  I used the tutorial she had just posted for the dress that she made her daughter for Easter (You can find it by clicking HERE!). 
I was going to make it sleeveless, but I gave up and just followed her directions.  I found that it was a little tricky under the arms,  but overall it went together pretty well.  And Lydia loves the sleeves!  She wanted to make sure she took her coat off when she wore the dress again at the doctor's office so that they could see her sleeves. =)
The night before Easter, I was unable to sleep after fixing button holes (I tried to do them on Mom's new machine since mine doesn't have an automatic feature and forgot to take the buttons- they were all too small). 
So, I was perusing around my pinterest board for hair accessory ideas and got sucked back into Jess's blog again.  I made these cute little felt flower clips to match (tutorial HERE).  The only difference was that I had to cut my own flowers out by hand.

So, thanks, Jess, for the big time save! =) 

This is her new picture smile.

She has no problem posing for pictures for me!
The spin-around model pic...

 So, tomorrow, I will (hopefully) be posting my own (before I ran out of time) tutorial for this cute bubble dress!

Grace's First Easter Dress

P4118329.jpg

Those Easter dresses were so much work that I am showing each one off in its own separate post and telling you all how I made them, hopefully getting some tutorials out on my original designs by the end of the week.  So, here we go- youngest to oldest...

For Grace, I made a simple sundress and a ruffle-butt diaper cover. 
I was crunched for time, so for the dress, I used a tutorial that I found over on Jess's blog, craftinessisnotoptional (so many great tutorials over there!!!)  You can see the tutorial HERE.  I did make a few changes, though.  I added an eyelet lace ruffle at the bottom and piping underneath the bodice.  It was my first time doing piping, so I knew it was a crazy idea for the day before Easter, but I LOVE the way it turned out.  It definitely makes the dress!
 

For the diaper cover I used THIS pattern, but I added ruffles, inspired by THIS tutorial.  I made some changes on the ruffles- the sides were hemmed in on a curve so that it doesn't look weird from the front, the bottom edges were hemmed instead if serged, and I had just enough lace leftover to make the top ruffle using that instead of the white fabric.

The white fabric for the lining and trims in all of the dresses came from a really nice white sheet I got at Target. 
OK... now for the proud-mama-show-off-pictures!!!


(Her finger is fine- she had a check-up that morning and needed a finger prick,
but the nurse matched the gauze to her dress!)
little peek at the ruffles
back of the dress
Here is her basket!  I let her pick the colors by crawling to the reed she liked. =

 Pretty cute for her first Easter!!! =)

In the Garden Twirly Easter Dress

easter2Bdresses2B20112B0592B252822529.jpg

My 7yo daughter was also very opinionated about her dress style. She wanted a "poofy" skirt and straps instead of sleeves (she said spaghetti straps and I said "NO"). So, I checked out my bookmarked list and found this tutorial. She totally approved! The straps are the minimum 1" wide allowed in the school dress code, so it should be OK to wear to school if she wants, and the skirt is two full widths of the fabric- so it is very "poofy."

I was really nervous to do the shirring because I had never tried it before and it is the very last step! I saw it done on Martha Stewart a few years ago and figured I could handle it. Luckily, it worked just fine.

Thanks for bearing with me as I showed off my girlies' Easter dresses the past few days! Happy Easter!!!