Ninja Turtle Baby Quilt

I finally finished it!  I started out with two yards of Teenage Mutant Ninja Turtle fabric that I had bought with the intention of making a quilt for my brother's first son.  That was years ago!  They weren't even engaged yet, but I was thinking ahead. :)  A little over 10 months ago, I finally got that nephew.  Then, I had to figure out what I was going to do with that fabric!
I hunted high and low for appropriate Ninja Turtle colors to match the fabric I already had.  These are the more recent movie version colors, and not the more traditional hues, so it was tough!
Then, I had to plan a quilt design.  Of course, I didn't follow that plan anyway, but it just sort of came together.
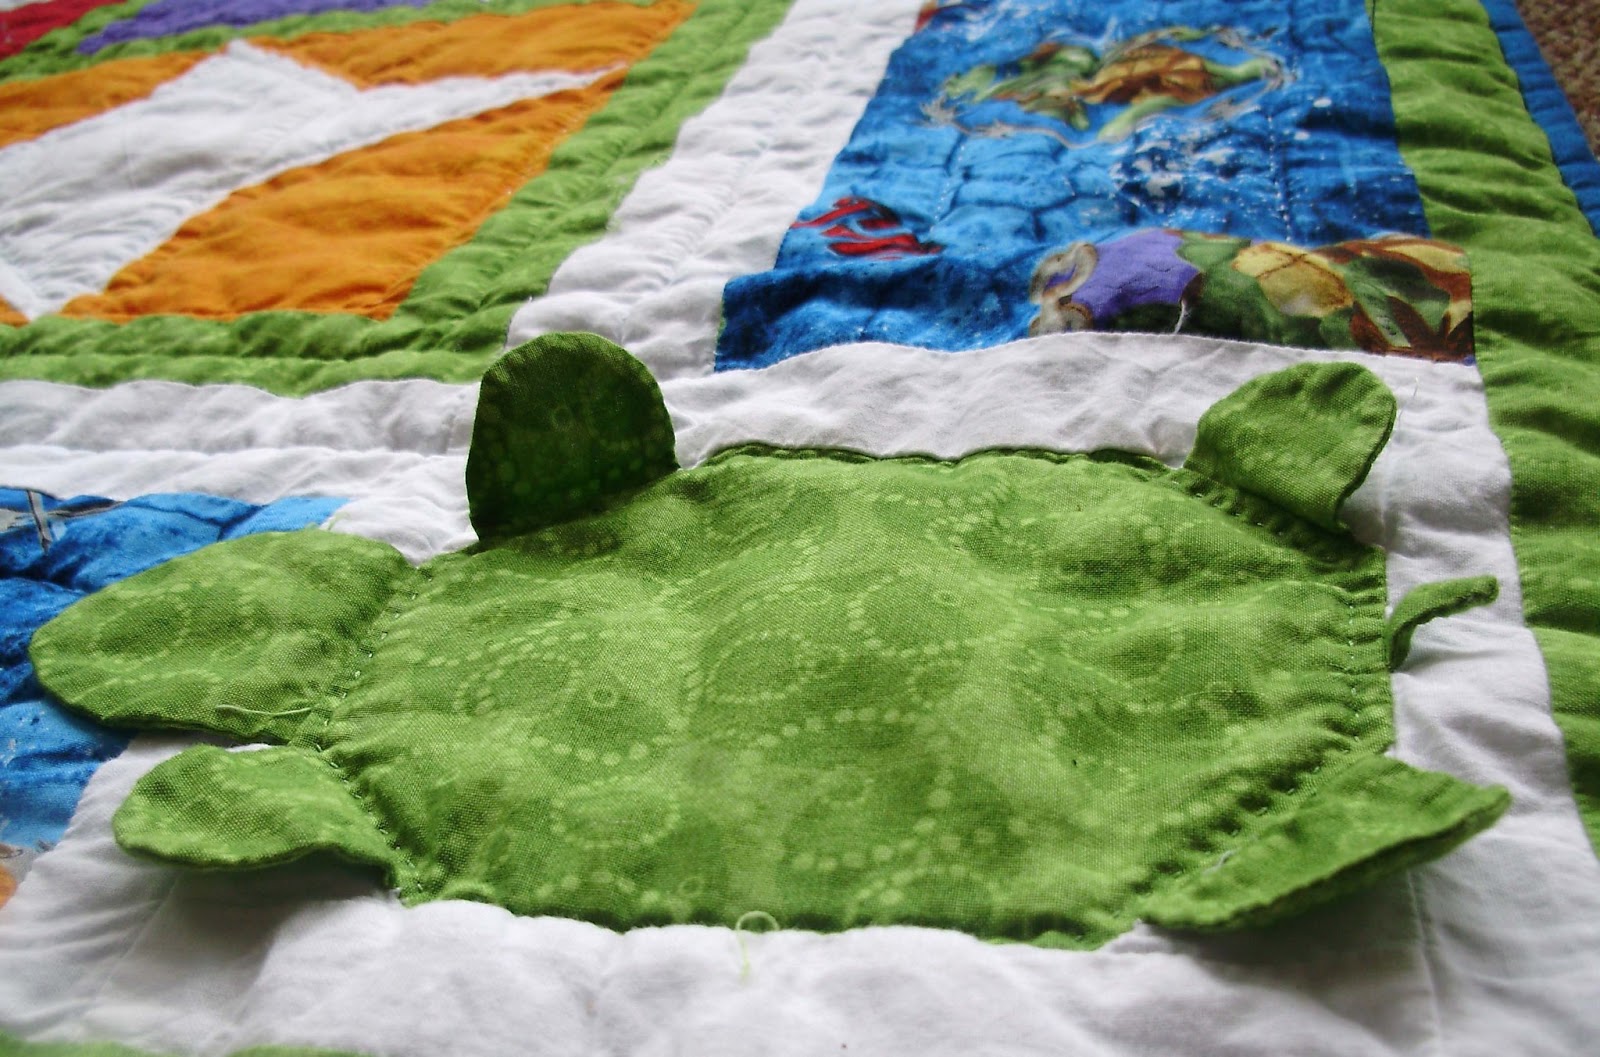
First, I made these adorable turtle blocks, thinking that the 3D effect of the feet, heads, and tails would make good chew toys.  Hey, he is teething right now, so I am just in time!
Then, I made the "ninja star" blocks.  They look like the paper "ninja stars" that my son likes to make, but this block is also called the "friendship star."  If you have ever seen the Teenage Mutant Ninja Turtles, you will understand just how fitting this is for them. :)
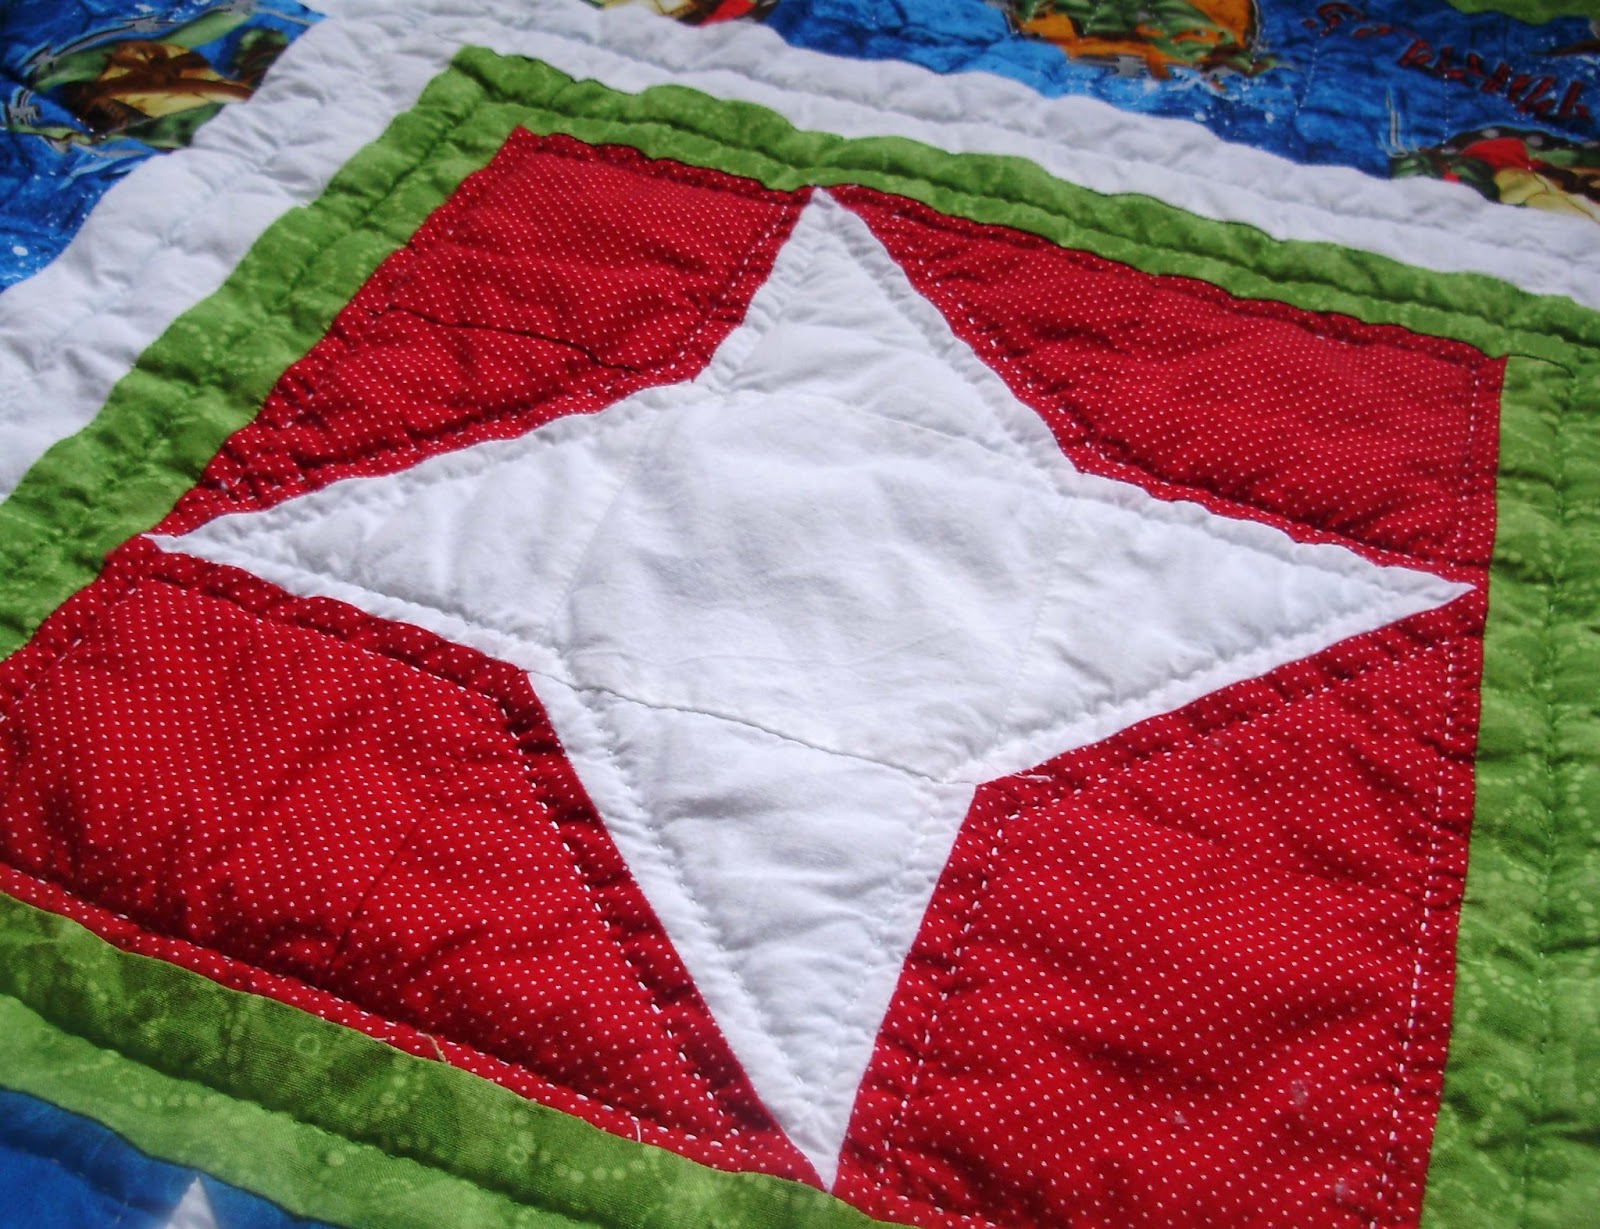
I also went with a twist on these, making the stars white and the backgrounds in their eye mask colors. (P.S. Michelangelo was always my favorite!)
I used green thread to hand quilt the sashing between each block and around the inside of the turtles. For the rest of the quilt, I used white cotton hand quilting thread, which is significantly thicker.  I quilted inside and around the stars and in the middle of the white borders.

On the wider borders with the Ninja Turtle fabric, I quilted in some of their catchphrases: "Cowabunga, Awesome, and Turtle Power."  On the remaining side, I quilted in my nephew's name.

Now, only one more nephew to go and I am caught up!

Hello Kitty Ears

I am back-tracking a little bit here, since I finally got all of my Christmas pictures off of the camera card. :) Right before Christmas, we celebrated Isabelle's 7th birthday and she wanted Hello Kitty again.  Just for fun, I made a dozen or so of these Hello Kitty ear headbands.


They were super easy and cute! I got the idea on Pinterest and you can see more Hello Kitty party cuteness HERE. I got 6-packs of headbands at the Dollar Tree and used a coupon on the felt at Michael's, so they were cheap, too.
Isabelle even made the adults wear them. Doesn't Aunt Loni look cute?

To make things a little different, I went with cookies and cupcakes instead of the Hello Kitty cake like I made a few years ago (seen HERE).  I bent a metal cookie cutter in the shape of Hello Kitty's head and made cut-out sugar cookies.  I made lots of them for her to take into school, so these are the not-as-cute leftovers. If I had had more time, I would have made them all glazed over in white icing first, but the rest of the decorating is icing and melted chocolate for the eyes. It made them in the last-minute-right-before-Christmas-good-enough stage.

It made for a Happy Birthday for Isabelle, so that is what matters! :)

A Big Batch of Filling- Freezer Cooking

fillingtofreeze.jpg
Now I am going to show you what to do with those leftover crusts from the uncrustables sandwiches... 

I save them to make filling!  I get a lot of compliments on my filling and it is so moist!  It is really simple to make, too.  Here is what you need:

6-7 loaves of white bread
3-4 medium onions
3-4 stalks celery
8 sticks margerine

I know!  That is a lot, right?  I like to make my filling in my electric roaster in a HUGE batch so that I have some to freeze for later. When I have some stocked in my freezer, it makes a quick side dish that is way cheaper and so much tastier than that boxed stuff (not to mention I can pronounce all of the ingredients!) So, I go to our local discount bread store and grab a lot of bread.  

I get to work (and put the kids to work) cutting the bread into cubes - it does not always fit in the roaster.  I let it sit out for awhile so that the cubes are not so soft.  If I am making a large noon meal, I will cut it in the evening and let it sit out overnight with the lid cracked a bit to let some air into the roaster.  You can cut up those leftover crusts, too!

Then I cry my eyes out and peel the onions.  I cut the onions and celery into big chunks...

...and my trusty, old food processor chops it all up for me!

This is probably how a normal person would chop them.

I don't like onions.  Or celery.  So I practically puree it to disguise them.

In my big skillet, I melt 8 sticks of margarine 

I mix in my veggies and let them simmer for a few minutes.

I also dump some parsley in there to give it some color.
Then I pour it all over the bread cubes.

I give it a good stir.  It doesn't seem like it coats every bread cube, but it works out just fine.  I cook it at 200 degrees for 2-3 hours, stirring occasionally. Do NOT crank that temperature up.  Trust me.  It burns.

It cooks down quite a bit, so you should be able to add any extra bread that didn't fit in no time.  All of the bread in that first picture cooked down to this:

Oh, it is so yummy and delicious!  You can eat it right away...

...or freeze it for later.  It is a quick side dish- just pull it out of the freezer and warm it up!  I like to use the microwave to get it thawed and then I pop it in the oven in a baking dish at 350 for 10-15 minutes just to make the edges a little crispy (but if you leave it in the oven too long it will dry out and you'll need lots of gravy).  I have also squished it into filling balls to freeze.  This would be great to pull out just a few at a time for smaller households.

I am hoping that my little cooking tips can help someone save a little $ while feeding their family healthier foods!  I would love to know if anyone makes this, so just leave a comment to let me know if you do!

Make Your Own Uncrustables

wrapandfreeze.jpg
Have you ever seen those "uncrustables" sandwiches that you can buy in the freezer section of your grocery store?  In my opinion, they are pricey and not worth it at all.  I guess you are paying for convenience.  My kids had some free samples at thee grocery store once (thanks a lot, lady!) and really liked them.  So, I decided to make my own... for cheap!
I get bread at a local place called "Budget Bakery" for cheap.  It is hit or miss, depending on what the truck has brought that day, but I can get a loaf of white bread for around 65 cents.  This stuff is not expired, either- so don't think we are eating moldy bread or anything.  I don't go there all the time, but if I need a lot of bread or buns it is worth it.
I figure that you can handle making a good ol' PB&J, but don't get too close to the edges, because those crusts are still good for something... I will post about that later.  Just trust me and save them.

I got this handy little tool at Walmart on an end cap for $1.97 and it seals the sandwich and trims off the crusts all in one push.
I put them on a cookie sheet and "flash freeze" them for a few minutes...

Then I wrap them up in plastic wrap and store them in the freezer.  It makes a nice snack or saves the day in frantic last-minute lunch packing.

Eggplant Parmesan (Freezer Cooking)

eggplantparm.jpg
One of the best ways to save money (and have better food) is to preserve fresh vegetables when they are in season.  I love to have eggplant already breaded and frozen for a fast, easy meal in the winter.  If you don't have a garden giving you lots of lovely, purple eggplants you can pick some up for cheap while they are in season at a local farmer's market.  Out of two very large eggplants, I got enough for four meals! 

Start out with a fresh eggplant, peel it, and chop the very ends off (that is the most bitter part).
Then slice it about 3/8" thick- yes, I know that seems awfully precise, but 1/2" is too thick and 1/4" is too thin.

Sprinkle both sides with a little salt- the seeds will turn brown very quickly- this is normal and you do not have a rotten or mutant eggplant.

Pour a little oil in a frying pan- just enough to evenly coat the bottom of the pan- and turn it on med-low heat.
Get everything else ready while the oil is heating.  You will need a bowl for eggs- I beat two of them thoroughly- and a bowl for bread crumbs.

Coat the slices evenly by dipping first in the eggs (that picture was blurry and I figure that you are smart enough to figure that out) and then in bread crumbs.

 Fry in oil until golden brown, flipping them to cook each side, of course.  The oil will get all yucky and bubbly after a few batches, so you might need to add/change oil partway through cooking.

Place the cooked slices on a paper towel covered plate to absorb the grease.

When they cool off, you can lay the fried eggplant slices flat in a freezer bag and save them for later.  When I cook them, I place the frozen eggplant in a baking dish that has a little tomato sauce spread on the bottom and spread a little more on top of the eggplant.  I bake it at 350 degrees for 30-40 minutes or until it is thoroughly cooked and soft (if you don't cook it long enough it will be bitter).  I sprinkle mozzarella on top for about the last 10 minutes and serve it with spaghetti.

Here is how I prepared it fresh, though!  I took a tomato from our garden and put thick slices on top of the eggplant, topped with a little oregano (I just used sauce on half of them for those of us who are a little bit picky).

I baked it for a half hour and then added mozzarella.

  Here was the final result...

Doesn't it look pretty?

I know a lot of people that say they have never eaten eggplant- to be honest I was intimidated by it at first, too.  If you are brave enough to give this a try, let me know how it turns out!