

All-American Dress Tutorial
/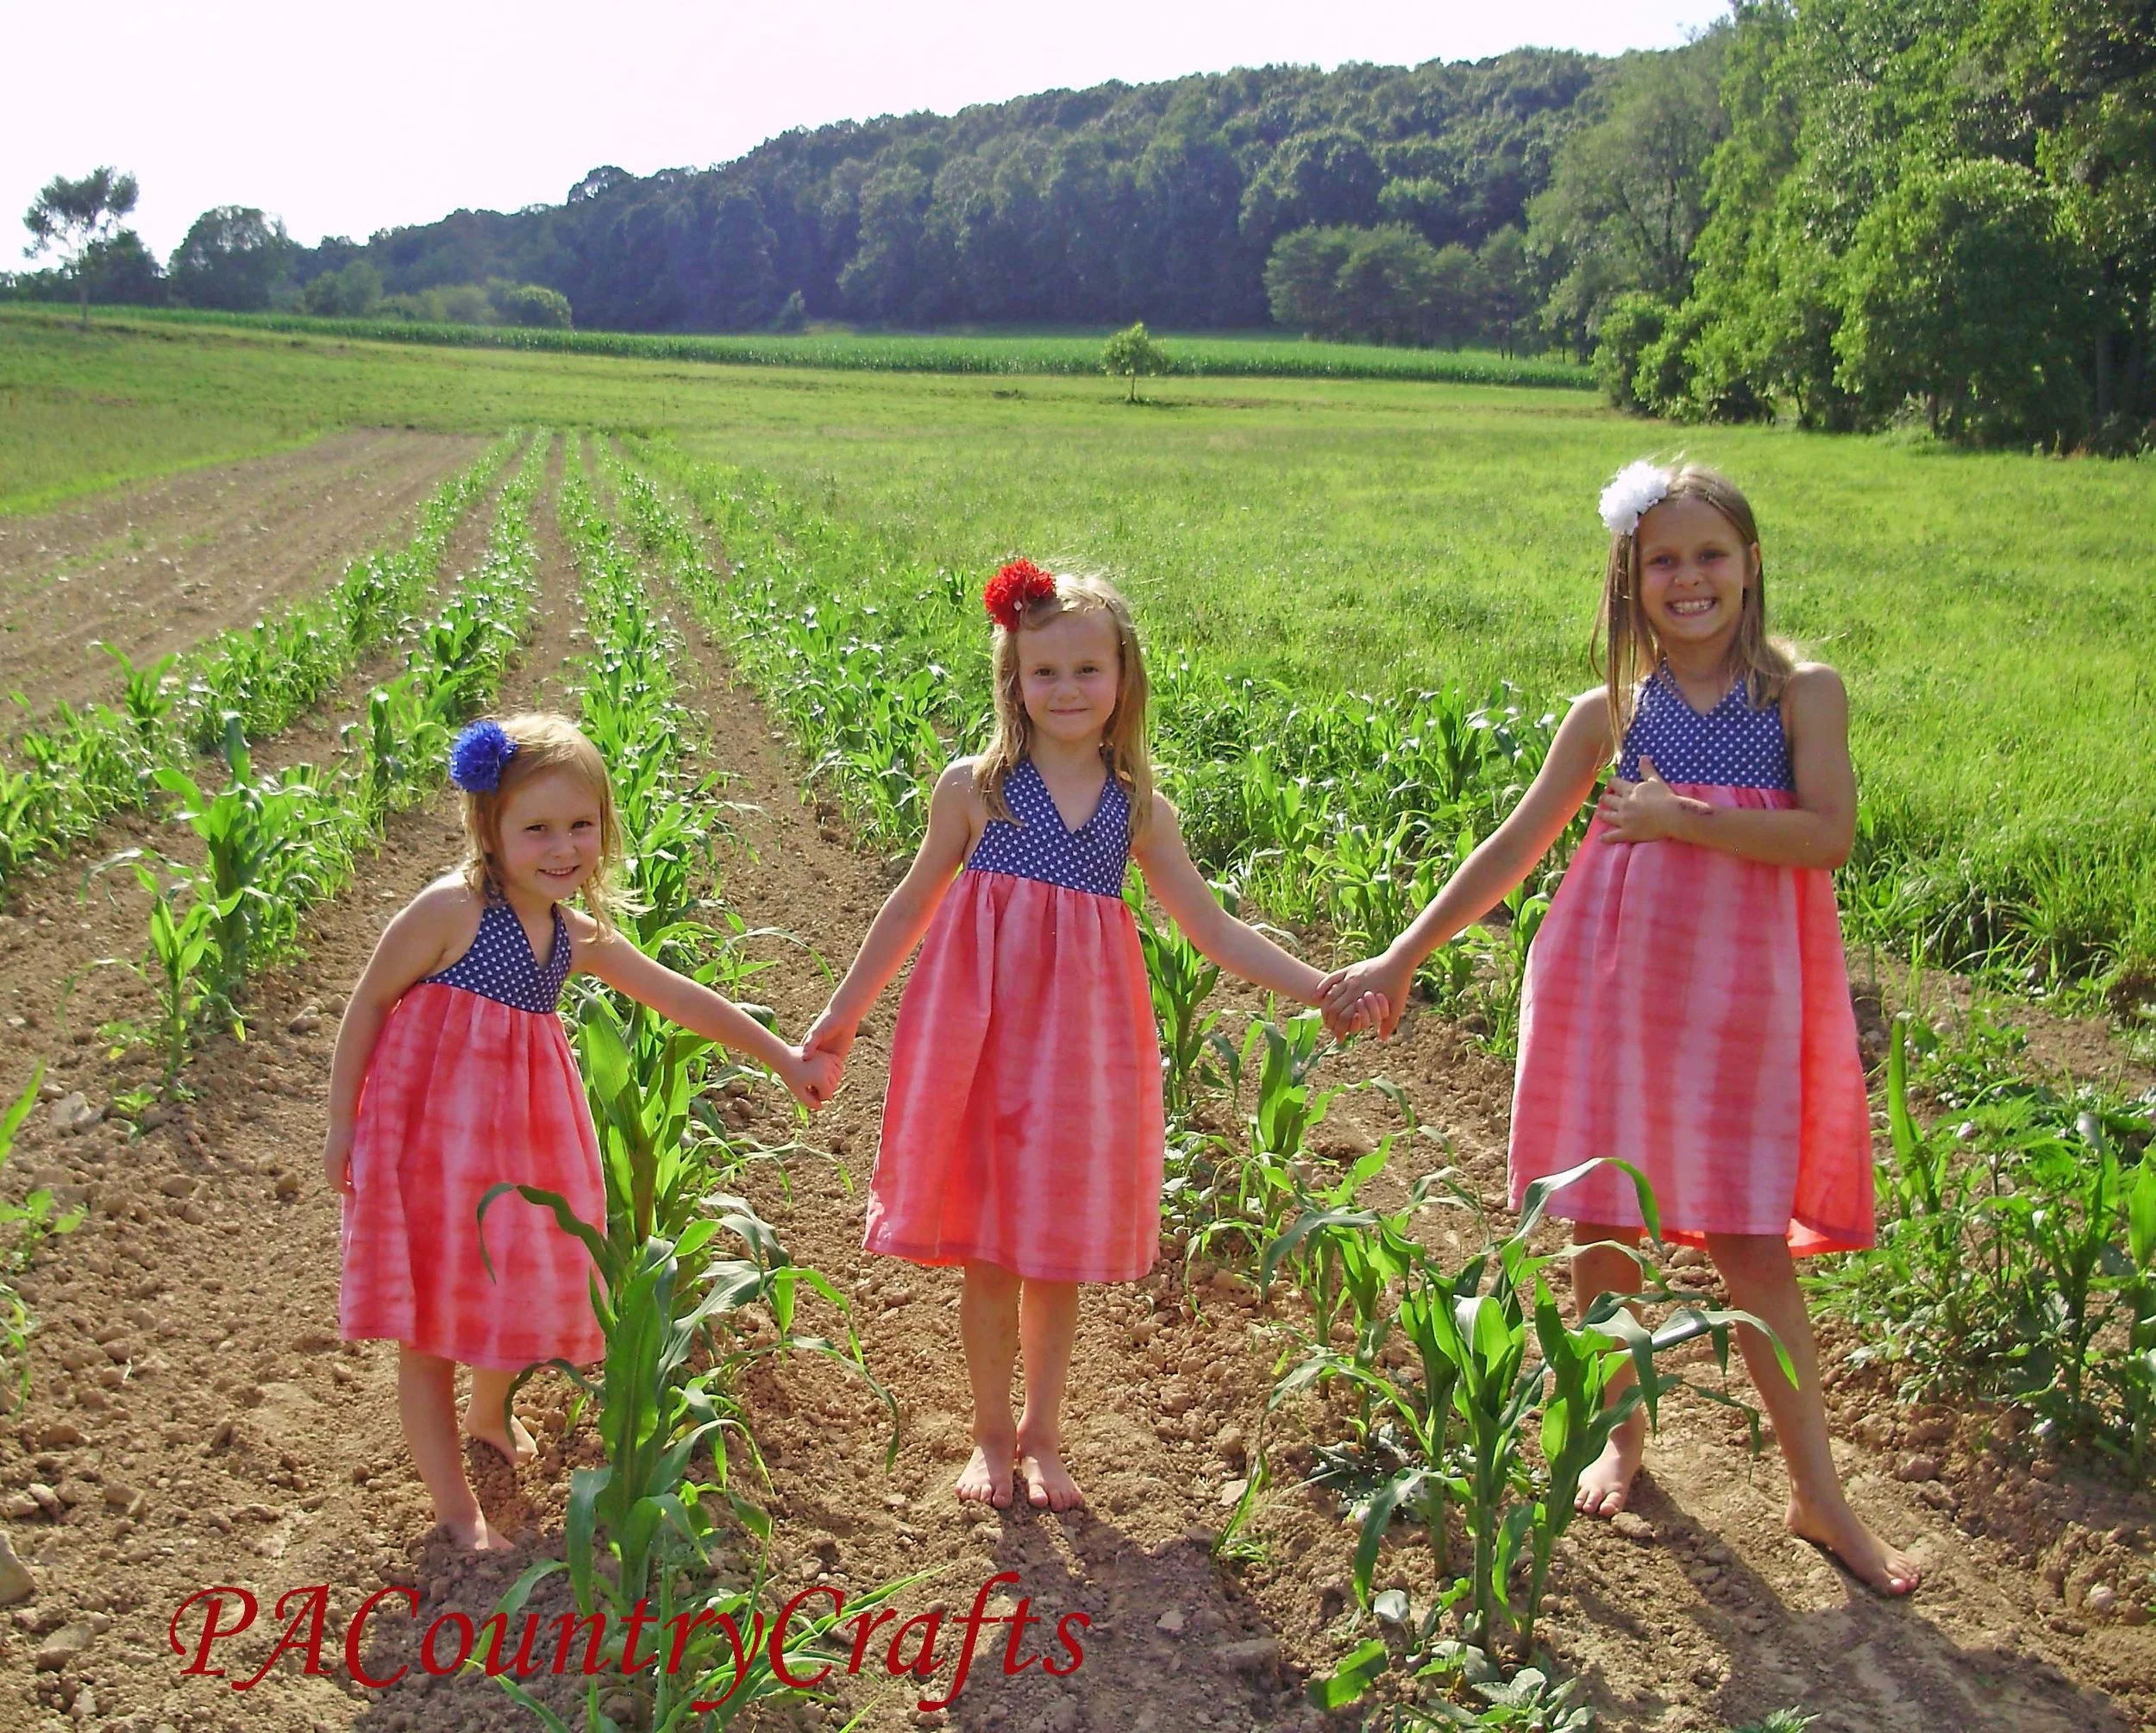
Tutorial for sewing this easy girls’ halter dress in any size. You can make it out of any fabric, but some patriotic stars and dyed sheets make perfect July 4th dresses!
Read MoreTutorial for sewing this easy girls’ halter dress in any size. You can make it out of any fabric, but some patriotic stars and dyed sheets make perfect July 4th dresses!
Read More
As I was stitching on the last little bit of the binding, I realized that I pieced this quilt 8 years ago! WOW! It isn't even a large quilt- only about 22 inches on each side. Talk about procrastination!!!

I like the soft sage green and tan fabrics, but there is not much contrast between these colors. The piecing is not perfect- I have definitely come a long way in the last 8 years!

I machine quilted it "in the ditch" to get get it DONE! (I rarely machine quilt, but thankfully I didn't have any trouble with this one.)

I will be donating it to a good cause. :)
It also qualifies as another finish towards my 12in2012 goal of finishing half of the UFO list over there on the sidebar and the Quilter-in-the-Gap 2nd Quarter Finish-A-Long! Two things in one week! WOOHOOHOO!!
This week I made something special for my baby girl! I am sharing the full tutorial over at Fireflies and Jellybeans next week, but here is a little sneak peek...


Make sure to check out my tutorial over at Fireflies and Jellybeans! I will update this post with the link when it is up!

UPDATE: You can see my CUTE Sweet Summer Halter Top tutorial HERE!
This simple Strawberry Shortcake girls costume was made with a tiered assymetrical circle skirt.
Read MoreWhen I am feeling particularly ambitious, the kids and I make homemade soft pretzels. They like playing with the dough to make different shapes and sometimes we use them as buns.

This is a recipe meant to be like those pretzels you get at the mall. They are awesome! Here is how we make them...
Sprinkle yeast onto the warm water. (Ooooh... fascinating!)

Stir to dissolve.


Then add the salt and stir. (Must be getting boring already!)

Pour everything over into the mixing bowl (or you could have done it all in there to begin with, but I wasn't thinking.)

Add in the flour... one cup at a time.

Let the mixer do the work. It should sorta' clean the sides by the time it is all mixed up well.

Cover and let rise somewhere warm. It should double in size- how long this takes depends on how warm it is, but about a half hour to an hour is about right.

Then, get ready to make pretzels! You will need to mix up the baking soda bath...

...and flour your rolling surface really well...

...and DO NOT FORGET TO GREASE YOUR COOKIE SHEET! (If the all-caps make you think I am yelling at you- I AM! I have forgotten this so many times and it is a bugger to get them off of the tray.)

Knead the dough slightly, just until it isn't sticky anymore.

Pinch off bits to roll out- a ball about 2 inches across is a good size. Roll into a long rope about 1/2" thick and 18 long. (My 6yo did a good job photographing this step for me!)

Twist 'em, twist 'em, twist 'em like a pretzel! (Sorry, wrestling cheerleading flashback.)

Dunk it in the baking soda bath real quick. (Keep stirring this bath from time to time in between dunks.)

Then flop it onto the cookie sheet.

They need to rise again to get nice and puffy- about 10 minutes should do the trick. Pop 'em into the oven.

While the pretzels are baking, get your butter ready.

Melt and stir in some sugar - that is key!

All done! I took these out a smidgen early- you can let them get a little darker if you want.

Dip in the butter (faster than brushing it on).

Sprinkle with Kosher salt (or you can dip them again in a cinnamon-sugar mixture and just gobble them up. Mmmmmm...)

They are soooooooooooo goooooooooooooood!

With these, I sliced them down the middle and filled them with leftover turkey, bacon, and cheese. About 10 minutes in a 350 degree oven and we had yummy pretzel melts for supper.

A quick thank you to my two lovely assistants...


Bread pudding is something that my mom made quite a bit when we were growing up. It is a great way to use up bread that is not so fresh, or those icky end pieces. You can serve it warm or cold, and it is also perfect for breakfast or a dessert.
Bread Pudding
6 eggs
1 cup sugar
1 tsp. vanilla
2 cups milk
8 slices of bread
spreadable butter
cinnamon
Start with 6 eggs (aren't they so pretty? They are darker blue and green than it shows in the picture.)

Crack the eggs in a 2 quart casserole dish and beat well. Add sugar and vanilla...

Mix well and add 2 cups of milk.

Stir together. Spread margarine or butter on the bread and cut it into quarters.

Push the bread pieces into the egg-milk mixture one at a time.

Sprinkle the top with cinnamon. Bake at 350 degrees for about an hour... it will get all puffed up and nearly firm.
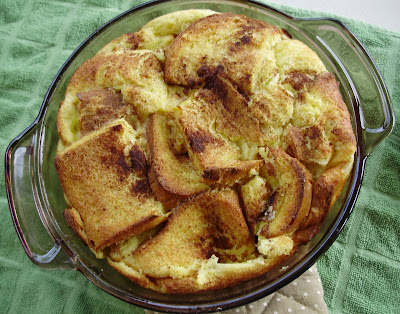
Pretty easy, right? Enjoy!


I let my brother-in-law choose the colors for my nephew's baby quilt and he really likes the old school Phillies stuff. To be honest, I had no idea what "throwback" meant, but I googled it.

Using the 1980's Phillies jerseys as my inspiration, I designed this strip quilt- very different than anything I have made before. The maroon and white stripes remind me of the sleeves of the jerseys and just look plain ol' sporty! I got the Robert Kauffmann baseball fabric on a little expedition to a fabric store trip last fall and the rest is just any blue fabrics I could find that resembled the old Phillies colors but did not have flowers.

To try something new, I machine appliqued the baseball bat. It went OK (I only had to seam-rip and redo half of it), but I would do it differently next time.

I hand appliqued and embroidered the little baseball. I was going to do more, but I ran out of ambition and thought that one ball made more sense with one bat. One thing I really like, though, was the quilting on the baseball fabric. I stitched in the old Phillies logo and on the other strip of baseball fabric, I replicated the lettering to make my nephew's name.

It is not the best quilt I have ever made, but at least it is finally finished (Woohoo! Check one off for the Finish-a-Long!) I started it all the way back in November. I embroidered the back with all of his birth info and a special verse:
So appropriate. That is my favorite part of this quilt. =)
Sewing, crafts, tutorials, recipes, and a little look at our life in the country - raising half a dozen children.

Hi! Thanks so much for stopping by! My name is Lindsay and on this blog you will find sewing, crafts, decorating, recipes, and tutorials with a little bit of honesty and encouragement.


