My Buttercup Bag, Modified

faith2B0052B252822529.jpg

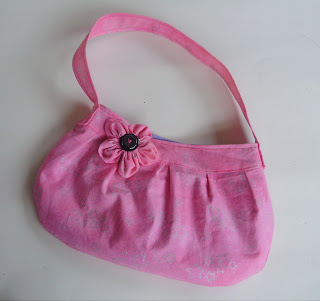
As promised, I am showing you all my modified Buttercup Bag. I got this LOVELY fabric like I used in my sister-in-law's purse for Christmas (I just reversed the outside and lining for mine). After making one for my daughter as a trial run, I realized the original pattern was too small for me, so I made mine a bit bigger (still a bit too small for me, but I am trying to size down from my HUGE Birdie Sling Bag). I made quite a few other adjustments from the original pattern...

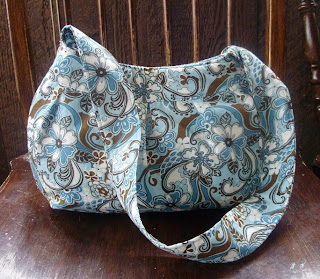
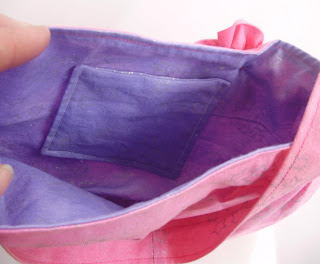
I used magnetic snaps like the pattern called for this time. It was my first time using these -they are really nice! I also added a loop to hook keys or whatever onto, and added an additional pocket (on the other side) just the right size to hold a pack of tissues and my cell phone.

The biggest change I made was that I interfaced the outside and strap, and used fusible fleece to line the inside. I had to take the lining in about 1/4" to account for the bulk of the fleece, but I made sure the band and top of the lining were still the same size so that they would line up when sewing it together. It definitely made the bag sturdier, but I soon discovered that, because of the heavy fleece lining, when I filled the purse up and went to sit it down, it would flop over to one side. So, I had to add small gussets in the bottom.The busy print of the fabric hides the pleats, but it is still a great little bag! :) Unfortunately, I have decided that the purse is also too small because it makes my pregnant belly look much bigger! :)

(And I even look pretty small in this picture!)

Monster Cookies

monster2Bcookies2B0052B252822529.jpg

Yummmmm...

I LOVE these cookies! I like to say that they are just about everything you could want in a cookie. Oatmeal, peanut butter, chocolate chips, m&m's,...

This is a modified Amish recipe, so you might want to cut it in half! This would make about 10 dozen cookies! It took FOREVER to make a full batch Saturday night, but hubby ate a lot of dough to help me out! :)

Monster Cookies

6 eggs
2 cups brown sugar
2 cups white sugar
4 tsp. baking soda
1 cup margerine
1 cup peanut butter
4 cups Quick Oats
1 tsp. vanilla
4 cups flour
1 bag chocolate chips (or more!)
1 medium bag m&m's (I like to save some to put on top before they go in the oven to make them prettier!)

Mix in order given. Drop by spoonfuls on a cookie sheet and bake at 350 degrees for about 10 minutes. DO NOT OVERBAKE! Take them out even if they look a little underdone - if they get to be golden brown they will get hard and crunchy.

Sneak Peek in the Studio Friday #2

I am taking part in my second Sneak Peek- I was pretty busy last week, so I have extra things to show you all that I have been working on. There are other things, too, but they are either listed in my shop or I don't have pics yet.

A cute kitty taggy blaket for my neice from my pile of things started. She loves tags, but will not play with it. She even threw it down to reach for the tag on a nearby stuffed cat!
Pillows for my hubby. I made the other 2 panels into pillows for my father-in-law for Christmas.
My own Buttercup Bag, modified. A full post on what I did coming soon. LOVE this fabric!
Snowmen. With Baby #5 coming, I have to start now to be able to make any ornaments this fall. I want to have lots of them "ready to assemble"! (And see my daffodils poking up outside!)
My first ever hair bow. I just want to make some for my girls. I figure it will be a lot cheaper and I can make them to match their outfits. I had some pig ribbon cause my 2yo loves pigs!
So, this is some of what I have been up to. I will be linking up HERE!
Psst... make sure you check out this great giveaway going on HERE!

Baby Powder in the Vacuum

sneak2Bpeek2B0082B252822529.jpg

If you remember, I mentioned that my girls were into the baby powder the other week. Well, my 2yo climbed up to the top bunk in her sisters' room and created a lovely baby powder shower from there. Their box of Barbie dolls and My Little Ponies and such got "dusted." I tried sticking her head in the end of the vacuum hose, but Snow White still has gray hair. Their beds were also very "dusty," but it actually smelled pretty nice in there after I got it all cleaned up.
BUT, I used my vacuum. I have had messes of this kind before, with the same result, and I have decided that the worst part about cleaning up baby powder with the vacuum is that no matter how many times you empty the canister or clean the filters, there is still some baby powder in there somewhere.
And it causes static electricity.
Sooooooo, whenever I vacuum now, I get little zaps if I bump up against the vacuum or even the hose. I also dread having to reach for the switch to turn it off because I know I am gonna' get it!
All I can really do anymore is laugh about it (and maybe buy a new vacuum cause this one was junk anyway), so I thought I would share so that you can have a good chuckle, too. :)

Kelsey's Quilt

I don't believe I have ever shown off one of my quilts on my blog, but I am also a quilter! (Actually, I learned to sew quilts before anything else.) After a really tough Spring semester my sophomore year of college, I sold back all the books I could find from the first two years, went straight to Walmart, and bought the only sewing machine I could afford. That summer, I taught myself to quilt.I made baby quilts for my nieces and nephews, but the pre-quilting era kids have been skipped. So, for the girls, I have been making larger quilts for their 12th birthdays. Kelsey’s was just a bit overdue. I started it in April of 2009 and I just finished it. The piecing went really quickly! Basic nine patches in light blue and lilac, set on point with a cream background.

(The backlight from the window doesn't show this off the best.)

See, it took so long because I like to hand quilt motifs on the open squares. This intricate flower one was totally my own design and each block varies.

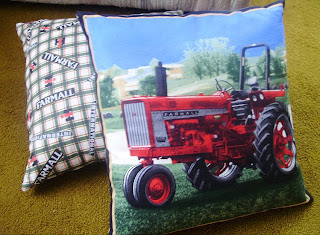
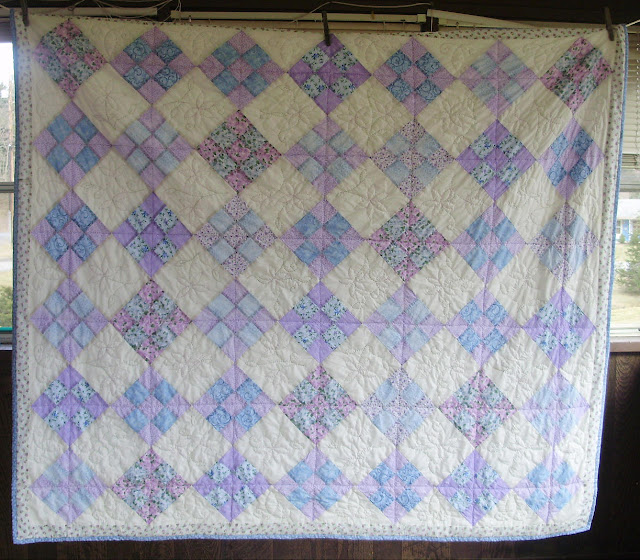
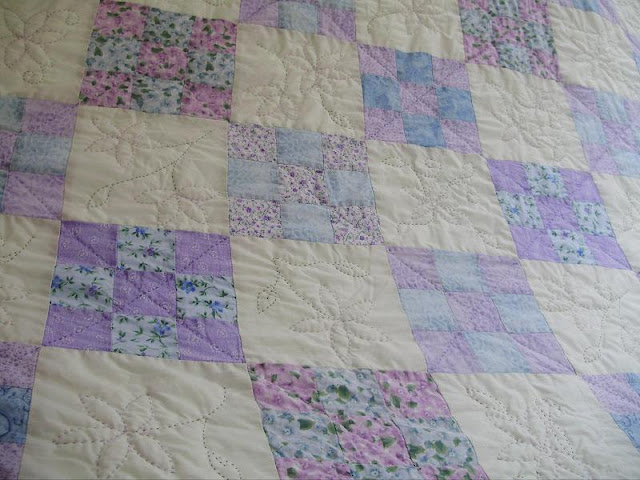
I like how the colored thread stands out against the cream fabric.

I put a few butterflies in there, too. I really punished myself with this one, and it would sit for months at a time with me having no ambition to work on it. However, I use washable crayola markers to draw on my quilting lines and after nearly 2 years, it didn't want to wash out! It took a lot of washing and soaking and OxiClean to get most of it out.

This is a terrible cropped in picture, but I designed a little motif to put her name in it that coordinated.

And of course I mitered the corners, too. I handstitch my bindings on around the back. (And that is some of Baby#5 under the green shirt there- makes a nice photo prop!)

I try to embroider a special message on the backs of these, and this one included Isaiah 40:8

The grass withers, the flower fades, But the word of our God stands forever.
So there is my first quilt show-off. Expect more of these because I am trying to catch up on some new baby nieces and also trying to use up lots of quilting stash before I move my sewing table and hubby sees how much I have jammed in there! :)

Buttercup Bag

kelsey2527s2Bquilt2B0022B252822529.jpg

I am trying to use up fabric quickly. I have to move all of my sewing stuff and fabrics to another room before Baby #5 comes! Then my husband will see just how much stash I have crammed into that sewing table, there! EEK!
I saw the Buttercup Bag sewing pattern (Free! YAY!) and wanted to make one for myself. However, I need it a little bigger than that, so I enlarged the pattern. But, before I waste the beautiful fabric I have waiting for my own purse, I thought I would try out the original pattern and make one for my 5yo.

She LOVES stars and I had 1/4 yard of this fabric in pink and a little less of the same in purple that I used for the lining.

I had a little pink left over (trying to use up fabric here!), so I wanted to embellish the bag a bit. I made one of these cute fabric flowers from the directions here.
It is an adorable little bag! The flower is actually a little heavy, since it is unlined. I will definitely make mine lined with interfacing and fusible fleece. Still, a very cute bag!

Sneak Peek in the Studio Friday #1

sneak2Bpeek2B0082B252822529-1.jpg
I have been awfully busy this week! I got a lot of craft projects completed that I had started, although I now have some more started that are not completed. Hmm...

First, the finishes...

Decoupage Easter eggs (I wanted to make these last year, but never got around to it)

"Blessings" embroidery- I tried a different technique painting the frame.

A BIG finish for me - well, almost... It took me two years to do the hand quilting on this beauty, but now my quilting lines I marked won't wash out! Here it is soaking in OxiClean (again). That is what I get for procrastinating, I guess.

Now, the started projects...

I can't decide on how I want to do the face for this bunny.

I have to finish the liners for these baskets, but they are still drying.

I made this CUTE Buttercup bag for my daughter, but I want to embellish it somehow with the wee bit of scraps I have left over. I also enlarged the pattern to make a bigger version for myself, I just have to get some magnetic snaps first.

And while I was being productive, my kids were productively messy with things like THIS!

I am linking up to StudioJRU's Sneak Peek in the Studio Friday party!