Sneak Peek of Doll Dresses and Some Valentine Stuff

pug2Bvalentine2Bbox.jpg

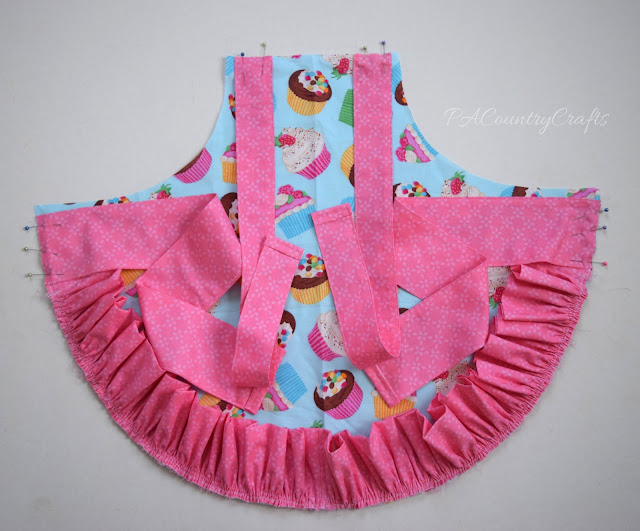
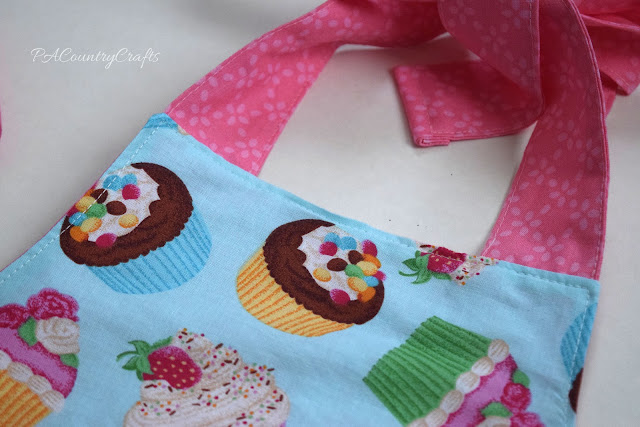
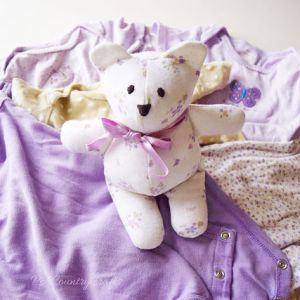
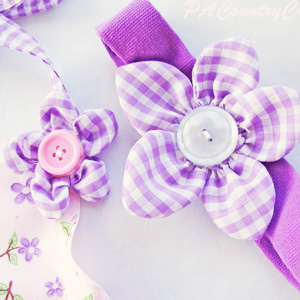
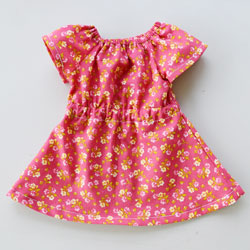
I have been doing a lot of craft projects for the kids/with the kids lately on these cold, snowy days. I made a few new things for their dolls a few weeks ago and ended up designing some new patterns. This one is a reversible doll dress.

Reversible Valentine doll dresses made with fat quarters and bias tape.
It was surprisingly easy and I hope to release a pattern to go with it soon. It only requires two fat quarters of fabric and some bias tape.

I just haven't found two coordinating fat quarters that I really like to make another one and take pictures. Doll clothes are a little trickier because you can't use large prints.

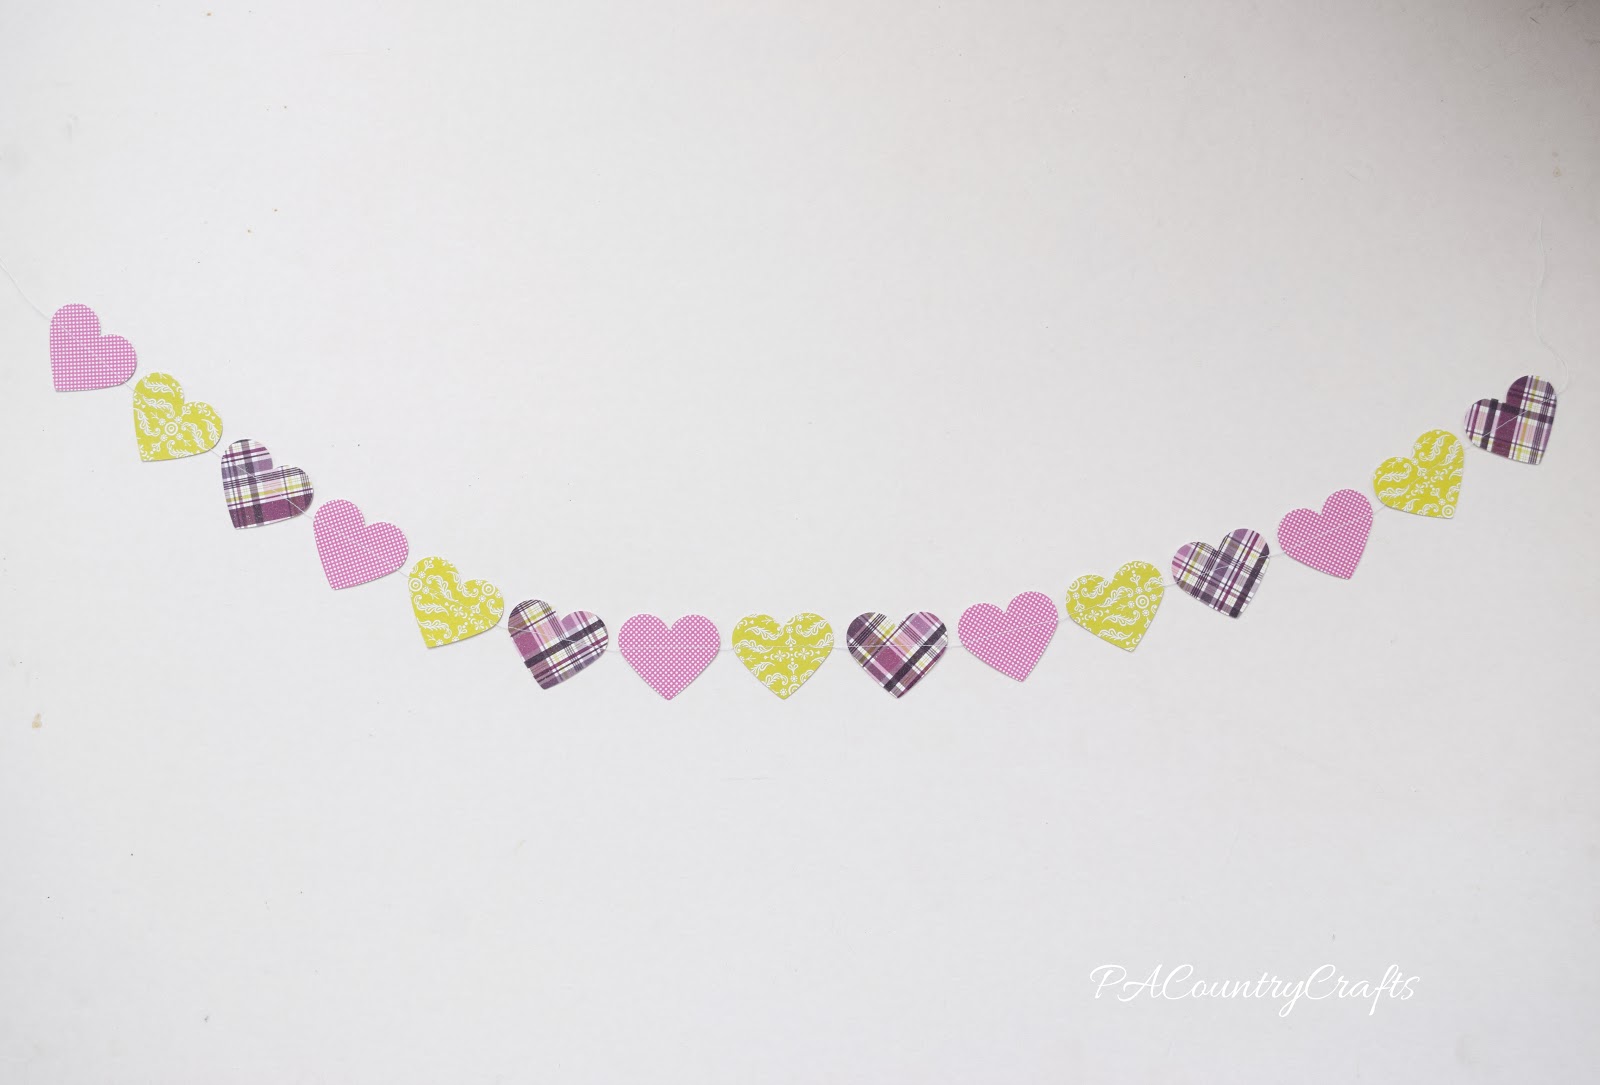
We have had oodles of delays and an early dismissal this week. Yesterday I decided to bribe the girls to clean up with the promise of a craft project. I bought a heart paper punch when I couldn't take it anymore and ran away to the craft store one day this week. We raided my scrapbook cardstock and they got to punch hearts out. Then, I took the pile and ran them through the sewing machine to make a garland.


Paper punched hearts sewn together to make a fun Valentine garland!


I just made a longer stitch and was sure to tie the ends together when I was done. These are fun and didn't take too much effort. That is my kind of project when there is a school delay.


There are some other things that aren't finished or are top secret, but I can show you this one, last Valentine project...
Pugs and Kisses Valentine box made out of a cereal box and kraft paper.
It is my daughter's Valentine box and it is made from an old Cheerios box and some brown packaging paper. I think he turned out pretty cute!
Happy Valentine's Day!

Girls Ruffle Apron Pattern and Tutorial

girls-ruffle-apron.jpg

My 4yo has been not so patiently waiting for her new apron. Previously, she used a hand me down one from her sister, but it was getting pretty small. She wanted to match my cupcake apron, but I let her choose the fabric for the back, ruffle, and ties.

She LOVES to bake with me. Especially cookies or anything with sprinkles. And now we can match.

I took pictures as I was making this apron, so I am throwing together a little tutorial.

You can adjust the size of the main apron piece as needed. I have a smaller one that my 7yo is quickly outgrowing, so I made this one a little bigger. It fits my 4yo (who is tall for her age) with room to grow. I made a digital pattern and it requires 4 pages. Print them out (check the "actual size" box), tape them together (left to right, top to bottom in numbered order), and cut it out. It is available HERE.

As for fabric requirements, you will need 2 yards total- a half yard for the front, a half yard for the back, and a yard for the ties and ruffles (with some to spare).

Now, I learned to quilt before I sewed anything wearable, so I do a lot of cutting things in strips with the rotary cutter from fabric off the bolt. That is usually about 44" or so. The fabric should be folded with the selvage edges together.

Cut out your pieces as listed below.

Ruffle: Cut 2 strips 6 1/2" x width of fabric (WOF)
Waist Ties: Cut 1 strip 6 1/2" x WOF
Neck Ties: Cut 1 strip 4" x WOF
Front and Back: Cut 1 of each from pattern pieces- available HERE.

I started with the ruffle. Sew one edge of each piece together on the short ends to make one long strip.

Hem the short ends of the ruffle pieces. I just folded it under twice and stitched it down.

Press the long ends together so that there is a nice fold on the bottom edge of the ruffle.

Sew two long gathering stitches and pull the bobbin threads to gather the ruffle. Pin it to the bottom of the apron, making sure the seam where the two pieces were joined is in the middle. Also, start 3 1/2" from the edge on each side to leave room for the waist ties and seam allowances.

Baste the ruffle to the apron. It just makes it easier to work with later.

Now... for the ties...

Fold each strip in half lengthwise with the right sides facing in. Stitch 1/4" from the edge on each piece to make long tubes.

Cut each piece in half, flip right sides out, and press well. Top stitch 1/8" from the edge all the way around each tie, hemming one end by folding it under twice before stitching. When I topstitch, I usually increase my stitch length a bit (to a 3).

Pin the ties in place on the main apron piece, paying attention to the hemmed ends to make sure they will face the same way. Leave 1/4" seam allowance between the tie and the edge of the apron at the corners.

Pin the back of the apron to the front of the apron, sandwiching the ruffle and ties. Be careful to make sure the waist ties are folded down so that you don't catch the edge when sewing the waist area of the apron.

Sew all the way around the edge of the apron, leaving an opening at the top between the neck ties. Also, stitch over the ties several times to make sure they are held in place really well. Use the opening to flip the apron right side out. Press it really well. Finally, topstitch 1/8" from the edge all the way around the apron. This will also close the opening at the top that you used to turn it right side out.

That is it! A pretty, ruffly apron!

Now, some things I have done differently on other aprons...

~you can make the ruffle extend all the way to the corner and put the waist ties under it if you prefer
~pockets can be added to the main body piece which is also nice if girls want to play restaurant and have a pocket to put their order tablet in ;)
~interfacing can be added to the waist ties to make them a little sturdier
~the waist ties can me made twice as long so that they wrap around and tie in a bow at the front
~the back can be made of a more contrasting fabric so that it is clearly reversible
~the ruffles and ties can be made of contrasting fabrics
~pleats instead of ruffles can be made along the bottom

UPDATE- There is a matching doll version available HERE!

Scarves- Crochet and Sewing

mustache2Bscarf.jpg

I made four scarves this year for Christmas. The first was a basic, crocheted infinity scarf for my mom. I forgot to take a picture.

The second was made the same way, but a bit smaller for my 10yo. Well, she thought it was too long, but not long enough to loop around twice, so I offered to rip it out and redo it. I ended up making a smaller cowl with a shell stitch. She likes this much better. It only used a half skein of yarn and the variegated colors somehow lined up on their own to make diagonal stripes.

The other scarves I made were from a flannel remnant I got at Joann's.  I just made two basic infinity scarves- they ended up costing about 80 cents apiece. My daughter loves mustaches and I thought that this was fun fabric! I kept one and she kept one. We're twinsies. :)
They were pretty lightweight, which was good because Christmas was so super warm in PA this year! The kids got to go outside to play without coats! There was no "Staching through the Snow" for us! :)

Mustache Pillow and Sparkly Pink Pillows

envelope2Bback2Bsparkly2Bpink2Bpillows.jpg

More pillows! That seemed to be the thing this year. I had an idea to make a huge mustache pillow for my daughter. I had some gray dot minky that I hadn't used for what I originally intended- an elephant taggy blanket- so I used it for this project instead. It goes perfectly with the gray walls and trim in their bedroom!

The back is a fun arrow print in coordintating colors that I knew my daughter would like. I figured cotton on the back would make it a little sturdier. I wish I had used a better quality cotton, though, because it ripped when I was stuffing it and I had to fix that. :/

The other pillows I made are for my daughter who LOVES all things pink and sparkly! 90% of her Christmas wish list was sparkly, which she pointed out with an asterisk and side note. :) One pillow is made from a performance lycra fabric- it was surprisingly easy to sew! The other is a pink sparkly satin.

I used a walking foot to sew these and made envelope closures for the back. They really only took a few minutes to make.

Both gifts were very much appreciated. I thought it was nice to make something fun and frivolous instead of something practical. You are only a little girl once!
There is a funny story to go with the pink pillows...
When I got the fabric, I was Christmas shopping with my husband and took him along to Joann's... again. He was a good sport and I left him at the cutting counter with the cutting instructions while I went to go look for something else. Well, he was not too thrilled to be left alone to get sparkly pink fabric cut. I think that makes him a good dad to his many little girls. :) He then helped me search several mall stores for a reindeer Beanie Boo. I don't care what it looked like- that is proof of a real man, right there. :)

Link Parties where I sometimes hang out...

Finish-A-Long Goals Q1

sampler2Bdoll2Bquilts.jpg

I have been proudly showing off all of the things I have actually finished lately, but for each one, there is probably 2 things that are unfinished and 10 things in the grand ideas stage. That is how it is for me in this stage of life. One day I will have lots of time to sew, but that day is not today.

However, there are some things that my girls are waiting on, and I want to get them done before they grow up any more than they already have. It would be nice if I could just hit the pause button on that growing stuff while I get some stuff caught up around here, but I can't.

My youngest is almost 2 1/2 and her baby quilt is still not finished. I actually made it larger because I know myself better than that. I want to quilt the top by hand and that will be a great project for winter- snuggling under a warm quilt on cold days!

My 4yo is waiting on a new apron. She has been using her sister's old one, but that one is getting small and is ready to be passed down to the youngest. She wants to match my apron, so I will share pics of both when I get it done.

Last year, my 7yo got a doll bunk bed for Christmas and I let her choose fabric for the sheets and pillowcases. I am also making two sampler block quilts to match and I want to get those finished up, too.

I am linking up with the 2016 Finish-A-Long so that hopefully I will be a bit more motivated to get these things done! I have a lot more unfinished projects, but I am just focusing on these three for now!

Shirt and Suspender Memory Pillow Covers

bottom2Bof2Bsuspender2Bshirt2Bpillow.jpg

I was asked to make these special pillow covers in memory of the recipients' loved one who had recently passed away. He was known for wearing these button down shirts and patriotic suspenders.

They were fairly easy to make. I had to iron all of the shirts really well, then slip my rotary cutting mat inside the shirt. Being careful of the placement of the buttons and pocket, I cut out a 16 1/2"square. I then cut another square out of the back of the shirt. I made loops out of navy bias tape that I had sewn together and sewed those to the bottom of the shirt panel.

Then, I just sewed the front and back all the way around. I serged the entire edge for durability. It was easy to use the button front to insert the pillow form. Last, I just hooked on the suspenders. It really was not too hard. I actually made six of these pillows, but just had Mom snap these pics of one of them on her phone.

A picture and a poem were placed in the pockets. I think this was a lovely idea, and I can't take credit for that part. I was honored to be a part of something special to make this Christmas a little nicer for the family.

Link Parties where I sometimes hang out...

Sew Can Do

,

 Monday Funday,

Motivate Me Monday

,

 Inspiration Monday,

Take a Look Tuesday

Naptime Creations

,

 The Gathering Spot

Carolyn's Homework

The Winthrop Chronicles

,

 Handmade Tuesdays

,

Your Whims Wednesday,

Weekly Homemaking Party

,

Create It Thursday

Treasure Hunt Thursday

Thursday Favorite Things, 

Wildly Original

Thriving on Thursday,

Grace at Home,

The 36th Party

Freedom Fridays

Feathered Nest Friday

Simple and Sweet Fridays

,

 Craft Frenzy Friday

Think Pink Sunday

, and 

Threading Your Way

Winter Quiet Book

I made a quiet book for my youngest daughter sometime late last winter.

Just because.

I originally planned to make one for each season, but that hasn't happened. :)

It is much smaller than the other quiet books I have made because I wasn't going into as much detail. You can see my other quiet books HERE. It is totally doable to whip up a quiet book before Christmas if you are still looking for gift ideas- just do one page at a time! 

For this winter themed book, I really wanted a scrappy look and I decided to use a color scheme inspired by the movie Frozen. (You may have seen it or heard that "Let It Go" song before. I know I have- a few million times!) I dug through my scrap basket and pulled out anything in the colors I was after so I didn't buy anything to make this book.

The cover has the adorable little penguin appliqued on it- the white is actually made of satin. I did french knots for the eyes and sewed on a tiny bow. The snowflake buttons were left over from a costume I made (will blog about that eventually). 

I even did a fancy stitch to applique the white strip on the side. Oh, and I finally remembered to add a little strap to velcro it closed- another reason for the white (the velcro blends in).

Next up is the hot cocoa page. The cup makes a little pocket and I stuffed in some white pom poms to make pretend marshmallows. The inside of the cup has a brown fabric for the hot chocolate, too (it is the same stuff as the heel of the skate on the next page). I hand embroidered the snowflakes and steam likes to embellish it a little more. Oh, and the crochet lace was a fun touch, too!

I used more white satin on the ice skate page.  The satin ribbon was hard to sew through those layers for the laces, but I got it eventually- I just used an upholstery needle. Again, I embroidered a bunch of snowflakes on there to dress up the solid background. I also added white eyelet to the edge of the page to make it a little fancier and keep up the scrappy look.

These winter woodland pages are the most played with, but I both love and hate them. I love the birch trees and the little felt animals. But, the little birds snap on and off and my little girl needs help to do that, so I am CONSTANTLY and LOUDLY being bothered to help her with that. It kinda' defeats the purpose of a "quiet" book. I should have used velcro. 

Also, the pages are on backwards. I messed up when I sewed everything together and the fleece snowbanks didn't line up. I tried to fill it in a little, but it isn't as cute as it would have been.

I also did a snow globe page! It is adorable, but the little star sequins and mini pom pom snowballs don't have enough air in there to really move around easily. I wonder if there is a way to puff it out a little more. The clear plastic is cut from a bag that curtains came in. 

The fleece mitten page has a scrappy background, too. The mitten is a little small, so I had to make the wrist portion under the ribbon loose at the sides so that she can fit her hand in there. She really doesn't play with this page too much.

On the back cover I embroidered a really intricate snowflake and my initials and the year, but it doesn't stand out so well. But, I know it is there and it is pretty.

I really like the durability of fabric quiet books and they are great to take along to church, sporting events, doctor appointments, etc. Next time I will try to save my patterns and scan them to share. I hope this at least gives some inspiration to others!