Boutique Style Peasant Dress (and Ribbon & Pearls Necklace)

backofdress.jpg
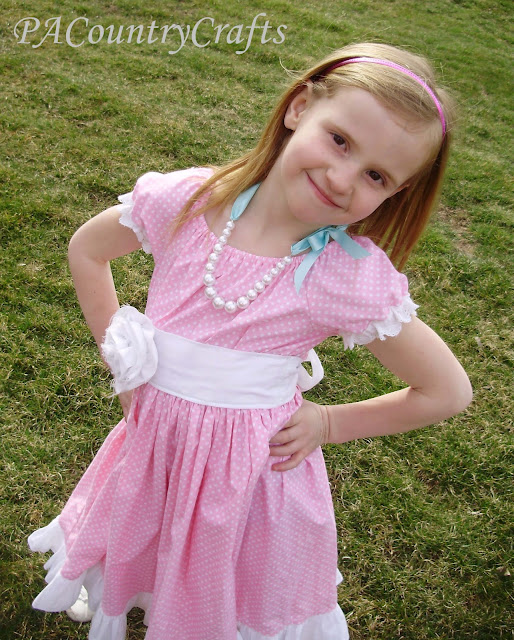
This dress was simple to make... in theory. :)   I didn't take pics of the whole process since I made changes along the way, but I will explain it a little bit here. I made the bodice in a peasant dress style (doesn't get too much easier than that!)
I trimmed the sleeves in eyelet lace after my first idea didn't work out. I had JUST enough on hand- only an inch to spare!
She wanted to be able to twirl around like here sister, so I made the skirt extra full. It is two full widths of fabric- that is a lot of gathering! But, it twirls...
...and this one is losing her shoe. I really need to work with these girls on their twirling.
So, two full widths of fabric to make the skirt meant that the ruffle was FOUR full widths of fabric! I gathered all of that by hand. It took FOR. EV. ER. I was going to make two ruffles at the bottom, but ran out of ambition after the first one. Oh, and I used pink thread to hem the ruffle for contrast. When I get a new sewing machine with fancy stitches I will try some of that on my hems for fun.
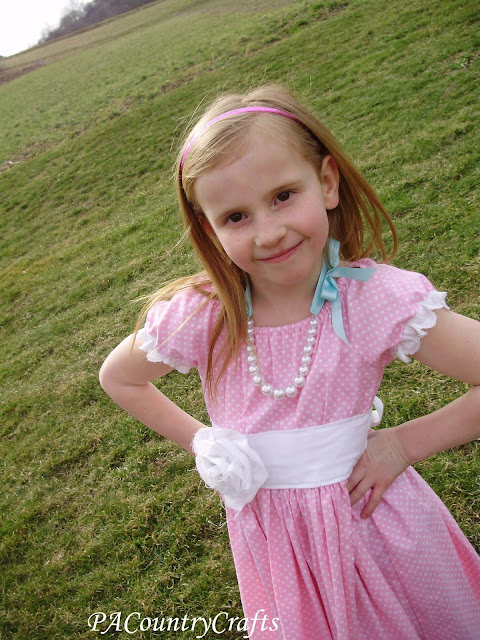
So, to pull all of that fabric from the loose-fitting peasant top together around the waist I added a contrasting white sash. It is sewn to the bodice with the topstitching at the top and bottom across the front of the dress. Then it doesn't wiggle around and pulls the bodice in more evenly. It just ties in the back so that it is still loose enough to be easy to put on and take off.
To really make it "pop" I added a BIG, frayed-edge fabric flower. I used THIS tutorial from Girl Inspired. It is backed in felt and pinned to the dress so I can still throw the dress in the washing machine.
I thought the dress still needed a little something and talked about it with my sister. She mentioned something about beads and suddenly a light bulb and a thought cloud with a ribbon pearl necklace were floating above my head. I was going to use pink or white ribbon, but didn't have enough on hand. The aqua gives it a nice contrast, though!
It was super easy to make and I already had the beads from something I was going to make years ago that I never got around to doing.
So, put it all together and this is what you get:

Two more Easter dresses to go! Stay tuned...

UPDATE: If you would like to see step-by-step pictures of how I made this dress, you can click HERE to see the matching doll-sized version. The process is exactly the same!

Linking up at:  Take-a-Look TuesdayYou InspiredShow Off Your Stuff Party, Make It Wear It Thursday, and Threading Your Way.

Summer Breeze Charm Tote

After sewing my little heart out for the girls last week, I was determined to finally make something for myself!  Last year, I won a giveaway at Quilting, Losing, and Tea (Thanks, Karen!).  I thought that the Summer Breeze II charm squares would make a lovely tote bag and have been wanting to make one for myself ever since.  Well, I needed some coordinating fabric for the handles and tossed around some different ideas for how I wanted to make it.  My friend, Anita, helped me out a bit with all of that and I ended up with a mish-mash of things to get this:


I saw a bag that she made with side ties and LOVED it! It really helps pull the bag together, but allows for more room if you need it (and let's face it, with all of these kids, I will probably need it!)  I think it will be a great size to take along to soccer and softball games this Spring (in our school colors of blue and gold! Go Eagles!!)

Lots of pockets for necessary things (I even did my first zipper pocket! WOOHOO!) and lots of room for snacks and things to entertain the kids/me. Now, I want to make a coordinating clutch or pouch to hold my embroidery projects- they are great to work on while waiting for practices and such. (Sadly, I am using a plastic sandwich bag right now.)

The handles are super sturdy- four layers of fabric and fusible fleece! My poor sewing machine!

I tried to FMQ the bag, but I can't lower the feed dogs on my machine and even if I cover them with the darning plate, I don't have the correct presser foot to make the tension work.  So, I just fought against the feed dogs. It isn't pretty and it was quite a workout, but it gives the ripply texture I wanted.

If it hadn't been for SewLux's Charm Madness Blog Hop, I probably would not have pushed myself to get it done so quickly. So... Thank you!

They have lots of great ideas over there, so check it out! I am linking up my charm square project for a chance to win a giveaway, but really, I have already won because I can cross this one off of my to-do list!

Sneak Peek at the First Easter Dress!

P3222199.jpg

I am busy sewing up a storm over here! One Easter dress is totally finished and two more are started.  The other one is still just a sketch and some random scribblings. I usually like to wait until they are all finished, but I am so excited about this one and I also wanted to audition for The Sew Off, so I only have a few hours to spare before auditions close. :)

I designed this dress for my oldest daughter from various elements of other dresses I have seen and liked.  I am still thinking of a name for it, too.  I will give the full tutorial later, but in the mean time, here are some of her modeling shots.

It has a cross-front bodice, just because I have never made one and wanted to try it.  I also fell in love with the idea of a wide band overlaid with crochet lace trim.

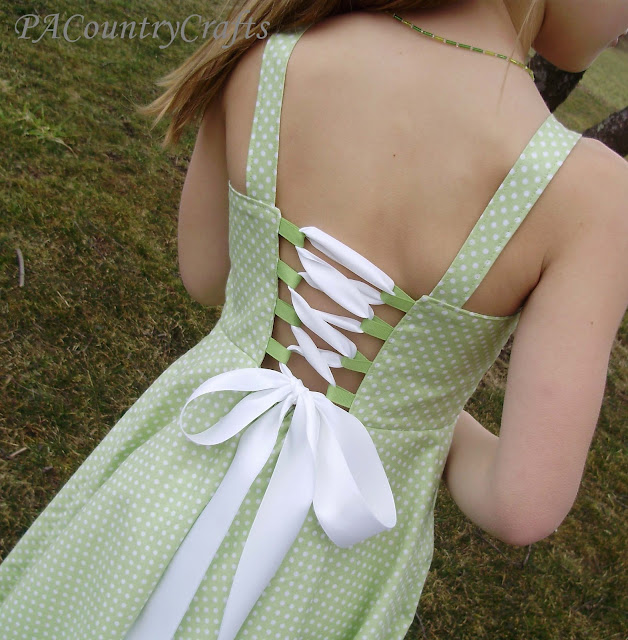
What little girls wouldn't love a pretty laced up back?

The challenge was getting the lacing to work with a full circle skirt.  She specifically asked for one that twirled, which meant that I had to make a dash to the store for more fabric last night.


Oh, but it twirls! I don't know how people get such cute pictures of their little girls twirling in circle skirts.  Then again, my girls are half falling over when they try to twirl so maybe it isn't all the photography.  I am going to have to make them practice twirling.


Hmmm... So if you can think of a good name for this one, I would love to hear your ideas!  
UPDATE: Combining a few of the suggestions, I came up with the Twirly Lace Dress and posted the tutorial HERE. Thanks for all of your help!!

I am also linking up at GirlInspired (love her blog, for obvious reasons!) and maybe some other places on my Link Parties page.  Then, it is back to sewing! Stay tuned...

Ninja Turtle Baby Quilt

I finally finished it!  I started out with two yards of Teenage Mutant Ninja Turtle fabric that I had bought with the intention of making a quilt for my brother's first son.  That was years ago!  They weren't even engaged yet, but I was thinking ahead. :)  A little over 10 months ago, I finally got that nephew.  Then, I had to figure out what I was going to do with that fabric!
I hunted high and low for appropriate Ninja Turtle colors to match the fabric I already had.  These are the more recent movie version colors, and not the more traditional hues, so it was tough!
Then, I had to plan a quilt design.  Of course, I didn't follow that plan anyway, but it just sort of came together.
First, I made these adorable turtle blocks, thinking that the 3D effect of the feet, heads, and tails would make good chew toys.  Hey, he is teething right now, so I am just in time!
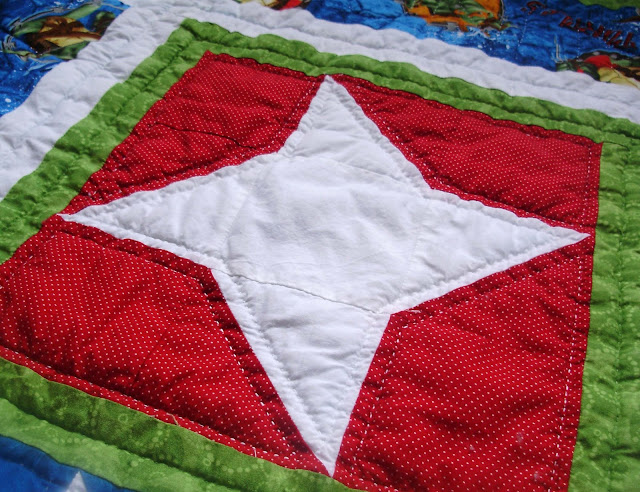
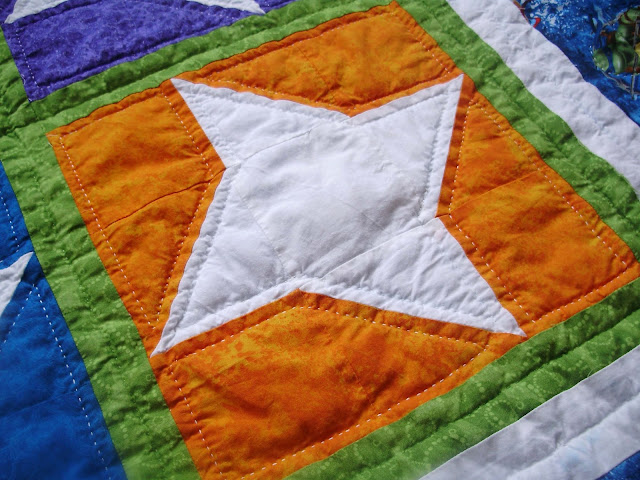
Then, I made the "ninja star" blocks.  They look like the paper "ninja stars" that my son likes to make, but this block is also called the "friendship star."  If you have ever seen the Teenage Mutant Ninja Turtles, you will understand just how fitting this is for them. :)
I also went with a twist on these, making the stars white and the backgrounds in their eye mask colors. (P.S. Michelangelo was always my favorite!)
I used green thread to hand quilt the sashing between each block and around the inside of the turtles. For the rest of the quilt, I used white cotton hand quilting thread, which is significantly thicker.  I quilted inside and around the stars and in the middle of the white borders.

On the wider borders with the Ninja Turtle fabric, I quilted in some of their catchphrases: "Cowabunga, Awesome, and Turtle Power."  On the remaining side, I quilted in my nephew's name.

Now, only one more nephew to go and I am caught up!

Little Star Quilt

macinequilting.jpg

 As I was stitching on the last little bit of the binding, I realized that I pieced this quilt 8 years ago!  WOW!  It isn't even a large quilt- only about 22 inches on each side.  Talk about procrastination!!!

I like the soft sage green and tan fabrics, but there is not much contrast between these colors.  The piecing is not perfect- I have definitely come a long way in the last 8 years!

I machine quilted it "in the ditch" to get get it DONE!  (I rarely machine quilt, but thankfully I didn't have any trouble with this one.)

I will be donating it to a good cause. :)

It also qualifies as another finish towards my 12in2012 goal of finishing half of the UFO list over there on the sidebar and the Quilter-in-the-Gap 2nd Quarter Finish-A-Long! Two things in one week! WOOHOOHOO!!