Doll Sewing

doll2Bsheets2Band2Bpillowcases.jpg
I think I just about have my toddler put to sleep here. But, I am just going to hold her for awhile to make sure. It sure is hard to get her to take regular naps with all of her sisters home for the summer.  Eventually she just crashes. About 5 second before I started typing I felt her head go limp against my arm. She is pretty snuggly right now. :)
Anyway, when I was on a blogging break, I did a lot of doll sewing. The girls had so many projects waiting for me to do and as soon as I closed the shop I was expected to jump on it!
This outfit was a prototype for THIS dress and the leggings were made from a thrifted T shirt. (Hannah had a pair of leggings made with the rest of the shirt and these were the scraps.)
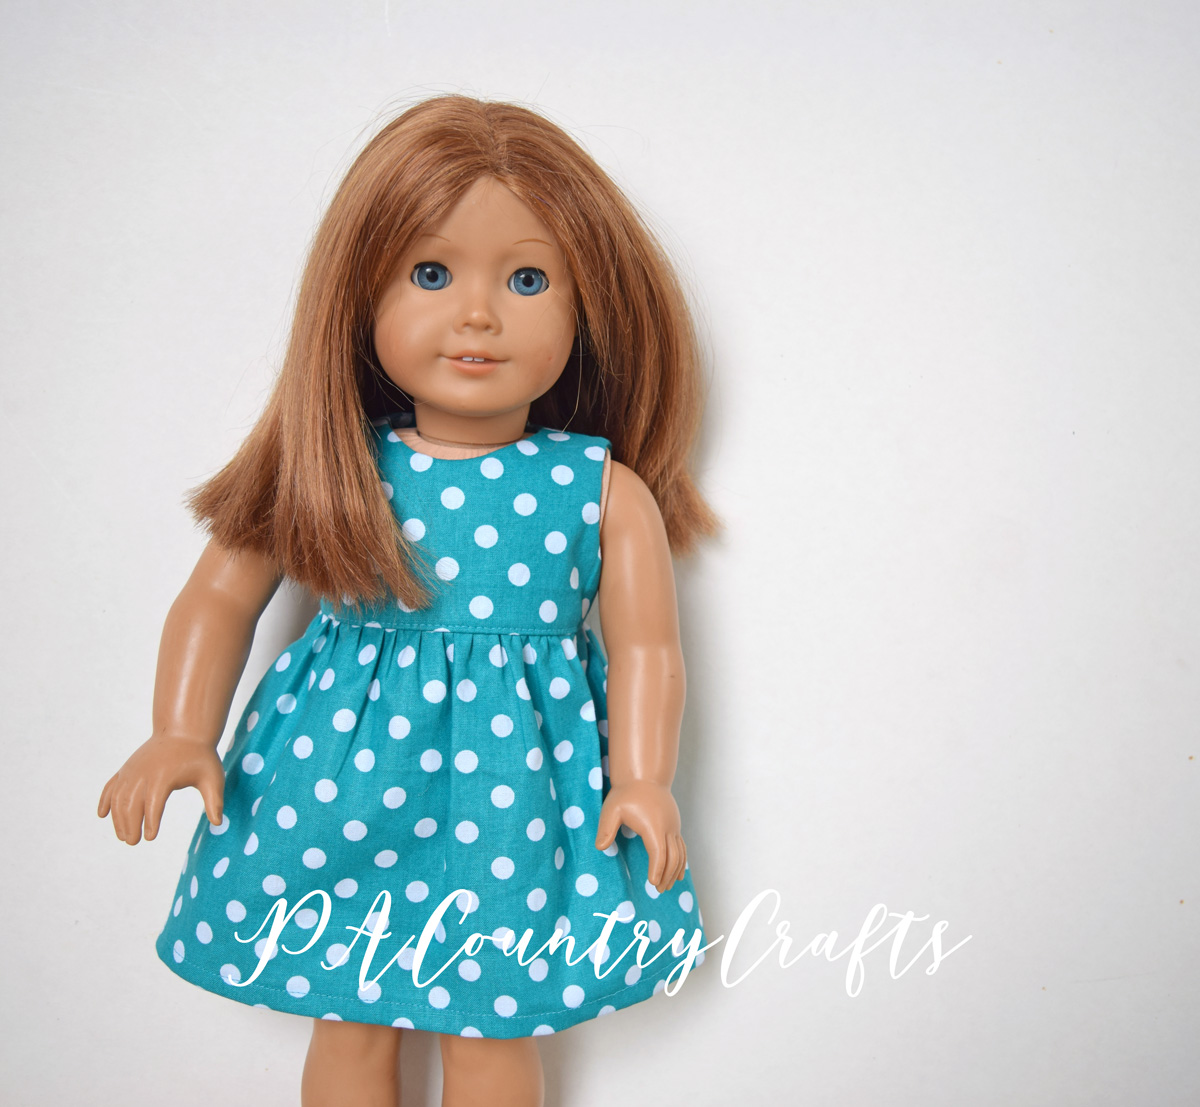
This dress was made from two different shirts using the Salina Dress pattern and I even attempted a flat felled seam in the front. I was pretty proud of how crisp that turned out! I also changed it to a slight high-low hem to use the original shirt.
My 9yo, Isabelle, finally got her new apron- I will have to show you that sometime- and I made a matching apron for her doll!
My niece got an apron and oven mitts for her doll, too. I used THIS pattern.

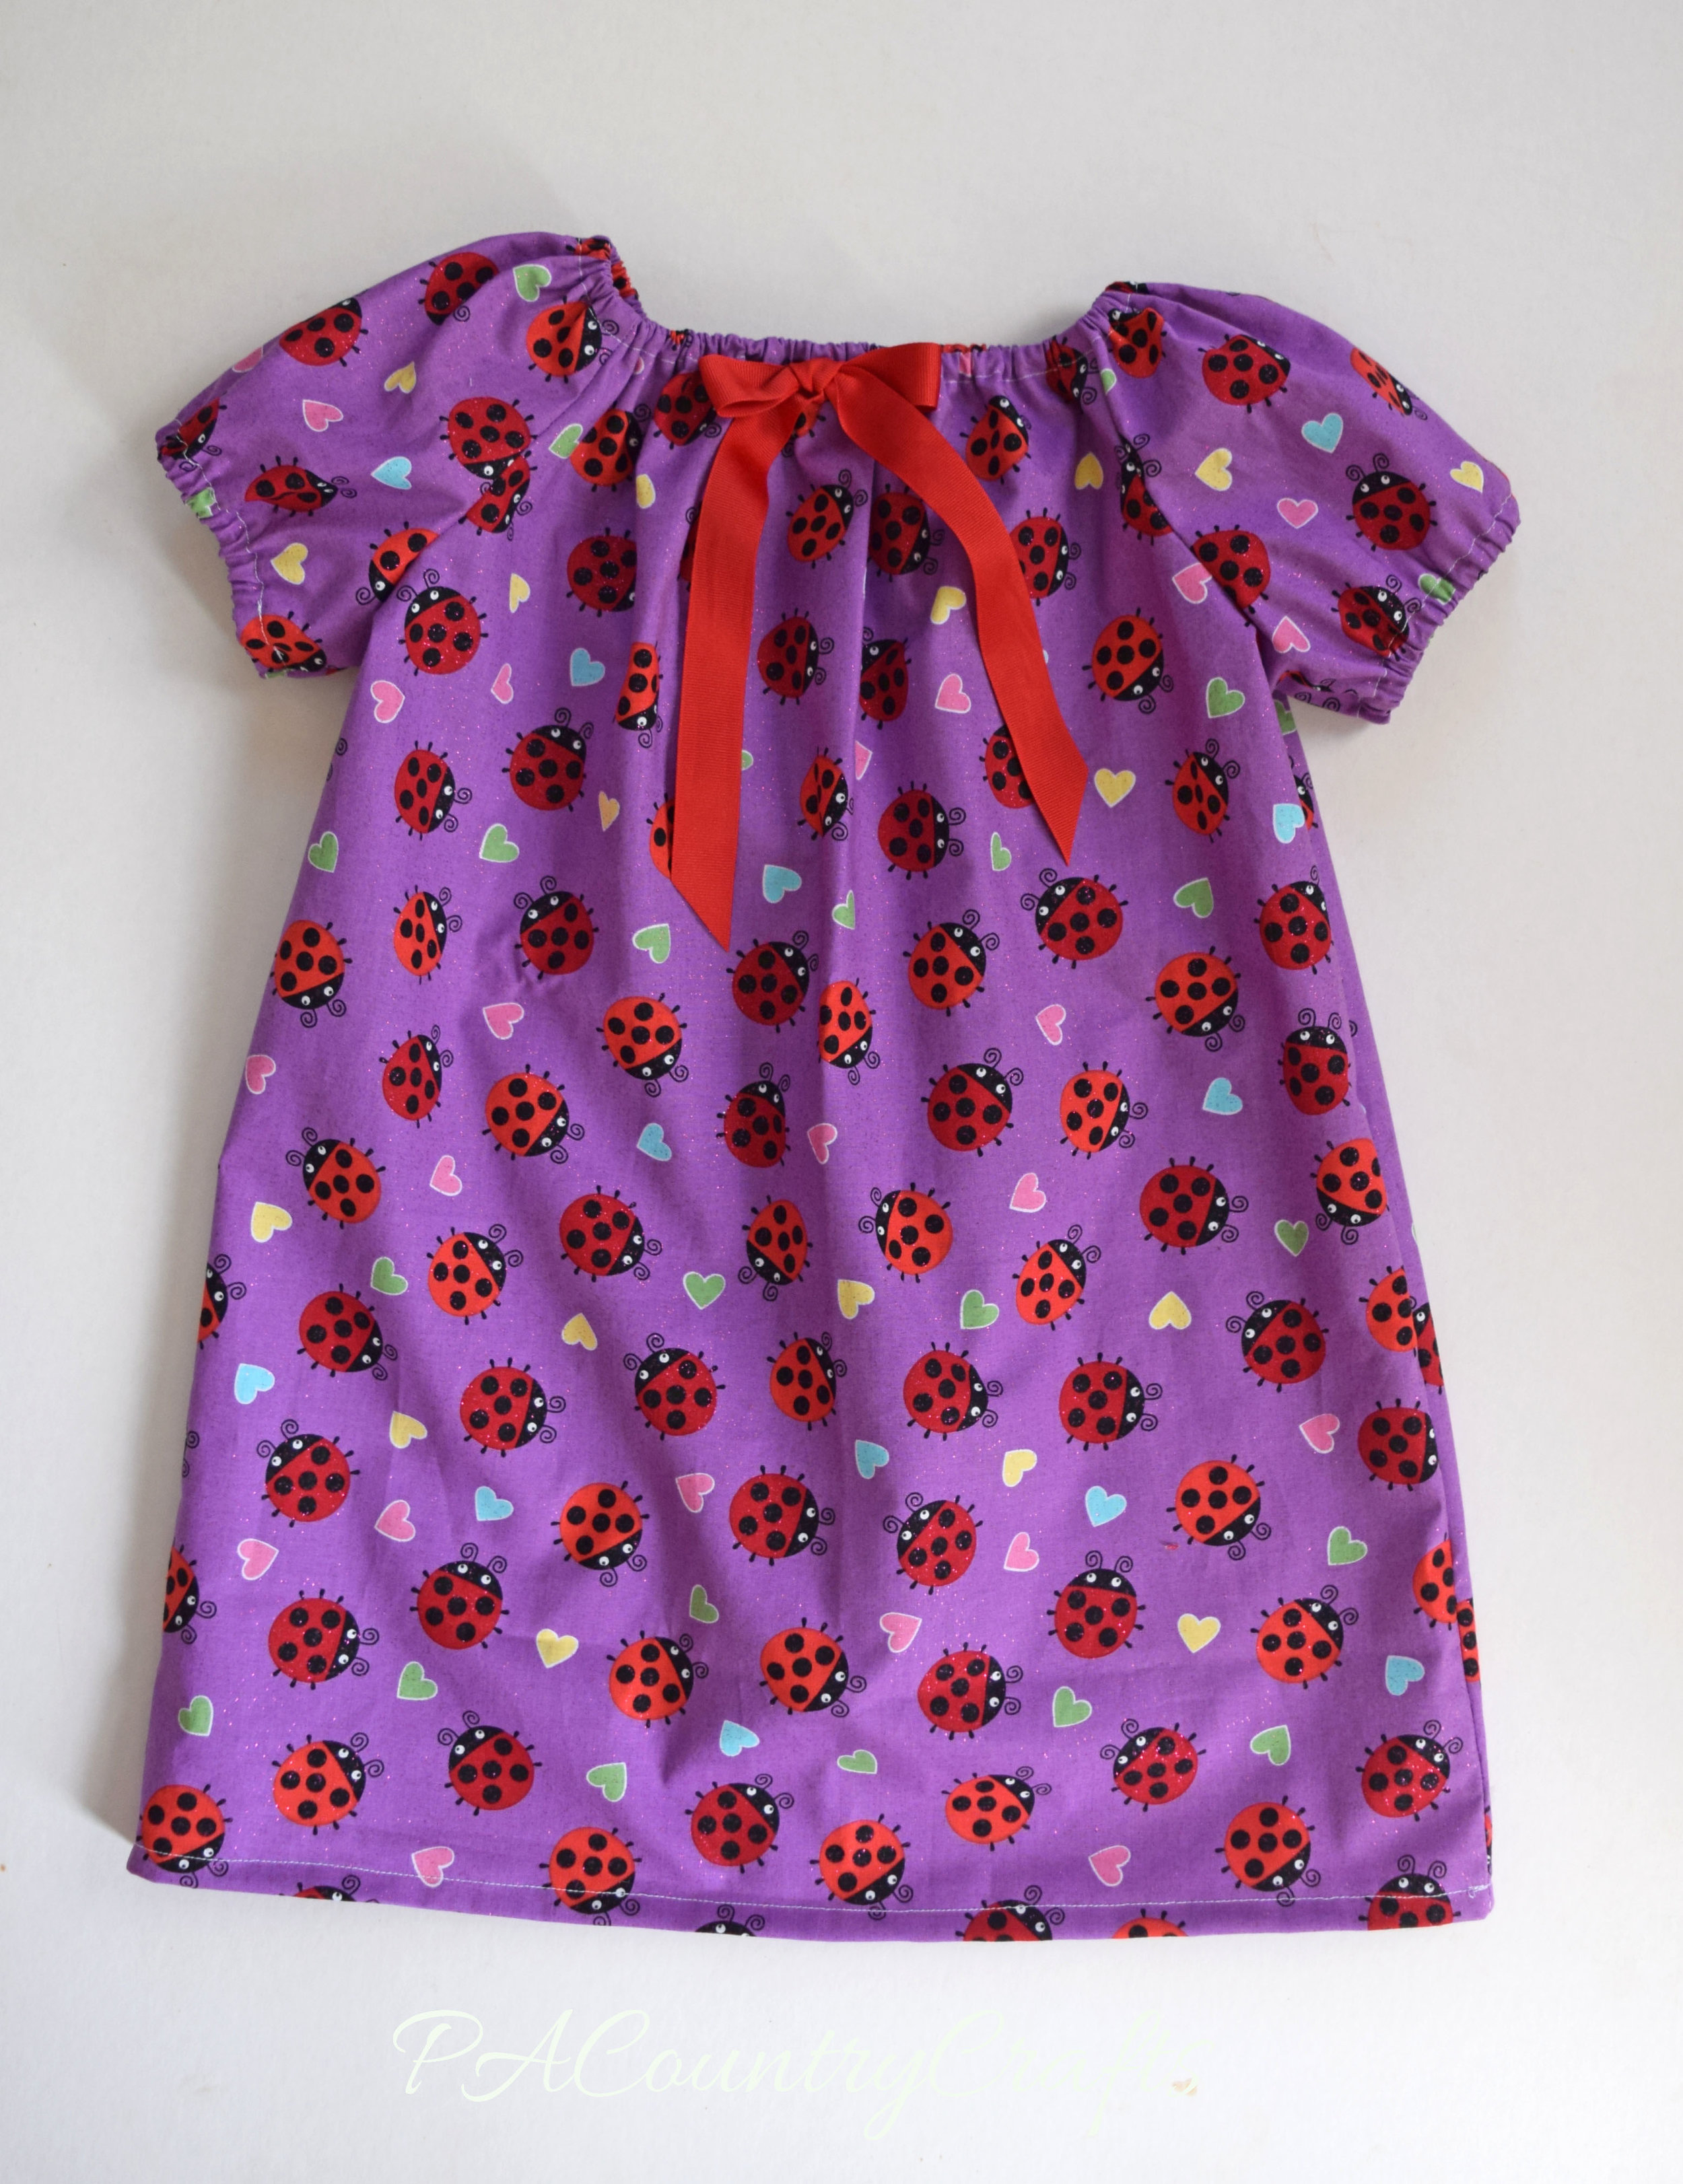
Isabelle made herself a nightgown last year with this flannel she chose. The doll dress was half finished on my sewing table for a long time and I just gave up and finished it for her. Procrastination might be an inherited trait. ;) It is just a peasant dress with a ruffle on the bottom.

She really does like to help me sew. She helped quite a bit with this assortment of doll clothes for charity. The Oliver & S Popover dress was an easy one! I extend the top up an inch or so and just use bias tape instead of adding a yoke. I like to sew in a bit of lace in the front. Isabelle likes to sew the side seams.

I also made some Twirly Lace dresses. That really is an easy pattern!

My 2yo niece got a doll diaper bag set for her birthday. The wipes are just squares of flannel in a tissue cozy. Isabelle sewed that, too.

Now, the big project I am working on right now- well, one of them- is bedding for my 7yo's doll bunk bed. It was her Christmas gift, and part of that included choosing the fabric for the bedding. Worst fabric shopping trip ever. Honestly, that is saying a lot with my girls' track record lately. I made the sheets and pillowcases, but now I am working on quilts. I couldn't just go with simple. It will take awhile.


Well, noisy sisters ended that nap! Ugh. I was done with the post, so at least it was good timing.

I think that catches us up on the doll sewing things around here. I love seeing what other people make, so I hope this may be inspiring to others. Maybe it will give you some ideas for sewing with kids. Even noisy big sisters.

Doll Diapers and Dresses

diapers2Band2Bdress.jpg
Today I have a very special guest post. This summer the girls and I have been doing a lot of craft projects. I am trying to keep them busy so that they don't find their own ways to entertain themselves. As I mentioned before, one of my tactics for making my daughters dread Joann's Fabric Store less is to allow them to choose a fat quarter when they are on sale. My daughter, Halley, and I used some of them to make doll diapers and dresses. I let her use my camera to photograph them and now she is going to tell you a little more about them while I bake cupcakes with her sister and make lunch...
~~~~~~~~~~~~~~~~~~~~~~~~~~~~~~~~~~~~~~~~~~~~
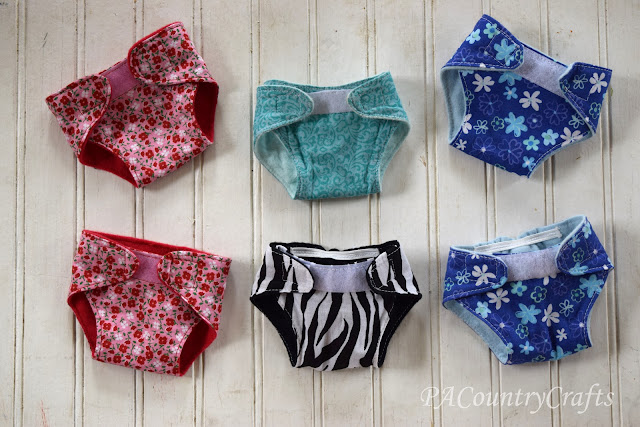
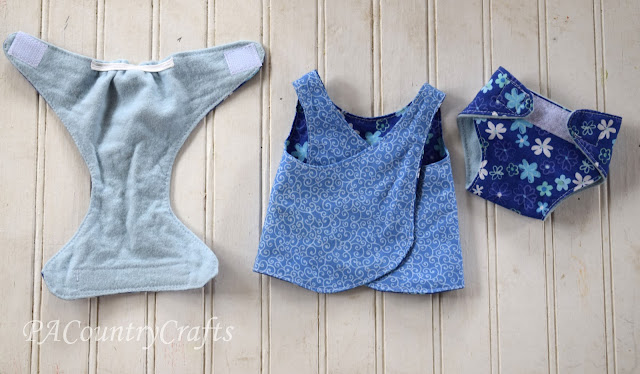
Hi, I'm Halley! My mom and I made dresses and diapers for my Baby Alive doll, Mandy Grace. The outside of the diapers are made out of fat quarters from Joann's Fabric Store. The inside is made of flannel scraps.We used velcro to attach the flaps to the front of the diaper, and a little strip of elastic in the back so they don't fall off of the doll. 
Here are all of the diapers we made.
Here is the  reversible dress, along with the matching diaper we made out the leftover fabric. We used a tiny bit of other fabric to cut out a little heart and sew on. We also used a little bias tape leftover from my Sunrise Dress.
Here  is the other side of the reversible dress  made out of the same fabric as the heart on the other side of this dress.

We also made a Reversible criss-cross dress that matches two of the diapers we made. The pattern was no longer available. They did have picture of the pattern, though! Unfortunately it was taken at a weird angle. So my mom drew a picture of the pattern. It worked, but unfortunately it was a little too big for Mandy.

Here is the other side. We didn't use velcro, instead we used snaps. Let's just say my mom isn't too experienced with snaps. She had to rip them out a couple of times.

Well, that about sums it up.Thanks for stopping by and checking out my first ever post!

~~~~~~~~~~~~~~~~~~~~~~~~~~~~~~~~~~~~~~~~~~~
Thank you, Halley! Yes, she is brutally honest. ;) I did make some adjustments to my pattern and I have it all worked out now, so I will probably make more of the criss-cross dresses. 

Elastic Waist Doll Dress Pattern

elastic-waist-peasant-doll-dress-1.jpg

Happy World Doll Day! In honor of this day, I would like to encourage you to use up some of that scrap fabric (I have WAY too much!) and make some doll clothes for organizations that donate dolls to children who could use a little joy in their lives. Here are some that I have found- some accept clothing donations and some do not but you may be able to help in some way or be inspired to start your own organization:

The Broken Doll - restores dolls and gives them to girls in foster care and hospitals
Broken Dolls Healing Hearts - creates care packages for children, including restored dolls
Hope Through Broken Dolls
Janie's Dollys for Recovery - dolls for girls undergoing extensive medical procedures

If you know of others, please share the info!

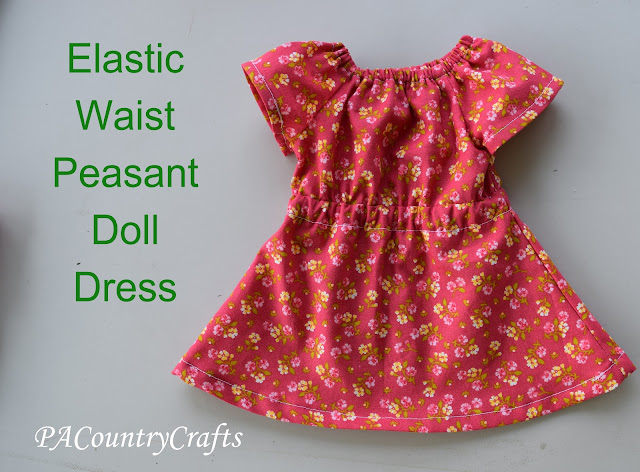
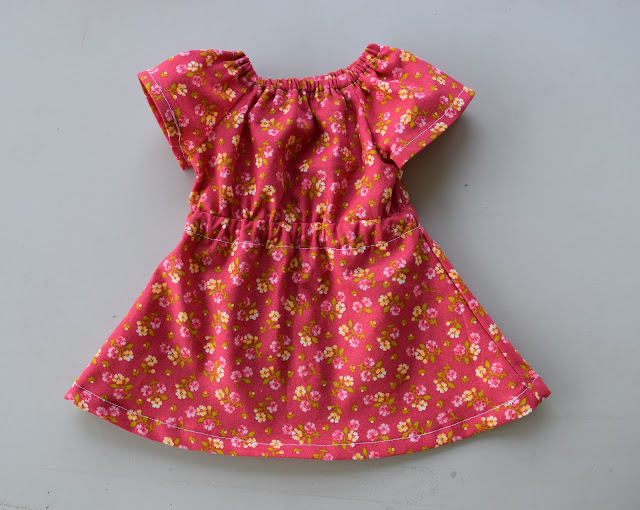
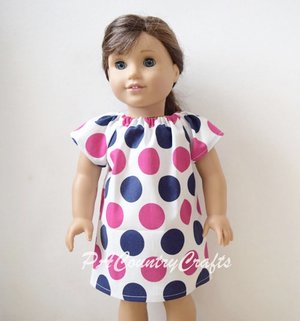
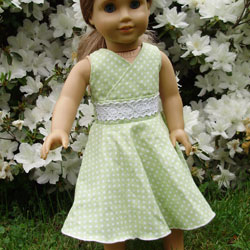
To get you started, I have a free doll dress pattern and tutorial for you today! This is a doll-sized version of the teen peasant dress from yesterday.

This really isn't too hard. I whipped this one up in about a half hour. It will fit an 18" doll like American Girl, Our Generation, or My Life. It would probably work for smaller dolls with some adjustments on the elastic length.

UPDATE 11/2019 - I now have a printable pdf pattern and step by step tutorial posted on the blog! See it HERE.

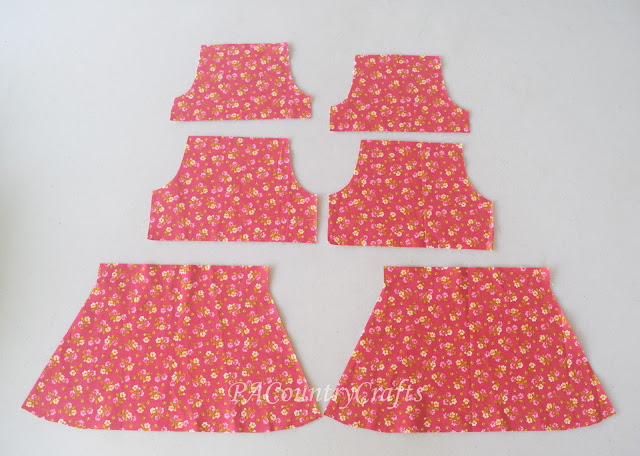
I am still working on the pdf pattern (which means it is burried on my sewing table somewhere) but you can cut these pieces with measurements.

Sleeves: 7" wide by 4 1/2" high
Tops: 8" wide by 5 1/2" high
Arm Scythes: 1 1/2" wide by 3" high (just curve it a little as shown)
Skirt: 7 1/2" high, 8" at waist, 14" at bottom (make initial slit 1" deep)
Waist elastic: 12" (1/4")
Neck elastic: 8 1/2" (1/4")

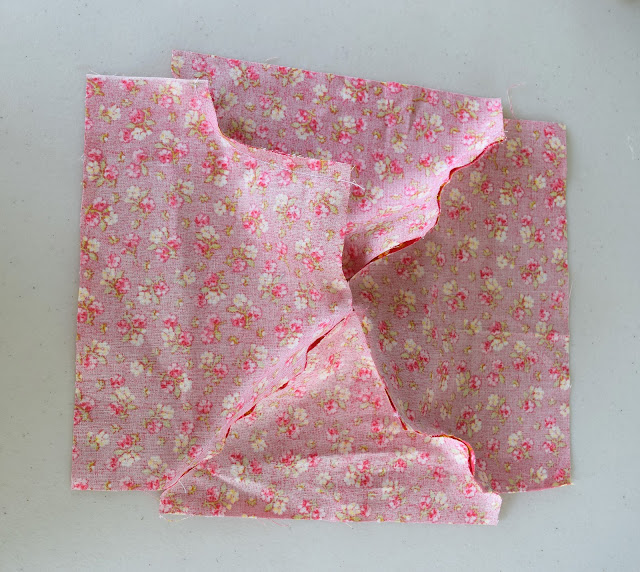
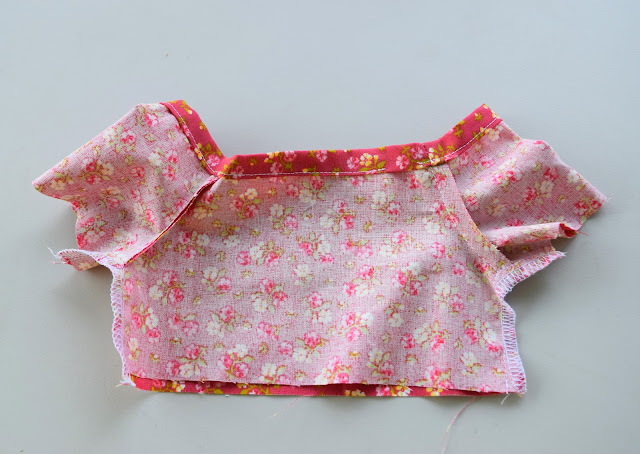
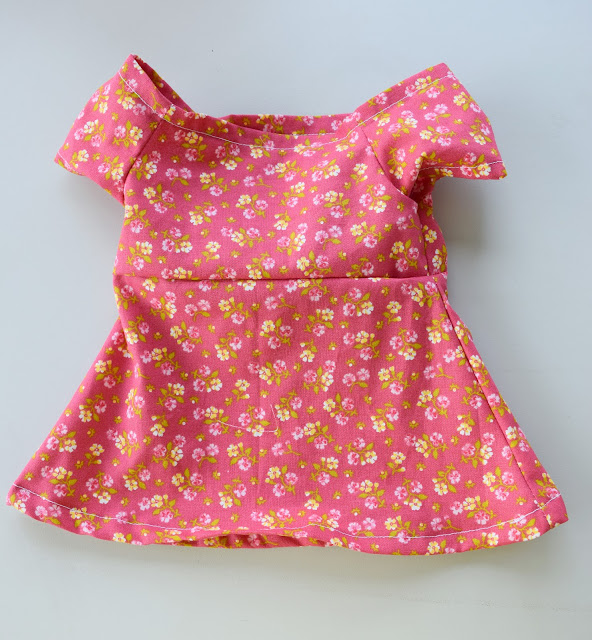
The sewing process is the same as the teen peasant dress (see THIS post for instructions!) The only differences are that I used a smaller seam allowance- 1/4" and made the elastic casings a tiny bit smaller. Also, it would probably be easier to hem the sleeves before sewing the sides.

It is really very straightforward. Just follow the same directions I gave HERE.

If you want to make puffy sleeves with elastic casings, increase the width to 9" and the height to 5".

Please use this pattern for personal, non-commercial, or charity use only. If you make one or more of these I would love to see it! You can contact me via facebook or email pacountrycrafts at gmail dot com.

I have other free doll clothing patterns available, too! They are all made to fit 18" American girl dolls. You can see them all under my tutorials menu, but here is a sampling:

Strawberry Shortcake Doll Dress

dresshint.jpg
Last year, I made my niece a Strawberry Shortcake dress for her birthday.(See it HERE!) So, this year I decided to make a matching one for her 18" doll.
American Girl Doll Strawberry Shortcake Dress
I just took the free T-shirt pattern from Liberty Jane (found HERE) and shortened it. I used an old, white T-shirt for my fabric. Then, I used freezer paper stenciling to make the Strawberry Shortcake logo on the front. Those tiny pieces were a PAIN to cut out!
American Girl Doll Strawberry Shortcake Dress
I assembled the shirt, then cut a skirt from leftover fabric I used on my previous girl-sized Strawberry Shortcake dresses. I made sure the waists matched and cut the skirt in a wide, A-line shape. I left a little opening in the center of the back and hemmed it inwards so that it goes on and off easier. Then, I just sewed the skirt to the shirt. I did a narrow hem at the bottom. 
American Girl Doll Strawberry Shortcake Dress
It was a quick project and a nice distraction from the craziness going on around here these days. Now, I need to get back to making actual strawberry shortcake!

Link Parties where I sometimes hang out...

Flutter Sleeve Doll Dress

americangirldolleasterdresscollection.jpg

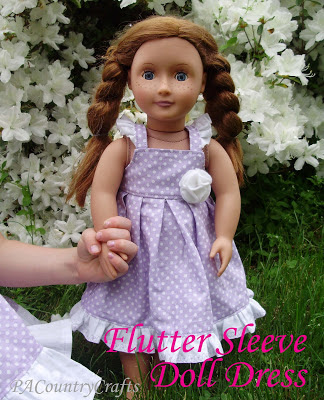
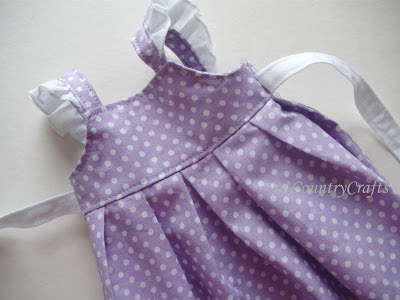
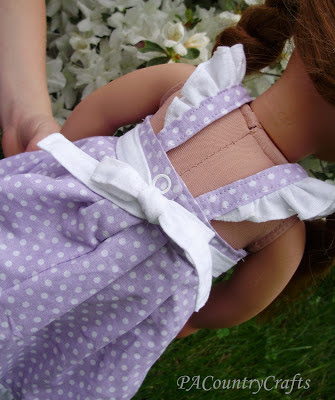
When my 5yo got her own "fake American Girl doll" for her birthday, she immediately began nagging incessantly for a doll dress to match her Flutter Sleeve Sundress. Since I made them for her sisters, it was only fair, so I whipped one up as soon as I got a chance.

She loves it! Again, I took pictures this time since I didn't have a deadline and could sew in the daylight hours, so you are getting a tutorial! YAY!

I made a pattern for you (again, this is for personal, non-commercial use only and don't sell this pattern, please and thank you). You can download the pdf pattern HERE. 

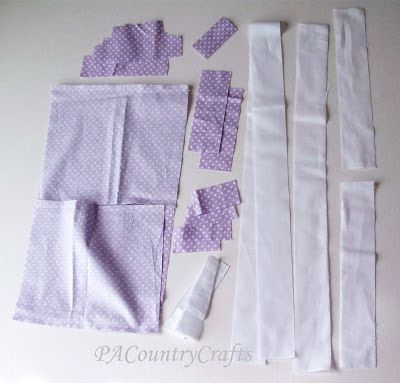
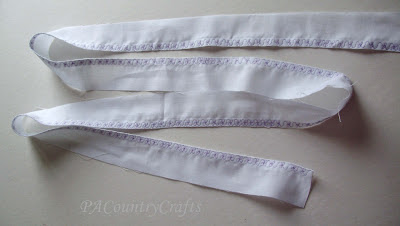
For the bottom ruffle and side ties, cut two strips 2" by the width of the fabric (about 44"). Cut one of those strips in half.  The bottom ruffle will take 1 1/2 strips.  Take the remaining half strip and cut that in half. Those are your side ties.

This is all of the pieces:

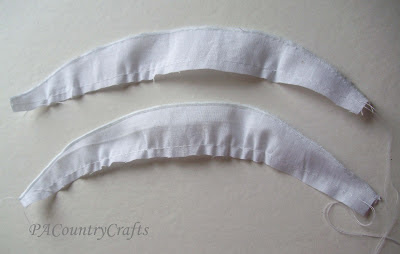
Let's start out with the straps. I used a rolled hem edge on the ruffles, so if you don't have a serger, you can cut them a bit wider and do a small folded hem instead. I sewed a long, gathering stitch along the bottom edge.

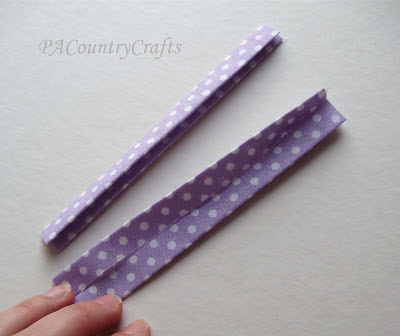
To make the straps, press the fabric like you are making double-fold bias tape.  Press the long edges to the center, then press again to fold it in half.

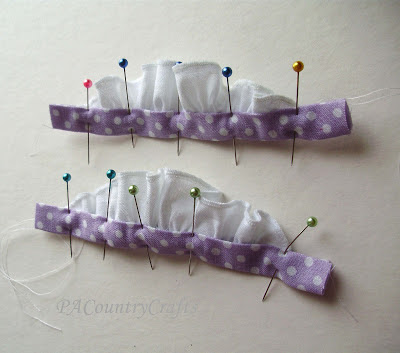
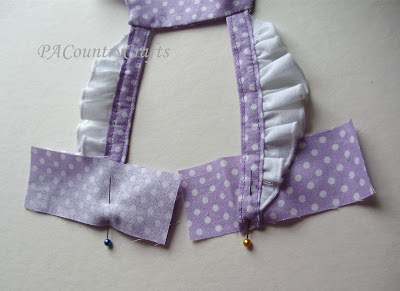
Gather the ruffles and sandwich them into the straps with pins. I left a little extra room on the ends in this pic, but the ends of the ruffles should be about 3/8" from the edge of the strap.

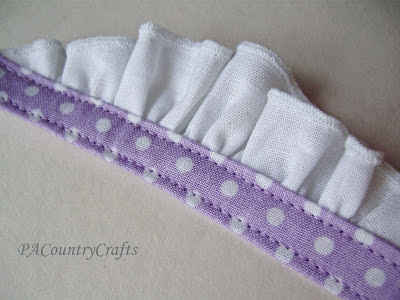
Sew about 1/8" or less from each side to attach the ruffle and topstitch. It looks so professional this way!

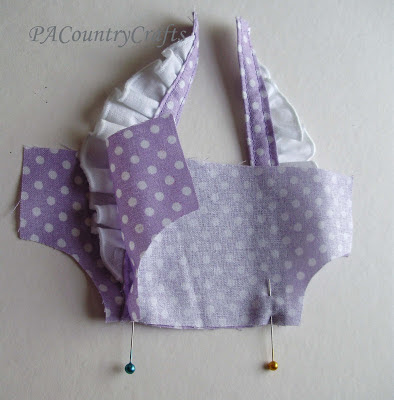
Pin the straps to the bodice, sandwiching them between the front and back pieces and leaving 1/4" seam allowance to the corners. 

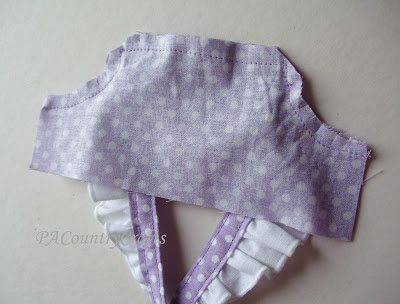
Clip the curves, flip, and press.

Attach the straps to the back pieces the same way.  The strap should be about 1" from the inside edge of the back and angled slightly as shown. (I left one of the back pieces off for the picture so that you can see the angle- they should be sandwiched when you sew it.)

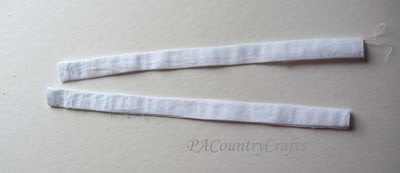
Make the side ties by sewing right sides together, flipping, and pressing neatly.

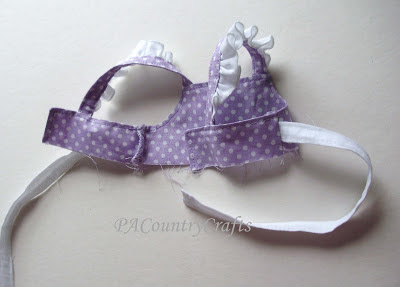
I topstitched all the way around and hemmed the ends, too. I just didn't take a picture of that. Now, I skipped some pictures here, but all you have to do is pin the straps into the sides 1/2" above the bottom edge and then sew the sides together. I serged them for more stability, too.  Then, I totstitched all the way around the edge of the bodice. Sorry, I know that is a lot at once.

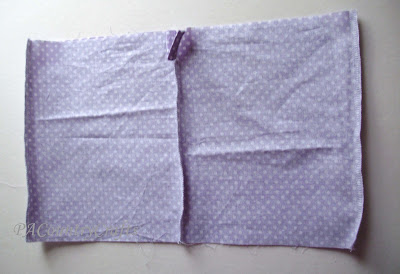
OK, for the skirt portion of the dress... sew the sides together and sew up the back center seam, leaving the top 2" open. Overlock or zig-zag over the raw edges.

Make a button placket to cover the opening. I am not going into detail on that part because I already did that HERE if you need help.

Then, just make your pleats using good ol' trial and error and pin the skirt to the top, right sides together.

Sew and overlock or zig-zag the raw edge and topstitch in place on the bodice about 1/8" above the skirt.

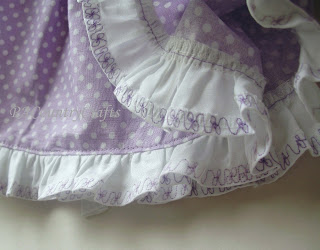
Almost done! Make the bottom ruffle by sewing the two pieces together and hemming the bottom edge.  I was playing with my new machine and made a fancy stitch here.  

Gather and sew it to the bottom edge of the skirt. Overlock or zig-zag stitch over the edge and then topstitch it in place.  

Insert a snap in the back...

...and make a little felt flower for the front.

TADA!

It made her so happy!

It makes me very happy that Grace isn't old enough to ask for a doll and matching dress for her Little Diva Dress though. I loved all those ruffles, but a doll is not worth that much effort to me.  I want to make her a matching purse instead, since she loves purses right now.

So, my 5yo wanted to take a picture of all of the dolls together...

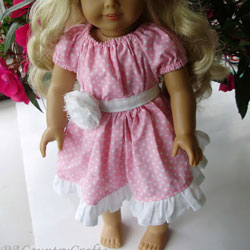
From left to right... Twirly Lace Doll Dress, Flutter Sleeve Doll Sundress, and Boutique Peasant Doll Dress.

If you make a dress using one of these patterns, I would love to see it! If you have any questions, just send me an e-mail. :)

Here are some more doll dress patterns you might like:

Boutique Peasant Doll Dress Pattern

boutiquepeasantdolldresstitlepic.jpg

I was surprised that so many people were interested in the pattern for this dress! So, I redrew it from my scribbled up copy and copied all of the measurements onto the same paper. Here ya' go! The downloadable pdf pattern is available HERE. (Updated 3/20/16)

If you have trouble, please just e-mail me at pacountrycrafts at gmail dot com and I will send you a copy of the pattern.

I hope this helps! The directions are in the original tutorial HERE.  If you make one I would just LOVE to see it! 

Again, this pattern is for your own, personal, non-commercial use. Please do not copy the pattern and sell it yourself. (As my 5yo would say, "Don't you know? That is actually rude!" Kinda' makes me wish I could upload sound on here for you to hear just how funny it sounds coming from her.)

Happy sewing! I hope I can help make some other little girls just as happy as mine were!