Rustic Winter Pine Cone Centerpiece

After all of the Christmas decorations are put away the house can seem a little cold and empty. I wanted to create some neutral, rustic, winter decor to fill the gap a bit. I have a few Valentine's Day decorations, but if I put pink all over the place I would start a pretty big fight in this house since we have strong opinions on both sides about that color. Instead, I went with more natural elements (free stuff I gathered outside) for sort of a rustic, winter look.

pine cone box centerpiece

The first thing I made was this pine cone centerpiece. My husband had built me a box that will hold mason jars for a centerpiece. I had yet to fill it with anything and I was inspired by a centerpiece on Pinterest that has a bad link. I stained my box with a weathered gray stain and topped it with dark walnut antiquing wax.

winter pine cone centerpiece

I found two pillar candles in a cupboard. They aren't even the same color, but I don't care.

natural winter centerpiece

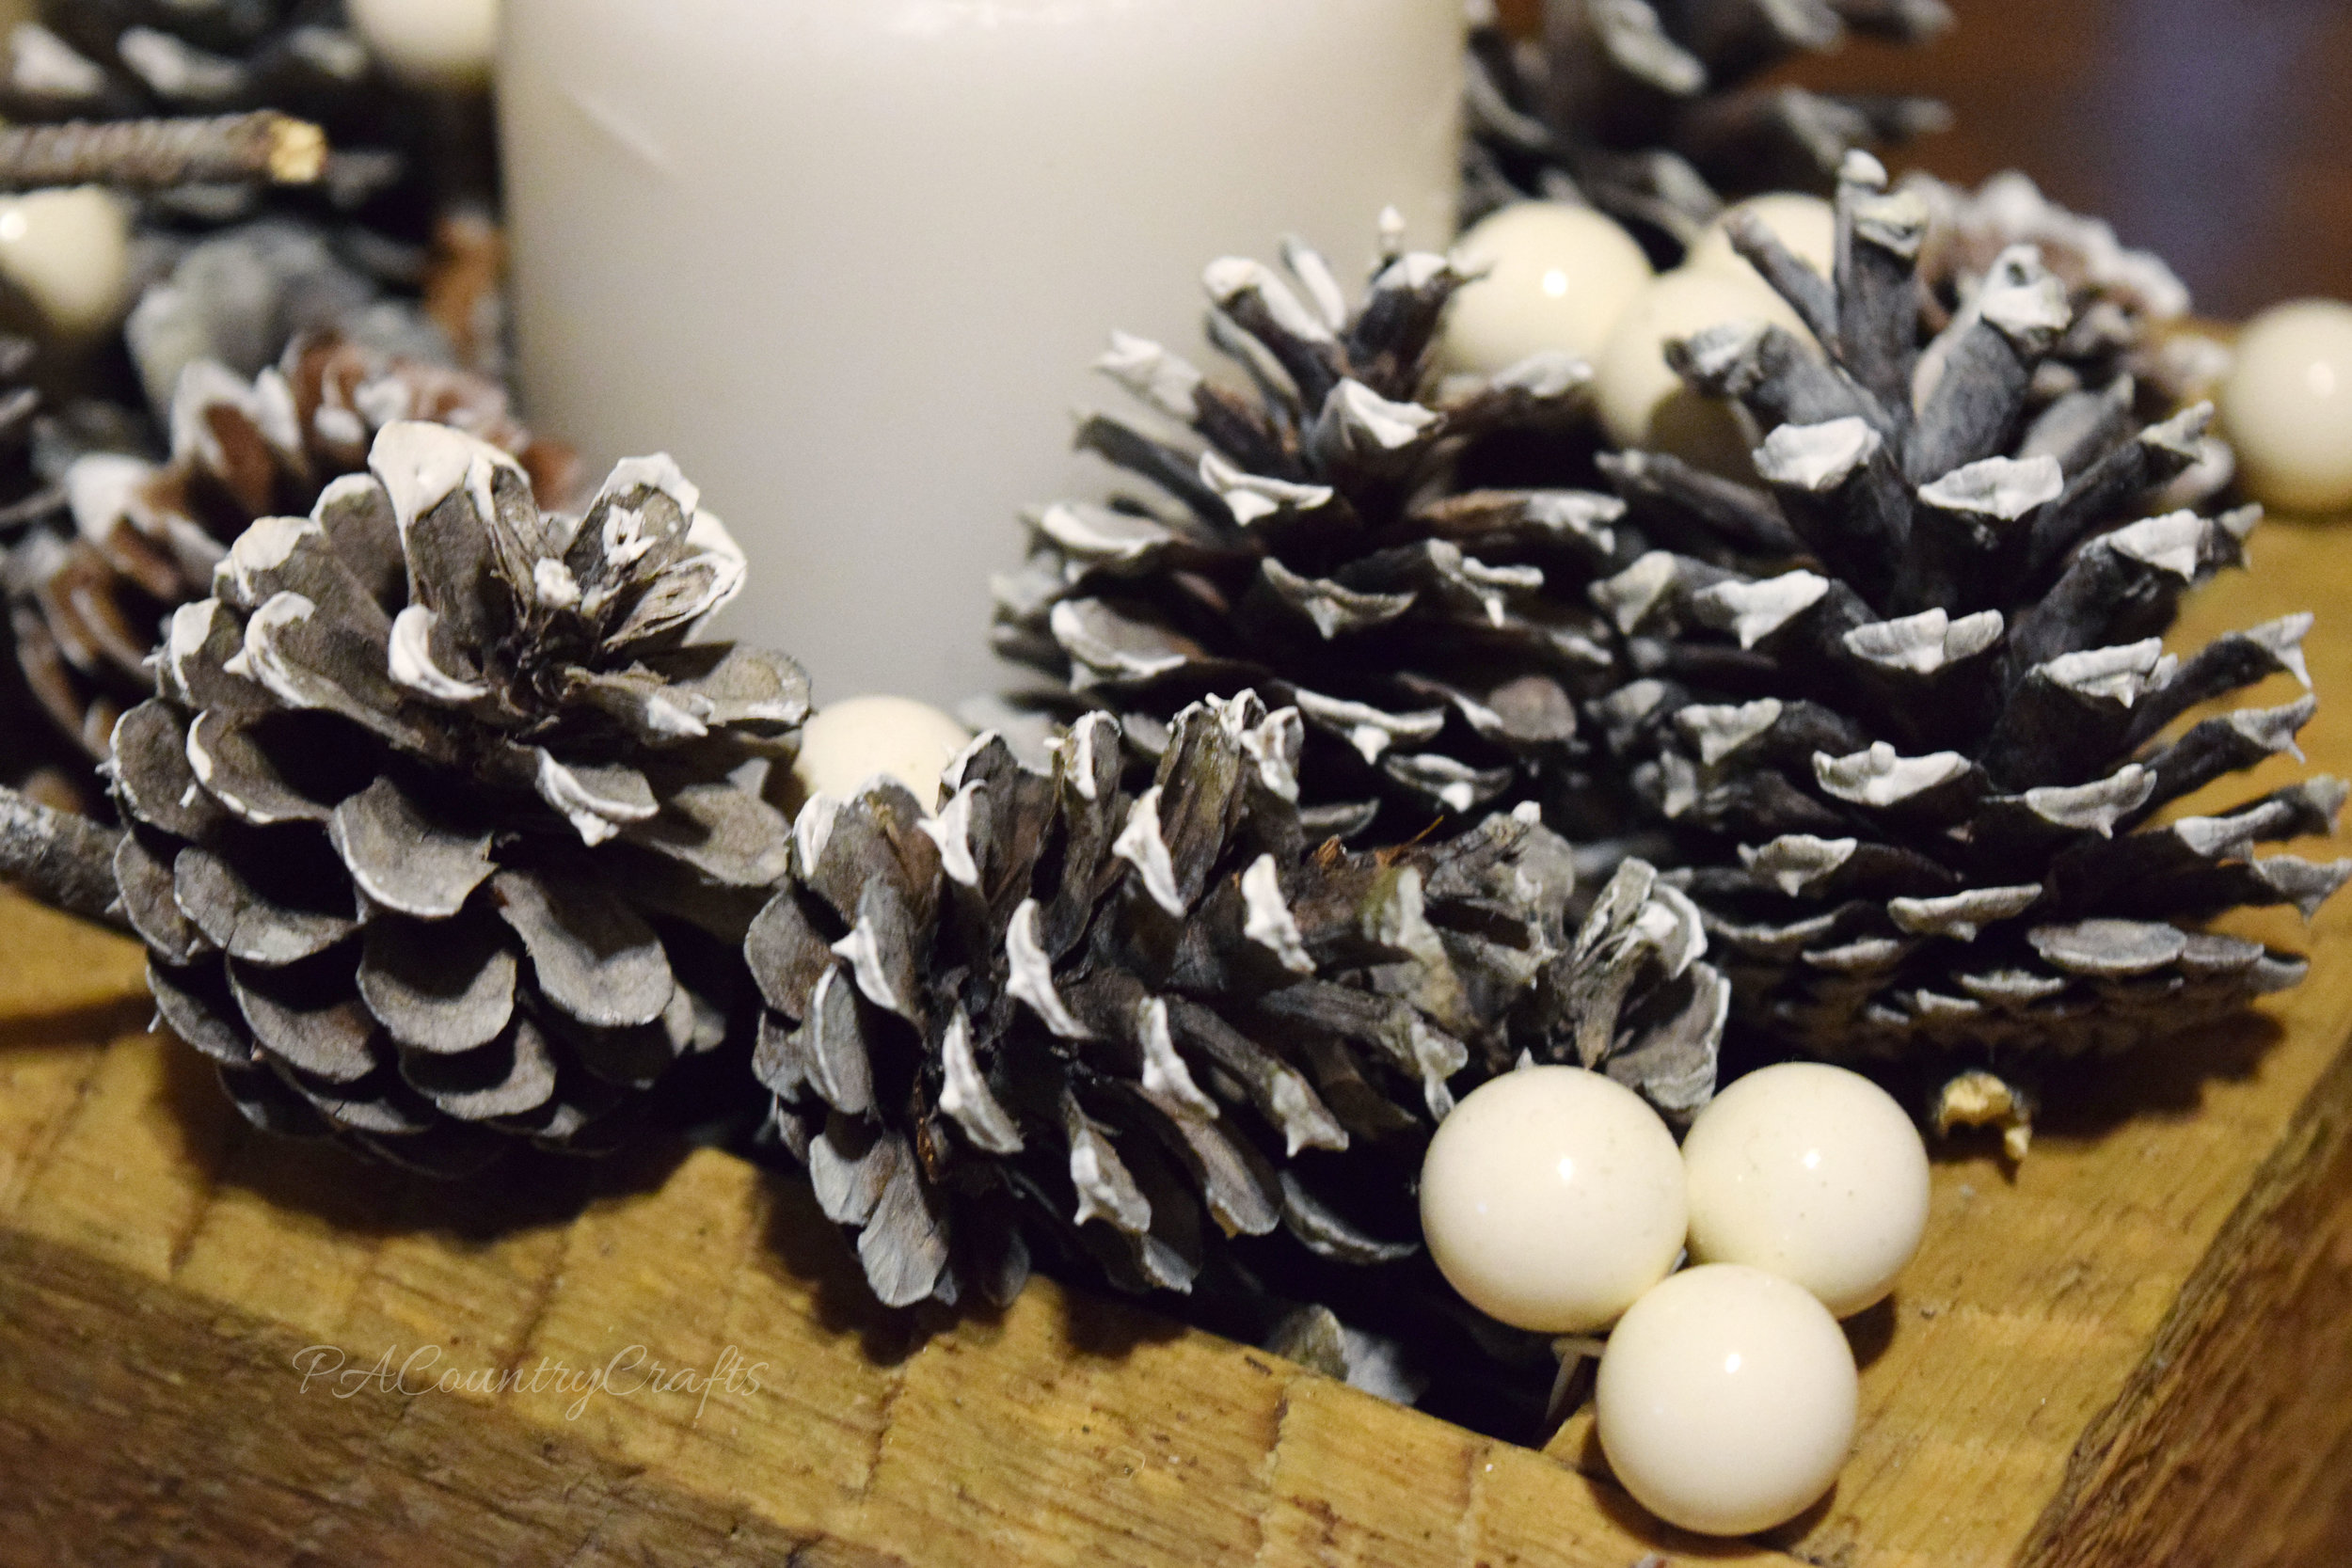
Next, my daughter and I went for a walk and collected pine cones. They were wet from being outside, so we baked them in the oven at 200 degrees Fahrenheit for an hour or two on a foil lined cookie sheet. This makes them open up and draws out the sap and bugs. I spray painted them with a little ivory just to dust them and give them a frosty coating.

how to bake pine cones
How to open pine cones

Finally, we arranged everything in the box with some white berry picks. Those were on clearance after Christmas and the only thing I had to actually buy for this project.  I really think arranging everything in the box was the hardest part. I also dabbed a bit more white paint on the edges of the pine cones for more contrast.  Some of the pine cones went missing before I took these pictures, too. ;)

DIY frosted pine cones
rustic winter centerpiece box

I like my little box and it will be fun to change it out with the seasons. It isn't perfect, but the girls got to help and we made do with what we could find.

I have a few more rustic, winter decorating projects that I will blog about later this week!

Kitchen Organization for Lunchbox Stuff

I must admit, I am slowing down a bit on my decluttering and organizing around here. Part of it is my ambition fizzling out and part of it is the kids being home more. Nothing ruins a good cleaning spree like a phone call about an early dismissal. Speaking of school, my kids go through little spurts where they like to pack their lunches. I used to encourage lunch packing quite a bit more, but frankly, I just got burned out. One year of packing three custom lunches and a snack every day wore me down. I have more of a "whatever" attitude about it now.

I still have a lot of lunch packing supplies- plastic containers, thermoses, etc. They can trash a cupboard pretty quickly. In a perfect world, I would have an entire area just designated to lunchbox stuff where everything is in one place, but my kitchen just isn't set up that way. I gotta' make do.

So, of course, I resorted to plastic bins from the Dollar Tree. They corral most of the plastic containers. I also sometimes use old food storage containers with missing lids. The white one holds my plastic mason jar lids.

lunchbox supplies organization

I like to use the plastic sandwich boxes because their sandwiches don't get smashed. The XS size Glad containers are a perfect snack size for elementary lunches! Also, a friend of mine sent reusable pouches for applesauce when my daughter had sever poison ivy all over her face and lips and couldn't open her mouth wide enough to eat much.

how to organize lunchbox containers

The older girls conned me into buying some cute sectioned containers that they don't really use.

lunchbox container organization

Some of the lunchbox goodies have to be stored in the fridge. I love the plastic baskets with the handles in front since I am short (they have them at our local Dollar Tree in cute colors right now!) It keeps everything in the fridge so much neater!

how to organize refrigerator shelves

The pink basket holds little things for lunchboxes, like yogurt cups and snacks. They would be a mess left loose in the fridge and I keep them up high or they will be gobbled up really quickly in this house. Remember those little Glad containers from a few pictures up? Well, those make perfect DIY jello cups! I also like to make my own granola bars and put them in snack bags.

homemade lunchbox snacks

The white basket is for jelly. We always have an assortment. (See THIS post for jelly recipes!)

how to organize jelly jars

I keep the soup thermoses with the water bottles (see HERE), but maybe I should pitch some of those divided containers and move them. The water bottles need to be kept at a more convenient spot because we use them more often. The actual lunchboxes are stored on the bottom shelf of my bakers rack in a big wire basket. I keep them low so the kids can put them away easily- they are supposed to empty their lunchboxes as soon as they get home.

These are just a few practical things that have helped to corral the mess. You can see my other kitchen organizing posts HERE and HERE.

If you have any organizing tips, I would love to hear them! I am always trying to make things more efficient!

More Kitchen Organization

Last year, I put a lot of thought into better ways to organize my kitchen. We don't have the money to totally redo things and my husband doesn't want to make even small cosmetic changes if we hope to tear it all out one day. Soon after we moved here, I did get him to move the stove and install a dishwasher. Unfortunately, that left an awkward space where the stove hood used to be. It is the area that I use the most when cooking and baking, so I found some practical ways to make it work for me. On the side of the cupboard, I added mug hooks to hang my mixer attachments and measuring cups. I love being able to reach up and quickly grab what I need without having to dig through a drawer or cupboard!

Hang mixer attachments and measuring cups from hooks on the side of a cupboard.

On the wall behind the counter, I hung two metal spice racks, side by side. It keeps my spices handy and they look so pretty and organized.

simple wall spice rack

spice rack bottles

I got the spice racks from Amazon and the jars came from the Target Dollar Spot. They didn't have any labels, so I painted the lids with chalkboard paint. I like having the option of changing it, but they tend to wipe off if I bump them a lot or get them wet.

Chalkboard paint spice jars

It is still an awkward space, and it is not pretty, but at least it is functional and organized!

Kitchen Organization

Easy Mason Jar Snow Scenes

The girls and I had a "craft day" over winter break. Christmas flew by in a blur and we still had a lot of craft projects that were still just big ideas and a pile of supplies. Honestly, some of the supplies were several years old because this seems to happen every year. One of the things that I wanted to make was a "waterless" snow globe decoration. The little plastic deer and bottle brush trees kept disappearing on me over the past year or so. Some of the deer didn't make it because their legs were chewed on. :( I picked up a few more things when Christmas shopping in early November, so before we had any more casualties, I wanted to make this one a priority.

Mason Jar Snow Globes

We used some "mason-type" jars. The "real" mason jars I use for canning, but there were some smooth sided jars mixed in my supply I didn't mind forfeiting.

Mason Jar Snow Scenes

The first one was the easiest. It is a little ceramic fox family and bottle brush tree from the Christmas village section at Walmart. I just stuck them in the jar and my 5yo added epsom salts. I did use a vintage lid and tie some baker's twine around the neck of the jar just to add a little more detail.

Easy winter scene in a mason jar.

The deer scene was probably the hardest. The supplies came from Michaels last year, so they were not in good shape. I made a snow mound out of clay and stabbed the trunkless trees and plastic deer into it. Getting those deer to stay in place was a pain and I needed pliers to push them down in firmly. Then, we also poured in some epsom salts, but I should have let the clay dry first.

Simple DIY waterless snow globe.

The snowman was made out of clay with wire arms, a play-doh orange nose that fell off, a jute scarf, sharpie dotted buttons, and a hat borrowed from our Monopoly game. There is a lollipop stick (unused) to hold all of the layers together, including a rounded base underneath the snowman. Unfortunately, I did not let the clay dry first and the moisture as it dried caused the epsom salts to crystallize up the sides of the jar. I had to take the whole thing apart and redo it. So, if you are making these, have a little patience and wait a few days for the clay to dry.

CLay Snowman Mason Jar Snow Globe

These were really simple to make and the kids like them! It is a nice decoration that I can leave out all winter long.

Easy Mason Jar Snow Scenes

Kitchen Decluttering and Organizing

I generally like to break my decluttering up by focusing on one area of my home at a time. If I don't I will end up ripping everything apart and it will look like a bomb went off. Did you ever read "If You Give a Mouse a Cookie"? Well, I am pretty sure that I inspired that book, even if I have never met the author. Yesterday morning the girls wanted to pack their lunches and I discovered that cupboard was a mess, so it just sort of spiraled from there. Before I knew it, I had decluttered a third of my kitchen cupboards. I had to cut myself off because there is still a lot of post-Christmas-recovery work to be done in the rest of my house.

Here is just a random list of things I decluttered in the last week or so...

Things to Declutter in the Kitchen
I seem to always start in the kitchen. It seems to be the room that we use the most and it gets cluttered pretty easily.  Fortunately, it is also pretty easy to find better ways to organize in the kitchen. If something isn't working out, like my lunchbox stuff, I am not afraid to move things around and try something else.

I try to find ways to make do with what I already have and I can't afford to spend much money on my kitchen. The absolutely MOST helpful thing I have ever done to organize my kitchen was to start using plastic bins on the cupboard shelves. I got most of my bins at the Dollar Tree (it can be hit or miss there) or Walmart. I am super short, so I can't reach those upper cupboards and the ones with the handles mean I don't have to drag a chair over or climb up on the counter!

In these bins up above my stove I have some gadgets (immersion blender, electric knife, apple peeler), cupcake liners, decorating supplies (candles, sprinkles, food coloring, etc.), and spices.

How to organize high cupboard shelves with plastic bins.

Here I have more spices on top. The next shelf has a bin entirely dedicated to chocolate- cocoa powder, chocolate chips, etc. My husband thinks I have a problem. The other one has my baking supplies- cornstarch, baking soda, baking power, etc. The bottom shelf has been promoted from sippy cups to water bottles. (sniff sniff)

Bins with handles are perfect for us short girls!

I also use bins in another area to store medicines. The adult medicines are in one bin and the kids' medicines and cough drops (which I am oddly stocked up on) are in the other. This was another huge help to me- especially when someone is sick and the last thing I want to do is climb up and look for the right medicine.

Plastic bins to organize medicine bottles.

Besides my chocolate issue, I do have a bit of a problem with cupcake liners. It seems extreme, now that I am blogging about it, to have an entire bin full of cupcake liners. I use them a lot, probably more for freezer muffins than cupcakes, and I can't resist a good clearance deal on cute ones!

cupcake liner ogranization

They get smashed really easy, so I had been looking for a pasta container to put them in like I saw on Pinterest. I never could find one and one day it occurred to me that I could just use some wide mouth pint mason jars.

cupcake liners in mason jars

I also seem to have a spice problem, so I plan on showing you what I have done to organize those later.

What are your best kitchen organization tips? Have you found anything that has worked really well? I am always looking for ways to make things more efficient around here.

8 Tips that Help Me Declutter

decluttering.jpg

Last February, I began a major decluttering campaign in my house. It wasn't consistent. I went through spurts where I purged a lot more than others. Still, any progress is better than no progress. I got rid of over 50 garbage bags of stuff!

Picture that for a minute.

And I still have a long ways to go.

When I am feeling overwhelmed and can't understand why I can't keep the house clean, I think back to those times when I WAS able to keep things consistently clean. I had a few less kids and a lot less activities keeping us on the go. But, we also had a lot less stuff.

I love the sense of accomplishment when I purge an area and it just makes me feel lighter. I know I am not alone. Many people are aspiring towards minimalism and trying to get rid of the stuff that is burdening our lives and weighing us down. There are thousands of books and websites dedicated to helping others part with their many possessions. It is so hard in so many ways!

Like I said, I still have a long way to go. I have made some progress and I just wanted to share a few things that I try to keep in mind when decluttering.

8 tips that help me to declutter!

  1. Don't anticipate regret. This is usually the hardest part. I can honestly say that there are only a handful of times that I have regretted getting rid of something. Usually, I was a bit too emotional when I was cleaning (but isn't angry cleaning often the most thorough?!) I have stopped holding on to so much stuff "just in case" I might need it later. I can usually find a way to make do without it. It helps to also tell myself that I need to trust that God will supply all of my needs.
  2. Bless others! I don't save things to have a yard sale. It usually is not worth my time and it is definitely not worth having a pile of stuff waiting for the community yard sale weekend. Craigslist and facebook yard sale pages are too much of a hassle for me. We are not ashamed to wear hand me downs and if we are blessed by others' generosity, we should do the same. I give things away to family and friends. The local pregnancy center accepts donations. And, the simplest thing to do is drop a few bags into one of those convenient bins the thrift store seems to have in just about every parking lot in the area. I tell myself that is selfish to hold onto things we aren't enjoying that could be a blessing to others. I had a hard time letting go of my daughter's Elsa nightgown (pun intended) but when I saw that a little girl is wearing it every day just like she did, I felt bad for even hesitating.
  3. Is it junk? Sometimes, I don't even realize I have so much garbage around. Is it broken? Am I ever going to actually get around to fixing it? Do I even want to? I stopped saving "play clothes" for my kids as hand me downs. They make their own play clothes soon enough and new stains appear like magic when clothes come out of storage. I look at things and made a judgement about whether something is worth the space in the storage tote. These types of things get thrown out instead of given away.
  4. Baby steps. I tend to get a little carried away. I get in a mood and rip the entire house apart. There are times where it is natural to purge a lot more than others- like when we switch clothes seasonally, but just tackling one small area per day can add up and make a big difference. Sometimes, I will go through one cupboard or drawer at a a time. I generally write "declutter" on my daily to do list to remind me to tackle at least one small area. I don't get around to it every day, but the reminder is there and I am trying to cultivate a habit.
  5. If it doesn't make you smile, it isn't worth your while. There are things I am so used to having sit around I forget about them- and may not even like them anymore. Tastes and styles change- and that is OK! (Picture 80s hair!) There are so many of my old craft projects that make me cringe now! If something doesn't fit, brings bad memories, or is just something I don't like, I don't have to keep it.
  6. Get rid of it ASAP! I like to load the donation bags immediately in the back of the car. The trickier part is remembering to drop them off and my husband does get really irritated if he has to load something and they are in his way. The longer bags sit around, the better chance one of my kids will rip them apart. Plus, it just junks the place up! (I still need to really work on this one!)
  7. Stop bringing so much stuff into the house to begin with! I am more intentional about what I buy. I don't buy fabric just because I like it. It has to have a specific project or purpose. Once in awhile I break this rule, but not too often. I am choosier about clothing. I am more resistant to clearance sales for the sake of a good bargain. I am trying to find a way to make do with what we have before I buy something else.
  8. Find some motivation. Sometimes, I don't know where to start. Making a room-by-room list of areas I want to declutter and then checking them off helps. Keeping a running total of the number of bags I have purged helps my perspective. Decorating an area that used to be junked up makes me happy and helps to keep it from getting cluttered up again as quickly. I just keep trying to find something that works for me.

I hope some of theses tips are helpful. I am certainly no expert, but I am trying. Do you have any other decluttering advice? I need all of the help that I can get!