In the Garden Twirly Easter Dress

easter2Bdresses2B20112B0592B252822529.jpg

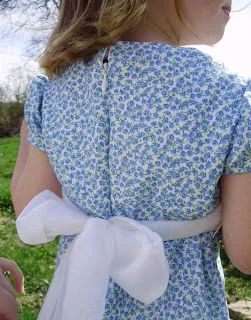
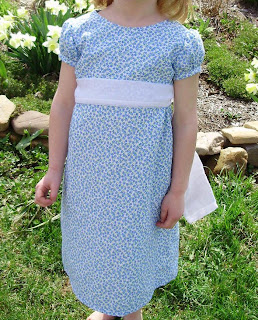
My 7yo daughter was also very opinionated about her dress style. She wanted a "poofy" skirt and straps instead of sleeves (she said spaghetti straps and I said "NO"). So, I checked out my bookmarked list and found this tutorial. She totally approved! The straps are the minimum 1" wide allowed in the school dress code, so it should be OK to wear to school if she wants, and the skirt is two full widths of the fabric- so it is very "poofy."

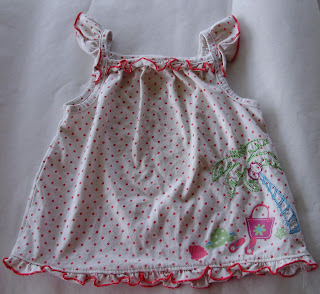
I was really nervous to do the shirring because I had never tried it before and it is the very last step! I saw it done on Martha Stewart a few years ago and figured I could handle it. Luckily, it worked just fine.

Thanks for bearing with me as I showed off my girlies' Easter dresses the past few days! Happy Easter!!!

Puffy Sleeve, A-Line Easter Dress

easter2Bdresses2B20112B0232B252822529.jpg

My 5yo wanted "puffy sleeves" (I wasn't thrilled with that- I don't like sleeves!) and a "straight" skirt.

I traced one of her T-shirts to get the bodice pattern, but made the waist fairy high. Then I cut the skirt to be an A-line style.

The sleeves were a little trickier, but they turned out really, really well! I used the same technique as found here.

I prefer invisible zippers and I used a sash from the Easter dresses I made two years ago. Maybe later I will make another one, but for now this is good.

It is very simple, but it is what she asked for! For now there is a little room for her to grow (or the dress to shrink) so she should be able to wear it all summer long!

Ruffle Tank Easter Dress

easter2Bdresses2B20112B0432B252822529.jpg

For the Easter dresses this year, I wanted to:
  1. use things I already had, if possible
  2. skip the commercial pattern thing
  3. let the girls have a say in what style they wanted

I had one yard pieces of cotton quilting fabric in pretty calicos that I made work for the younger girls, but I had to buy some for the oldest one. All these addicting blogs gave me the confidence to "wing it" with the patternless approach, too. But for my youngest, who is not yet 3, she would have asked for something ridiculous given the option.

So.. I patterned the style after her favorite shirt -the one that she INSISTS on wearing all the time (she says it is her beach shirt, even though she has never been to the beach.) I made it longer, of course.

I love the cute little flutter sleeves on this. When I sewed the top ruffle on, most of the front gathering came out, so I just let it go cause I was lazy.

I also got my gathering foot to work for my serger, and I was so excited that I made ruffles until I ran out of fabric. So there are 2 rows of ruffles on the bottom.

She loved the pockets on her Leah tunic so much that I put pockets on the dress, too. And I added ruffles at the top.

It was very easy to sew up, so I may make another one and post a tutorial and pattern for it, too!

Pirogi Casserole

pierogi2Bcasserole2B0032B252822529.jpg

This is such a quick and easy recipe that I wanted to share it here. It is a great way to use up leftover mashed potatoes (or plan ahead and make a little extra!)

Pirogi Casserole

12 lasagna noodles, boiled
2 cups mashed potatoes
2 cups shredded cheddar cheese
2 cups shredded mozzarella cheese
½ cup butter

You can also add some chopped onions, salt, and pepper to the mashed potatoes, but I don’t.

Place 4 lasagna noodles on the bottom of a 9x13 pan. Top with half of the mashed potatoes, dot with 1/3 of the butter, and sprinkle the cheddar cheese on top. Make another layer of noodles, top with remaining mashed potatoes, 1/3 of the butter, and mozzarella cheese. Put the rest of the noodles on the top. Put the remaining butter in microwavable cup, melt, and drizzle over the casserole. You can sprinkle it with parsley if you want to. Bake at 350 degrees for 30 minutes.

This is sooooo yummy! Definitely not a diet food, but…

Butterfly Quilts

I try to make quilts for my new nieces and nephews when they are born. For my niece, Eden, I made this beautiful butterfly quilt, and I used some extra blocks to make a doll-sized version for her older sister, Anna, too.

I used only fabrics I had on hand- I didn't have to buy anything, so it was some major stash-busting! I even used up extra binding that I over-cut from the last quilt and just cut a little more.

I have made butterfly blocks before, but I was inspired by the Moda Bake Shop quilt pattern here. I changed the measurements of my blocks some, though.

I hand quilted inside the butterfly wings and up the middles, and just did X's on the empty blocks (Yes, I am getting lazy here, but that flower one did me in!)

Another finished quilt- actually two!!! YAY!!!


Sneak Peek in the Studio Friday #3

sneak2Bpeek2B32B0022B252822529.jpg

Lots of crafting this week! I am just plugging away!!! (Guess this is my version of nesting since the more things I finish the closer I am to moving my sewing stuff for Baby#5)

This pretty basket and the quilt it is sitting on (full blog post on the quilt next week when I finish its complimentary doll version)...I LOVE SUNFLOWERS! I finished this embroidery and frame for my etsy shop.
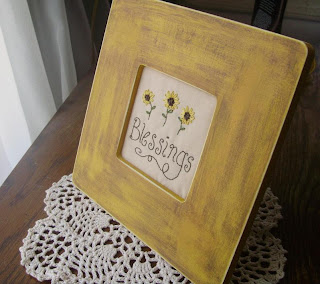
I went through a patriotic quilt phase a few years ago. Here is a little one I made and finally did the binding for. I never had navy blue to do it, and never remembered to get any. For the sake of getting something off the pile I used white. I am still thinking about tea-staining the whole thing...
Now on to the newly started things...

Some baskets for a custom order- this is how I flatten out the bottom!
On Saturday afternoon (I have been sewing on Saturdays a lot lately) I made the entire quilt top for my other baby niece (only 7 months old now), but this is all I can reveal because I don't want my sister to see it yet!
I am linking up at StudioJRU's Sneak Peek in the Studio Friday which you can find here. It is a great motivation for me to finish some things to show you all on Fridays! :)