

Manly Bunting
/.jpg)
I am trying to do more craft projects with the kids because it affords me a few minutes where they are not inventing their own “projects.” So, while supper was cooking last night, we threw together a “Welcome Home” bunting for hubby who had to stay away for a night because of work. Since it was a last minute job, I used whatever I had on hand. I wanted to make it “manly” for him, so I stole a few old hunting magazines from the basket (Before you gasp at that- I usually purge them after they are 6 months old anyway and he doesn’t seem to notice or care.) I picked out the pages that were mostly pictures and cut them into bunting shape triangles for later.
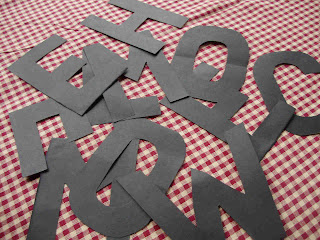
I cut out letters from a black gel pen paper tablet the kids have (Thank you, Mr. Schwalm, who made us learn how to cut out block letters every year in elementary! I still remember!)
.jpg) Then, since I realized they weren’t gonna show up so well against the dark pages, so I had the girls glue stick them to some pages that were mostly black type on white background.
Then, since I realized they weren’t gonna show up so well against the dark pages, so I had the girls glue stick them to some pages that were mostly black type on white background.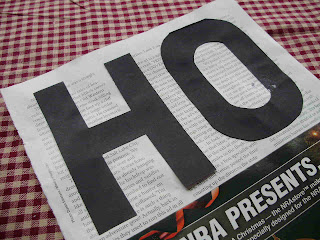.jpg)
Then I cut around the edges of those and had them glue stick them to the triangles..jpg)
We folded over the back with the yarn in it and taped it down (this was a three person job- one to cut tape, one to hold, and me to stick it down- excellent because little hands were kept busy!) Then we hung it up in the window and waited for him to come home. .jpg)
Of course, he didn’t see it when he stumbled in exhausted later that night, so I had to ask for a drink of water. But I was glad he was….jpg)

.jpg)
.jpg)
.jpg)
.jpg)
.jpg)
.jpg)
.jpg)

.jpg)

.jpg)
.jpg)
.jpg)
.jpg)

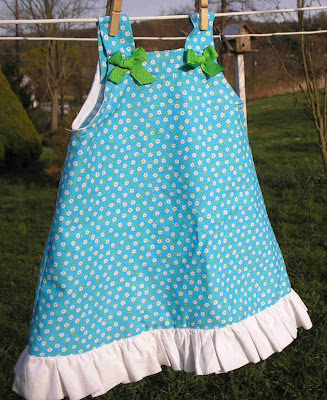.jpg) For my youngest daughter, I wanted to make a dress instead. She is little, so I had enough material.
For my youngest daughter, I wanted to make a dress instead. She is little, so I had enough material..jpg) I fixed the shortness by adding a ruffle on the bottom from the white cotton. I took a 6” strip, folded it in half and ironed, then gathered it and sewed it on the bottom.
I fixed the shortness by adding a ruffle on the bottom from the white cotton. I took a 6” strip, folded it in half and ironed, then gathered it and sewed it on the bottom.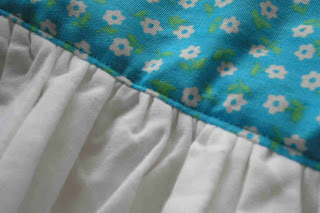.jpg) I topstitched to make it look more finished and hold the ruffle down nicely.
I topstitched to make it look more finished and hold the ruffle down nicely.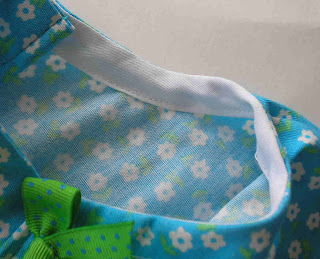.jpg) The armholes called for single fold bias tape in the original
The armholes called for single fold bias tape in the original 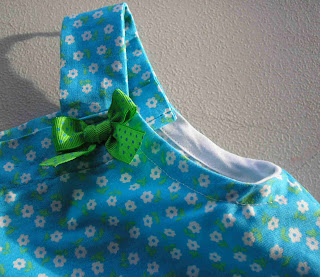.jpg) To make the dress fit better I took the front half of the bias tape off and made it cut in a little more so that the front is narrower than the back before I sewed the bias tape back on. The fit was much nicer, but I still hate bias tape.
To make the dress fit better I took the front half of the bias tape off and made it cut in a little more so that the front is narrower than the back before I sewed the bias tape back on. The fit was much nicer, but I still hate bias tape.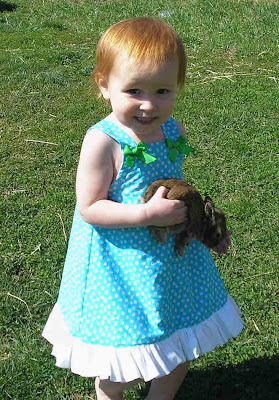.jpg) FINALLY the fit is perfect- although it is now nothing like a pillowcase dress at all! Unfortunately, it is REALLY tight going over her head, so I may have to make the straps thinner if she ever grows some hair and it gets too hard to put on.
FINALLY the fit is perfect- although it is now nothing like a pillowcase dress at all! Unfortunately, it is REALLY tight going over her head, so I may have to make the straps thinner if she ever grows some hair and it gets too hard to put on.
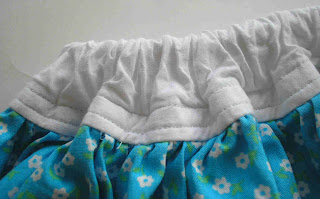
.jpg) For the next skirt in my Easter sewing series- I went totally without pattern! I decided I wanted to make this one a longer style with a wide white waistband along the top and a ribbon bow accent.
For the next skirt in my Easter sewing series- I went totally without pattern! I decided I wanted to make this one a longer style with a wide white waistband along the top and a ribbon bow accent. 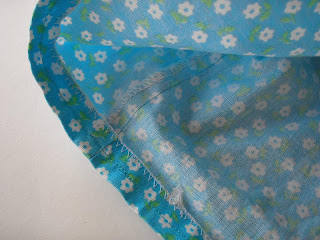
.jpg)
.jpg)

.jpg) I am going to start my Easter sewing series with the easiest of the skirts I made. First, however, I need to brag about my thriftiness! I found this heavy cotton material - it is a little stiffer than regular cotton- for $2.00 a yard for 60” width at Walmart. I also bought a yard of plain white cotton and some notions like elastic, ribbon, bias tape, and a zipper. Sadly, the fabric was the cheapest part!
I am going to start my Easter sewing series with the easiest of the skirts I made. First, however, I need to brag about my thriftiness! I found this heavy cotton material - it is a little stiffer than regular cotton- for $2.00 a yard for 60” width at Walmart. I also bought a yard of plain white cotton and some notions like elastic, ribbon, bias tape, and a zipper. Sadly, the fabric was the cheapest part!.jpg)
.jpg)
.jpg)


.jpg)