Buttercup Bag

kelsey2527s2Bquilt2B0022B252822529.jpg

I am trying to use up fabric quickly. I have to move all of my sewing stuff and fabrics to another room before Baby #5 comes! Then my husband will see just how much stash I have crammed into that sewing table, there! EEK!
I saw the Buttercup Bag sewing pattern (Free! YAY!) and wanted to make one for myself. However, I need it a little bigger than that, so I enlarged the pattern. But, before I waste the beautiful fabric I have waiting for my own purse, I thought I would try out the original pattern and make one for my 5yo.

She LOVES stars and I had 1/4 yard of this fabric in pink and a little less of the same in purple that I used for the lining.

I had a little pink left over (trying to use up fabric here!), so I wanted to embellish the bag a bit. I made one of these cute fabric flowers from the directions here.
It is an adorable little bag! The flower is actually a little heavy, since it is unlined. I will definitely make mine lined with interfacing and fusible fleece. Still, a very cute bag!

Play Pea Pods Tutorial

peasheep0062.jpg

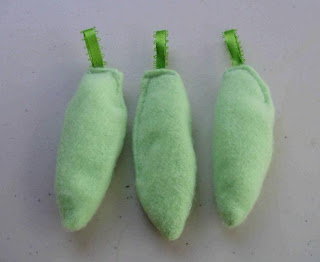
As pomised yesterday, here is my new tutorial on the play pea pods I made with the girls.
I used some old green fleece (felt would have been better but I didn't have any green), beads from a broken, gaudy, old Avon necklace, and some green ribbon.

First I made a pattern on an old index card and traced it on the fleece- this was cheapy, one-sided fleece, so I used the non-fleecy side. I folded it over and cut two layers at a time.

Then I sewed the right sides together and left the end and part of the side open to stuff with beads.

I clipped the curves a bit and turned right-side-out.

Then stuffed with these beads. There were different sizes- we used some medium and some large ones. Each one has a different numbers/sizes of beads so the girls can tell theirs apart by feeling them.
Then I folded the open edges in and stuffed a folded loop of green ribbon in there.
***IMPORTANT!!! The ends must be sealed- I didn't do this and they frayed and tore out right away because they were pulling on them while arguing over whose was whose.***

And... TA DA!!! Pea pods. I may be crazy but I am considering making play food as things come in season in the garden. Big ideas... maybe I should finish something else first!

Easter Sewing Part 4

easter20100273.jpg

My skirt is the last in the series… I wanted and A-line, and I loved the contrast of plain white against the fabric in the other skirts, so I wanted to trim with white.

I used a pattern, sort of- because I made it myself! I took a skirt I already have and took the measurements of the bottom width and the length of the skirt and my waist. Then I took a piece of freezer paper in the same length, and marked off the half of the waist and half of the width. I drew a diagonal from the waist to the bottom marks.

Then I marked the length on the diagonal and made it curve gently from the bottom to the mark on the diagonal. Using this pattern, I cut two pieces on the fold from my skirt fabric.

For the white waistbands, I measured my waist (ICK!) and divided it in half again. I added seam allowances and cut four pieces in this length by 2 inches wide. I sewed two of them together along the long, top side and pressed them with the seam inside and repeated this with the other 2 pieces. Each waistband piece was then sewed to the top of a skirt half and the edges overlocked. I sewed the skirt halves together on the right side the whole way, and up to 6 inches from the top on the left side and overlocked again.. I put an invisible zipper in the left side and hooks on the top at the waistband.

The hem was my favorite part! I overlocked the edges, then took white double fold wide bias tape (like quilt binding) and sewed it on! This was my first time using double fold bias tape and I LOVED it! How can single fold be so awful and double fold be so wonderful! I cannot believe I have been hand-sewing quilt binding for all these years! I might have to cheat now!

It fits pretty well, although it bunches just a tad in the pelvis area when I bend and sit, but it is still the best thing I have ever sewn for myself to wear!

NOW... drum roll please...........................................

The whole collection! Now, I don't have my hair or makeup done, so ignore that- it was very tempting to use one of the other 3 pics hubby took first with my head cut off because he was so worried about getting the girls to look to see whether I was in the shot! The shirts are a little big, but I am sure they will grow or the shirts will shrink. I wanted to embellish those as well, but then I regained my sanity. I hope you enjoyed my series this week and that you may have gotten some ideas or just enjoyed laughing at my novice abilities and insane ramblings...

Easter Sewing Part 3

easter20100352.jpg

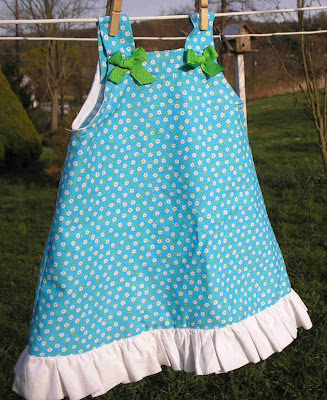
For my youngest daughter, I wanted to make a dress instead. She is little, so I had enough material.

I tried to make a pillowcase dress from this tutorial, but it was too big and because the material is stiffer than regular cotton, when I tightened the ribbons to make it fit it was then too short.

I fixed the shortness by adding a ruffle on the bottom from the white cotton. I took a 6” strip, folded it in half and ironed, then gathered it and sewed it on the bottom.
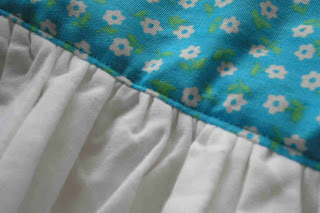
I topstitched to make it look more finished and hold the ruffle down nicely.
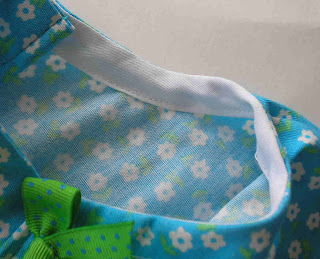
The armholes called for single fold bias tape in the original directions- it was my first time using single fold bias tape and I hated it. Seriously.
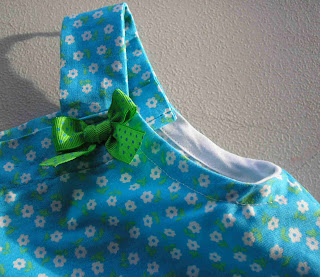
To make the dress fit better I took the front half of the bias tape off and made it cut in a little more so that the front is narrower than the back before I sewed the bias tape back on. The fit was much nicer, but I still hate bias tape.
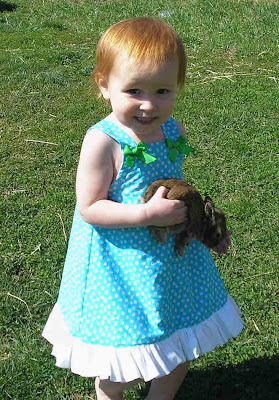
The ribbon ties still did not work because of the material/she never holds still so I scrapped it and added some nice, wide straps. It still needed a little something, so I made some tiny bows out of the green grosgrain ribbon and hand stitched them on at the end of each strap.

FINALLY the fit is perfect- although it is now nothing like a pillowcase dress at all! Unfortunately, it is REALLY tight going over her head, so I may have to make the straps thinner if she ever grows some hair and it gets too hard to put on.
Just my own skirt left for tomorrow!

Easter Sewing Part 2

easter2010041p.jpg
For the next skirt in my Easter sewing series- I went totally without pattern! I decided I wanted to make this one a longer style with a wide white waistband along the top and a ribbon bow accent.
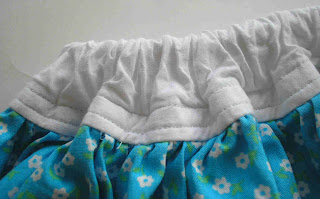
I made another rectangle measuring 18” by the fabric width- 60”and sewed it into a tube. Again, I overlocked the edges and hemmed the bottom.
Then I made a wide, white waistband by taking a 30” by 5” piece, sewing the short ends together, and pressing it folded in half with the seam to the inside. The measurement of this piece is wide enough to go over her hips. I sewed a casing for the elastic and put it in, although I could not find elastic as wide as I wanted to it still twists a bit when she wears it.

I gathered the skirt part with a wide basting stitch and attached it to the waistband. I topstitched it- not very close to the edge, but it looked better on the wide waistband.
To put the bow on, I used two small seams to attach the middle of the ribbon to the waistband off to one side. And... TA DA! The perfect length for a not-so-modest 6yo!


Tomorrow's dress was the hardest but by far the CUTEST!!! Stay tuned!

Easter Sewing Part 1

I am going to start my Easter sewing series with the easiest of the skirts I made. First, however, I need to brag about my thriftiness! I found this heavy cotton material - it is a little stiffer than regular cotton- for $2.00 a yard for 60” width at Walmart. I also bought a yard of plain white cotton and some notions like elastic, ribbon, bias tape, and a zipper. Sadly, the fabric was the cheapest part!
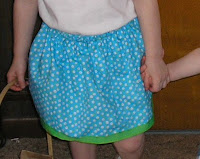
My 4yo’s skirt was VERY simple to make! I sort of used the directions I found here. It called for making a simple tube of fabric from a rectangle made in the desired length by the whole 45” width… but mine was 60” width. SO I used double her waist- about 40” which seems to be a good way to figure a gathered skirt- double the waist. With her facing me, I measured the length I wanted and as per the directions I added 2” for elastic casing and hem. However, I have now learned that she takes after me more than I thought- she DOES have a butt! So it is shorter than I would have liked in the back and we will just put leggings under there from now on.

I made my 14” by 40” rectangle into a tube by sewing the short ends together and used my mini-serger to overlock the raw edges. Then I just sewed an elastic casing on the top by turning it down and sewing all the way around except for an opening to insert elastic. I put in elastic a little shorter than her waist and it gathers up nicely when it is all done.

I turned the bottom up and hemmed it in place before sewing some grosgrain ribbon along the bottom hem for embellishment. It was so quick and easy!

One down... three to go!