

Grace's First Easter Dress
/
Those Easter dresses were so much work that I am showing each one off in its own separate post and telling you all how I made them, hopefully getting some tutorials out on my original designs by the end of the week. So, here we go- youngest to oldest...


For the diaper cover I used THIS pattern, but I added ruffles, inspired by THIS tutorial. I made some changes on the ruffles- the sides were hemmed in on a curve so that it doesn't look weird from the front, the bottom edges were hemmed instead if serged, and I had just enough lace leftover to make the top ruffle using that instead of the white fabric.

The white fabric for the lining and trims in all of the dresses came from a really nice white sheet I got at Target.
OK... now for the proud-mama-show-off-pictures!!!

 |
| (Her finger is fine- she had a check-up that morning and needed a finger prick, but the nurse matched the gauze to her dress!) |
 |
| little peek at the ruffles |
 |
| back of the dress |
 |
| Here is her basket! I let her pick the colors by crawling to the reed she liked. = |
Pretty cute for her first Easter!!! =)
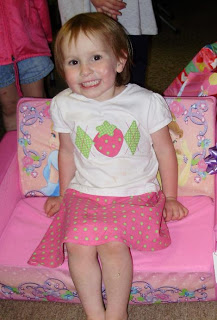
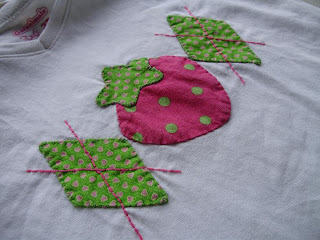
 I just blatantly copied Strawberry's dress by sewing a semi-circle skirt to the bottom of a white T-shirt.
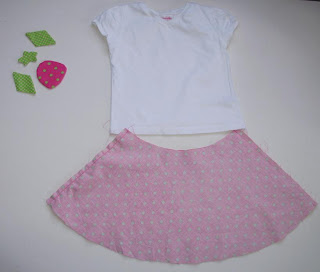 It turned out pretty good, but my brain does NOT function well lately, so I had a few snags. I accidentally made the skirt twice as big as I needed to (should have divided the waist by 4 instead of 2!) so I cut it in half and now I could make another one if I need to (and I might because this is a white shirt after all!) I originally wanted a full circle skirt, so it isn't as twirly as I wanted, but it is actually closer to the "real" one.
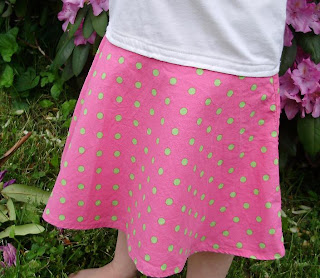
 If I hadn't been doing this as a surprise I would have been able to catch that the T-shirt is a little long and it would be better if I had cut some of the bottom off before sewing the skirt on. But now it is big and if she doesn't destroy it she can grow into it and wear it longer.
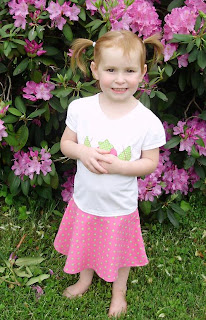


 I was really nervous to do the shirring because I had never tried it before and it is the very last step! I saw it done on Martha Stewart a few years ago and figured I could handle it. Luckily, it worked just fine.


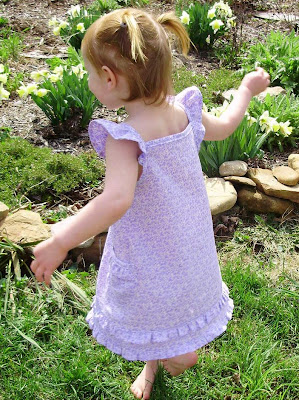


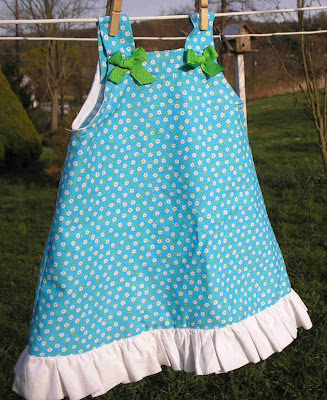.jpg) For my youngest daughter, I wanted to make a dress instead. She is little, so I had enough material.
For my youngest daughter, I wanted to make a dress instead. She is little, so I had enough material..jpg) I fixed the shortness by adding a ruffle on the bottom from the white cotton. I took a 6” strip, folded it in half and ironed, then gathered it and sewed it on the bottom.
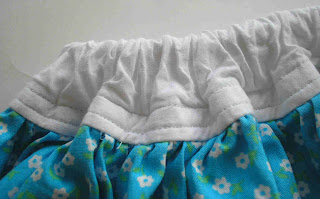
I fixed the shortness by adding a ruffle on the bottom from the white cotton. I took a 6” strip, folded it in half and ironed, then gathered it and sewed it on the bottom.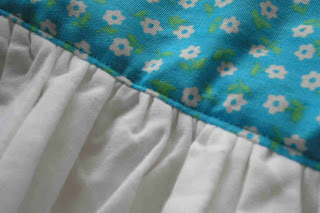.jpg) I topstitched to make it look more finished and hold the ruffle down nicely.
I topstitched to make it look more finished and hold the ruffle down nicely.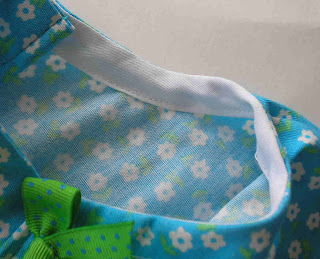.jpg) The armholes called for single fold bias tape in the original
The armholes called for single fold bias tape in the original 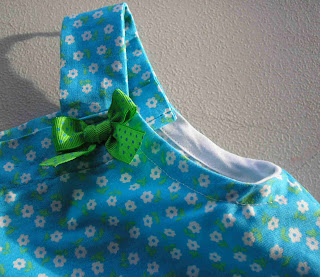.jpg) To make the dress fit better I took the front half of the bias tape off and made it cut in a little more so that the front is narrower than the back before I sewed the bias tape back on. The fit was much nicer, but I still hate bias tape.
To make the dress fit better I took the front half of the bias tape off and made it cut in a little more so that the front is narrower than the back before I sewed the bias tape back on. The fit was much nicer, but I still hate bias tape.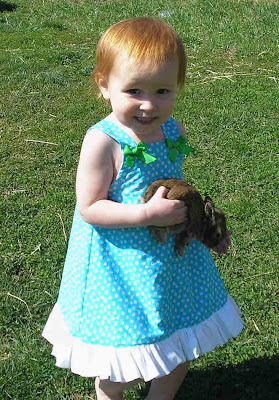.jpg) FINALLY the fit is perfect- although it is now nothing like a pillowcase dress at all! Unfortunately, it is REALLY tight going over her head, so I may have to make the straps thinner if she ever grows some hair and it gets too hard to put on.
FINALLY the fit is perfect- although it is now nothing like a pillowcase dress at all! Unfortunately, it is REALLY tight going over her head, so I may have to make the straps thinner if she ever grows some hair and it gets too hard to put on.
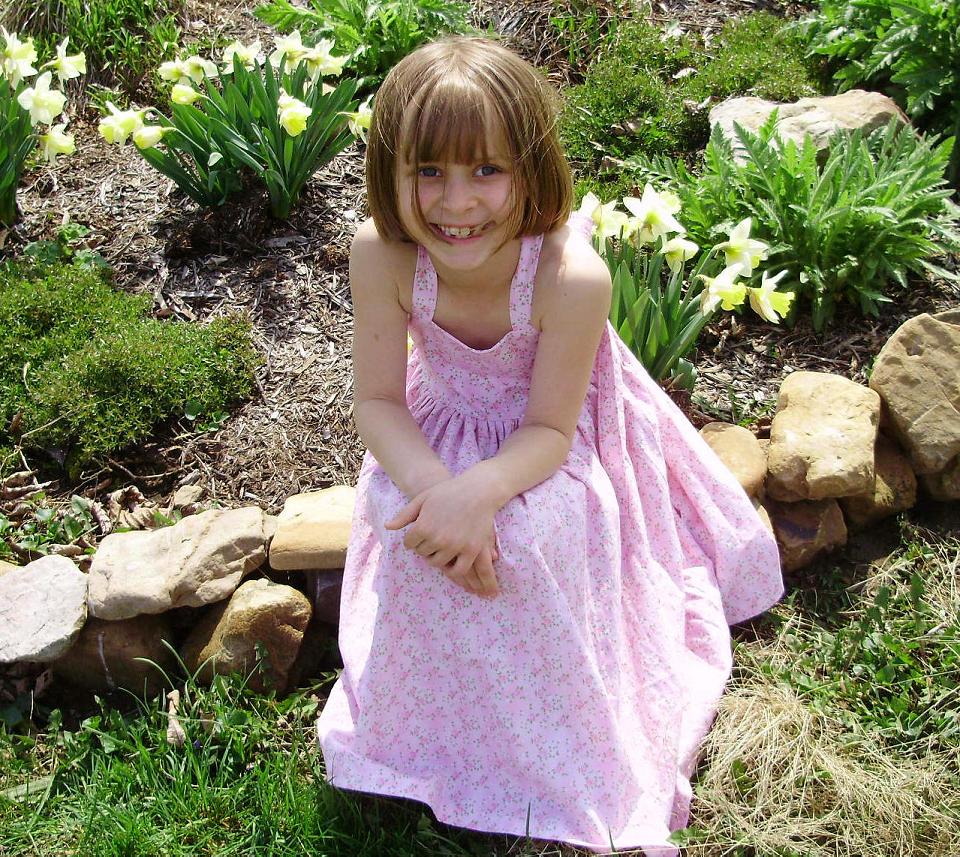
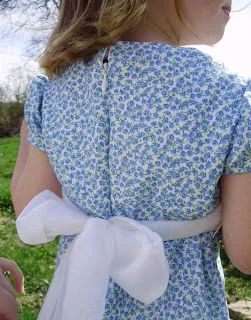
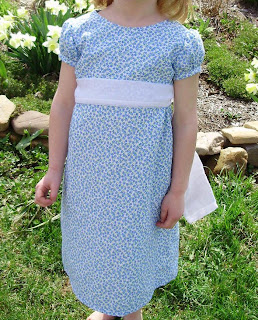
.jpg) For the next skirt in my Easter sewing series- I went totally without pattern! I decided I wanted to make this one a longer style with a wide white waistband along the top and a ribbon bow accent.
For the next skirt in my Easter sewing series- I went totally without pattern! I decided I wanted to make this one a longer style with a wide white waistband along the top and a ribbon bow accent. 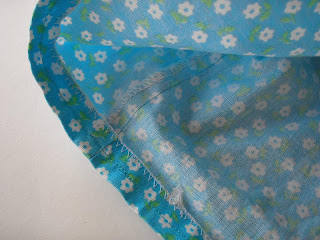
.jpg)
.jpg)


