Baked Ziti Freezer Meals

baked2Bziti2B0052B252822529.jpg

I thought I would take a break from Christmas preparations for a minute and share one of the Christmas gifts that I am making. I am putting together homemade frozen dinners for my grandparents. I know that Grandma LOVES my baked ziti (she is half Italian after all!) so I made a batch for them. (Note: it is not cooked in this picture- just ready to freeze!)
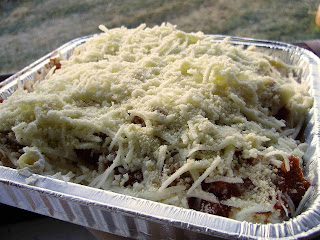
One of my batches makes 3 8” square pans or 2 9”x13”cake pans. Not only is this a great gift, it is just nice to have some frozen dinners on hand for those unexpectedly busy evenings- and it prevents a fast food splurge, too! So I thought it would be a great idea to share here. Without further ado, the recipe:

Baked Ziti
~2 pounds loose sausage (Optional- I actually like it just fine without meat, but Hubby and other meaty guys I know like it better. Oh, and you can use hamburger, too.)
~6 cups spaghetti sauce (I used a quart and a pint of what I canned this summer and added a little tomato paste to thicken cause my sauce is always runny, but I had some left over, so if you are purchasing jars from the store get less)
~1 pound ziti pasta
~32oz. Ricotta cheese (Stock up when this is on sale!)
~6 cups mozzarella
~½ cup parmesan

Brown sausage and drain grease. Add tomato sauce to pan and heat through. Meanwhile, boil ziti just until tender- do not overcook! Drain. Mix ricotta and 3 cups mozzarella and stir in cooked ziti. Put a layer of sauce on the bottom of each pan. Top with ziti and cheese mixture, splitting it evenly between the pans. Spread remaining sauce on top of ziti. Sprinkle remaining mozzarella evenly on top of each pan and then sprinkle heavily with parmesan.

Then, you have two options- bake now or freeze! (I like to put these in two cake pans to make one right away for dinner and freeze the other for later.) If you are baking it right away, cover with foil and bake at 350 degrees for about 30 minutes, or until the cheese on top is bubbly and begins to brown. If you are freezing it, cover with plastic wrap, then foil. (If you are giving it as a gift, be sure to label and include heating instructions.) When you go to bake it, remove the plastic wrap and put the foil back on. Then bake at 350 degrees until it is heated through and the cheese is bubbly and begins to brown on top- I really forget how long it takes.

Peanut Butter Reindeer Cookies

reindeer2Bcookies2B0032B252822529.jpg

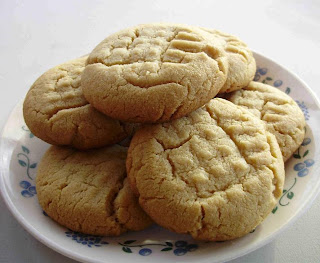
YAY! I am almost done with my ornament orders! I just wanted to get off of my feet for a minute and share with you the cookies I baked with the kids this morning.

They are just regular peanut butter cookies, some of which we decorated up a bit.

Peanut Butter Cookies
½ cup shortening
1 cup peanut butter
½ cup brown sugar
¾ cup sugar
1 egg
1 tsp vanilla
1 Tbsp. milk
¾ tsp. baking soda
½ tsp. baking powder
1 ¼ cups flour
Cream shortening, peanut butter, sugar, brown sugar, milk, and vanilla at medium speed until well blended. Beat in egg. Add dry ingredients. Roll into a ball. Place on a cookie sheet and flatten with a fork dipped in flour. Bake at 350 degrees for 10 minutes- DO NOT OVERBAKE or else they will be really dry.
If you want to make these into reindeer like we did, just put a red m&m on for the nose, two chocolate chips for the eyes, and two pretzels for the antlers (really smash those in god or they will fall off when baking or shortly thereafter!)

Pumpkin Whoopie Pies

whoopiepies0032.jpg

Sorry I have been scarce on the blog lately. I have been cleaning and crafting my little heart out around here! As promised to several people, here is the recipe I got from a great lady at church for making pumpkin whoopie pies! Chocolate whoopie pies have always been a PA Dutch/Amish kind of thing so I grew up with those- I thought it was really funny when the New York Times ran an article a few years ago about them like it was some new discovery sweeping the nation! Anyway, here is the pumpkin version!


Pumpkin Whoopie Pies
1 lb. brown sugar (I thought “YIKES” when I saw that but trust me, they are good!)
1 cup vegetable oil
2 eggs
2 cups pumpkin
1 tsp. vanilla
1tsp. cinnamon
1 tsp. ground cloves (I go a little light on this)
1 tsp. ground ginger
1 tsp. baking soda
1 tsp. baking powder
3 ½ cups flour
Mix pumpkin, eggs, sugar, oil, and vanilla. Add spices and dry ingredients. Drop by spoonfuls on a cookie sheet and bake at 350 degrees for about 10 minutes. Remove from tray and cool.

For the yummy cream cheese filling you will need:
4 ½ Tbsp. butter, softened
6 oz. cream cheese, softened
1 tsp. vanilla
3 cups 10x sugar
Beat cream cheese, butter, and vanilla. Mix in the sugar and then spread a little bit on the flat side of a cookie, then sandwich

If you want them to last more than a day you may want to make a double batch!

Pumpkin Muffins

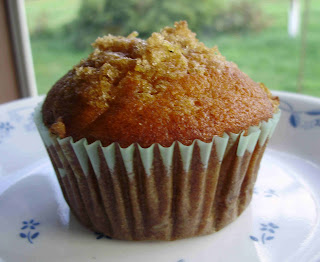
WOW! Another great pumpkin recipe! This one came from my friend, Cheyenne, with a beautiful blog over at Little Prairie Baby. THANK YOU!!! I baked some today (although I probably went overboard on the brown sugar sprinkled on top- I go overboard on all brown sugar) and hubby gobbled 4 of them up! He probably would have liked more, but they are safely on a plate covered in plastic wrap to take along to a family dinner!

Anyway, here is the fabulous recipe!

Pumpkin Muffins 4 eggs 2 cups sugar 1 1/2 cups oil 3 cups flour 1 tsp cinnamon 2 tsp baking powder 2 tsp baking soda 1 tsp salt 1 cup chocolate chips 1/2 cups chopped nuts (optional) 1 3/4 - 2 cups pumpkin Beat eggs slightly. Add sugar, oil, and pumpkin. Beat thoroughly. Add dry ingredients and mix until smooth. Stir in chocolate chips. Fill muffin tins 2/3 full and sprinkle tops with brown sugar. Bake at 375 for 15-20 minutes. Makes about 36 muffins.

How to Cook a Pumpkin

Our pumpkins did very well in the garden this year! We have some really big ones! We plant them just for fun/decorating, but this year they have another fate...

I have always been partial to Libby's canned pumpkin, but since there was a pumpkin shortage last year in the US- there was NO pumpkin in the stores until recently, I have decided to try eating our pumpkins. So I called my bestest friend to find out how to do it and now I am going to share it with you all!


I have our pumpkins lined up on my front porch, and I just go out and pick one to cook. I keep picturing horrified jack-o-lantern faces on them as they wait to see who is next!
This one was a funny shape and flat on the one side.
Step 1: Wash it off.
Step 2: Slice in half.
Step 3: Scoop out the seeds and schmutz! (PA-dutchified word) Step 4: Chop it up into pieces if it is too big for your roaster(s) and put the pieces in the roasting pans with enough water to cover the bottom of the pan. Step 5: Bake at 350 degrees for an hour or more... until you can stick a fork through the rind and it is soft.


Step 6: Use a fork to scrape the pumpkin off of the rind. A lot of water should be draining off of the pumpkin pieces.

I throw the pumpkin right into my colander in the sink so that more water can drain off. I am not straining it really, just letting the water drain out on its own. I just give the pumpkin a little stir once in a while. It really is key to let a lot of water drain off so that it is not runny.

Step 7: Puree in a food processor or blender. Then you can use it to make pumpkin pie, pumpkin roll, pumpkin bread, pumpkin pancakes, or even these DELICIOUS pumpkin cookies!!!
I got the recipe from GroovyPumpkin HERE. Mine look a little flatter than hers, but I am guessing it is the pumpkin. They are so soft and so, so good! I did some with and some without chocolate chips in them. Yummmmmm....
So, if you have any pumpkin recipes, feel free to pass them on! I told you our pumpkins did well- they are BIG!!! I am getting 12 cups or so from each one! Geez!!!

Homemade Pizza Sauce

pizzasauce020.jpg

Well, since I have been so very busy lately, this post is a little late in its usefulness, but if you don't have any late tomatoes hanging on yet, you can bookmark it for next year!

I have a great homemade pizza recipe and I like to can my own sauce for it. This is how I do a small batch- if I am doing a lot of tomatoes, I use different equipment and such.

I start out with some tomatoes from our garden and wash them off- Mom's scrubbies work so great for scrubbing those dried on leaves and dirt off of them without roughing them up! If I have Roma's, I just take off the tops and, if they are big, I cut them in half. Then I cook them until they are soft, adding only enough water that they don't stick to the bottom.
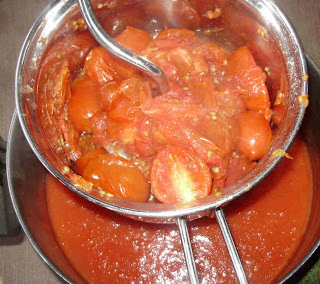
When they are ready, I use a big, strainy spoon to scoop them into my food mill which is placed over a pot.
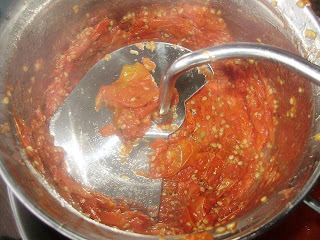
Then, I crank that handle around and reverse and turn some more until just the skin and seeds are left. Kids also come in handy in this step!

This is what comes out the bottom!I cook that down for a loooooooong time until it is about halfway.Then I add, for every one cup of sauce I estimate is in the pot...
1 tsp .oregano
½ tsp. marjoram
½ tsp. basil
½ tsp. garlic salt

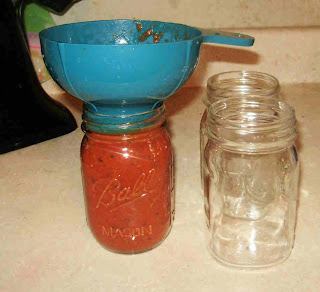
I use my canning funnel to ladle it over into clean jars, leaving about 1/2" head space.

Now, I skip a lot of official steps, but this one is a MUST- wipe the edges of the jars off! Otherwise you won't get a good seal.
Then attach the lids and bands.
And place in a water bath canner for about 30 minutes.See? Only 3 jars- this is a very small batch!
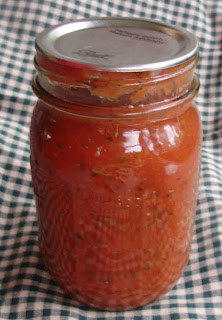
Take them out and let them cool on a towel on the counter. After about 24 hours, remove the bands and wipe them down.
Now, I skip some things like I said before. I don't keep my jars hot until I fill them, and I don't keep my lids in warm water until I am ready to put them on. But I do try to make sure that the filled jars and the water in the canner are close to the same temperature when I put them in. I have blown out the bottoms on many jars to learn this well. So, don't put cool sauce into boiling hot water or vice versa.

See? It is not that hard! Hard is this:

17 jars of salsa by myself in one day!

Ahhh... I did the last of my tomatoes up earlier this week. Some hot jelly today and then, when the Fuji apples are ready, applesauce and apple butter. Almost done!!!
We were blessed with a bountiful harvest from our garden this year. Did you grow anything?What foods do you like to preserve?

Zucchini Alfredo

initialpumpkinandapples0082.jpg

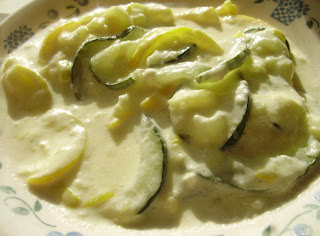
I have had some requests for this recipe, so I made it AGAIN and took a picture this time. Then, we ripped out the zucchini plants. Most of them were going to feed the pigs anyway, and they were not that good anymore, either- kinda tough. I did have some more recipes to try out, but they will have to wait for next year. So.... last one!

Zucchini Alfredo4 cups young, tender zucchini- cut into thin slices or - if you are ambitious- noodles
Salt water
¼ cup butter
8 oz. package cream cheese
¾ cup milk
½ cup shredded parmesan
Garlic salt
Slice zucchini and soak in salt water for one hour. Drain. Saute in butter until zucchini is limp, but not too long so that it turns to mush (I have done this a few times). Meanwhile, in a small saucepan, heat cream cheese and milk, stirring until smooth. Add garlic salt to taste and stir in parmesan- it will be really creamy! Drain zucchini and coat with sauce.
Now, I need to look for eggplant recipes! We have 27 eggplant plants because my husband discovered his great love of eggplant last year and got a little carried away planting!