Sunrise Dress Tutorial
/Tutorial for a 1950s vintage style dress with a boatneck, scoop back, and twirly hi low skirt. It was made from a vintage sheet and trims.
Read MoreTutorial for a 1950s vintage style dress with a boatneck, scoop back, and twirly hi low skirt. It was made from a vintage sheet and trims.
Read MoreTutorial for sewing this easy girls’ halter dress in any size. You can make it out of any fabric, but some patriotic stars and dyed sheets make perfect July 4th dresses!
Read More
Next to nothing in the way of PJs or nightgowns survived the first two girls to be passed down to my 3yo. Nightgowns are, in my opinion, way too much $ for what they are to buy them in stores. I made it from some great giveaway prizes, so it cost me nothing but a little bit of thread, elastic, and time. Sweet!
 |
| There is that picture smile again. |
Then, I sewed a yard of lace onto the bottom edge- directly onto the right side of the fabric because the pretty lace covers the serged edge.
Then, I took the leftover lace- 18 inches, and cut it in half to make straps (See? The amounts were PERFECT!) I pinned them two inches from the center on each side, but I forgot to figure in the gathering, so they should have been out another inch. I turned the top of the fabric down 1 1/2 inches and sewed all the way around on the same line where I attached the lace. I sewed back and forth several times over the straps to make it extra durable.
Then, I made a casing for the elastic. I carefully sewed 1/2 inch from the top all the way around, leaving a small opening to insert the elastic. I was careful not to catch the lace from the top edge, but I did sew the straps down again really well.
Finally, I inserted the elastic by putting a safety pin in the end and pushing it through. I sewed the ends of the elastic together by overlapping them about an inch.
And that was it! Very, very easy!
She loves it and I like its simple, vintage style... kinda' dreamy.
Thank you again to Karen and Carly for the great prizes. :)
I have decided to participate in Kids' Clothing Week Challenge since I have some other sewing projects in mind for my girls. The goal is to sew for an hour a day, but for me, it will probably be little bits of time here and there as I can grab it. Wish me luck!!

Pin all the way around the top, lining everything up...
Sew in place. If you flip it, now it should look like this...
But, wait! We need the straps! You probably could have put some of them in before sewing, but I figured it was enough to worry about getting everything lined up. So, turned it inside out and seam ripped a little to put the strap and a tie in like so...
I tried the dress on her first to get the angles- you can do that or just estimate from this picture.
For the back side, I did the tie the same way, but the strap I just inserted from the right side.
Then I topstitched the back to hold it in place. (Don't look too close! My totpstitching stinks!)
I added a ruffle at the bottom, too, for more length and more white to match the other dresses. It is just a strip 6 inches by about 90 inches pressed in half, gathered, sewed on, and topstitched. Kinda basic, but if you have any questions, let me know!
I also used some scraps to make her a cute, rolled rosette fabric headband. You can find tutorials on those everywhere... just do a search for it.
I hope this one is a lot more clear than yesterday's Bubble Dress Tutorial. It is a totally different style. Just like my girls.
Well, that wraps up my Easter dress posts for this year... four dresses, four colors, four styles, four sweet girls! Thanks so much for letting me show all of them off a bit! =)


As promised, I am showing you all how I made Isabelle's Easter dress. I talked her into a bubble dress, but she chose the high bodice style with a highish waist and wide sash part herself.

And she picked the buttons out, too.

(Yes, it is missing one- I forgot the buttons when I used Mom's machine to make the holes and didn't listen to her when she said she thought the pack only had three buttons. I'll add another one later.)
As soon as she saw the bubble skirt finished, she got so excited that I didn't even have to give her the bribe I had promised her to let me make it!

It was a lot of work, but I was really happy with the finished result.


I thought I would try to put together a tutorial of how I made this dress. It was not super easy, so this isn't a beginner project. In advance, I apologize if my pictures are not all that great- I was sewing whenever I could get a spare minute over several days. This is also long, and picture heavy, consider yourself warned...


As it says on the pattern pieces, for the front bodice cut one out of the main fabric and one out of the lining on the fold, and for the back cut two each out of the main fabric and the lining.


The raw edge is against the bottom, just to be clear. You could topstitch the top of the band here if you wanted to. I didn't feel like it.
I used a slightly different technique to make my ties, but this is how I should have done it (hence, no pictures of that step).

(Sew the right sides together at the sides- just to clarify.)
Now, moving on to the skirt...


This is a little tricky because obviously the slit does not want to open up straight... just do your best to make it work!


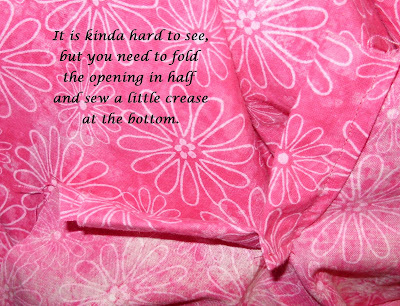
This crease will make it fold over and overlap flat like it is supposed to. If it does not look perfect below this piece, it is not a really big deal because the skirt is so full and bubbly that you will not notice.


Now, let's make it bubble! I was making this up as I went along. You could cut the skirt out in three pieces (two for the back and one for the front), but I didn't think that far ahead.


This is where I realized that it would probably have been better to cut the back in two pieces and make an extra seam, but it really doesn't matter. Whatever...


TA DA!!! You are done!


She insisted on posing this way holding a tiny flower...
If anything is unclear, please let me know so that I can fix it! Thanks!!!
One more quick shout-out to Jess at craftinessisnotoptional for this cute felt flower tutorial found HERE. I used extra felt, so it is extra big, but I love how this turned out!

One more dress left to show you!


So, thanks, Jess, for the big time save! =)
 |
| This is her new picture smile. |
 |
| She has no problem posing for pictures for me! |
 |
| The spin-around model pic... |
So, tomorrow, I will (hopefully) be posting my own (before I ran out of time) tutorial for this cute bubble dress!

Those Easter dresses were so much work that I am showing each one off in its own separate post and telling you all how I made them, hopefully getting some tutorials out on my original designs by the end of the week. So, here we go- youngest to oldest...
For the diaper cover I used THIS pattern, but I added ruffles, inspired by THIS tutorial. I made some changes on the ruffles- the sides were hemmed in on a curve so that it doesn't look weird from the front, the bottom edges were hemmed instead if serged, and I had just enough lace leftover to make the top ruffle using that instead of the white fabric.
The white fabric for the lining and trims in all of the dresses came from a really nice white sheet I got at Target.
OK... now for the proud-mama-show-off-pictures!!!
 |
| (Her finger is fine- she had a check-up that morning and needed a finger prick, but the nurse matched the gauze to her dress!) |
 |
| little peek at the ruffles |
 |
| back of the dress |
 |
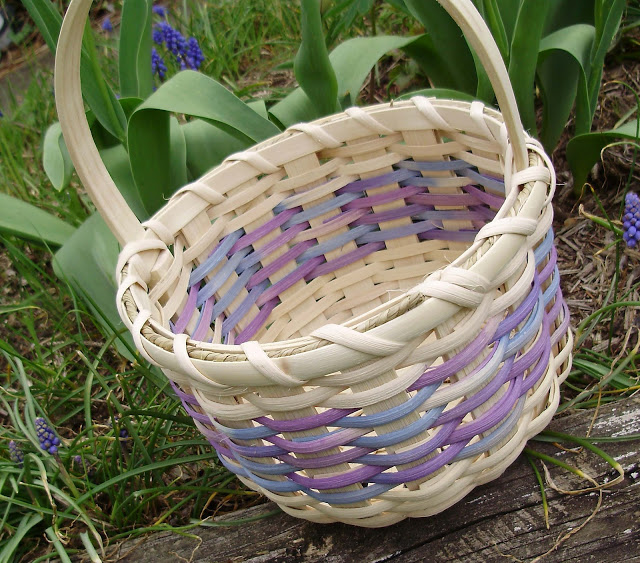
| Here is her basket! I let her pick the colors by crawling to the reed she liked. = |
Pretty cute for her first Easter!!! =)
Sewing, crafts, tutorials, recipes, and a little look at our life in the country - raising half a dozen children.

Hi! Thanks so much for stopping by! My name is Lindsay and on this blog you will find sewing, crafts, decorating, recipes, and tutorials with a little bit of honesty and encouragement.