

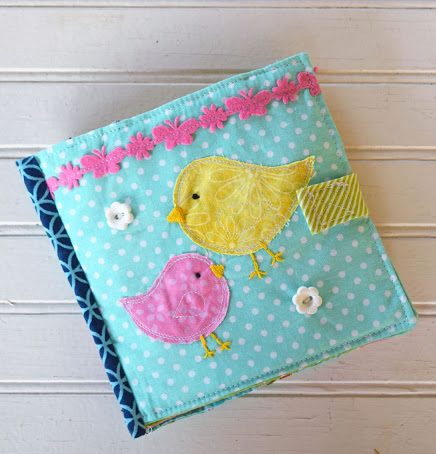
Paint Chip Easter Egg Busy Bag
/
Use paint chips, scraps of ribbon, and small craft supplies to create a preschool Easter egg busy bag craft!
Read MoreUse paint chips, scraps of ribbon, and small craft supplies to create a preschool Easter egg busy bag craft!
Read MoreDIY school supplies! Let the kids decorate their binders and pencils for back to school to make them cute! Tips for packing a zipper pouch for middle school and high school girls to be prepared for personal emergencies!
Read MoreA tropical beach theme birthday party with simple decorations and canvas painting classes for kids of all ages!
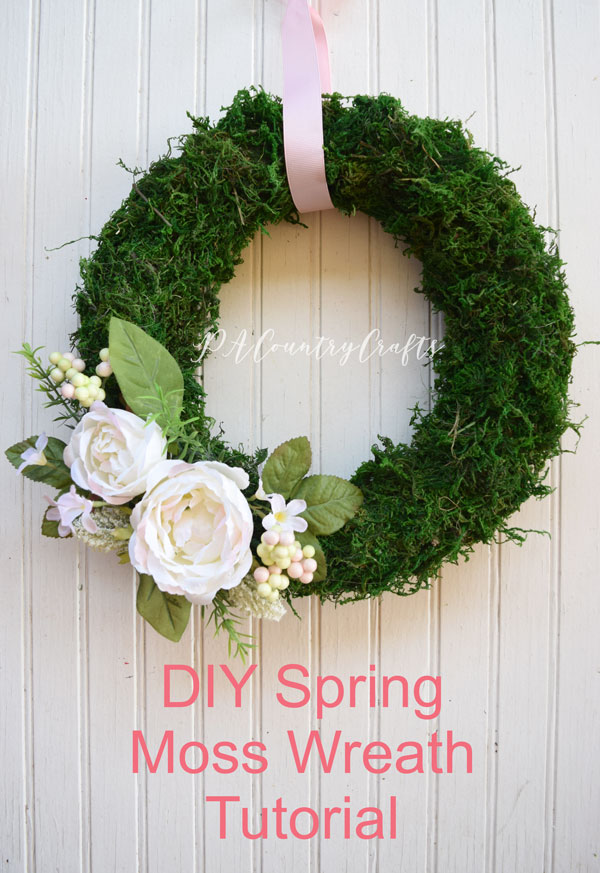
Read MoreIt is not too often that I actually make something for myself. I actually do not have a great place to display this wreath, but I made it anyway and I really love it!
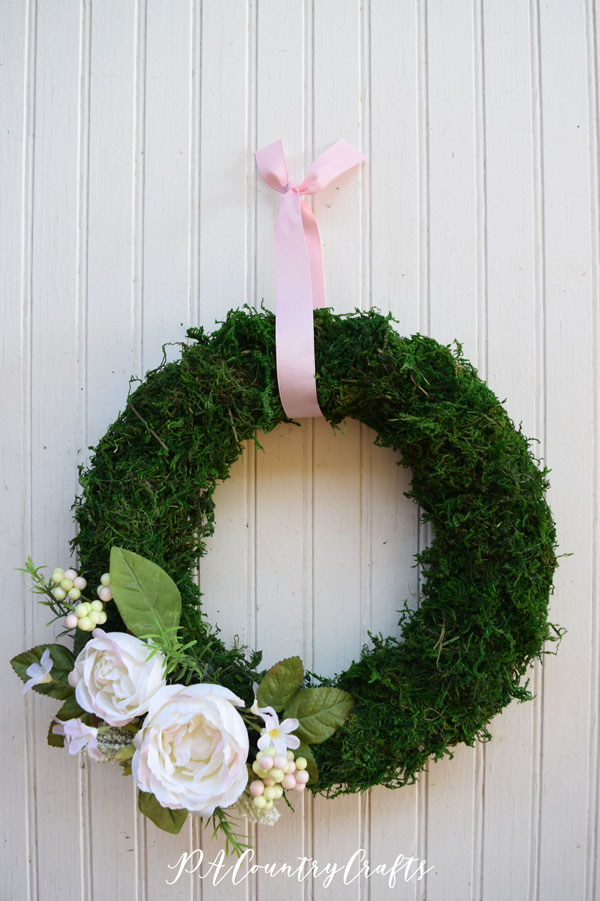
I had some foam wreath forms a friend had given to me a long time ago and I just hadn't found a use for them. Recently, I was browsing Pinterest and saw some cute moss wreaths I thought I could make. For myself!
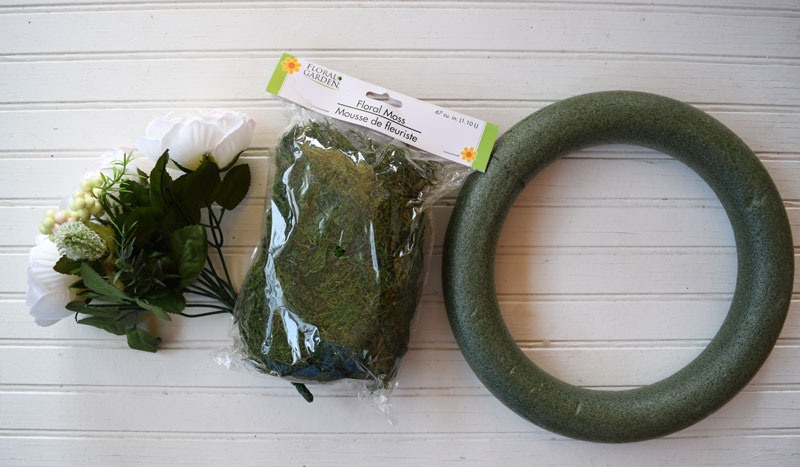
The wreath form was free, but they do carry slightly smaller ones at the Dollar Tree. I also got a bag of moss at the Dollar Tree. The flowers came from Michaels. I actually wanted coral ones, but there was a sweet older lady who asked my 12yo which flowers she recommended (I guess we have similar taste, my daughter and I) so I found something else. Anyway, this was a really cheap project!
So, gather all of your supplies...
A ribbon to hang would be helpful and is not shown. You also need hot glue sticks, a glue gun, toothpicks, and green floral tape.
Now, the moss part was a mess. I made this on my kitchen counter, but anticipate snibbles of moss everywhere!
Just take small bunches of moss and hot glue them onto the wreath form. It takes quite a few sticks of hot glue. Check for any thin spots and add more as needed.
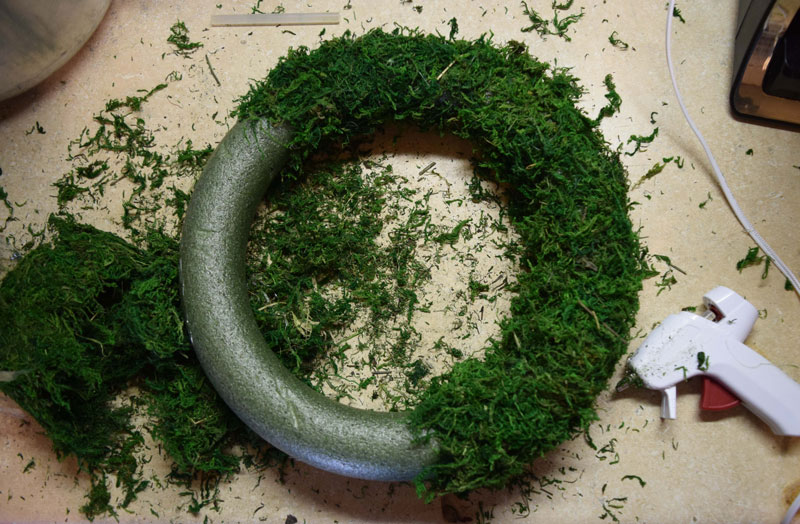
It is actually still pretty cute plain!

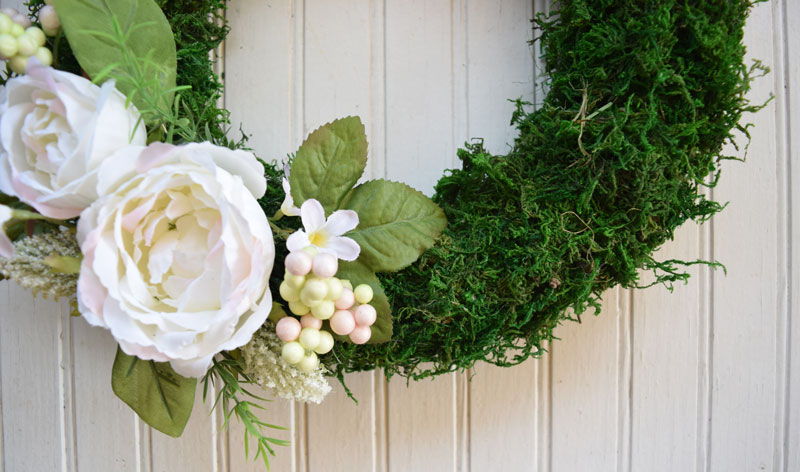
Next, add the flowers. Cut them apart and lay them on the wreath until you get an arrangement you are happy with. My flowers had enough stem to poke into the wreath but I added some hot glue around the bottom of the flower just in case. Attach the leaves to toothpicks using hot glue and green floral tape. Stick them into the wreath as well.


Pretty easy, right? Hot gluing the moss is a little messy and tedious, but I priced similar wreaths at $30. The moss sheds a little, so I don't want to hang it on a door that is opened and closed a lot, but on a wall it is pretty!
If you want to pin it for later...
You may also like these posts...
I am getting ready to graduate from MOPS :( but I decided that I would share our last craft project for the year. I thought it would be nice for the moms to be able to make some spa themed goodies to take home with them and, hopefully, relax a little bit later. I presented several options to our steering team and they wanted do to them all. So, we made rice socks, sugar scrubs, and bath bombs.

I have also done some of these crafts with tween girls so these are all simple projects that work well for a girls' night, youth group, girl scouts, birthday party, craft club, etc. Here are the details on each of them...
Rice Sock
These are really nice to warm up and wrap around your neck to relieve tension. I microwave mine for about a minute, but my microwave is super old so yours may be different. You can also store them in the freezer for boo-boos.
I got socks at the Dollar Tree (2 pair for $1) and small elastic hair ties. Then, I fumbled around in the grocery store with gigantic, 20lb bags of rice. It took about 2 cups of rice per sock.
At the craft tables, we had measuring cups (the glass ones with the pouring spout) to measure the rice and mix in essential oils if desired (we had people bring their own). One person held the sock open while the other poured the rice into the sock. Then, we tied them shut with the hair elastics. However, some people were concerned about the hair ties melting or not holding up over time so they just tied a knot in the end of the sock. That made it faster, easier, and smarter!
Sugar Scrubs
I made these a really, really long time ago and they make nice little gifts. They work really well for getting dirt out of your skin if you are gardening or have kids who play in the mud.
I got 10-packs of little containers at the Dollar Tree. Then, I got sugar and dish soap at the grocery store. We used Dawn Olay Hand Renewal dish soap in blueberry something and the store brand in pomegranate. (I have since found that Target has their generic even cheaper! Click HERE to see it.) It is just the stuff that smells pretty and is supposed to be good for your hands.
For these containers, we used 3 Tablespoons of sugar mixed with 1 Tablespoon of dish soap and stirred with a popsicle stick. (As long as you keep the 3:1 ratio it works.)
Bath Bombs
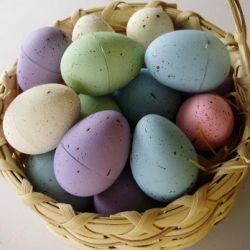
An April craft meeting meant it was great timing to get plastic Easter eggs as bath bomb molds. I got ours at Walmart and I have noticed that they are smaller then my older plastic eggs. I think the plastic egg industry is slowly shrinking them on us. I got the remaining ingredients at a bulk foods store, except the citric acid which I ordered from Amazon.
This station was really messy, so I am glad that we kept it in the kitchen. To prepare, I had measuring cups set out with each ingredient, bowls for mixing, and sandwich bags to hold the plastic eggs (in case they popped open later). I also melted the coconut oil and kept it warm in a bowl sat on top of a pot of warm water.
We used a basic recipe and the moms were encouraged to bring oils to add to them. Each recipe made 5-6 eggs.
1/2 cup baking soda 1/4 cup corn starch 1/4 cup epsom salt 1/4 cup citric acid 3-4 teaspoons melted coconut oil 1-2 teaspoons water essential oils
The dry ingredients were mixed together and then the wet ingredients were added. It should be the consistency of a wet sand and start to stick together when you squeeze it. If it was too dry, more water or oil was added. Then, we pressed everything together into the egg. The egg halves had to be overflowing a bit. When the two sides were pressed together, the excess fell out. This made sure the eggs were full with no air bubbles.
It was a lot of work to gather all of the supplies for a large group, but the craft went pretty well. They seemed to be simple enough for everyone to easily make. If someone did not want to make all of them, they did not have to do it.
You can see some of the other MOPS crafts we did by clicking on the pictures below...


Several years ago I was very ambitious and made hair clips for my girls. I got a bunch of supplies to get started. Then, over the years, I collected more. And more. And more. And made less. And less. And less.
They are so cute! You can make them for holidays, stocking stuffers, and Easter egg fillers. At one point I wanted to have headbands or hair clips to match all of my girls' outfits!
Ha! I am happy if I can find a plain, black hair elastic most days. (Seriously! Where do they all go?!?)
But in my #springdeclutteringchallenge I purged a lot of my ribbon and trims. It needed to be done because I had way too much stuff. I also used up a lot of what I had, even inviting a friend over to make hair stuff with me. (There were unfinished felt flowers in my box that we made last time- just before her 5yo was born!)
Since I was mass producing these adorable (and EASY!) little bow clips I decided to put together a tutorial. We had a Nor'Easter here at the time, so the pics are kinda dark. That is PA spring weather for you, though. Anyway, here it goes...

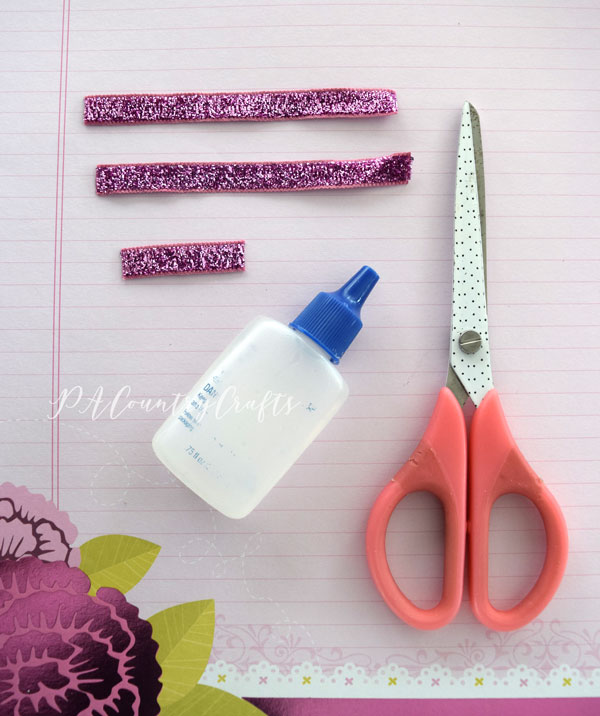
Here are the supplies you will need:

I used 3/8" glitter ribbon from the Target Dollar Spot that I got around Valentine's Day. Grosgrain ribbon also works. I got my 1 3/4" double prong alligator clips from etsy (in bulk) but if you just want to make a few of these you can pick some up at craft stores. That bottle with the lettering worn off is my fray check. :)
Side note: The U.S. government has all sorts of safety rules to keep our kids safe from lead, so please be aware that there are regulations out there if you sell things like this!
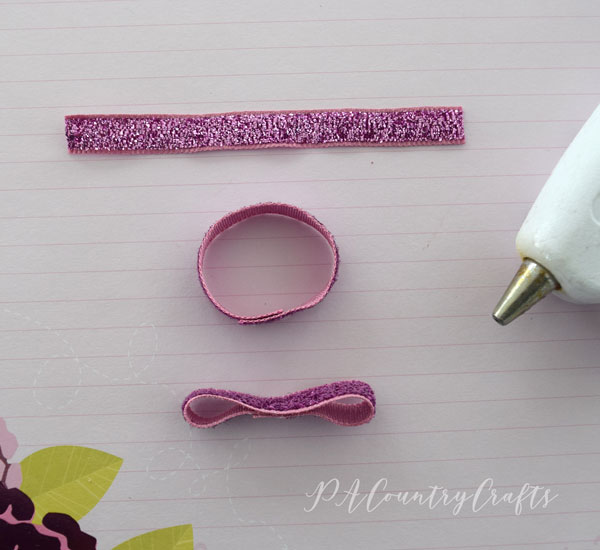
You will need to cut two pieces of ribbon 4" long and one piece 1 1/2" long. Seal the ends with fray check. If I am using grosgrain I carefully melt it with a lighter.
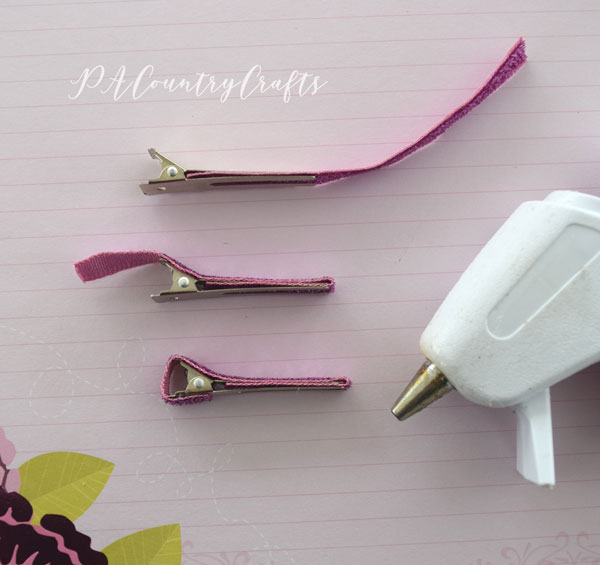
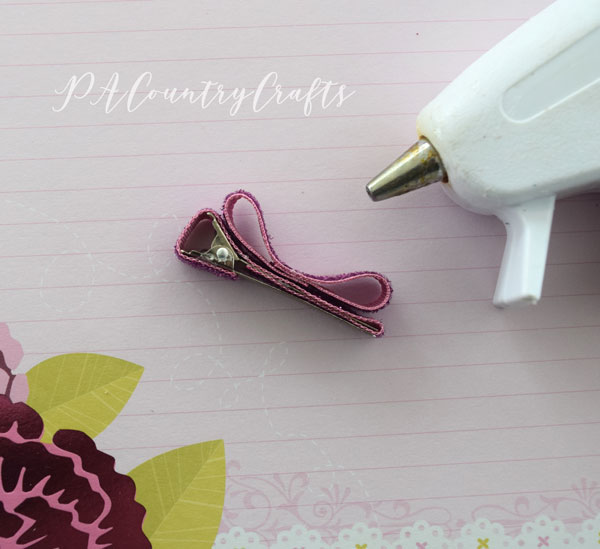
Wrap one piece of ribbon around the hair clip, using hot glue to attach it. The underside of the bent, top prong will have ribbon over them, but the bottom prongs on the flat side do not. These clips are actually really cute with only the glitter ribbon covering them so you could stop there if you would like. I usually add the little bow, though.
To make the bow, take your other 4" piece of ribbon and overlap the ends, hot gluing them together. Then, glue the top and bottom of the circle together in the middle. Be careful to make these loops the same size!
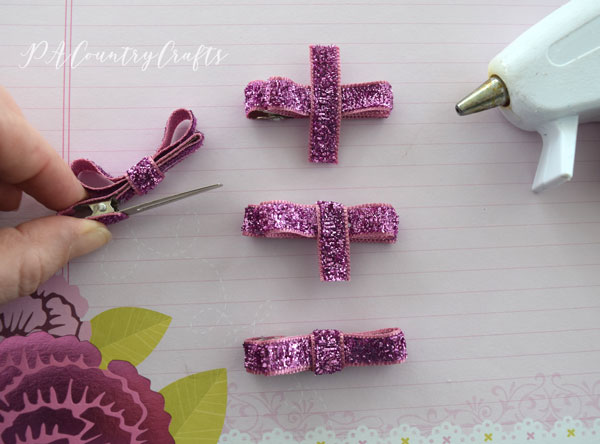
Next, glue the bow to the center of the top of the hair clip. I just glue it down in the middle. You could glue more if you would like.
Finally, use the short pieces of ribbon to wrap the center of the bow. Glue it on top and overlap both ends on the bottom of the upper prongs. You have to squeeze the clip to open it up so that you can get to the underside. If you have non-slip grips you can put them on the underside of the top prongs as well. I don't have any.
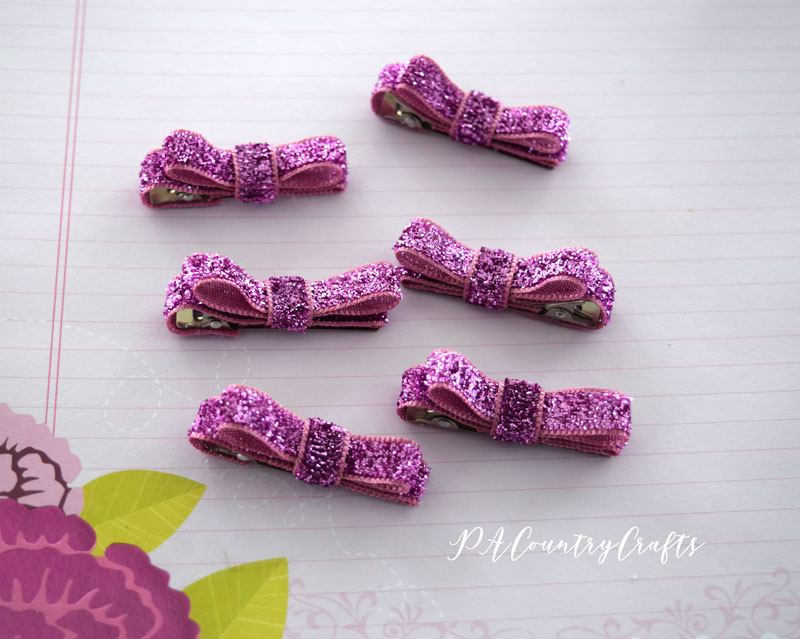
Finished! These only take a few minutes to whip up. Can you see why I overbought supplies? I am being good now, though. I promise!
If you want to pin it for later...
You may also like...

Fabric Bow Tutorial

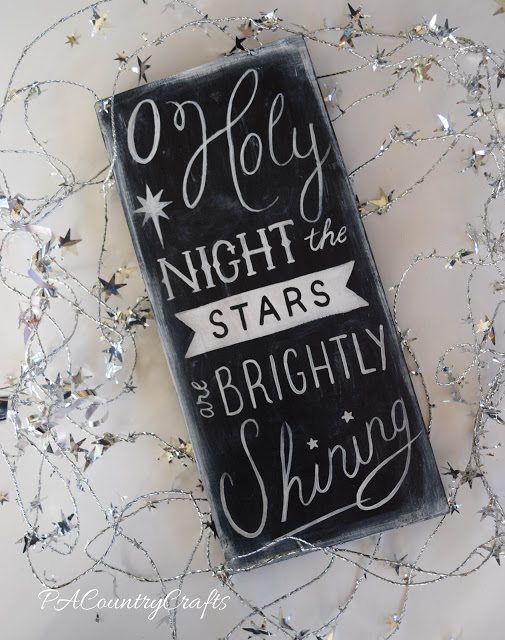
A new trend I have noticed is displaying portions of handwritten notes enlarged as a sign. I think it is a lovely way to remember special words. I was recently asked to create a sign with a portion of Clarence's note from It's a Wonderful Life so I thought I would snap a few pictures of the process to share a tutorial on the blog.

I happened to have the perfect size board already on hand. It is a rough cut board sanded slightly, so it has the rough edges and saw blade marks still visible. It really gives the piece some rustic character. I just lightly brushed some cream paint onto the board to get a weathered effect. You can also sand the edges to remove paint and make it more rustic.
Next, I resized the portion of the original note I was using and printed it out. (I just use Microsoft Word because I can use the page size to estimate dimensions.) I used carbon paper to transfer the image to the painted wood.


I used a fine tip black paint marker to paint the words onto the wood. It is more natural to make handwriting with a paint marker vs. a paintbrush. I also let the roughness of the wood texture the lettering by not filling in chips and grain.

Finally, I applied an antiquing wax to further age and seal the piece.

I think this technique would be really sweet for old love notes from your spouse, cards from special occasions, or even treasured family recipes!
You may also like...
Sewing, crafts, tutorials, recipes, and a little look at our life in the country - raising half a dozen children.

Hi! Thanks so much for stopping by! My name is Lindsay and on this blog you will find sewing, crafts, decorating, recipes, and tutorials with a little bit of honesty and encouragement.


