Turtleneck to Maxi Skirt Tutorial

maxionswing1.jpg

This one has been a long time coming! I finally got some cute pics of my daughter in her maxi skirt so that I could finish up this post!  Last spring, when I was on my maxi skirt sewing kick, my 5yo had requested a RED one. Well, I thought I would just pick some fabric up at a nearby Walmart, but they no longer carry ANY knit at that store! :( So, I wandered over towards the clothing and found a Women's XL red turtleneck on clearance for $1!

This was a super cheap and easy project. I even had enough left over to make her a headband (which we forgot about when taking these pictures- that is what happens when you wait all summer!) and a matching skirt and headband for her doll (see THIS post if you care.)
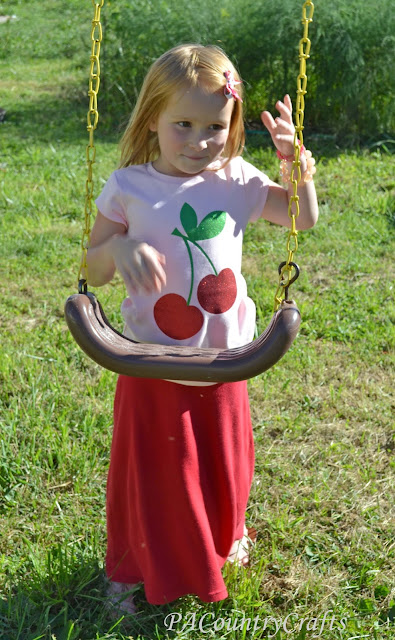
I am not sure what she is doing with her hands here...
This skirt is so comfy (not that I actually wore it, but, you know, she did) and it doesn't slow her down and keep her from playing hard- which is a must for kids' clothing. Are those enough selling points for you? Well, they should be. If you make one, pretty please show me some pics! OK?  Good.  Here is your free tutorial...
I thought the neck looked like it would fit her waist so I had her try it on. It was a perfect fit! (My kids might think I am crazy. You know, "Here, honey. Put this turtleneck on, but put the neck around your waist. OK?") If it is too big, you can just take it in after you cut it off. You want it to fit snugly, so it has to be a little smaller than the actual waist measurement. (I guess I could have just measured instead.)
Anyway... cut the neck off, then fold the shirt in half. Measure the height needed from waist to ankles.  Starting that distance from the bottom, draw a line that is one quarter of the total measurement of the neck/waist/whatever. Then, draw an a-line to the bottom of the shirt. You are keeping the original hem of the shirt (SWEET!) I hope this step is not too confusing.  Just follow the picture...

Sew the side seams of the skirt, right sides together.  You can use a zig-zag or stretch stitch or a serger. I used a stretch stitch and then overlocked the edges for extra durability.

Pin the neckband to the inside of skirt.
Sew it together. This is what it looks like, inside out.

Flip it around and press.

TADA!  It really only took about 15 minutes to make.  Definitely a hit!

As always, this tutorial is for personal, non-commercial use only. No copycats. Got it? Thanks!

Maxi Skirts Galore!

maxiskirts4.jpg
A few weeks ago I was on a maxi skirt sewing frenzy...

Please excuse my modeling skills in the following pictures. :)

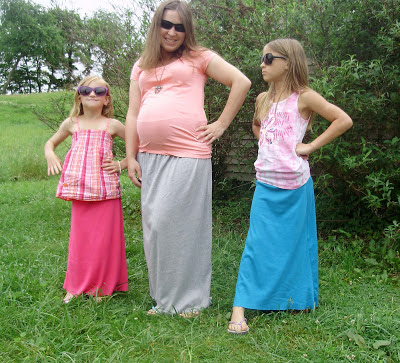
As you can see, one of my daughters, however, thinks she is QUITE the little model. Sometimes she overdoes it, though.
For the girls' pink and blue skirts I used THIS tutorial, but the waist needs to be an inch or so smaller than the actual measurement (these are little girls without womanly hips after all).  I also made one in the pink for myself, but, unfortunately, I DO have womanly, child-bearing hips and it looks pretty awful on me right now as I was trying to make do with some fabric I had on hand. Maybe maxi skirts will still be in style next summer.
I also need to hem the girls' skirts, but the girls won't part with them long enough. I mean to swipe them straight out of the clean laundry basket, but they are faster than my folding, sometimes ripping them right off of the wash line.


My gray skirt was made using THIS tutorial like the skirt I made HERE, but I extended it to maxi length. So comfy and I can wear the waistband over the large belly or folded down. I think the girls' skirts look better, though.

Since my girls now also request matching clothes for their dolls every time I make something for them, I made maxi skirts for their dolls, too.  It was easy peasy and I have a tutorial coming up for that one as soon as I take pictures of the dolls wearing them (they are better models anyway!) 
These are all really easy skirts! I made two skirts for the girls, two for me, and two for the dolls in one morning. Mass production at its finest. Go ahead and give it a try! 

Cozy Knit Maternity Skirt

myskirt.jpg
Last week I whipped up this skirt for myself. Yes, I sewed something for myself. That was not a typo. 
I am not usually comfortable having my picture taken, but for my loyal readers I will make this sacrifice.  :)  I walked up to the edge of the fields with my oldest daughter and gave her the camera.    She did a fantastic job!
Oh, and before you think that belly is so adorable, let me put it in perspective.  I am only 21 weeks. Yup. It is gonna be a looooooong summer! Good thing this knit has a lot of stretch!
Last time I was expecting I tried to make one of these skirts and it was a giant FAIL. This time, I messed up the exact same way (UGH!) by sewing the skirt on inside out, but I was able to save it. I sewed everything on my serger this time, too.  I can, hopefully, wear this one after the baby is born with the yoga waistband folded down.  If I need to, I can easily rip it apart and take it in, and I might shorten it some, too.  It is so incredibly comfortable and you can find the tutorial I used HERE.

 I have JUST enough left over that I think I am going to make a skirt for one of the girls. However, I love the detail on this shirt (Thank you, Loni!) and I am considering trying to make a similar design on the knit using a bleach pen. Do you think it will work?

I am linking up at the brand new Project Sewn and The SewOff Flickr Pool and Make for Mom.

Easter Sewing Part 4

easter20100273.jpg

My skirt is the last in the series… I wanted and A-line, and I loved the contrast of plain white against the fabric in the other skirts, so I wanted to trim with white.

I used a pattern, sort of- because I made it myself! I took a skirt I already have and took the measurements of the bottom width and the length of the skirt and my waist. Then I took a piece of freezer paper in the same length, and marked off the half of the waist and half of the width. I drew a diagonal from the waist to the bottom marks.

Then I marked the length on the diagonal and made it curve gently from the bottom to the mark on the diagonal. Using this pattern, I cut two pieces on the fold from my skirt fabric.

For the white waistbands, I measured my waist (ICK!) and divided it in half again. I added seam allowances and cut four pieces in this length by 2 inches wide. I sewed two of them together along the long, top side and pressed them with the seam inside and repeated this with the other 2 pieces. Each waistband piece was then sewed to the top of a skirt half and the edges overlocked. I sewed the skirt halves together on the right side the whole way, and up to 6 inches from the top on the left side and overlocked again.. I put an invisible zipper in the left side and hooks on the top at the waistband.

The hem was my favorite part! I overlocked the edges, then took white double fold wide bias tape (like quilt binding) and sewed it on! This was my first time using double fold bias tape and I LOVED it! How can single fold be so awful and double fold be so wonderful! I cannot believe I have been hand-sewing quilt binding for all these years! I might have to cheat now!

It fits pretty well, although it bunches just a tad in the pelvis area when I bend and sit, but it is still the best thing I have ever sewn for myself to wear!

NOW... drum roll please...........................................

The whole collection! Now, I don't have my hair or makeup done, so ignore that- it was very tempting to use one of the other 3 pics hubby took first with my head cut off because he was so worried about getting the girls to look to see whether I was in the shot! The shirts are a little big, but I am sure they will grow or the shirts will shrink. I wanted to embellish those as well, but then I regained my sanity. I hope you enjoyed my series this week and that you may have gotten some ideas or just enjoyed laughing at my novice abilities and insane ramblings...