Flannel Button Quilt

button2Bquilt2B3.jpg

So, my little girl went through a phase where she LOVED pink camouflage. I was on a flannel quit kick, so I decided to make her a pink camo one for her second birthday.
She turned five in December.
You see, I thought it would be absolutely charming and adorable to do a checkerboard pattern and use high-loft batting and sew a button on each square. I was picturing this comfy, cutesy, "Little House on the Prairie" effect. But sewing buttons is a pain in the neck.
So now, 3 1/2 years later, in my "finish up projects so I can make room for Baby #5 kick" I have forced myself to finish it! I only had 21 buttons left to sew on, and it probably took me less than an hour (hanging my head in shame here). The binding only took one dentist appointment and two soccer practices. It is an odd size and the pink in the squares doesn't really match the camo too well, but it was so long ago that I don't know what I was thinking anymore. BUT... YAY for another finish!!! And since she is older now, buttons are probably less of a choking hazard. :)

In the Garden Twirly Easter Dress

easter2Bdresses2B20112B0592B252822529.jpg

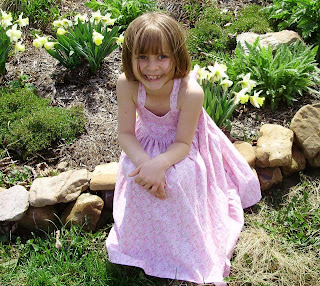
My 7yo daughter was also very opinionated about her dress style. She wanted a "poofy" skirt and straps instead of sleeves (she said spaghetti straps and I said "NO"). So, I checked out my bookmarked list and found this tutorial. She totally approved! The straps are the minimum 1" wide allowed in the school dress code, so it should be OK to wear to school if she wants, and the skirt is two full widths of the fabric- so it is very "poofy."

I was really nervous to do the shirring because I had never tried it before and it is the very last step! I saw it done on Martha Stewart a few years ago and figured I could handle it. Luckily, it worked just fine.
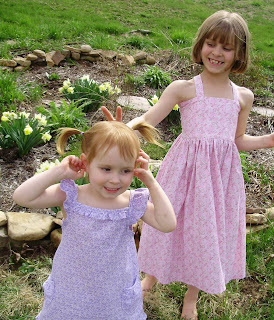
Thanks for bearing with me as I showed off my girlies' Easter dresses the past few days! Happy Easter!!!

Puffy Sleeve, A-Line Easter Dress

easter2Bdresses2B20112B0232B252822529.jpg

My 5yo wanted "puffy sleeves" (I wasn't thrilled with that- I don't like sleeves!) and a "straight" skirt.

I traced one of her T-shirts to get the bodice pattern, but made the waist fairy high. Then I cut the skirt to be an A-line style.

The sleeves were a little trickier, but they turned out really, really well! I used the same technique as found here.

I prefer invisible zippers and I used a sash from the Easter dresses I made two years ago. Maybe later I will make another one, but for now this is good.

It is very simple, but it is what she asked for! For now there is a little room for her to grow (or the dress to shrink) so she should be able to wear it all summer long!

Ruffle Tank Easter Dress

easter2Bdresses2B20112B0432B252822529.jpg

For the Easter dresses this year, I wanted to:
  1. use things I already had, if possible
  2. skip the commercial pattern thing
  3. let the girls have a say in what style they wanted

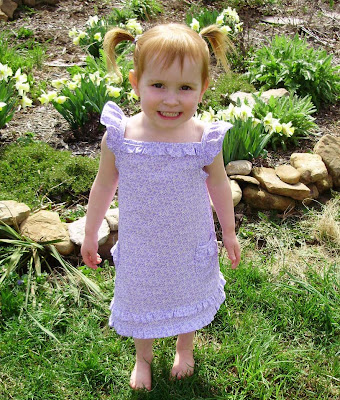
I had one yard pieces of cotton quilting fabric in pretty calicos that I made work for the younger girls, but I had to buy some for the oldest one. All these addicting blogs gave me the confidence to "wing it" with the patternless approach, too. But for my youngest, who is not yet 3, she would have asked for something ridiculous given the option.

So.. I patterned the style after her favorite shirt -the one that she INSISTS on wearing all the time (she says it is her beach shirt, even though she has never been to the beach.) I made it longer, of course.

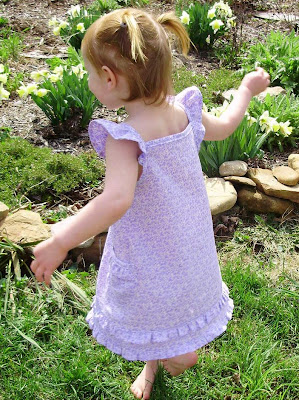
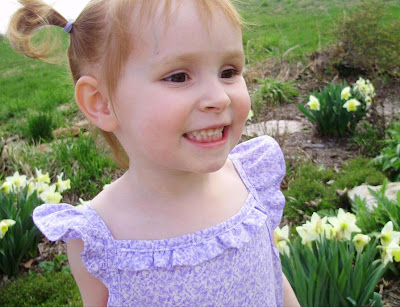
I love the cute little flutter sleeves on this. When I sewed the top ruffle on, most of the front gathering came out, so I just let it go cause I was lazy.

I also got my gathering foot to work for my serger, and I was so excited that I made ruffles until I ran out of fabric. So there are 2 rows of ruffles on the bottom.

She loved the pockets on her Leah tunic so much that I put pockets on the dress, too. And I added ruffles at the top.

It was very easy to sew up, so I may make another one and post a tutorial and pattern for it, too!

Butterfly Quilts

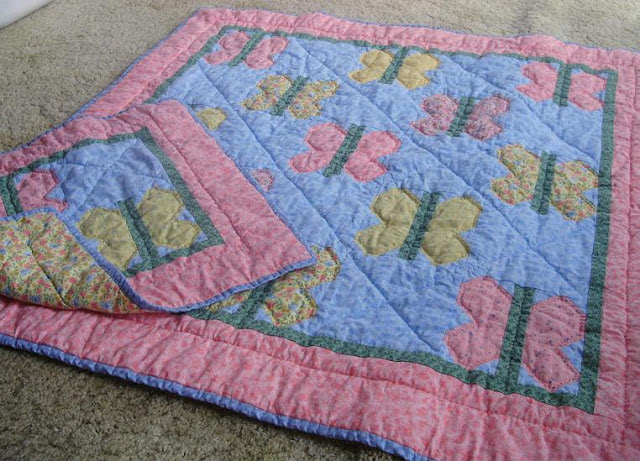
I try to make quilts for my new nieces and nephews when they are born. For my niece, Eden, I made this beautiful butterfly quilt, and I used some extra blocks to make a doll-sized version for her older sister, Anna, too.

I used only fabrics I had on hand- I didn't have to buy anything, so it was some major stash-busting! I even used up extra binding that I over-cut from the last quilt and just cut a little more.

I have made butterfly blocks before, but I was inspired by the Moda Bake Shop quilt pattern here. I changed the measurements of my blocks some, though.

I hand quilted inside the butterfly wings and up the middles, and just did X's on the empty blocks (Yes, I am getting lazy here, but that flower one did me in!)

Another finished quilt- actually two!!! YAY!!!


My Buttercup Bag, Modified

faith2B0052B252822529.jpg

As promised, I am showing you all my modified Buttercup Bag. I got this LOVELY fabric like I used in my sister-in-law's purse for Christmas (I just reversed the outside and lining for mine). After making one for my daughter as a trial run, I realized the original pattern was too small for me, so I made mine a bit bigger (still a bit too small for me, but I am trying to size down from my HUGE Birdie Sling Bag). I made quite a few other adjustments from the original pattern...

I used magnetic snaps like the pattern called for this time. It was my first time using these -they are really nice! I also added a loop to hook keys or whatever onto, and added an additional pocket (on the other side) just the right size to hold a pack of tissues and my cell phone.

The biggest change I made was that I interfaced the outside and strap, and used fusible fleece to line the inside. I had to take the lining in about 1/4" to account for the bulk of the fleece, but I made sure the band and top of the lining were still the same size so that they would line up when sewing it together. It definitely made the bag sturdier, but I soon discovered that, because of the heavy fleece lining, when I filled the purse up and went to sit it down, it would flop over to one side. So, I had to add small gussets in the bottom.The busy print of the fabric hides the pleats, but it is still a great little bag! :) Unfortunately, I have decided that the purse is also too small because it makes my pregnant belly look much bigger! :)

(And I even look pretty small in this picture!)

Kelsey's Quilt

I don't believe I have ever shown off one of my quilts on my blog, but I am also a quilter! (Actually, I learned to sew quilts before anything else.) After a really tough Spring semester my sophomore year of college, I sold back all the books I could find from the first two years, went straight to Walmart, and bought the only sewing machine I could afford. That summer, I taught myself to quilt.I made baby quilts for my nieces and nephews, but the pre-quilting era kids have been skipped. So, for the girls, I have been making larger quilts for their 12th birthdays. Kelsey’s was just a bit overdue. I started it in April of 2009 and I just finished it. The piecing went really quickly! Basic nine patches in light blue and lilac, set on point with a cream background.

(The backlight from the window doesn't show this off the best.)

See, it took so long because I like to hand quilt motifs on the open squares. This intricate flower one was totally my own design and each block varies.

I like how the colored thread stands out against the cream fabric.

I put a few butterflies in there, too. I really punished myself with this one, and it would sit for months at a time with me having no ambition to work on it. However, I use washable crayola markers to draw on my quilting lines and after nearly 2 years, it didn't want to wash out! It took a lot of washing and soaking and OxiClean to get most of it out.

This is a terrible cropped in picture, but I designed a little motif to put her name in it that coordinated.

And of course I mitered the corners, too. I handstitch my bindings on around the back. (And that is some of Baby#5 under the green shirt there- makes a nice photo prop!)

I try to embroider a special message on the backs of these, and this one included Isaiah 40:8

The grass withers, the flower fades, But the word of our God stands forever.
So there is my first quilt show-off. Expect more of these because I am trying to catch up on some new baby nieces and also trying to use up lots of quilting stash before I move my sewing table and hubby sees how much I have jammed in there! :)