I thought I would take a break from Christmas preparations for a minute and share one of the Christmas gifts that I am making. I am putting together homemade frozen dinners for my grandparents. I know that Grandma LOVES my baked ziti (she is half Italian after all!) so I made a batch for them. 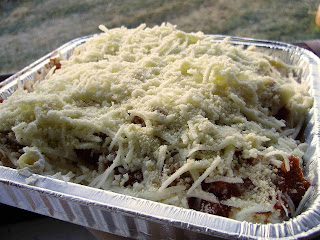 (Note: it is not cooked in this picture- just ready to freeze!)
One of my batches makes 3 8” square pans or 2 9”x13”cake pans. Not only is this a great gift, it is just nice to have some frozen dinners on hand for those unexpectedly busy evenings- and it prevents a fast food splurge, too! So I thought it would be a great idea to share here. Without further ado, the recipe:
Baked Ziti
~2 pounds loose sausage (Optional- I actually like it just fine without meat, but Hubby and other meaty guys I know like it better. Oh, and you can use hamburger, too.)
~6 cups spaghetti sauce (I used a quart and a pint of what I canned this summer and added a little tomato paste to thicken cause my sauce is always runny, but I had some left over, so if you are purchasing jars from the store get less)
~1 pound ziti pasta
~32oz. Ricotta cheese (Stock up when this is on sale!)
~6 cups mozzarella
~½ cup parmesan
Brown sausage and drain grease. Add tomato sauce to pan and heat through. Meanwhile, boil ziti just until tender- do not overcook! Drain. Mix ricotta and 3 cups mozzarella and stir in cooked ziti. Put a layer of sauce on the bottom of each pan. Top with ziti and cheese mixture, splitting it evenly between the pans. Spread remaining sauce on top of ziti. Sprinkle remaining mozzarella evenly on top of each pan and then sprinkle heavily with parmesan.
Then, you have two options- bake now or freeze! (I like to put these in two cake pans to make one right away for dinner and freeze the other for later.) If you are baking it right away, cover with foil and bake at 350 degrees for about 30 minutes, or until the cheese on top is bubbly and begins to brown. If you are freezing it, cover with plastic wrap, then foil. (If you are giving it as a gift, be sure to label and include heating instructions.) When you go to bake it, remove the plastic wrap and put the foil back on. Then bake at 350 degrees until it is heated through and the cheese is bubbly and begins to brown on top- I really forget how long it takes.


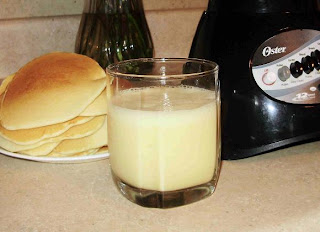 Well, so much for making up school days! President's Day was a snow make-up day, but we got MORE snow so it was cancelled. So, I used up all my daily ambition first thing in the morning and made a nice breakfast for the kiddos. One of their FAVORITES is Orange Julius. I have also made this for


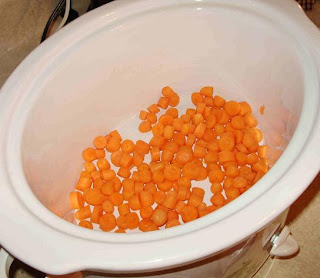 I used baby carrots because they were buy one get one free and what I had on hand. Although more of a pain to chop, they will be eaten more easily by the kids than big slices of carrot.
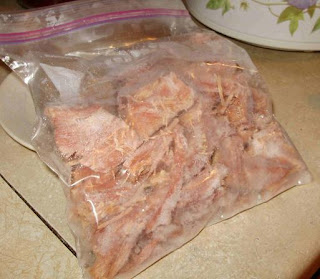 When I boil a large ham, there is usually an excess of meat, so I cut it up and freeze it in smaller quantities to use in recipes later. This is a great idea if you can get a big ham on sale around holidays, like Easter. If you don’t have the freezer space for a big ham- cook it right away and make a big pot of ham pot pie or ham and green beans (typical PA Dutch foods), freezing the rest of them ham for later. You can get several meals out of it this way.
 Potatoes are a big food staple in this house. We grow a lot but we need a better way to store them…
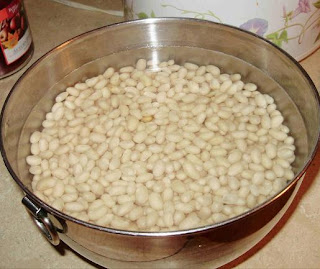 Remember to soak your beans the night before! Dry beans are really cheap and they take up less space in your cupboard than canned ones.
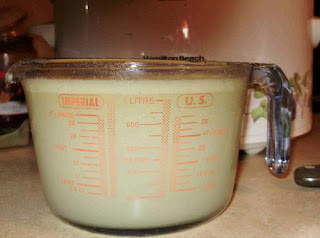 Instead of canned chicken broth, boil some chicken and save the broth. The chicken was used in zucchini casserole, but other than casseroles, I sometimes use the meat in chicken wraps for lunches, too. I boil the broth down to condense it sometimes, then freeze it in old margarine or sour cream containers. Another great way to take advantage of a good sale on chicken, or better yet, get your meat directly through the farmer- you will cut out the middle man and save! If you want it to be lower in fat, you can let it cool and then skim the fat off of the top.
 It was pretty good. Next time, however, I might try to use ham soup base instead of chicken broth. I am used to my regular ham bean soup with that good, smoky flavor. Bacon would really make this, too. :)


.jpg)
.jpg)


