Women's Dress to Girls' Skirt Refashion Tutorial
/I love living in the country. Except for my kids, it is nice and quiet. We have a little farmette with lots of animals and the kids have plenty of space to play outside. We are pretty much in the middle of nowhere. The downside to this is that there aren't very many places to shop for fabric, especially apparel fabrics. We do, however, have a really big thrift store nearby, so I often get creative with some refashioning. This year, I got the opportunity to be a contributor for Skirting the Issue. During the month of July, Simple Simon & Company and Project Run & Play host a sew-along for skirts, quilts, and pillowcases to be donated to local foster care centers. (You can read all about it HERE.) I decided to share a tutorial for an upcycled skirt to hopefully inspire others to think outside the box when it comes to fabric sources. I have used women's shirts, men's dress shirts, T shirts, sheets, bridesmaid dresses, and turtlenecks to make clothing for my girls. You can see many examples of my upcycled projects HERE.
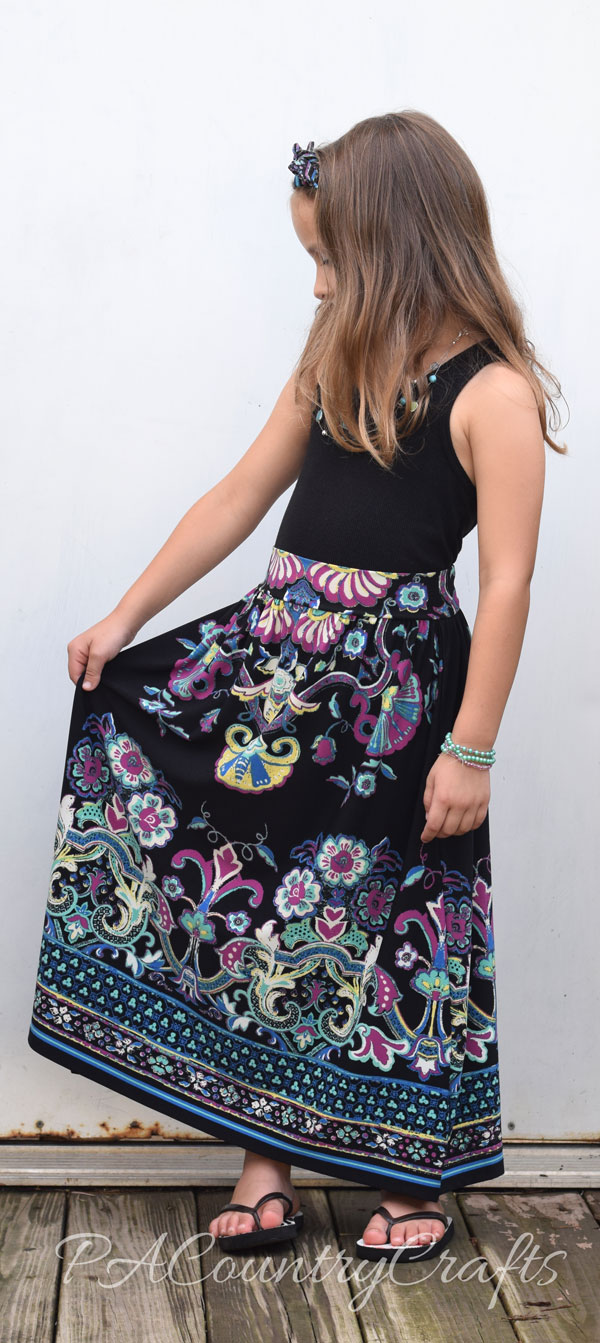
My 6yo is my fancy girl. She loves a fabulous outfit, especially skirts and dresses. I picked up a dress (on half off day!) at the local thrift store for $4 and turned it into a maxi skirt for her. That is a little more than I usually spend for this sort of project, but I really liked the colors and the silkiness of the fabric. You just can't buy something off the bolt like this at Joann. Plus, the hemming was already done for me! I actually would have even kept this dress, but it looked awful on my wide ribs and that beaded medallion on the front was a bit much.
It makes a really classy-looking maxi skirt, though!
Since no outfit is complete without a matching headband, I used one of the waist ties to make her a simple tied headband.
Also, since I was overachieving and we needed something to do while waiting at the dentist, we made some simple stretch bracelets with the beads taken off of the front of the dress. She actually lost the best one already and I didn't get pics. I am sure we will find it later.
The tank was 50 cents, so $4.50 for this entire outfit isn't too bad!
Here is a little tutorial to show you how I made the skirt. This is a stretch fabric made of 95% polyester and 5% spandex.
Start by disassembling the dress. I cut off the waist ties and cut the skirt from the bodice.
Measure the length you need for the skirt, and add a half inch or so for seam allowance. Measure from the hem to the waist and cut as needed. Using the original hem makes this a really fast sew!
*TIP- Fold and pin the bottom hem together so that you can cut several layers at once without the fabric shifting.
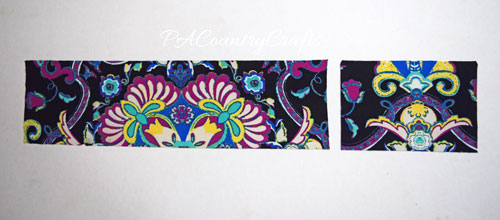
From the back of the bodice, I cut two 4 1/2" strips to make the waistband. I had to use one longer strip and one shorter strip to get the length I needed. It still looks fine. You can use other fabric for the waistband or just make do with what you have left from the bodice like I did.
Sew the strips together and cut to make a waistband measuring one inch smaller than the actual waist measurement. Sew the short ends together to make a loop.
Fold the waistband in half with the wrong sides together.
Mark the centers and sides of the skirt and waistband. Sew two basting rows along the top of the skirt and gather to make it fit the waistband. (I forgot to take a pic of that.) Lining up the pins will make sure everything is even. The skirt should be inside out and the waistband will be on the inside because I find it easier to sew with the gathers away from the presser foot.
Use an overlock machine, if available, to sew all the way around the waist. If you don't have one you can just use a stretch stitch.
Remove the basting threads and then press really well. (This is obviously before pressing.)
It only took a few seams to put this together. It fits her perfectly and is comfy enough to run and play. And did I mention that I didn't have to hem anything? I love that.
Don't forget to check out the rest of the posts this month for more sewing inspiration!
You may also like...


