Drawstring Adventure Bag Tutorial
/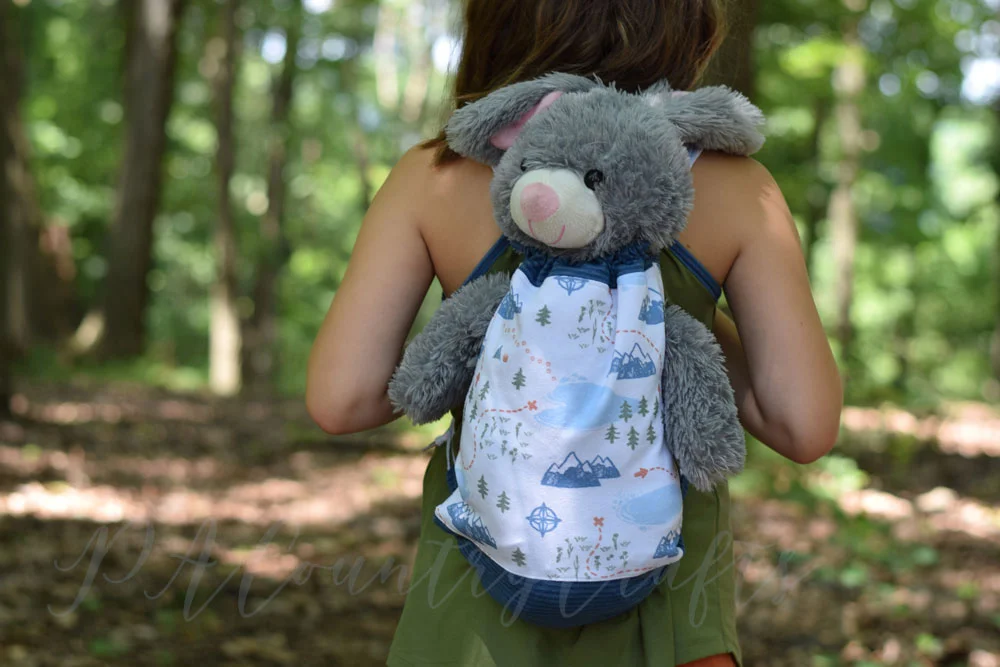
Make a drawstring bag out of cozy knit fabric with openings in the sides for stuffed animal arms. It makes a perfect sleepover bag!
Read MoreMake a drawstring bag out of cozy knit fabric with openings in the sides for stuffed animal arms. It makes a perfect sleepover bag!
Read MoreHey there! I am still here. You can always assume that if I am not blogging it is because I am super busy with real life stuff. I tend to take on too much and end up getting really burned out. That usually results in getting sick, too. It is like my body is forcing me to slow down and take care of myself. Unfortunately, moms don't get sick days. Even though my 4yo was struggling with a nasty cold herself, she still had way more energy than I could handle. I have written before about utilizing busy bags, quiet books, or stashes of special toys/activities to keep little ones occupied. The past few days we have gone through quite a few of them.
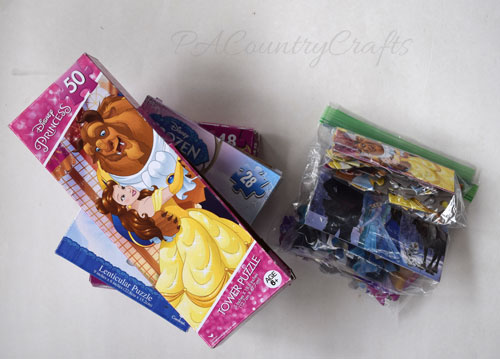
At the beginning of the year I was on a major decluttering and organizing spree. One of the things I tackled was the puzzles. I decided to throw away any puzzles that did not have all of their pieces. Most of them are from the Dollar Tree so it was not a great loss. It made it easier to clean the rest of the house because I tossed any pieces I found instead of saving them and trying to put them in the right box later. Here is the before picture...
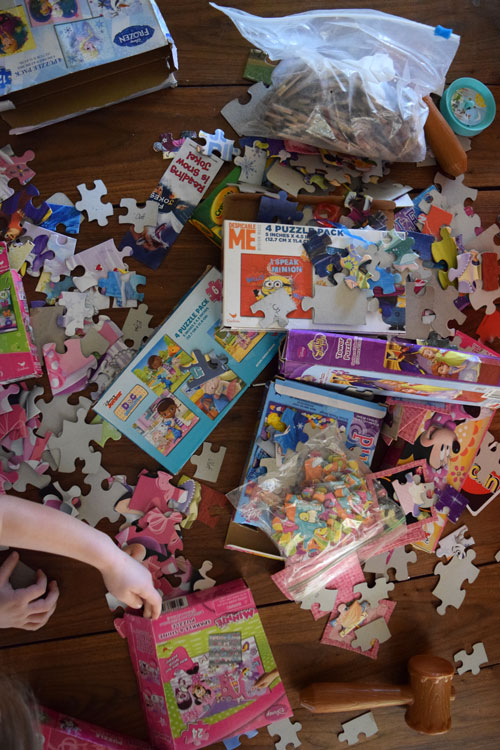
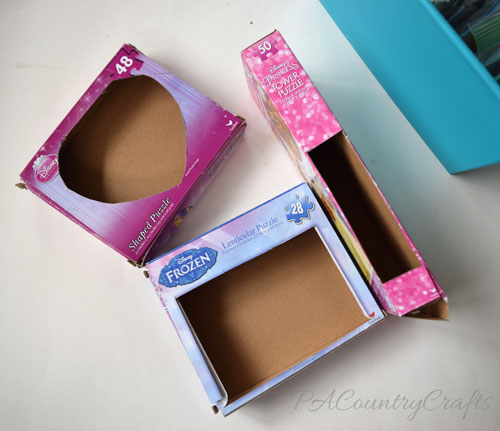
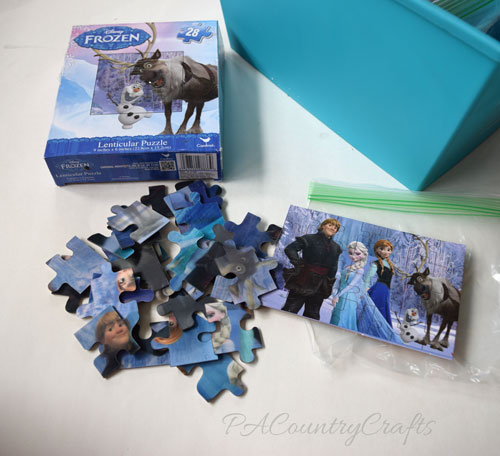
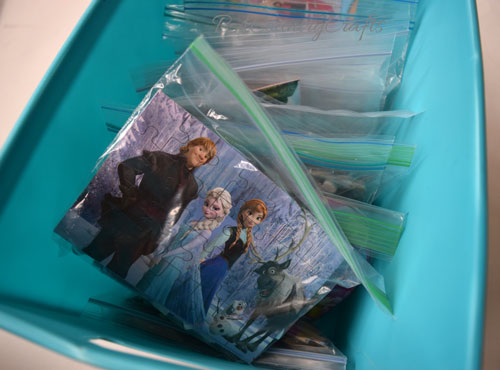
Puzzle boxes take up a lot of space for the tiny pieces that they hold. They also come in all shapes and sizes, so the boxes do not stack neatly anywhere. I decided that it was easier to put them all in bags instead. All of the bags fit in one bin from the Dollar Tree. (Honestly, I don't shop there very often!) I cut the pictures off of the boxes so that they know what it is supposed to look like.
I can fit dozens of puzzles in that little bin!
It was a simple storage solution for us. Although, the puzzle my daughter chose to do was actually missing one piece. Figures!

Other posts that you may find helpful…
Kitchen Decluttering and Organizing
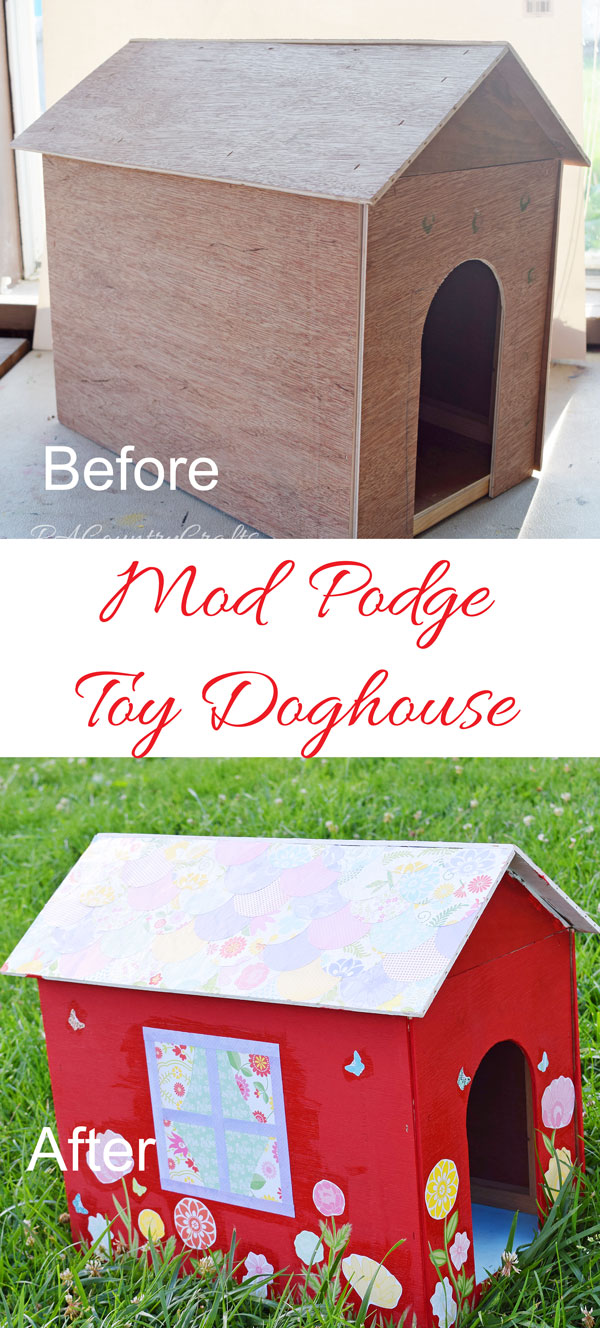
My parents have a great tradition with the grandchildren. When they reach a certain age, they are treated to a birthday dinner out/shopping spree/sleepover. My kids really enjoy it. They love having some one on one time with them and getting a break from their siblings! Last year, my dad helped my 9yo build a toy doghouse for some stuffed animals she chose on her shopping spree. She brought it home to have me help her decorate it. We finally got around to it a year later. I am going to let her tell you about it!

~~~~~~~~~~~~~~~~~~~~~~~~~~~~~~~~~~~~~~~~~~~~~~~~
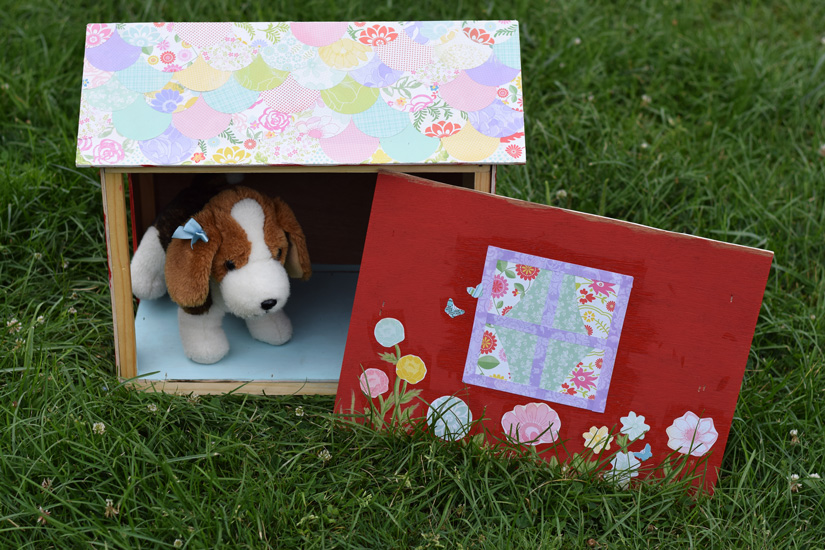
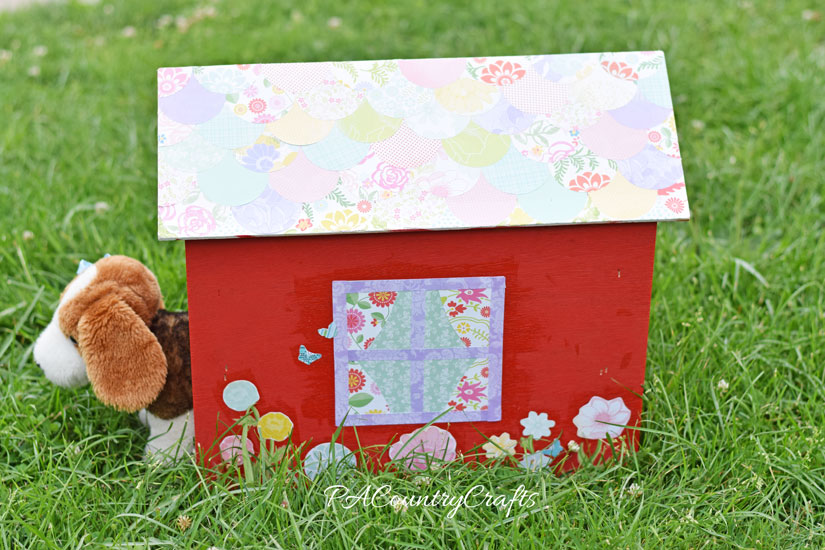
Hi! I'm Lydia. I have 2 stuffed dogs named Sky and Rose. My Pappy and I built a doghouse for my dogs.

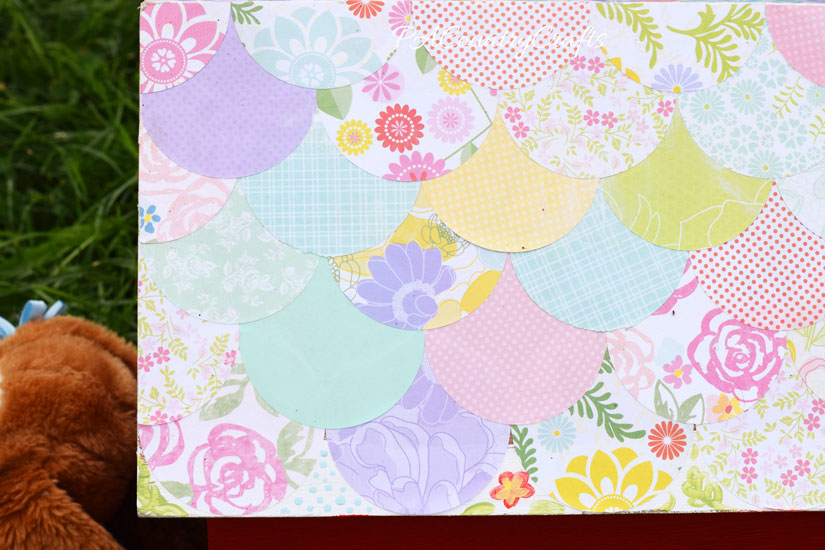
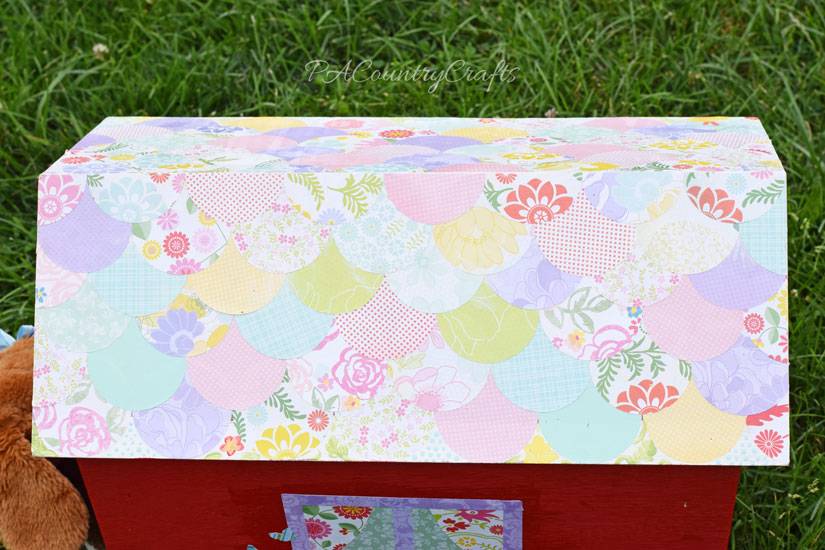
Then, my mom helped me decorate the doghouse and it was looking pretty good! First, I decorated the roof. We punched circles out of scrapbook paper. Then, we used Mod Podge to glue them on the roof.

Some of them stuck out over the edge so we had to sand them off.


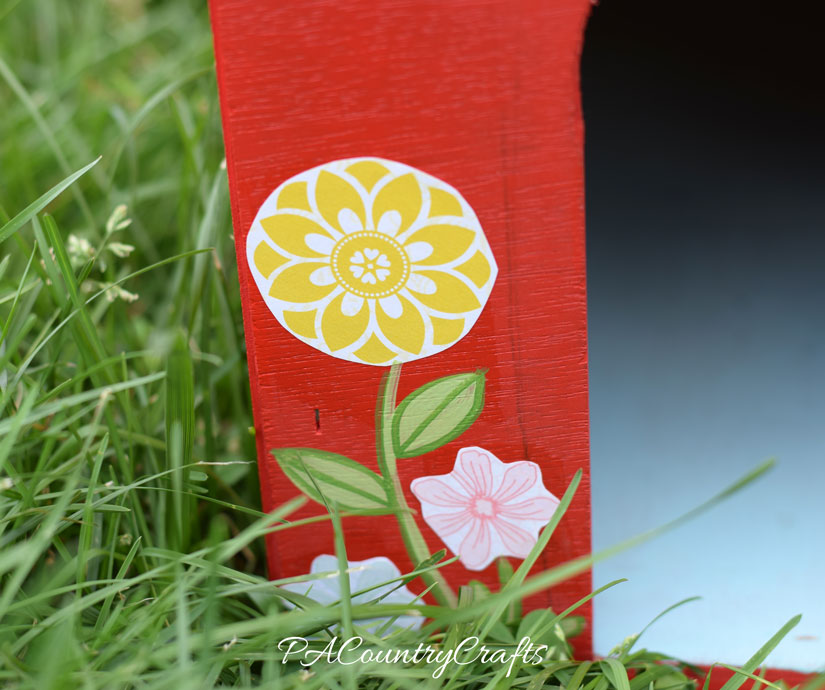
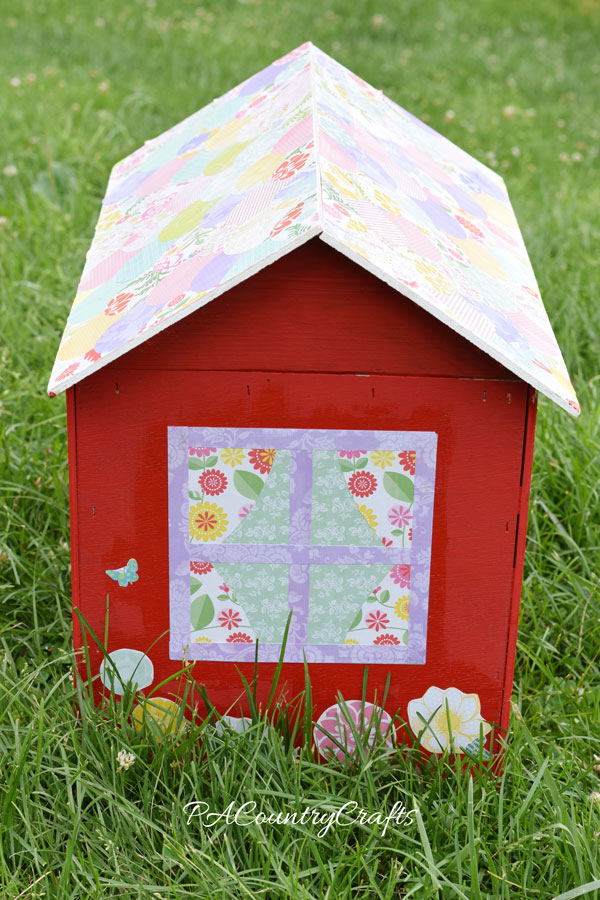
Next, I painted the outside of the house red and the inside aqua. Then, we cut out windows, flowers, and butterflies from the leftover paper. We used Mod Podge to put them on, too.


Last, Mom painted grass, stems, and leaves on the sides of the house.

My doghouse turned out beautiful!


~~~~~~~~~~~~~~~~~~~~~~~~~~~~~~~~~~~~~~~~~~~
Thank you, Lydia! The before and after is pretty impressive. I was glad that we could work together on this. It is sometimes hard for me to let go of my perfectionism and let the kids have control of the craft projects. She did a great job!
If you want to pin it for later...
You may also like...


Free pattern and tutorial for a basic doll dress made to fit 14” dolls like Disney Princess Toddler dolls or Wellie Wishers. Clear, step-by-step instructions and a printable paper pattern!
Read MoreSummer vacation is rough!!! I (laughably) thought it might be easier this year because I actually downsized from being with 20 kids all day to just 5. Hahahahaha! Dealing with 5 of my own kids is entirely different. They aren't used to being with each other all day so they need to reestablish the pecking order. It is taking longer than usual with the hormones raging in this house these days (oh, just a sample of what is to come, I know!) Now we have a heat wave and my car is in the garage. It has been quite the week! So, if you are wondering where I have been, I am probably hiding- locked in my bedroom and curled up in the fetal position with a bag of chocolate chips.
OK. Not really.
I have ice cream.
Every now and then I get ambitious/drink extra coffee and try do something fun. Last week we went on our planned shopping excursion, but it took until 2pm or so to get them to clean their rooms so we could leave. Our first stop was the thrift store for a very specific purpose- bunny ears. The kids are waking up right now so I am going to let my 9yo do a little guest posting and tell you about it!
~~~~~~~~~~~~~~~~~~~~~~~~~~~~~~~~~~~~~~~~~~~~~~~~~~~~~~~~~~~~
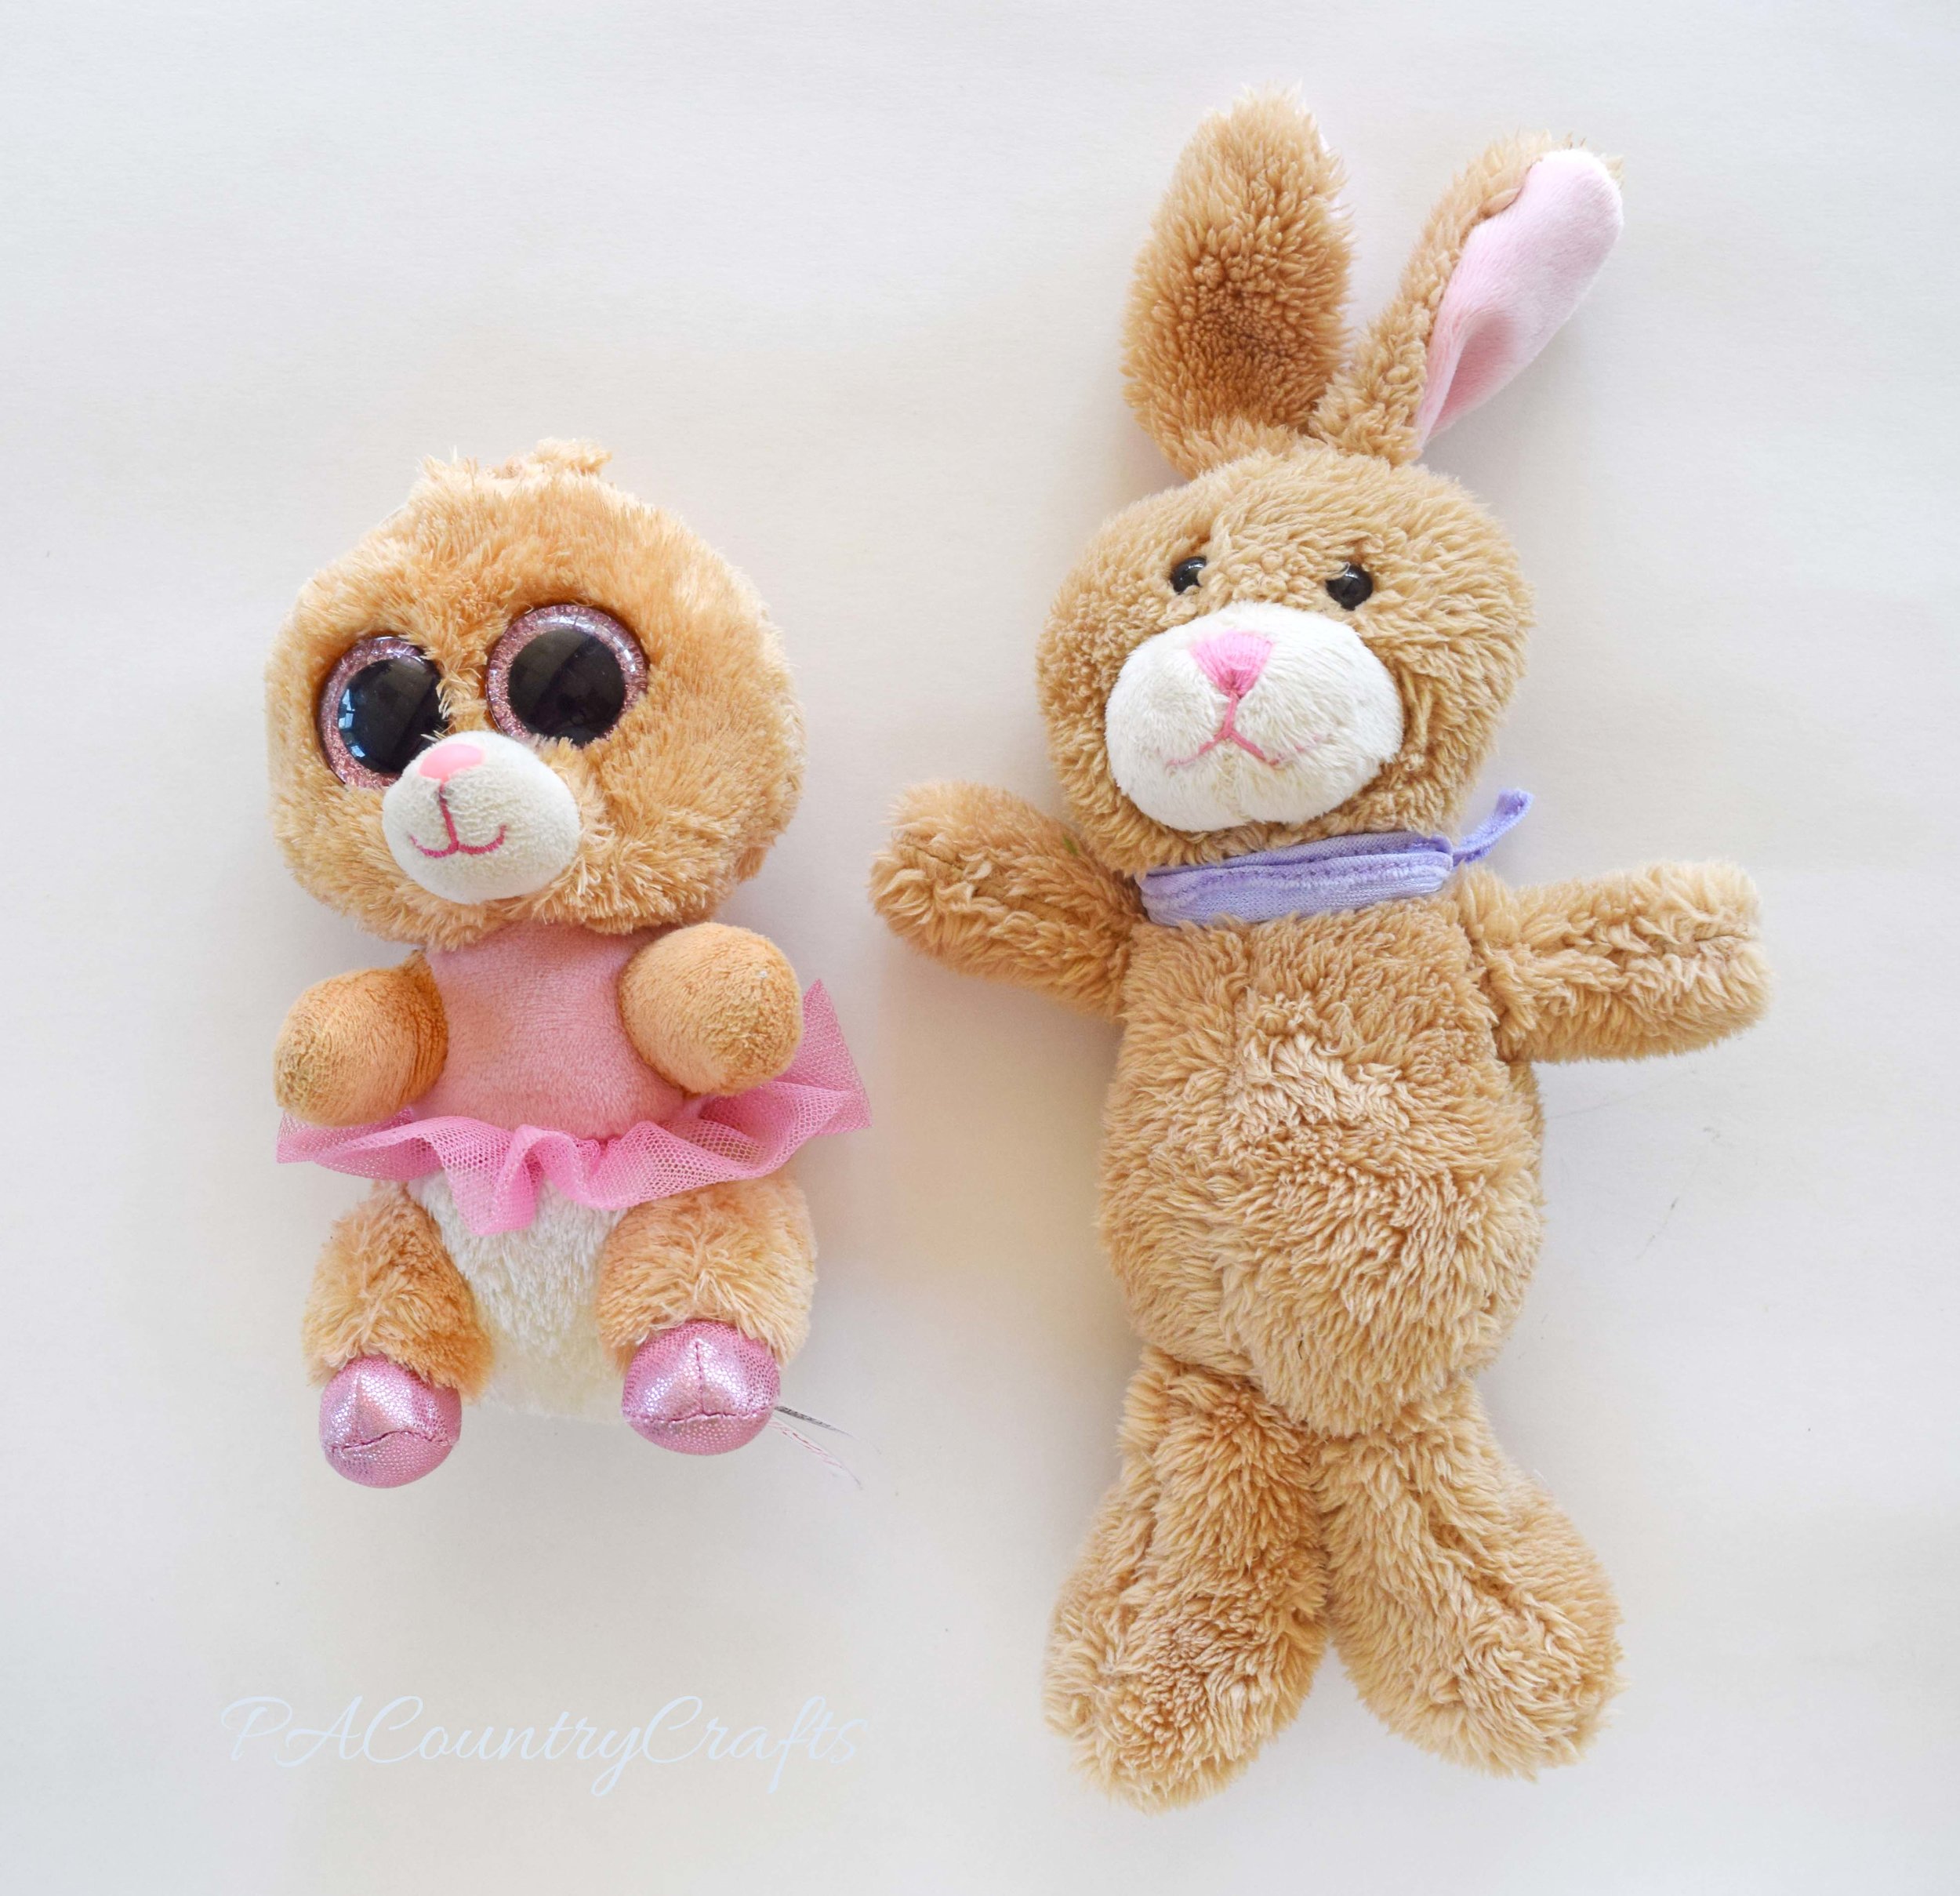
I have a stuffed bunny named Twinkle Toes. It is a Beanie Boo that has the same birthday as me. My aunts' dog chewed off my bunnies' ears. They don't make these bunnies anymore so we couldn't get a new one. My mom and I decided to go to the thrift store to find new ears. I found the perfect bunny. It's ears were backwards! We all went home and mom washed the bunny. A few days later, my mom seam ripped what was left of the ears on Twinkle Toes. She also cut the ears off of the 2nd bunny. She sewed the ears on Twinkle Toes. We even added a pink flower! AGAIN, MOM SAVES THE DAY!!!!!!!!!
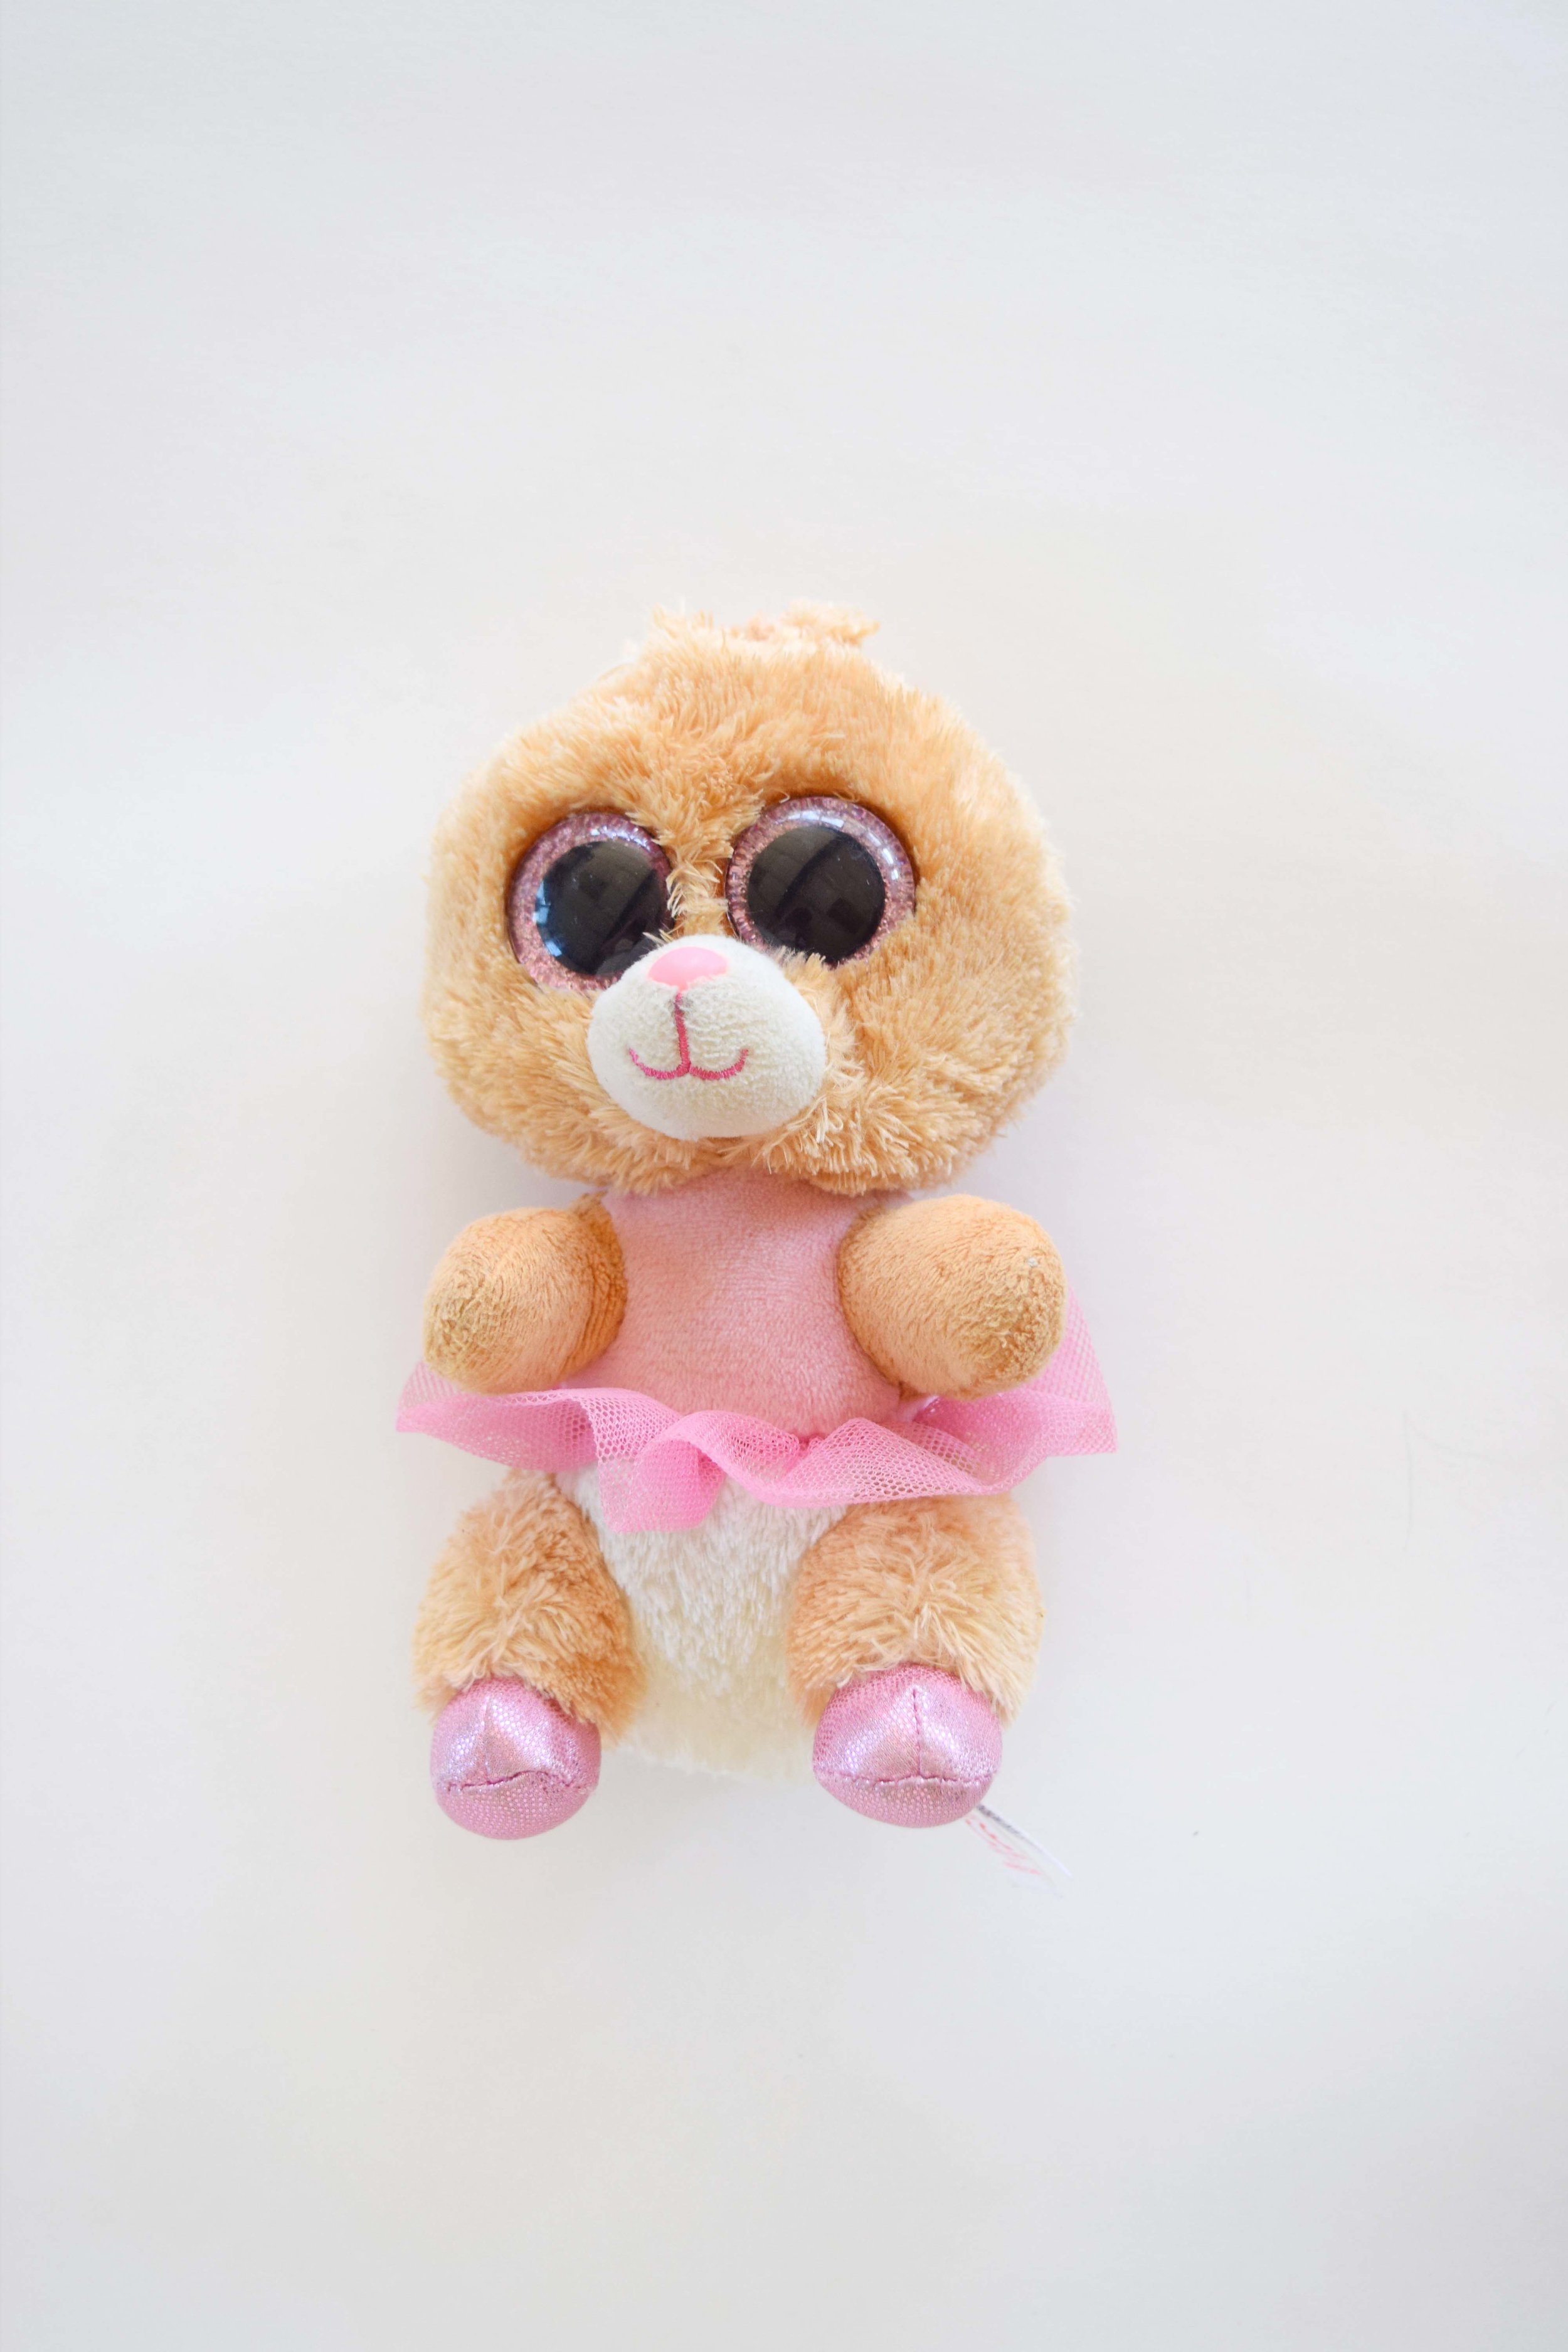
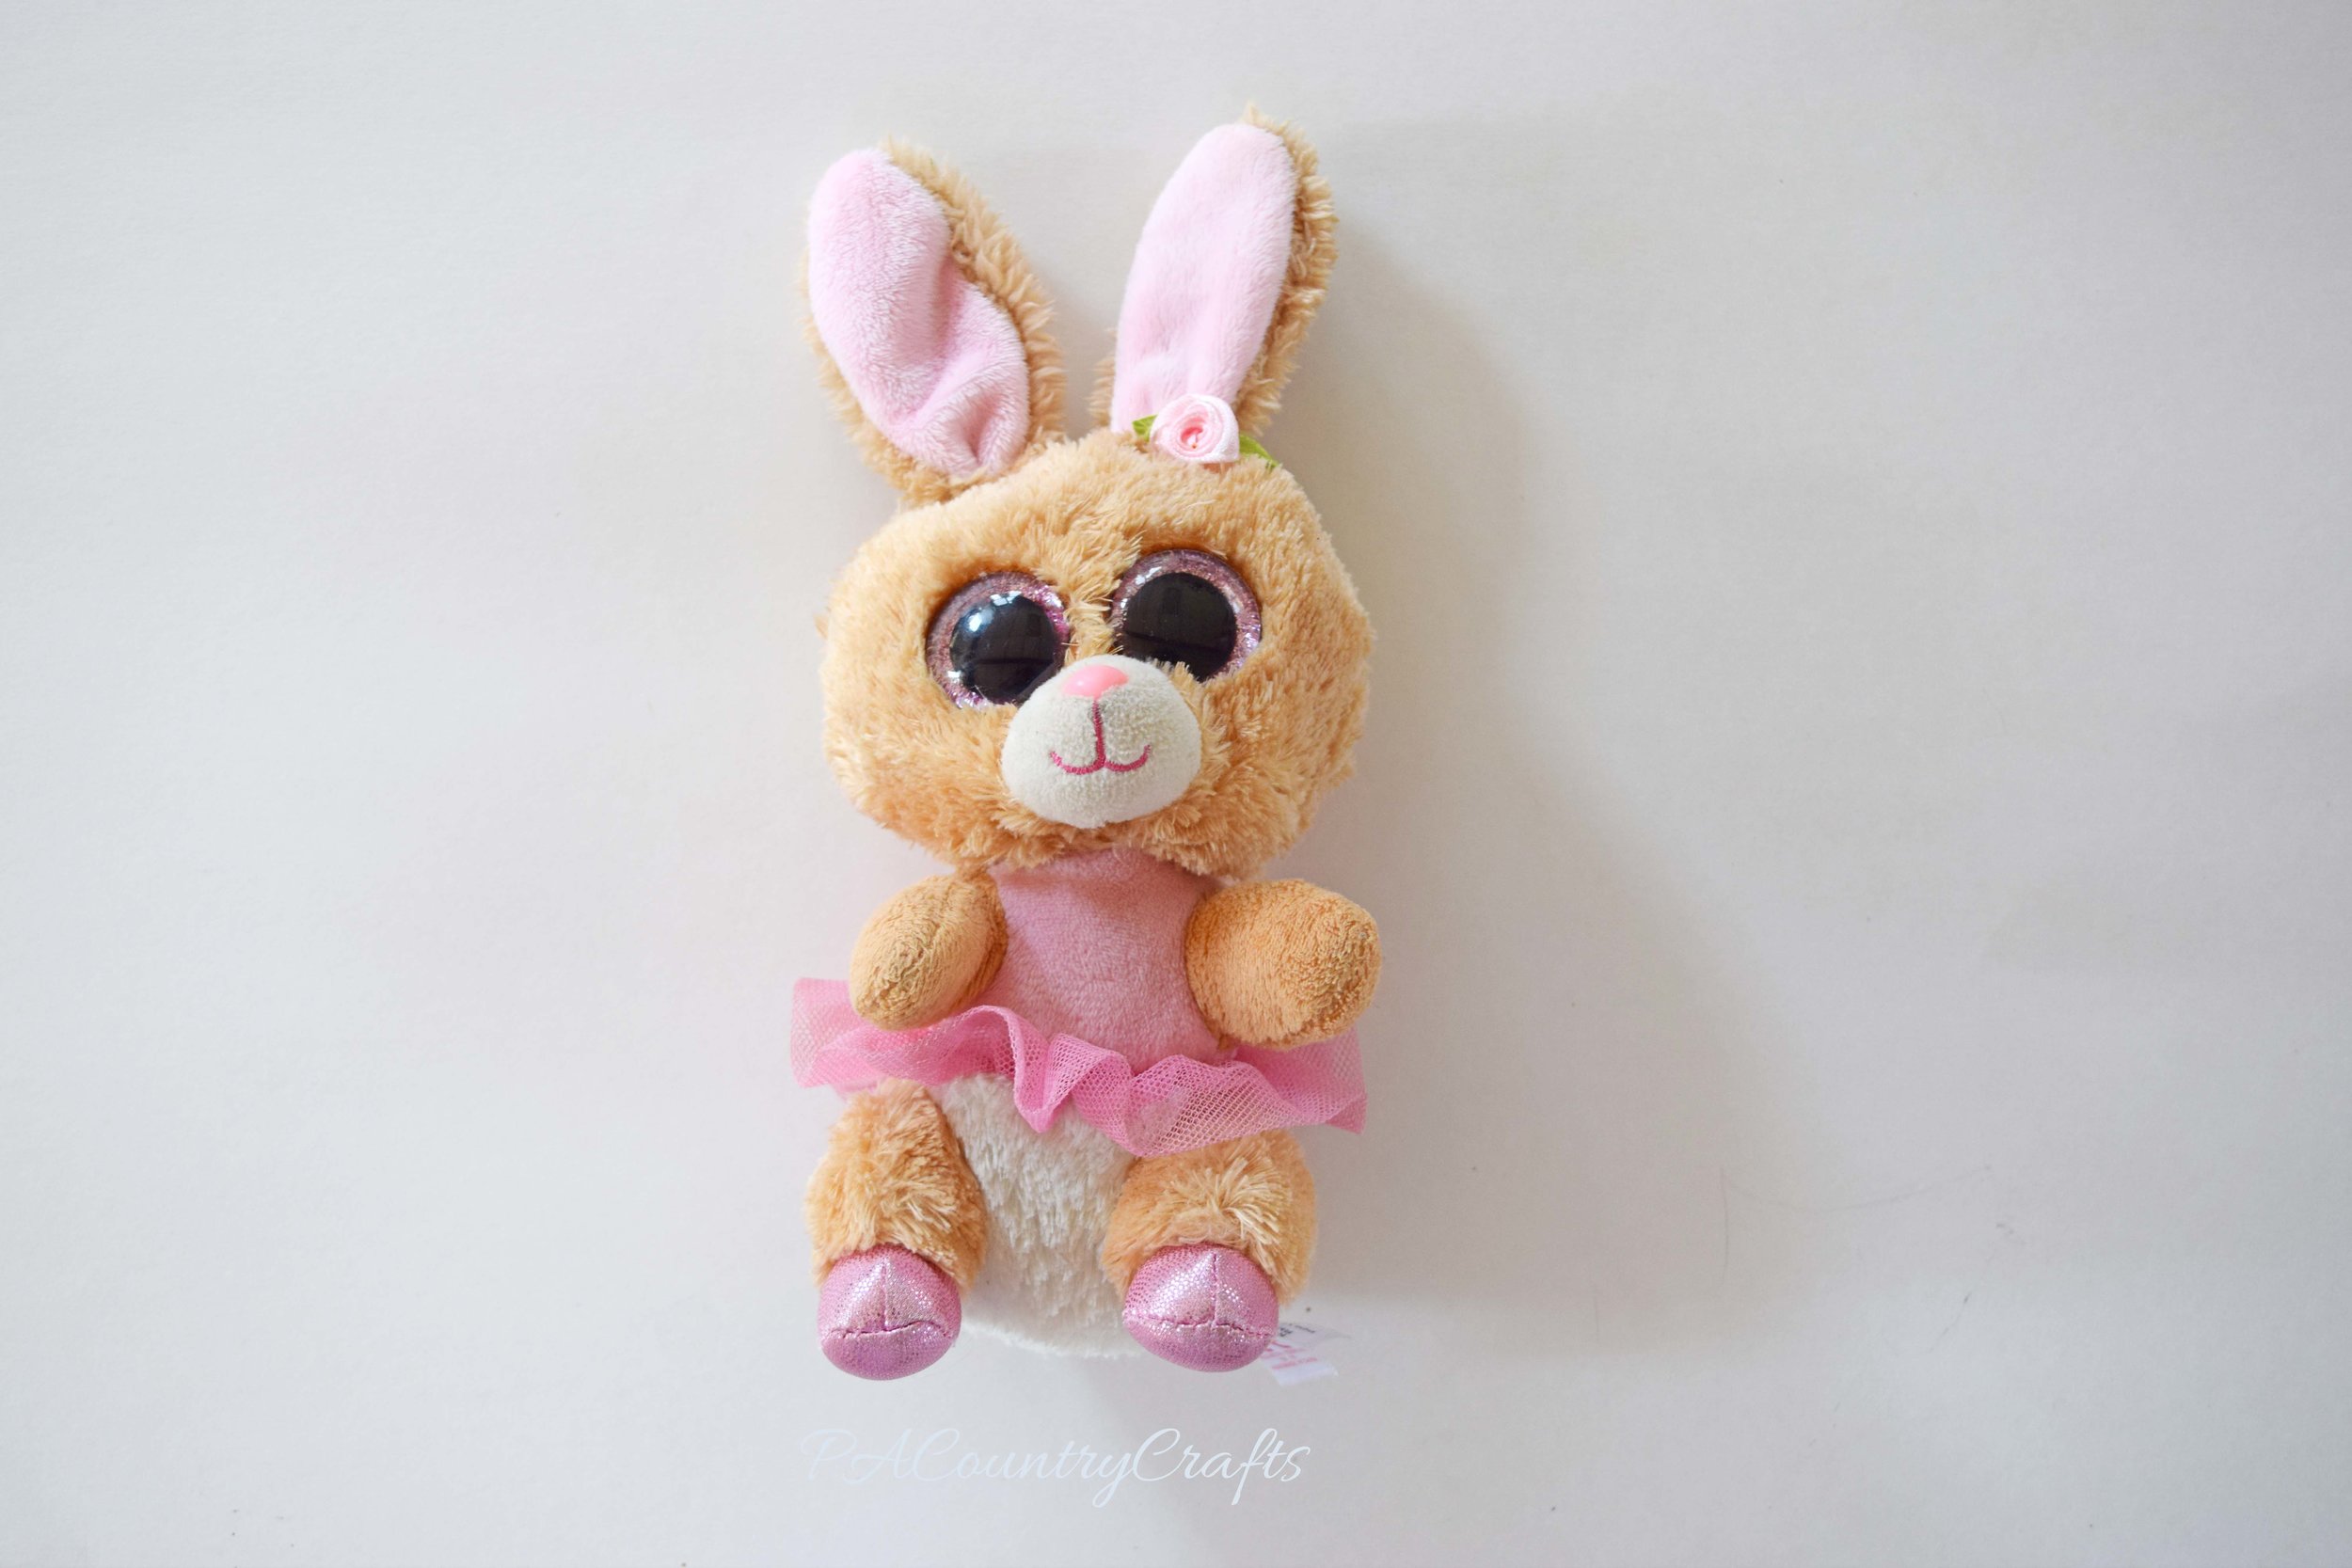
Thank you for posting for me today, Lydia! I am happy that I could fix your bunny for you!
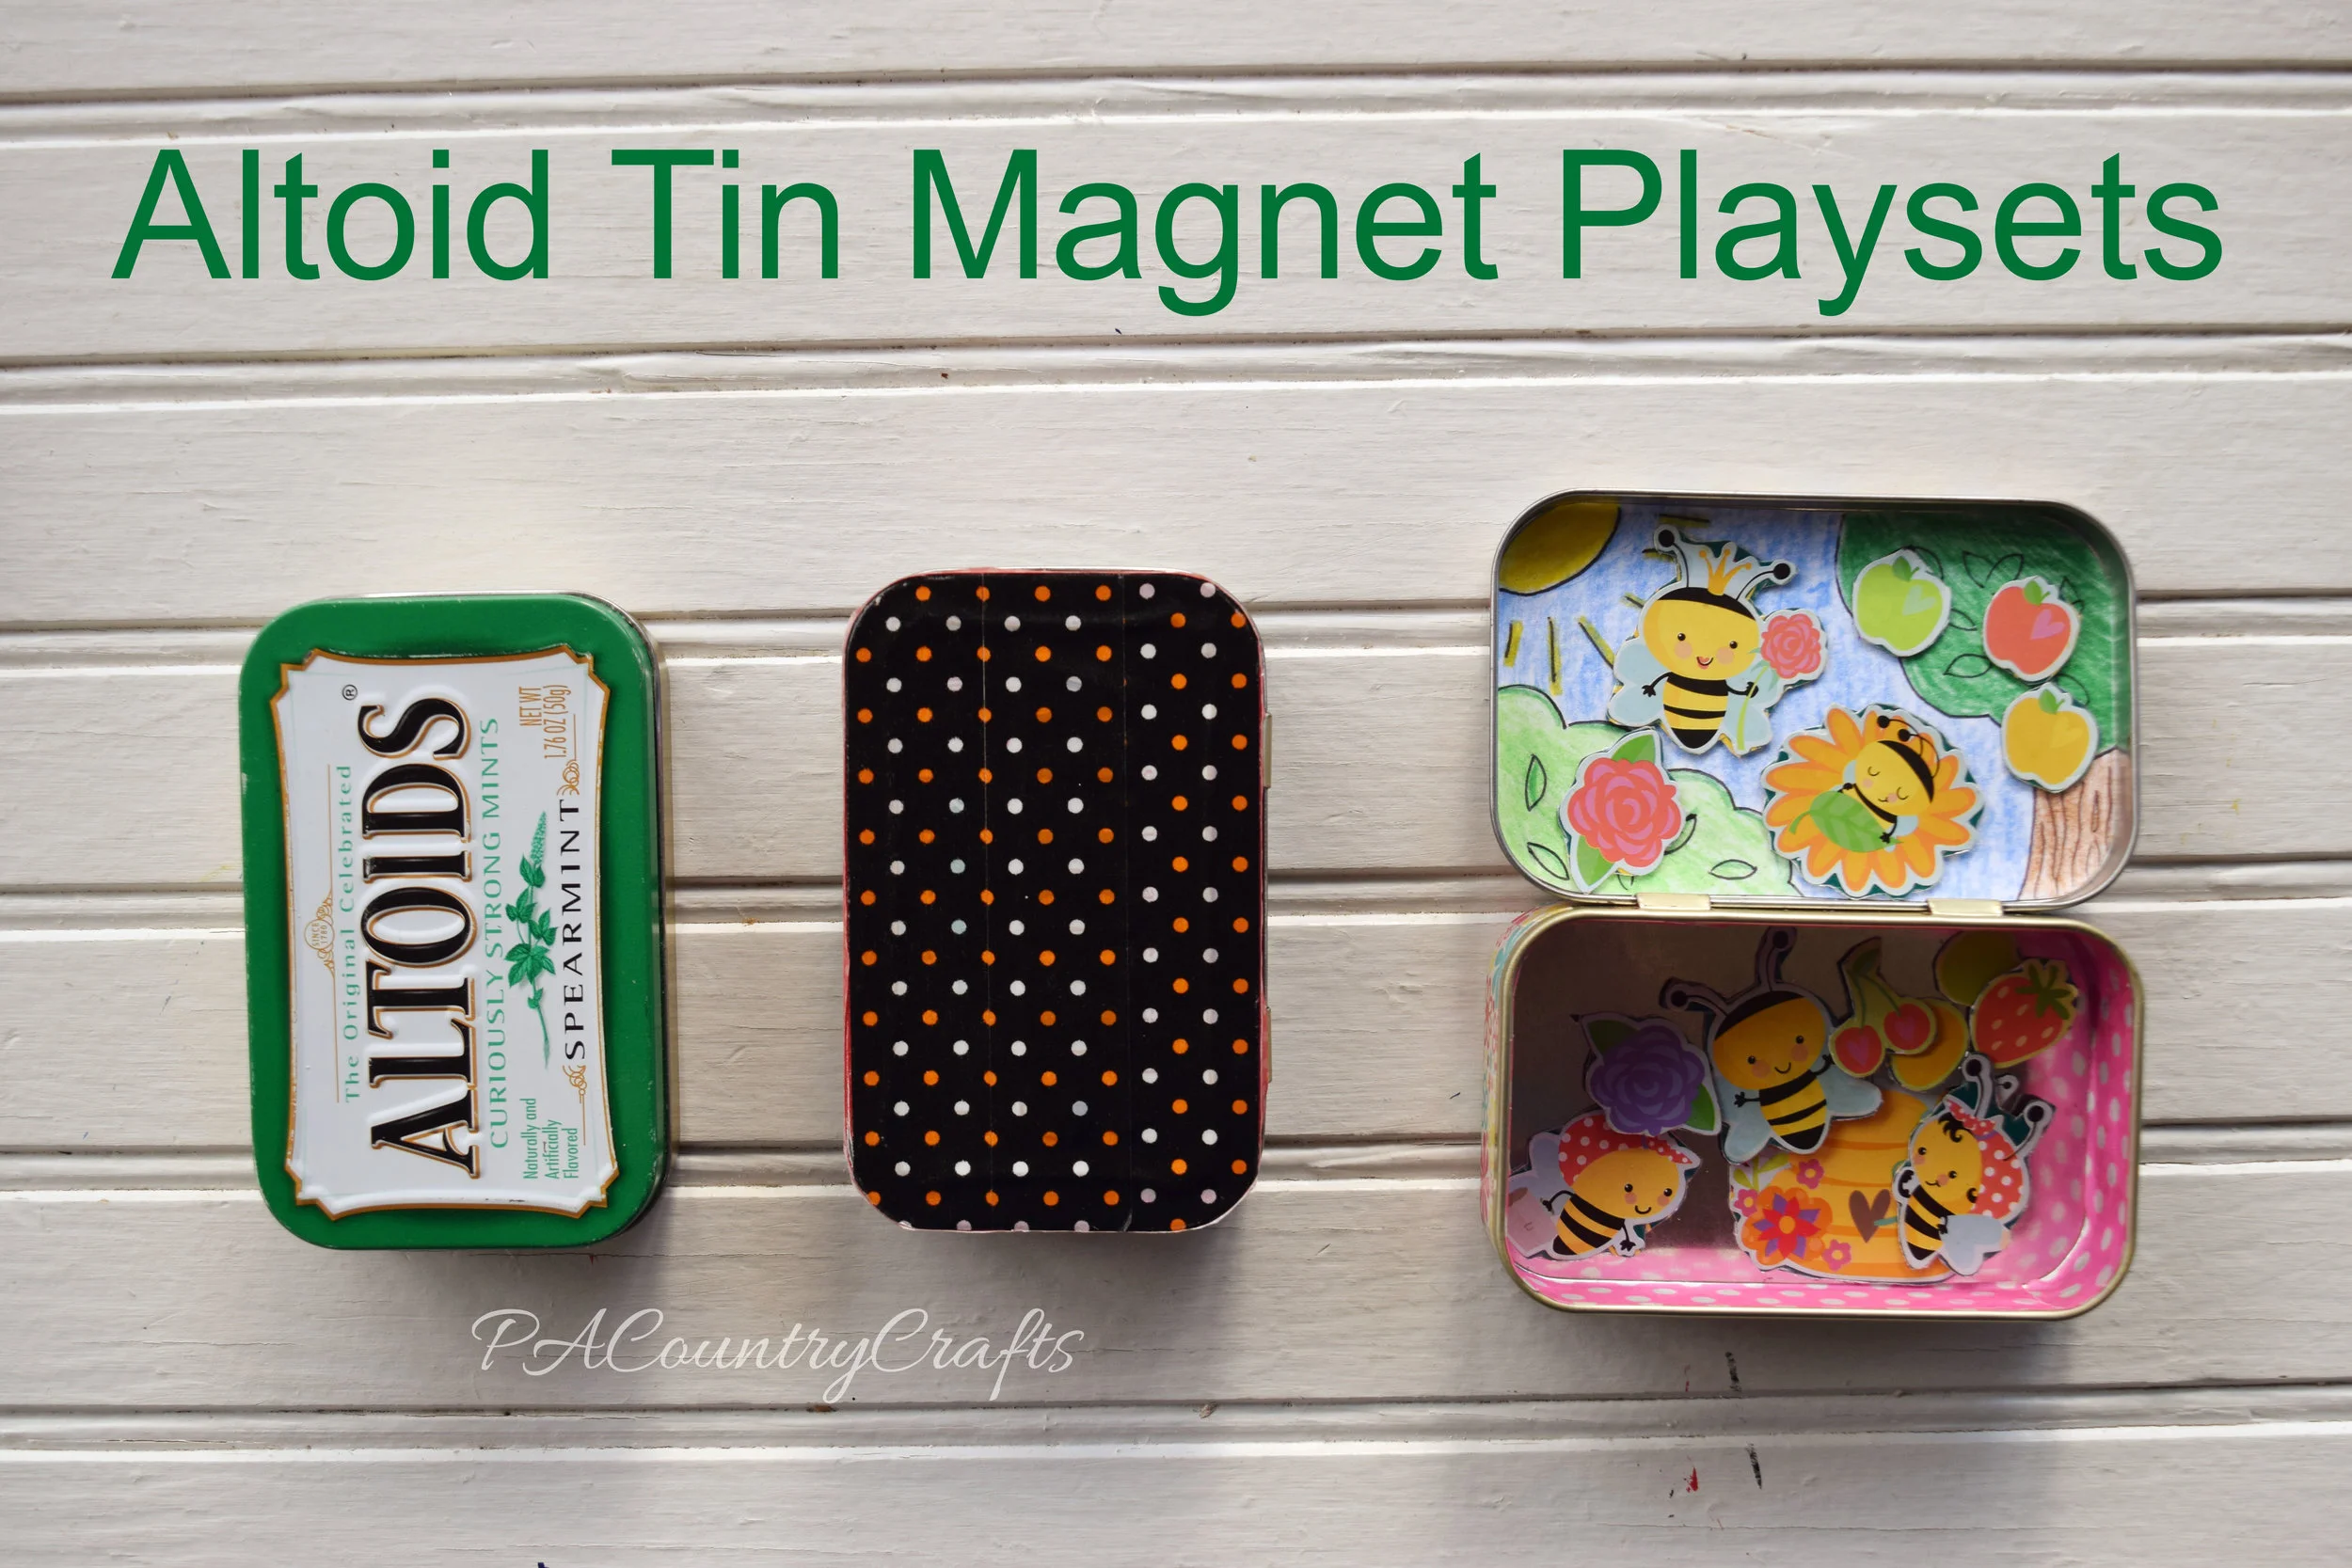
Make a magnetic playset from an altoid tin! Great recycled project and kids craft. It is perfect for a travel activity or to include in Operation Christmas Child shoebox gifts!
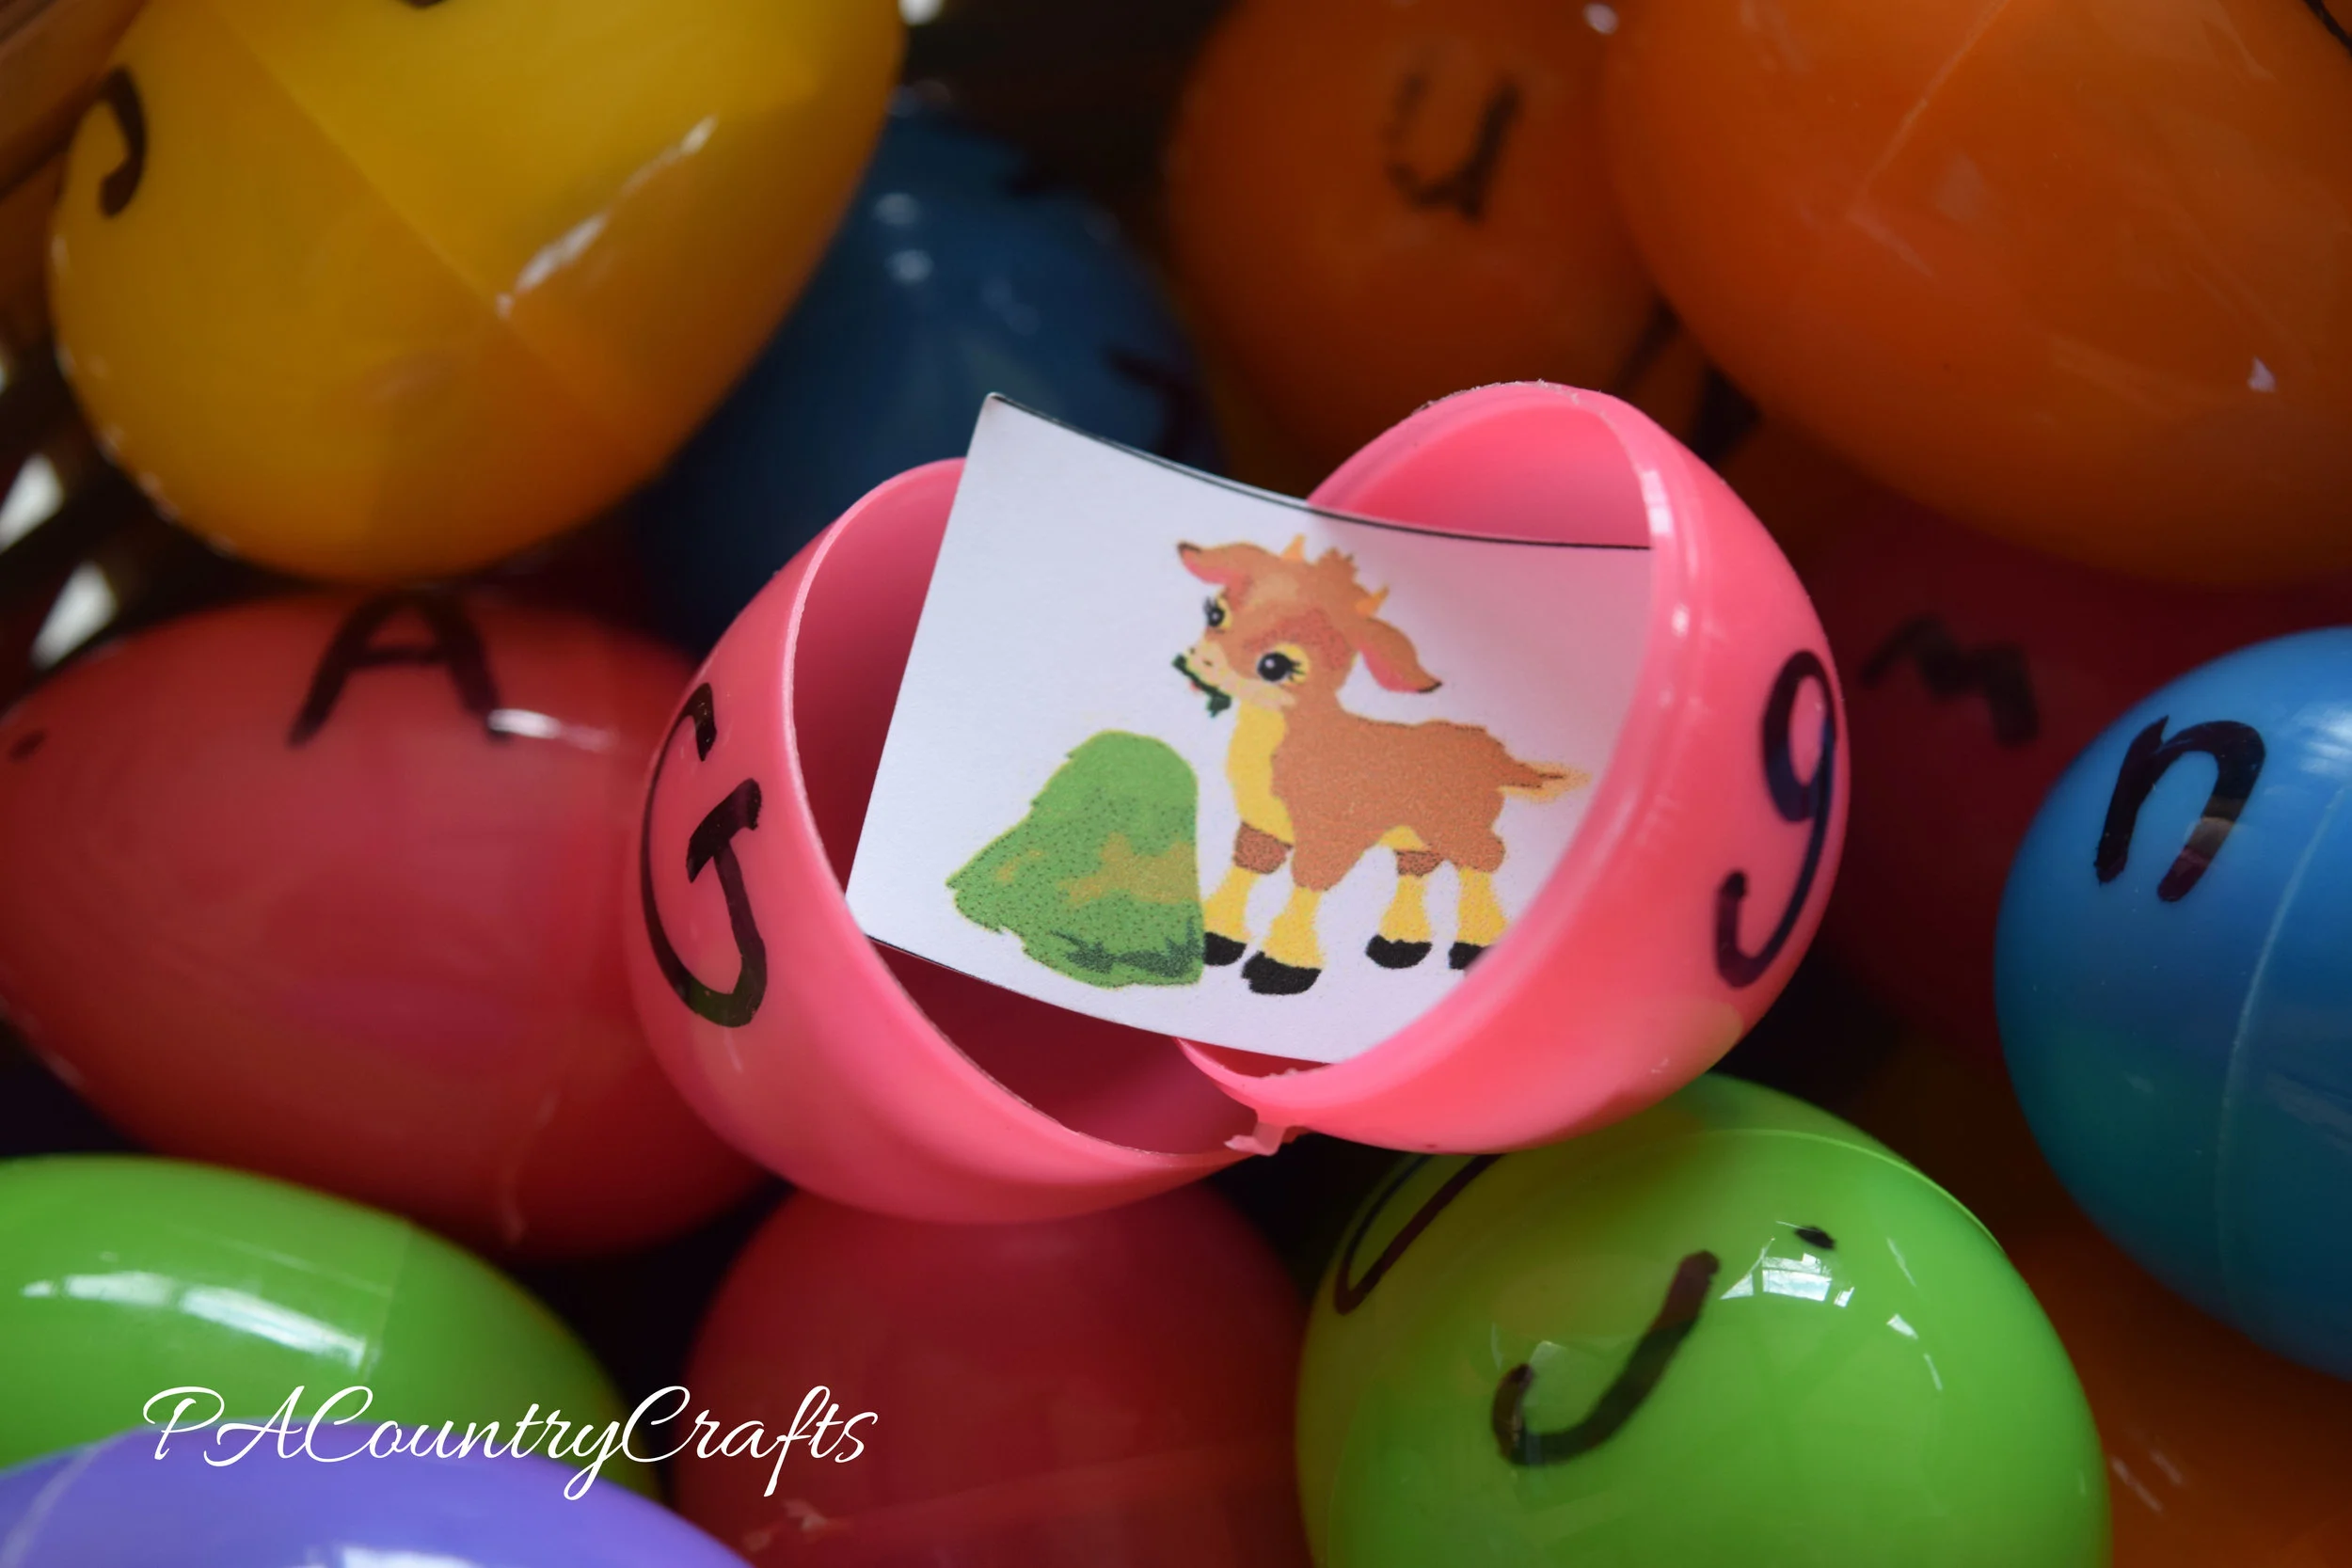
Read MoreUse plastic Easter eggs for an educational preschool or Kindergarten activity- match upper and lower case and letter sounds. Free printable included!
Read MoreSewing, crafts, tutorials, recipes, and a little look at our life in the country - raising half a dozen children.

Hi! Thanks so much for stopping by! My name is Lindsay and on this blog you will find sewing, crafts, decorating, recipes, and tutorials with a little bit of honesty and encouragement.