Spring Snow
/
main-pic
You can vote for your favorite "greenery" inspired design HERE at Project Run and Play.
The challenge for Project Run and Play this week is "greenery" which is Pantone's color of the year. It is symbolic of spring, rejuvenation, and reconnecting with nature.
We are in the middle of a potentially record-breaking blizzard in PA today.
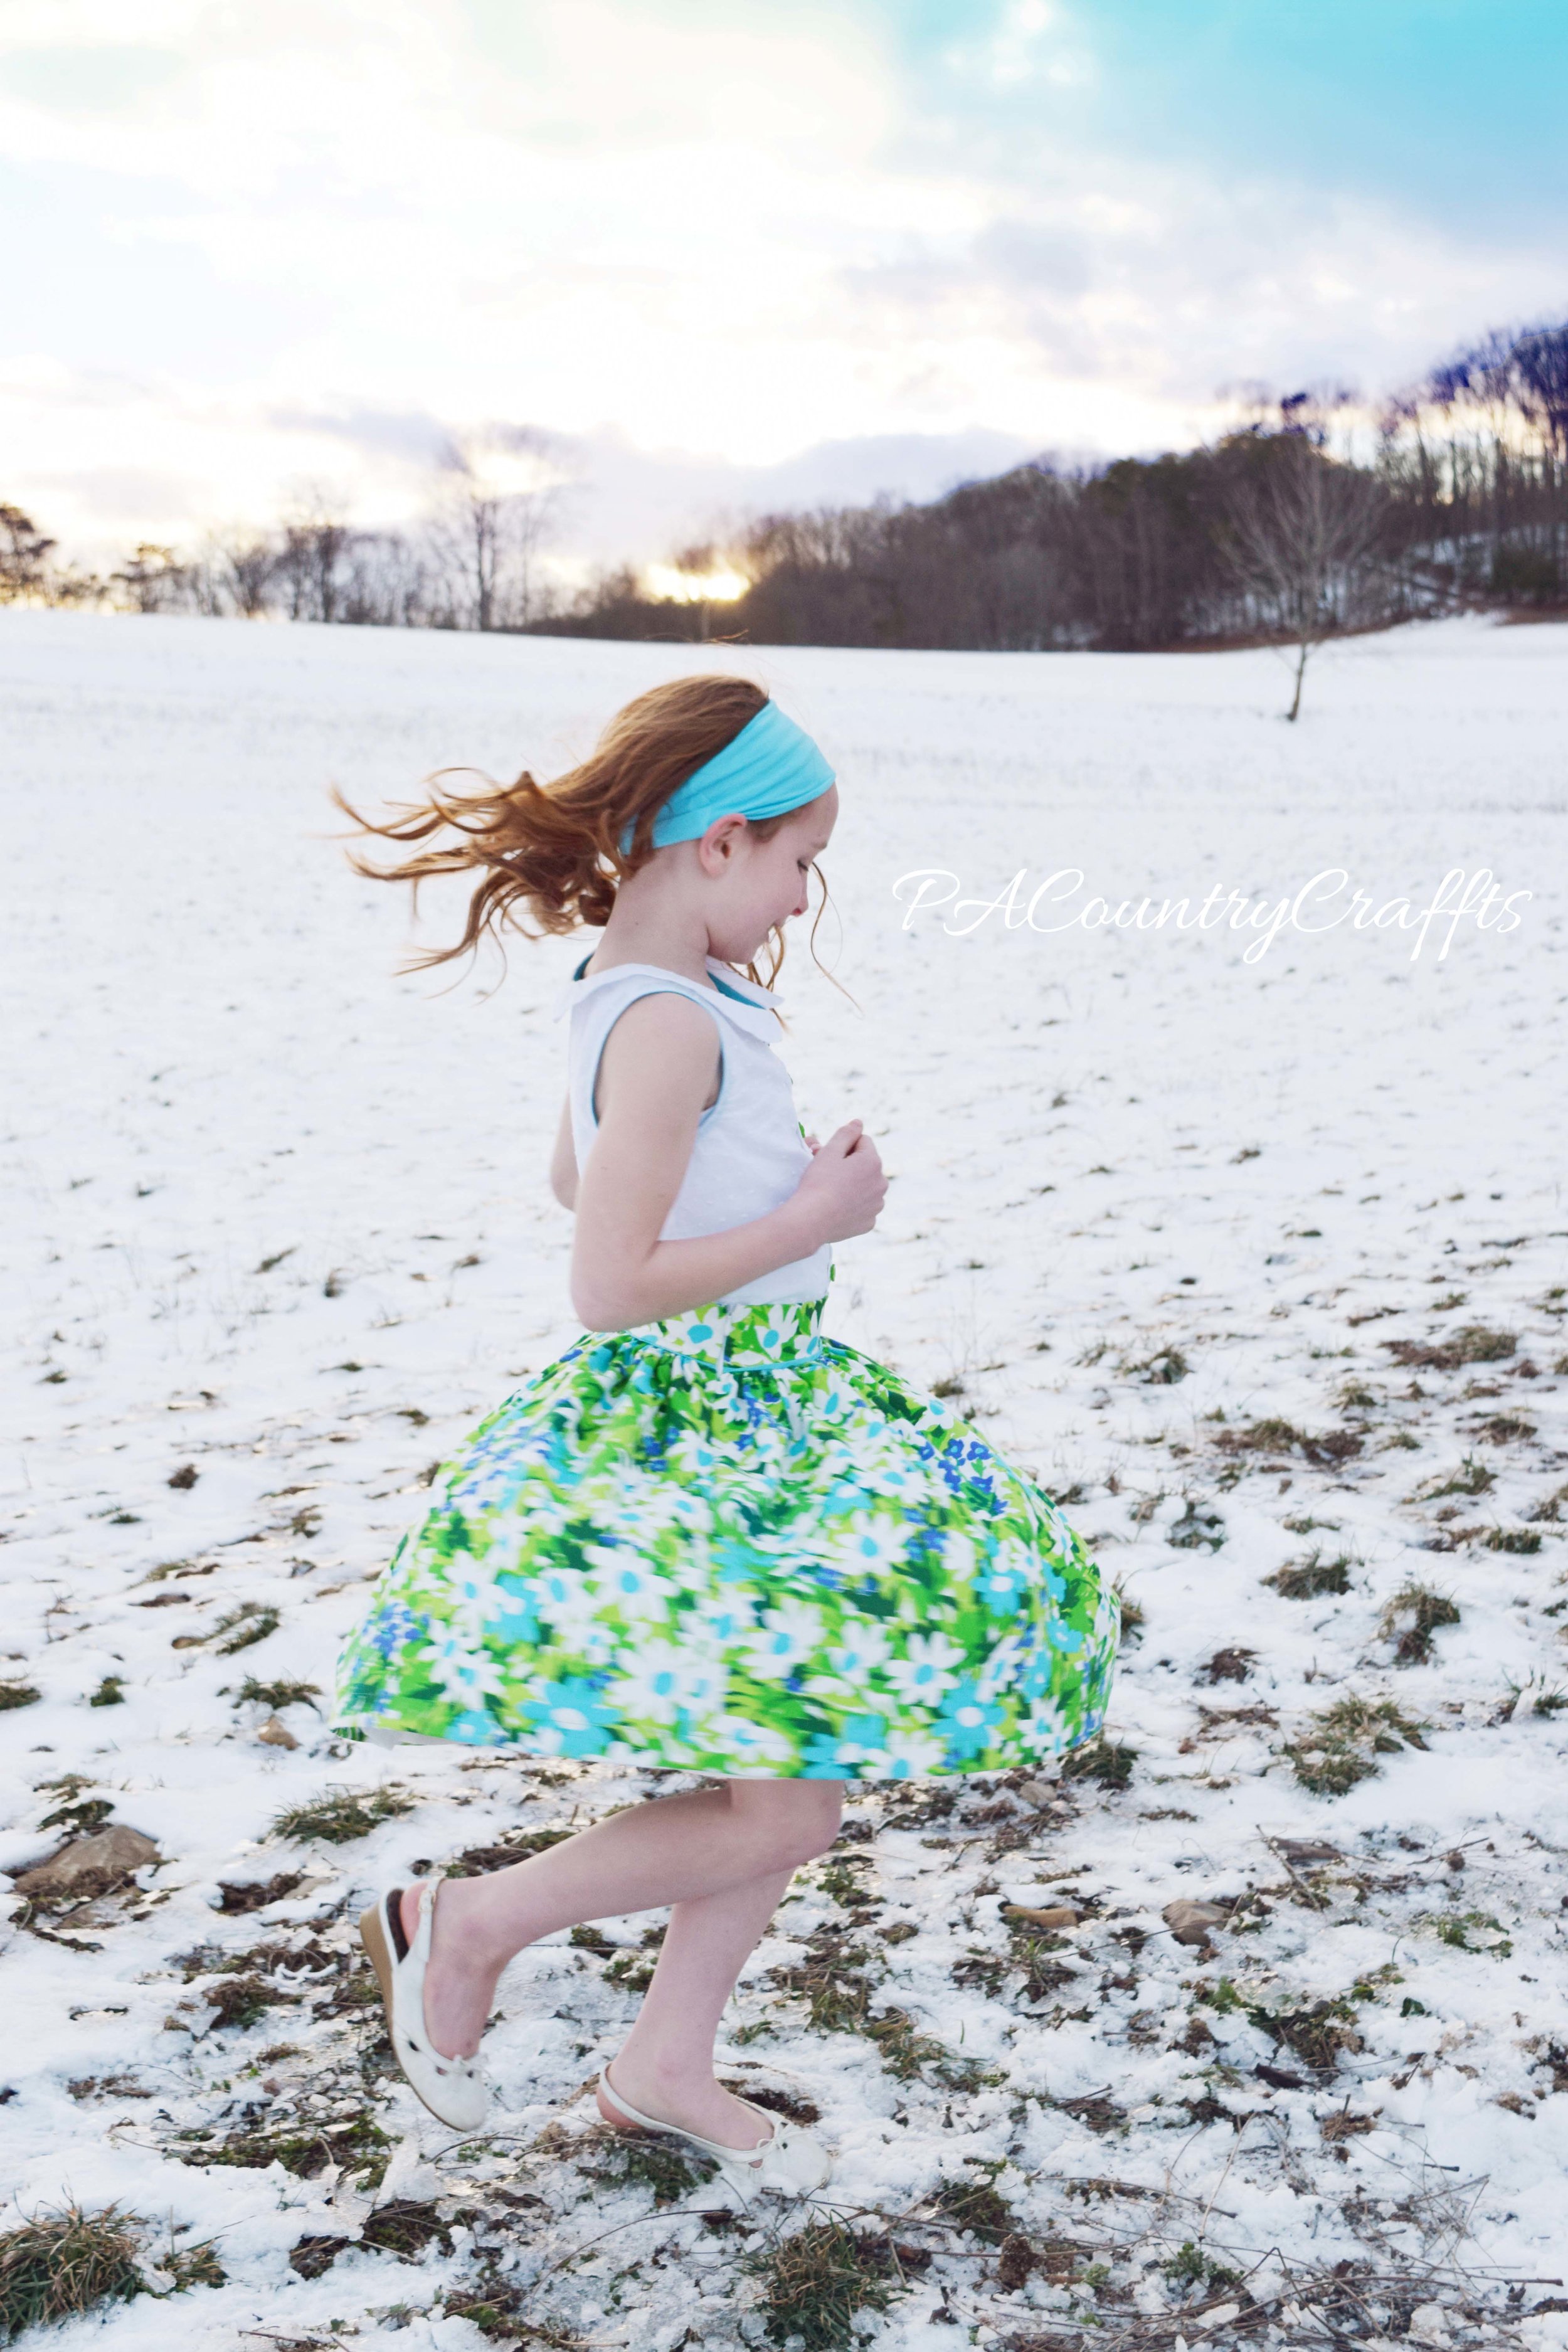
I was having a hard time connecting with the theme and figuring out how to take some pictures of the outfits, especially with the smaller snowstorm we got on Friday while I was freezing and sewing my little heart out in the sunroom. Then, I realized that the weather perfectly mirrored what I was trying to create. Like the bright blue skies and bits of green grass and daffodils peeking up out of the cold snow to bring new life, I aimed to create something beautiful out of things that were unwanted.

daffodils in the snow

project run and play week 2 outfits
When I looked at Pantone's website to learn more about the color "greenery" I immediately pictured a piece of vintage fabric that I had stored in a box in my shed. It came from someone's attic and had been sewed and used for something else a long time ago. I pictured a full, vintage style skirt with a crisp, white, sleeveless swiss dot blouse.
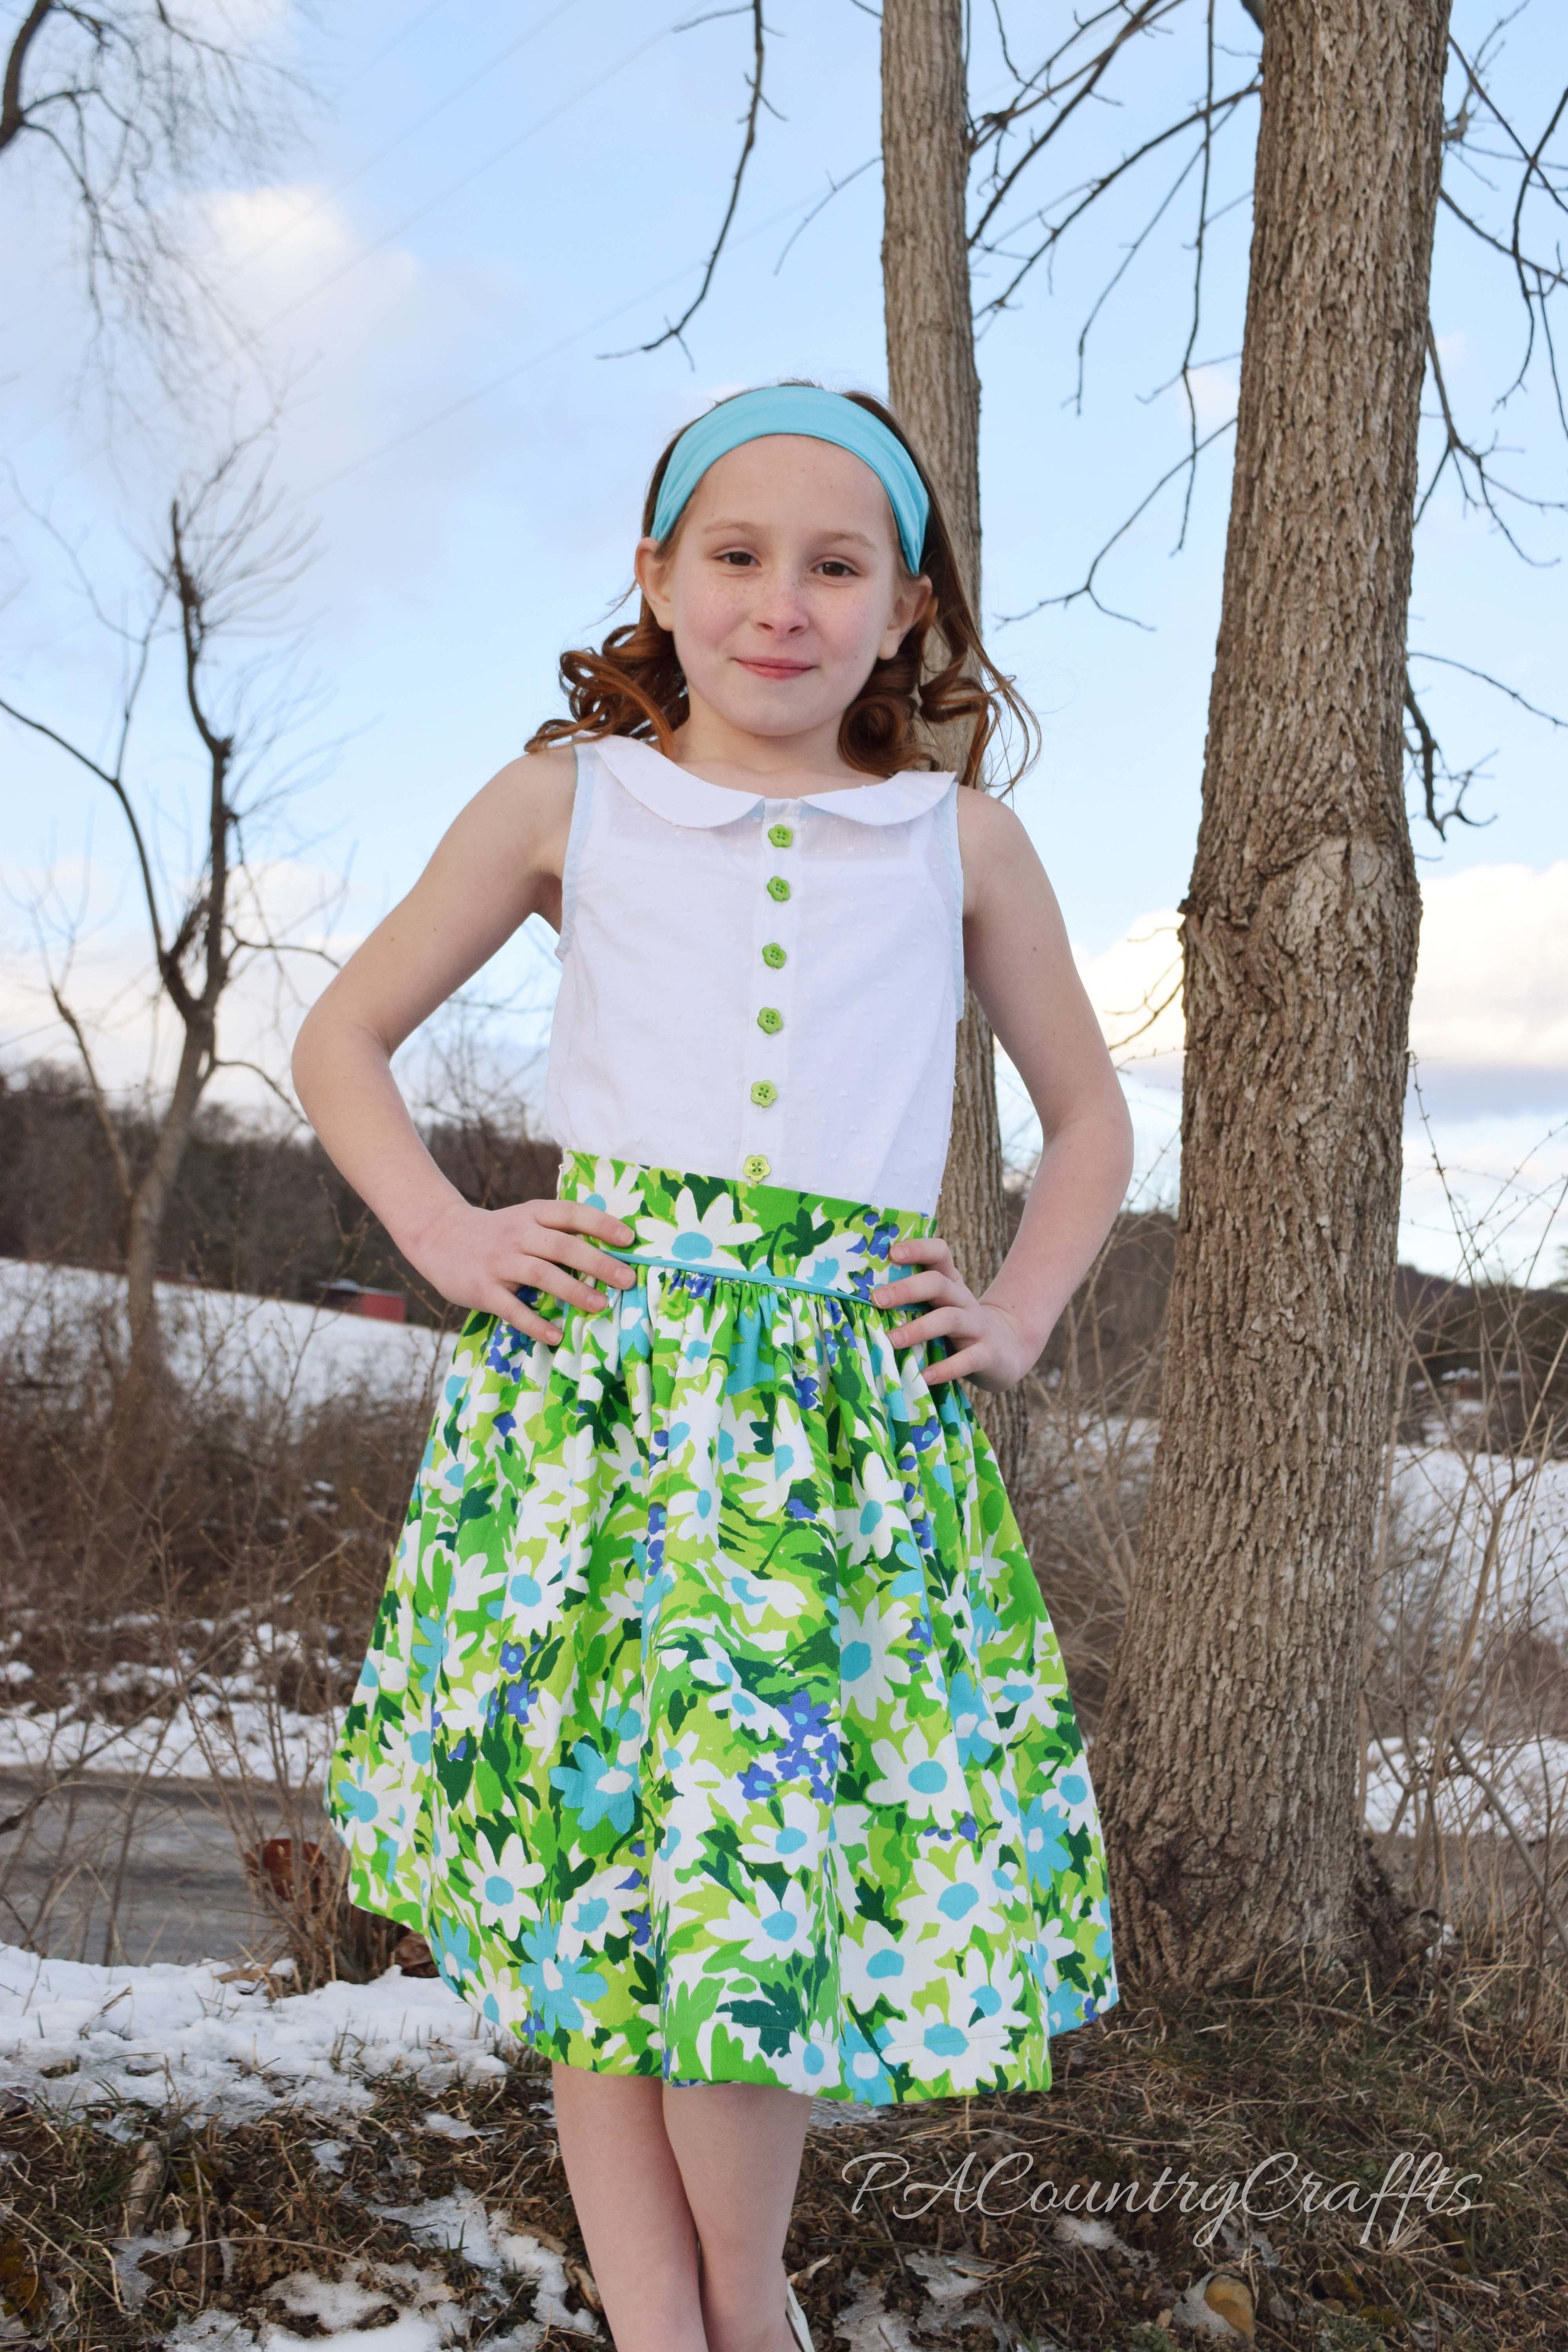
Vintage style girls outfit
vintage style girls outfit
The skirt is so full!!! The fabric is heavier than quilting cotton, so it holds it shape very well. I added lining and a built in petticoat layer, so this skirt has 552 inches of gathering!!! I used some vintage bias tape as flat piping under the waistband, too.

flat piping made from bias tape
The shirt was a bigger challenge for me. I drafted my own pattern and used some more of that vintage single-fold bias tape around the arms and neckline. The fabric is somewhat sheer, so it adds a hint of color to the edges. I hand stitched the button holes since my sewing machine started snapping needles again. The buttons are from Joann and I was excited because they matched perfectly!

swiss dot sleeveless blouse
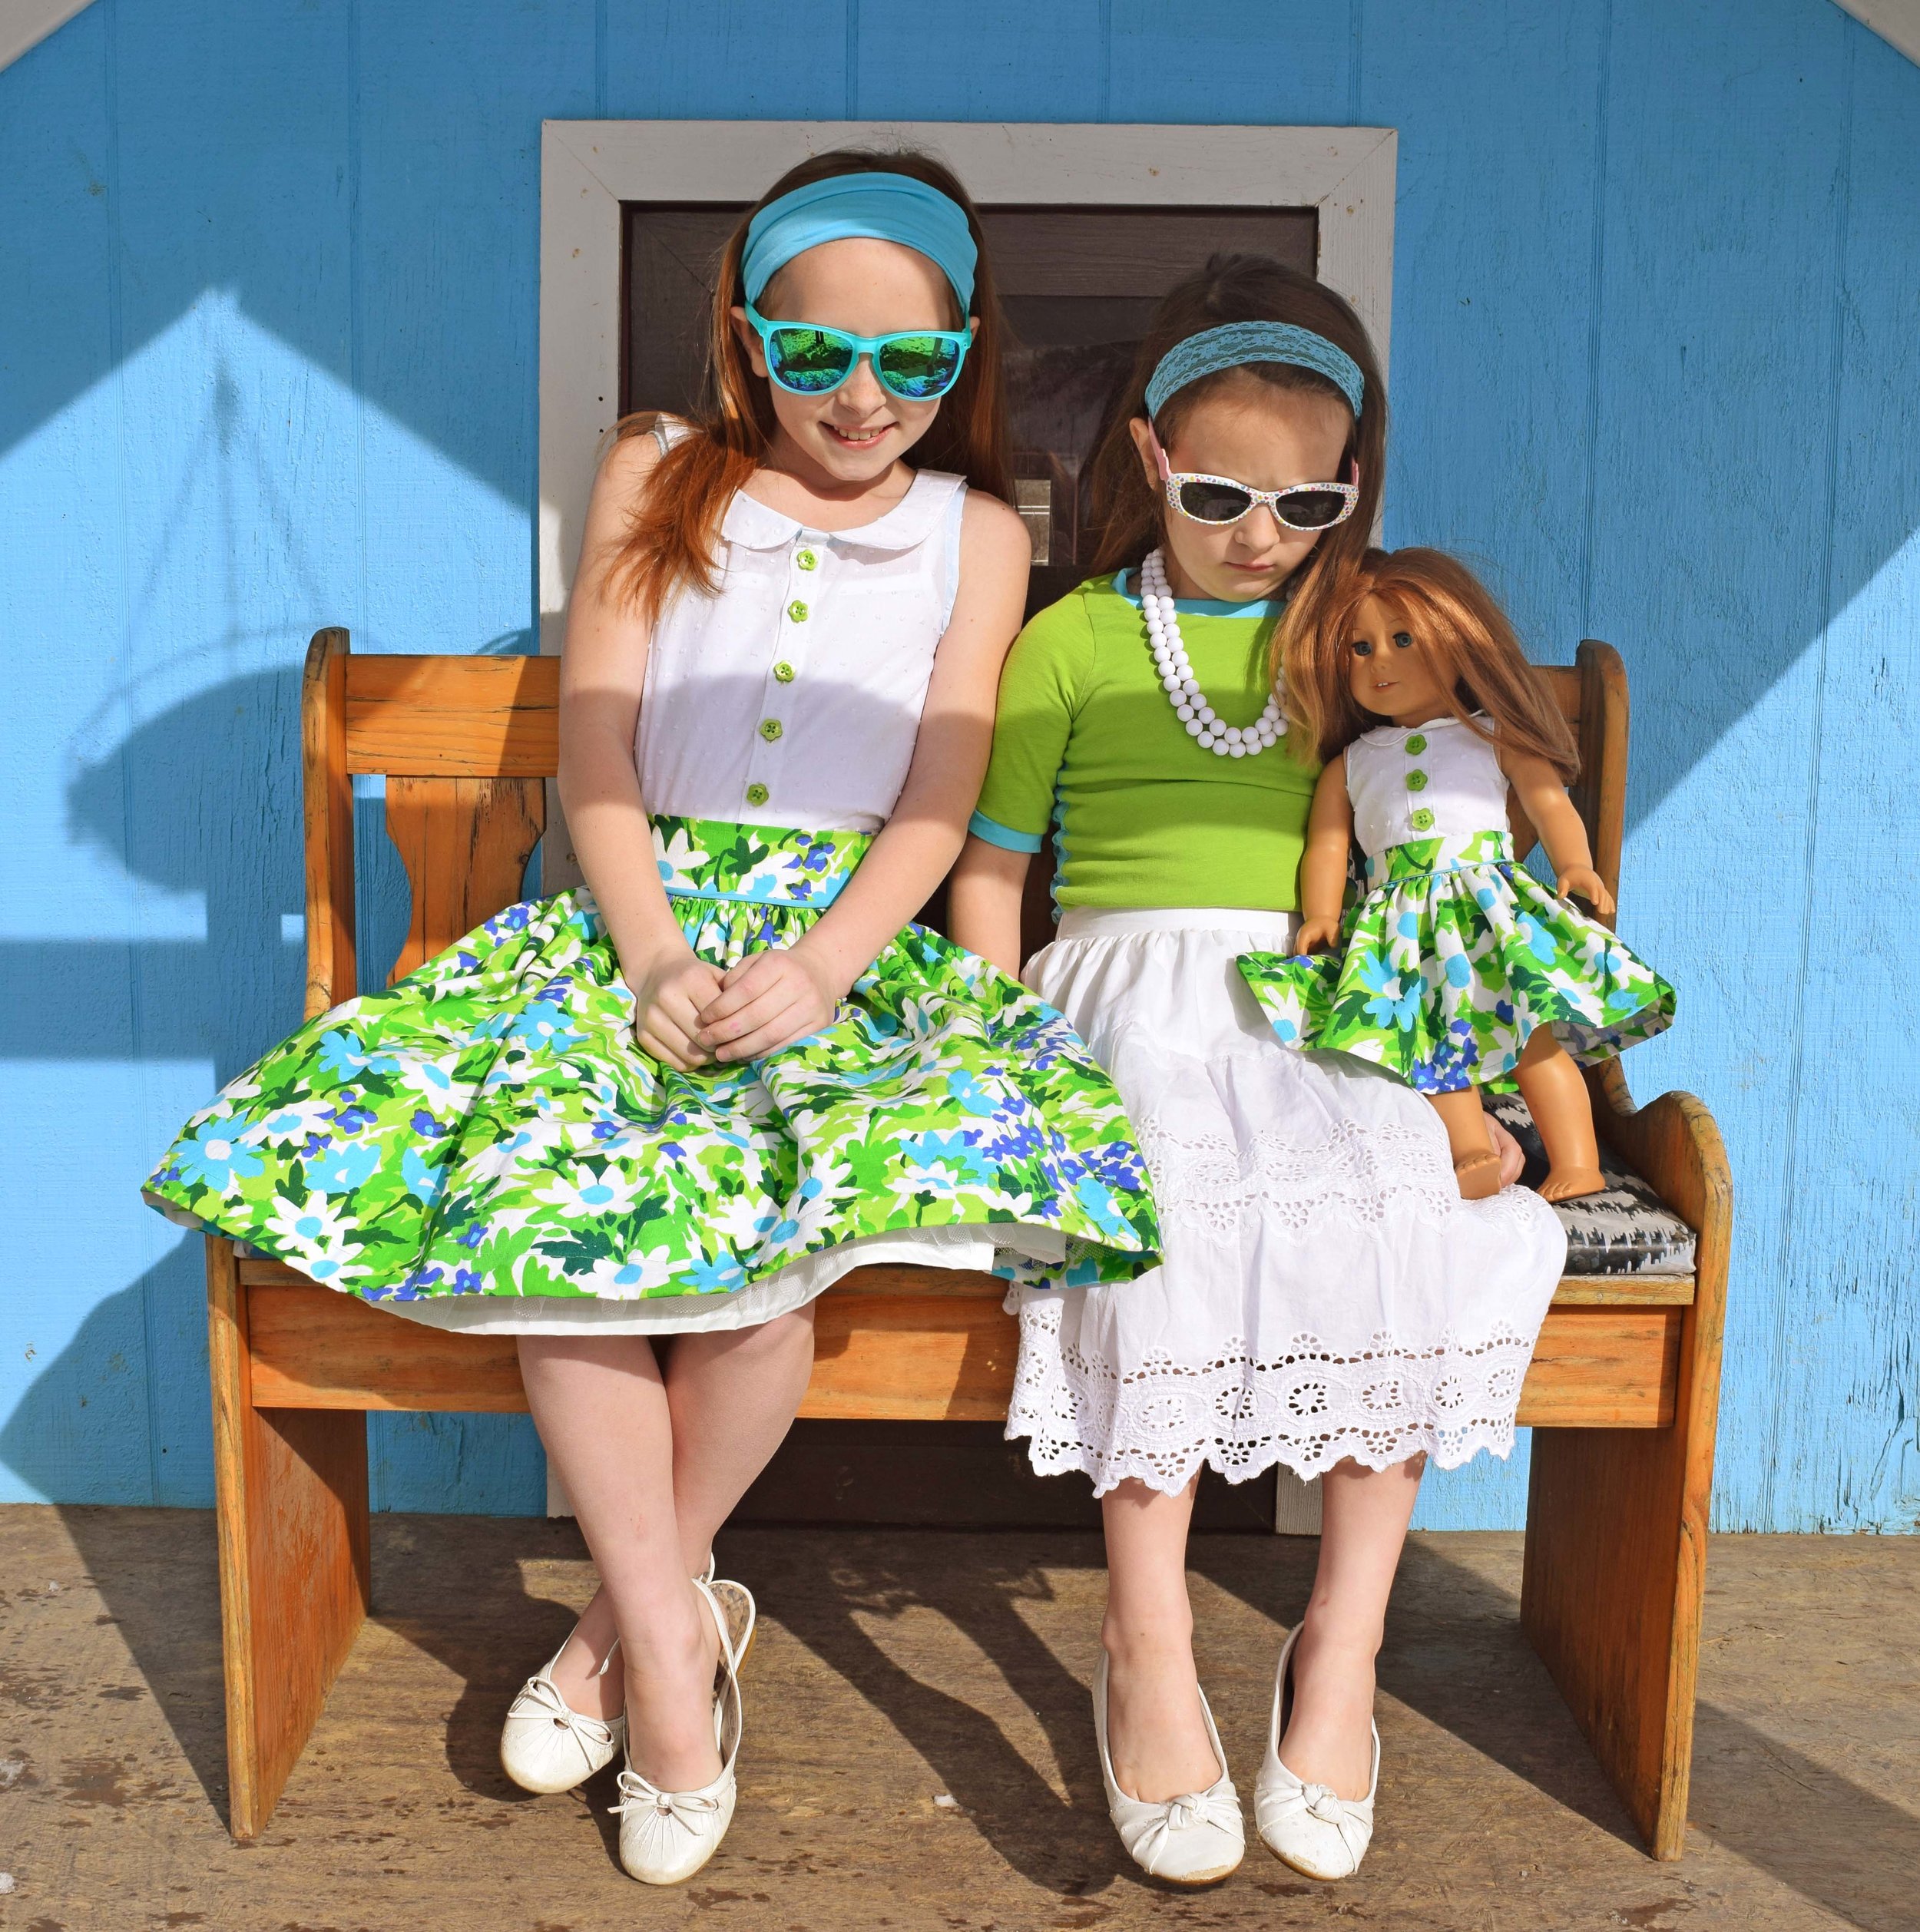
To take it a step further, I created a matching doll outfit from the scraps. I made my own patterns for these, too. It is lined, so I just used aqua topstitching around the edges.

matching vintage doll outfit
For the second outfit, I used two old t-shirts to create a new shirt in the same color scheme. I have never made a knit neckband before, so I was really happy with how that turned out. It has sheer, vintage lace under the arms.
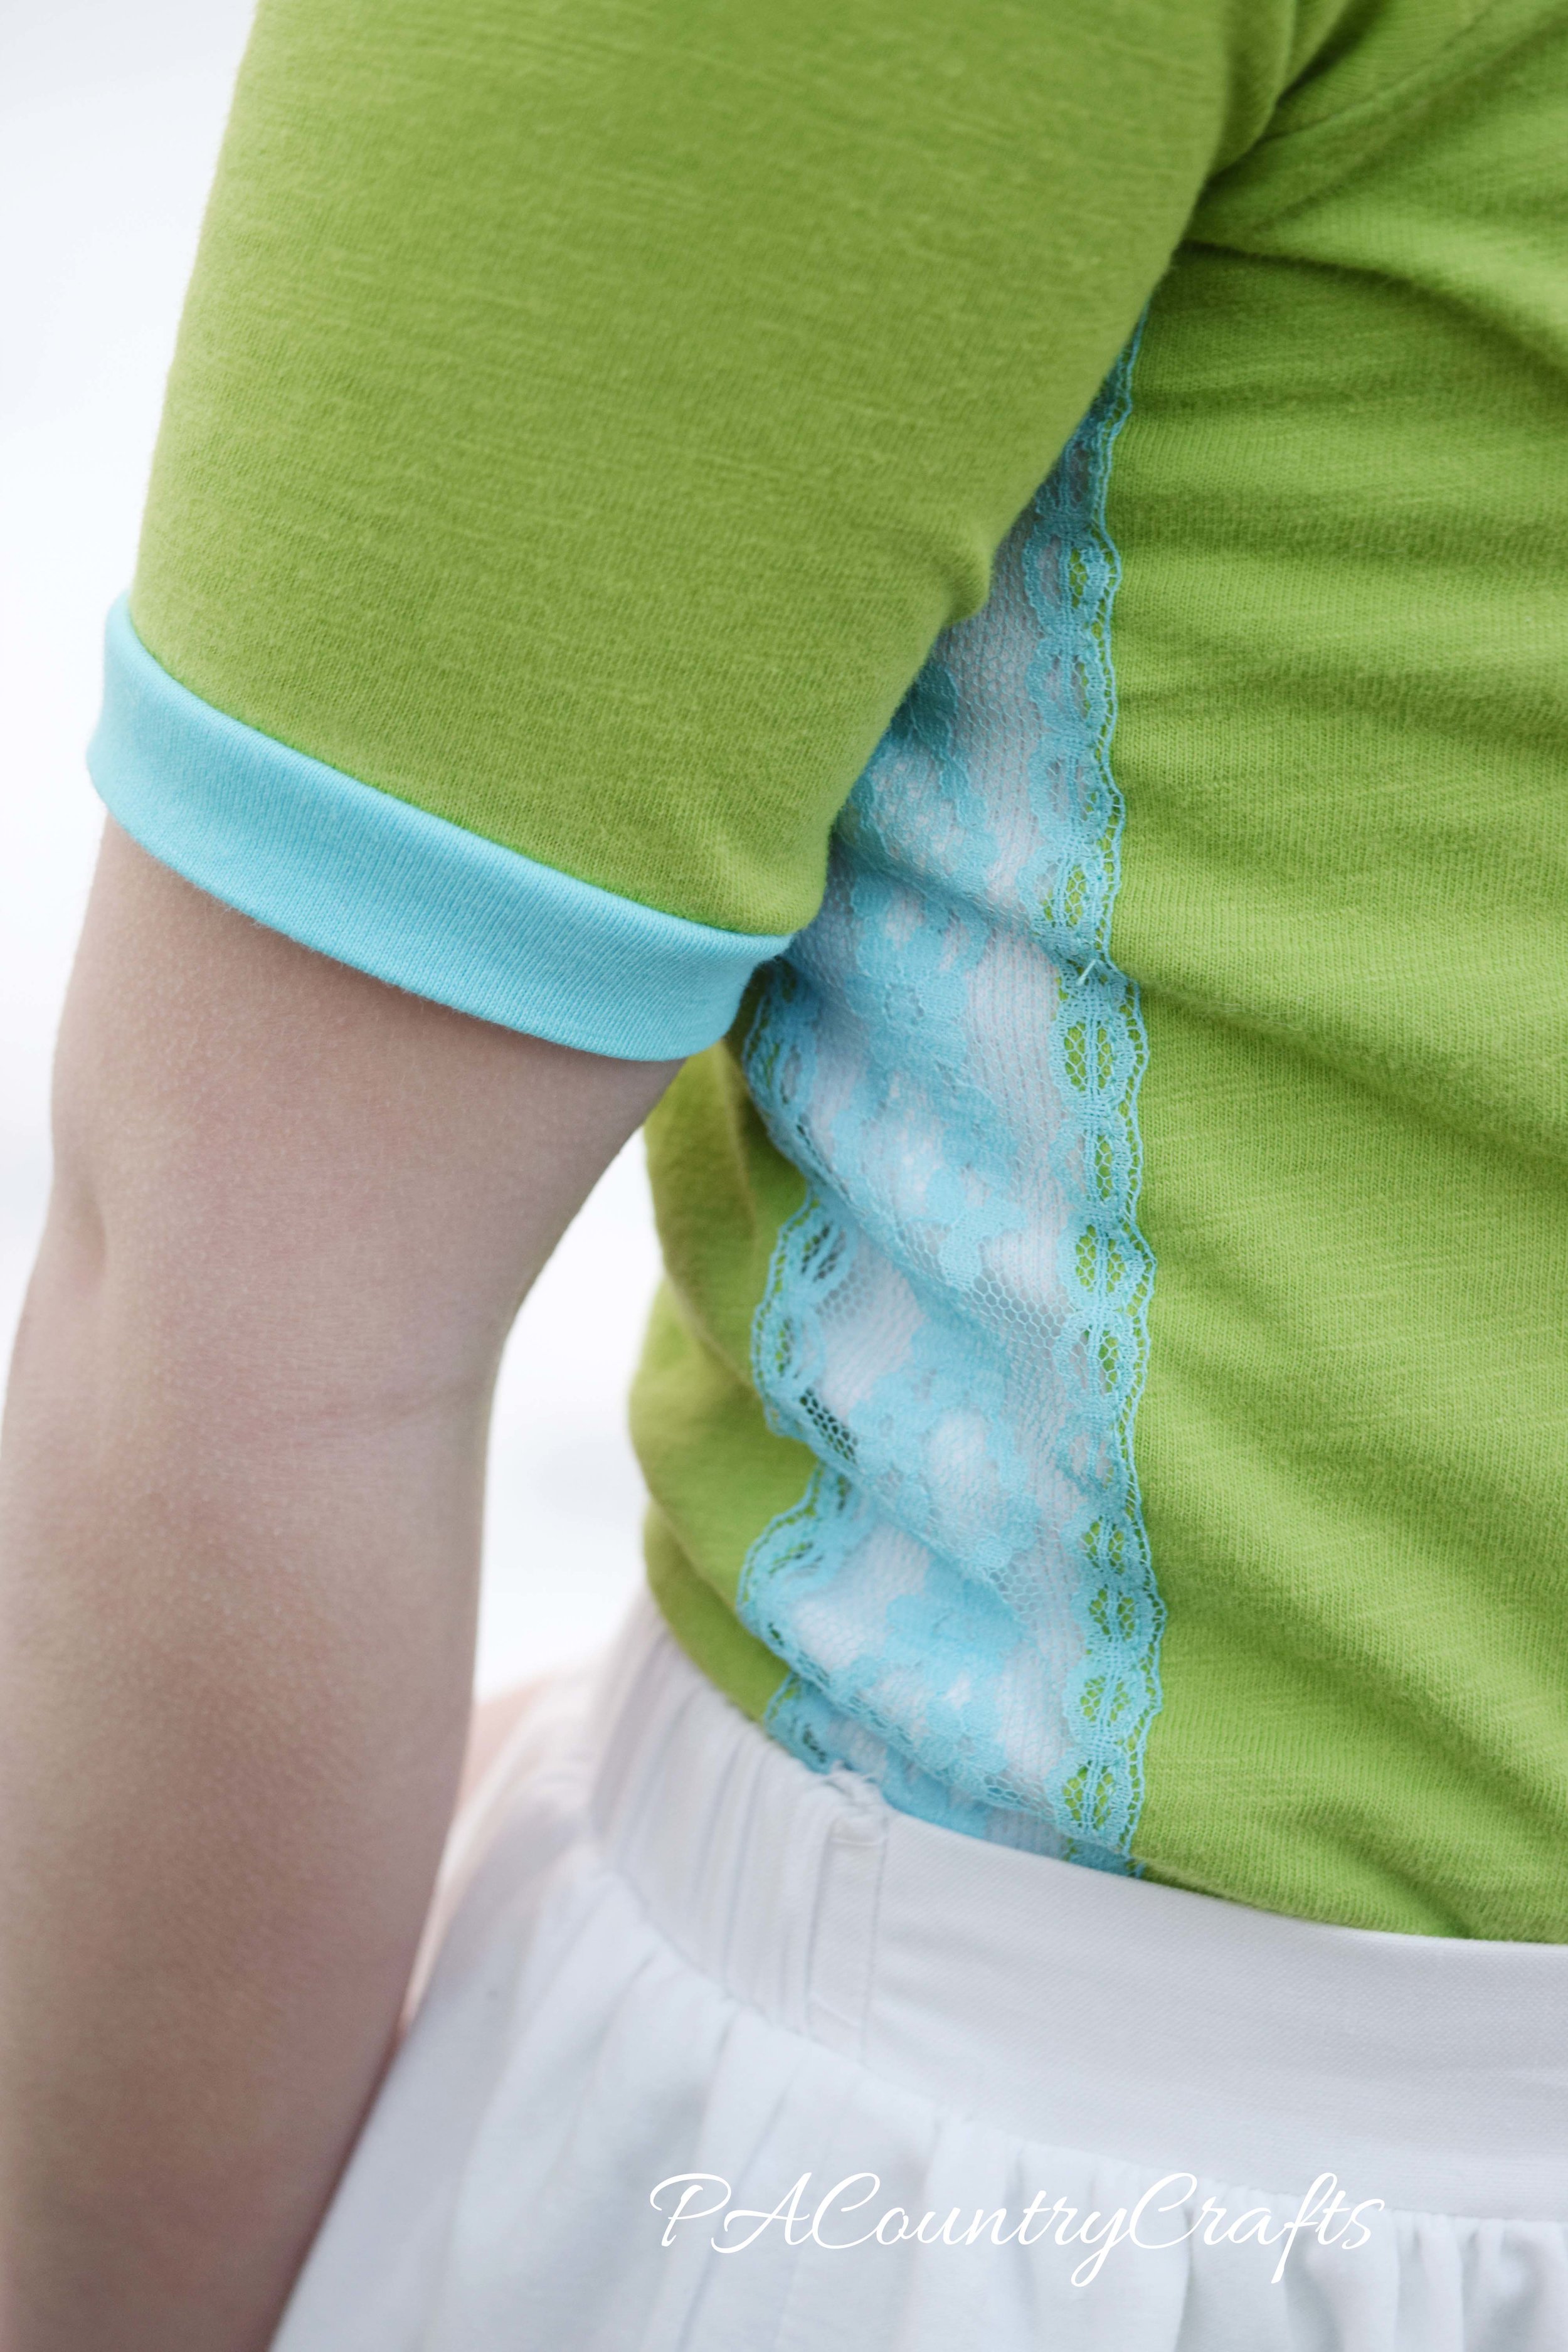
lace inset sides
(Yes, I know she has goosebumps. Poor girl! We took most of the pictures in our greenhouse so that it would be a little warmer.)
The beautiful lace eyelet skirt used to be part of a dress I found at the thrift store. I added some quilting cotton scraps to make a waistband that is elastic in the back. I know white is dangerous, but I figure there is always bleach. Something gross and awful happened to it after this photo shoot, so I will probably be testing that out soon. #keepitreal
I whipped up a few headbands to match from more lace and t shirt scraps.

greenery project run and play week 2 outfits
Oh, and the bright blue playhouse is an upcycle project, too. It used to be a chicken pen with weathered wood and a leaky roof! Sometimes, all it takes it a little bit of hard work to bring new life to something that was unwanted. So, even though things may be looking like a winter mess where I live today, I know that it is going to be OK: spring and all of the beauty that comes with it will be here soon.

Cute vintage style girls clothes made from repurposed materials- there is even a matching doll set!
You can vote for your favorite "greenery" inspired design HERE at Project Run and Play.
Thank you to everyone who voted for me last week! I am so excited to stay in the competition!!! Thank you again to the friends and family, even those with terrible fashion sense, who help me figure things out and give me honest opinions. Thank you to my Aunt Karen who forgot to vote, but gave me one of shirts I used. Thank you to Vicki for saving that wonderful, old fabric for me. Thank you to my friends and family who help me with my vision. Thank you to my husband for finishing the greenhouse before the snow came and being my photography assistant. As you can see by the picture below, one of my models was not as cooperative this week.
Adorable vintage style girls outfits made from upcycled materials


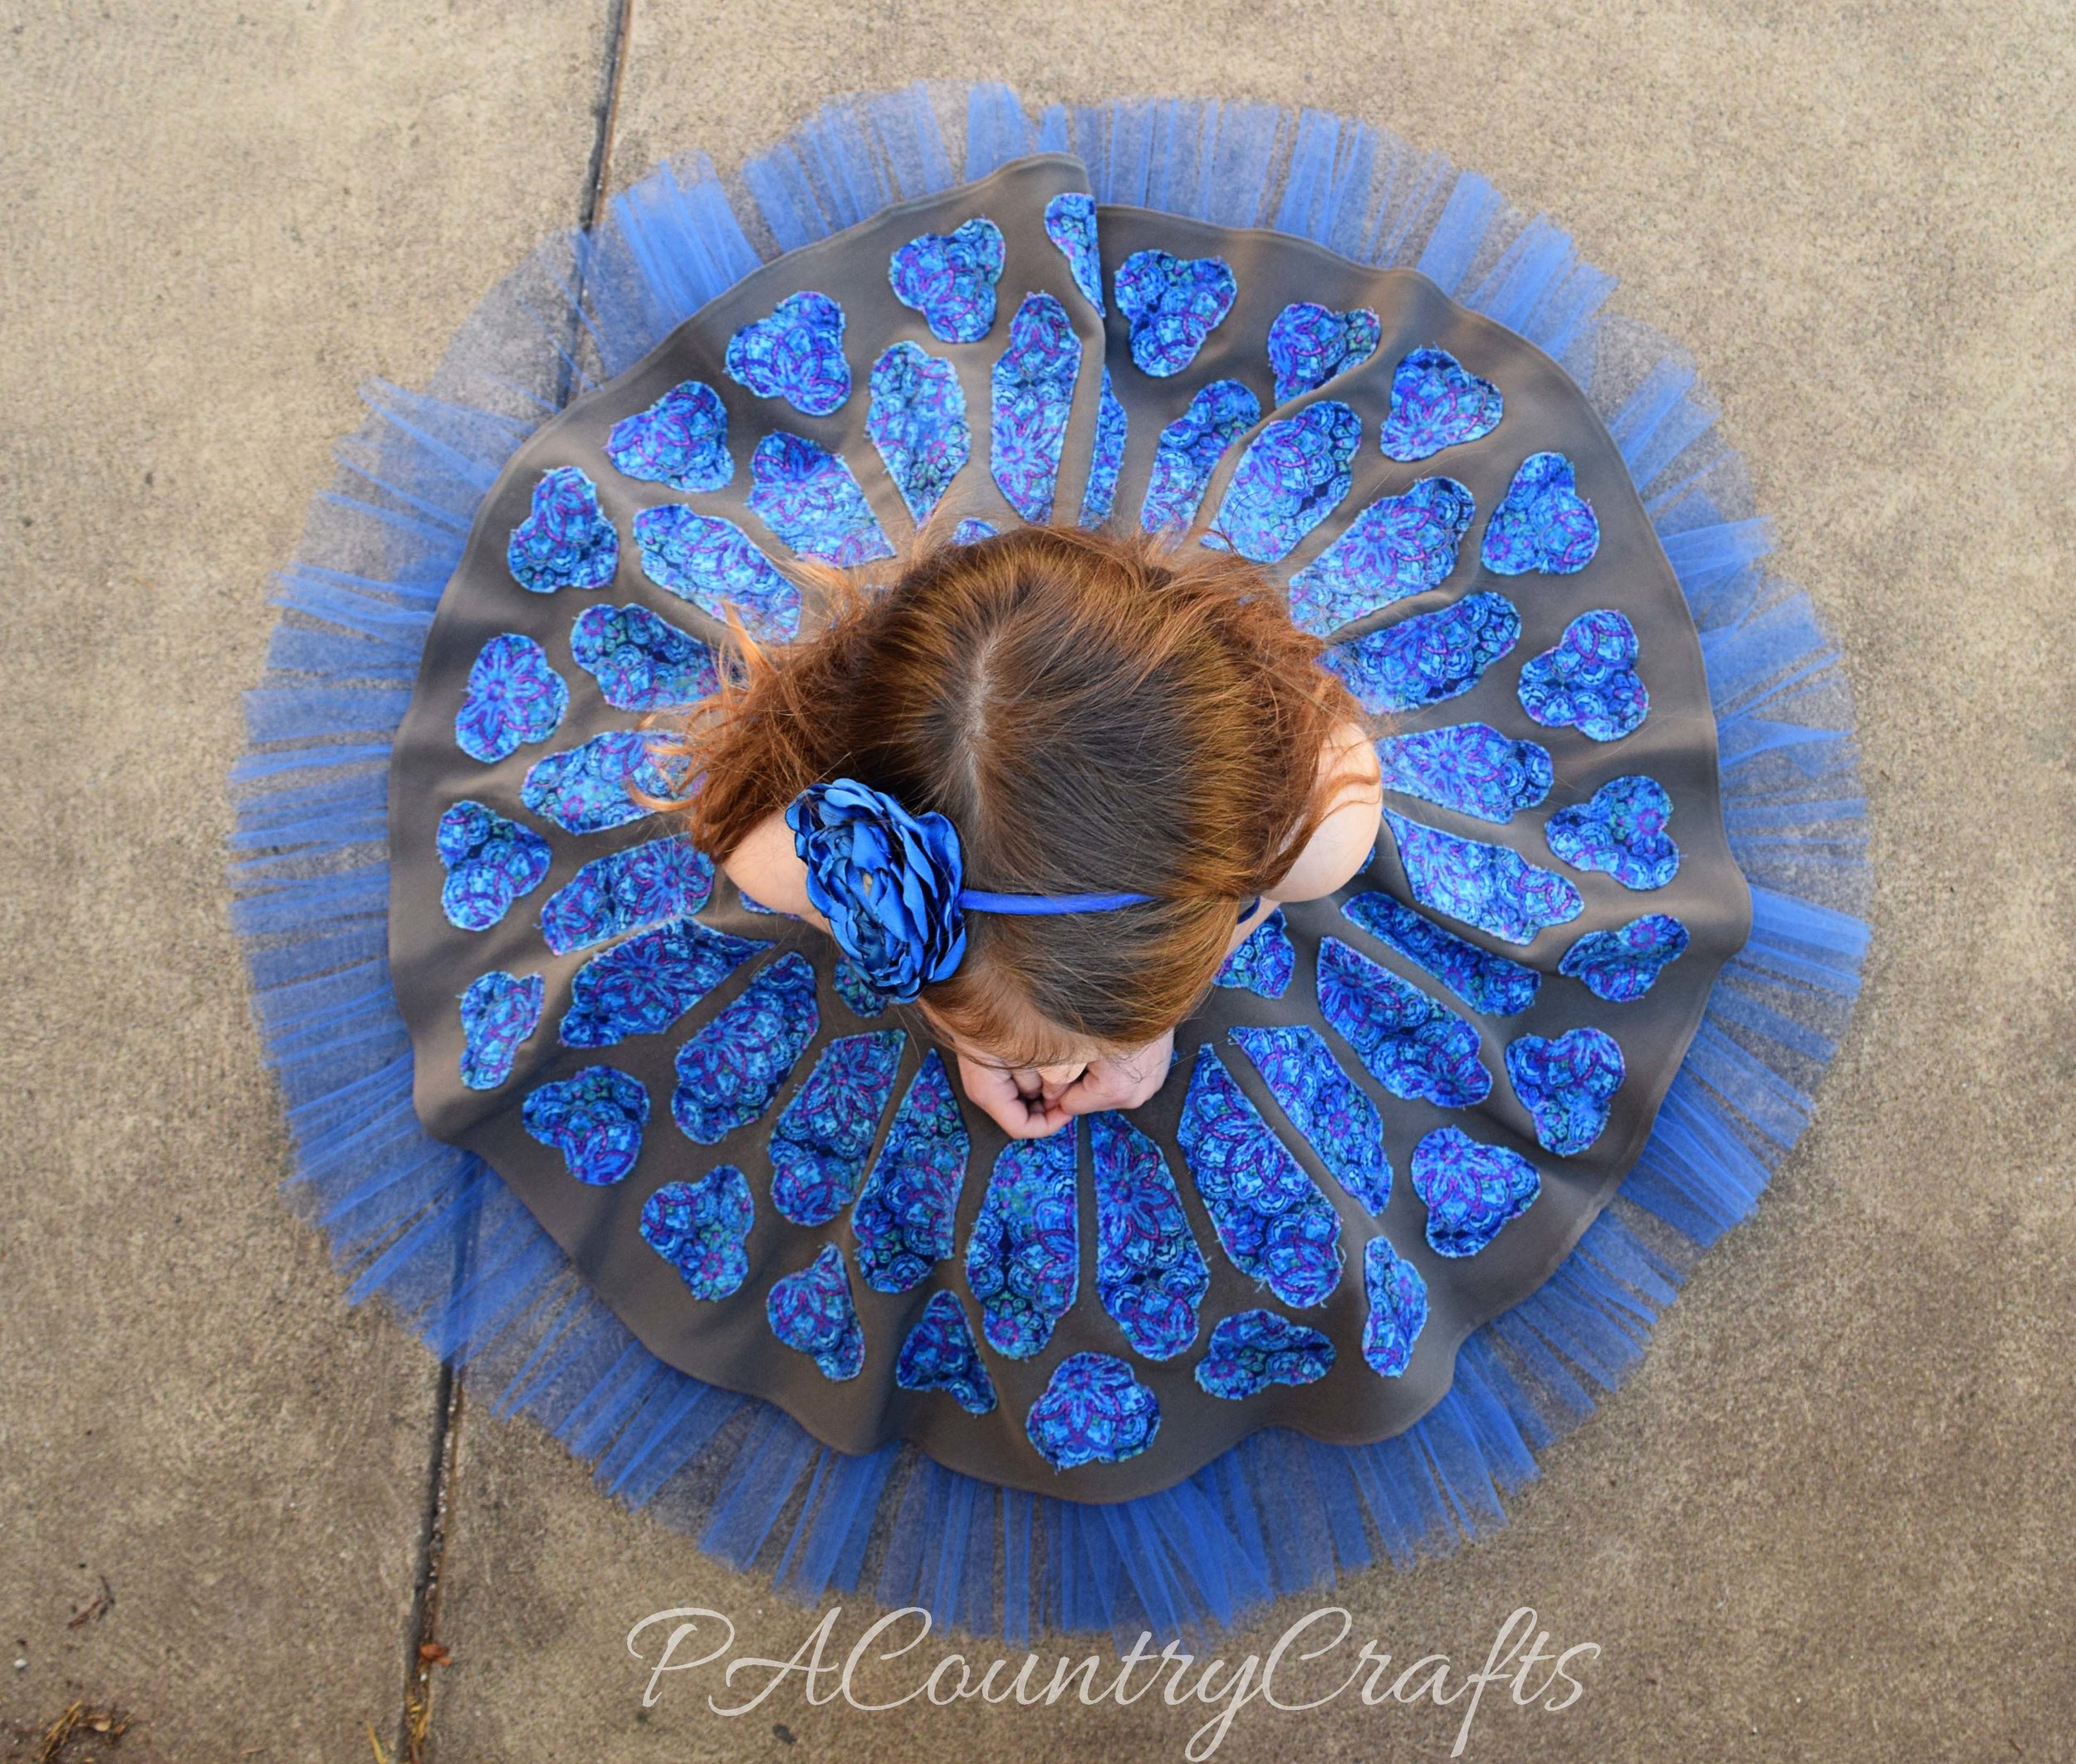 For the bodice of the dress, I wanted to mimic some of the architectural details. I added piping to the front inspired by the arc of the flying buttresses that support the cathedral walls.
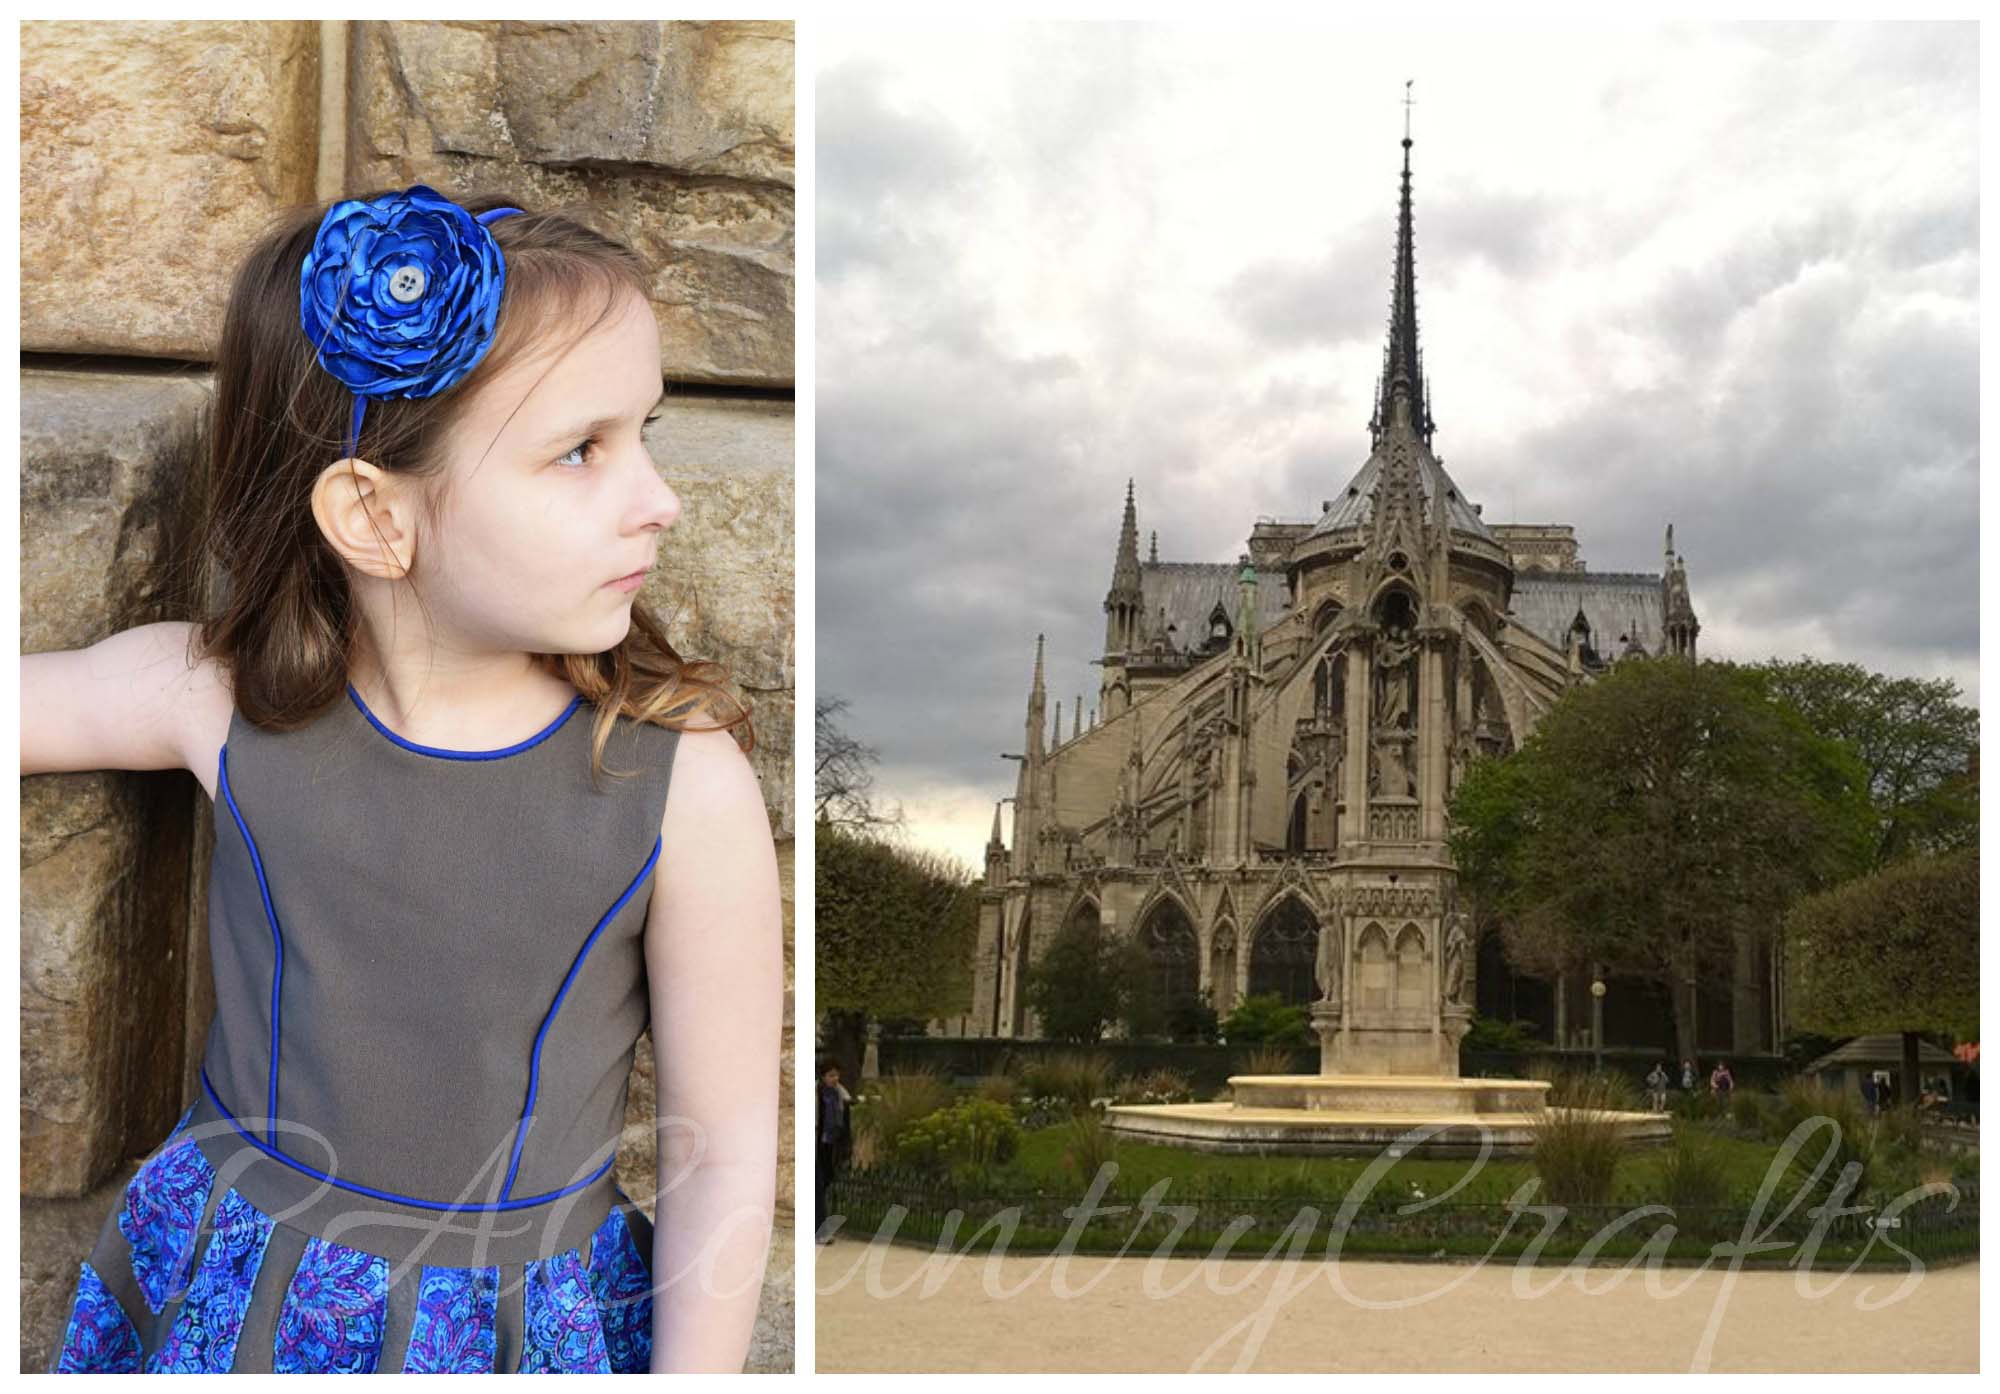 In the back, I made a Gothic, pointed arch cut-out and added soft, ruffle elastic, criss-crossing straps inside that mirror the beams in the vaulted ceilings. It closes with coordinating gray buttons, and I even hand-stitched the buttonholes because the fabric was thick and I had broken almost all of my needles earlier.


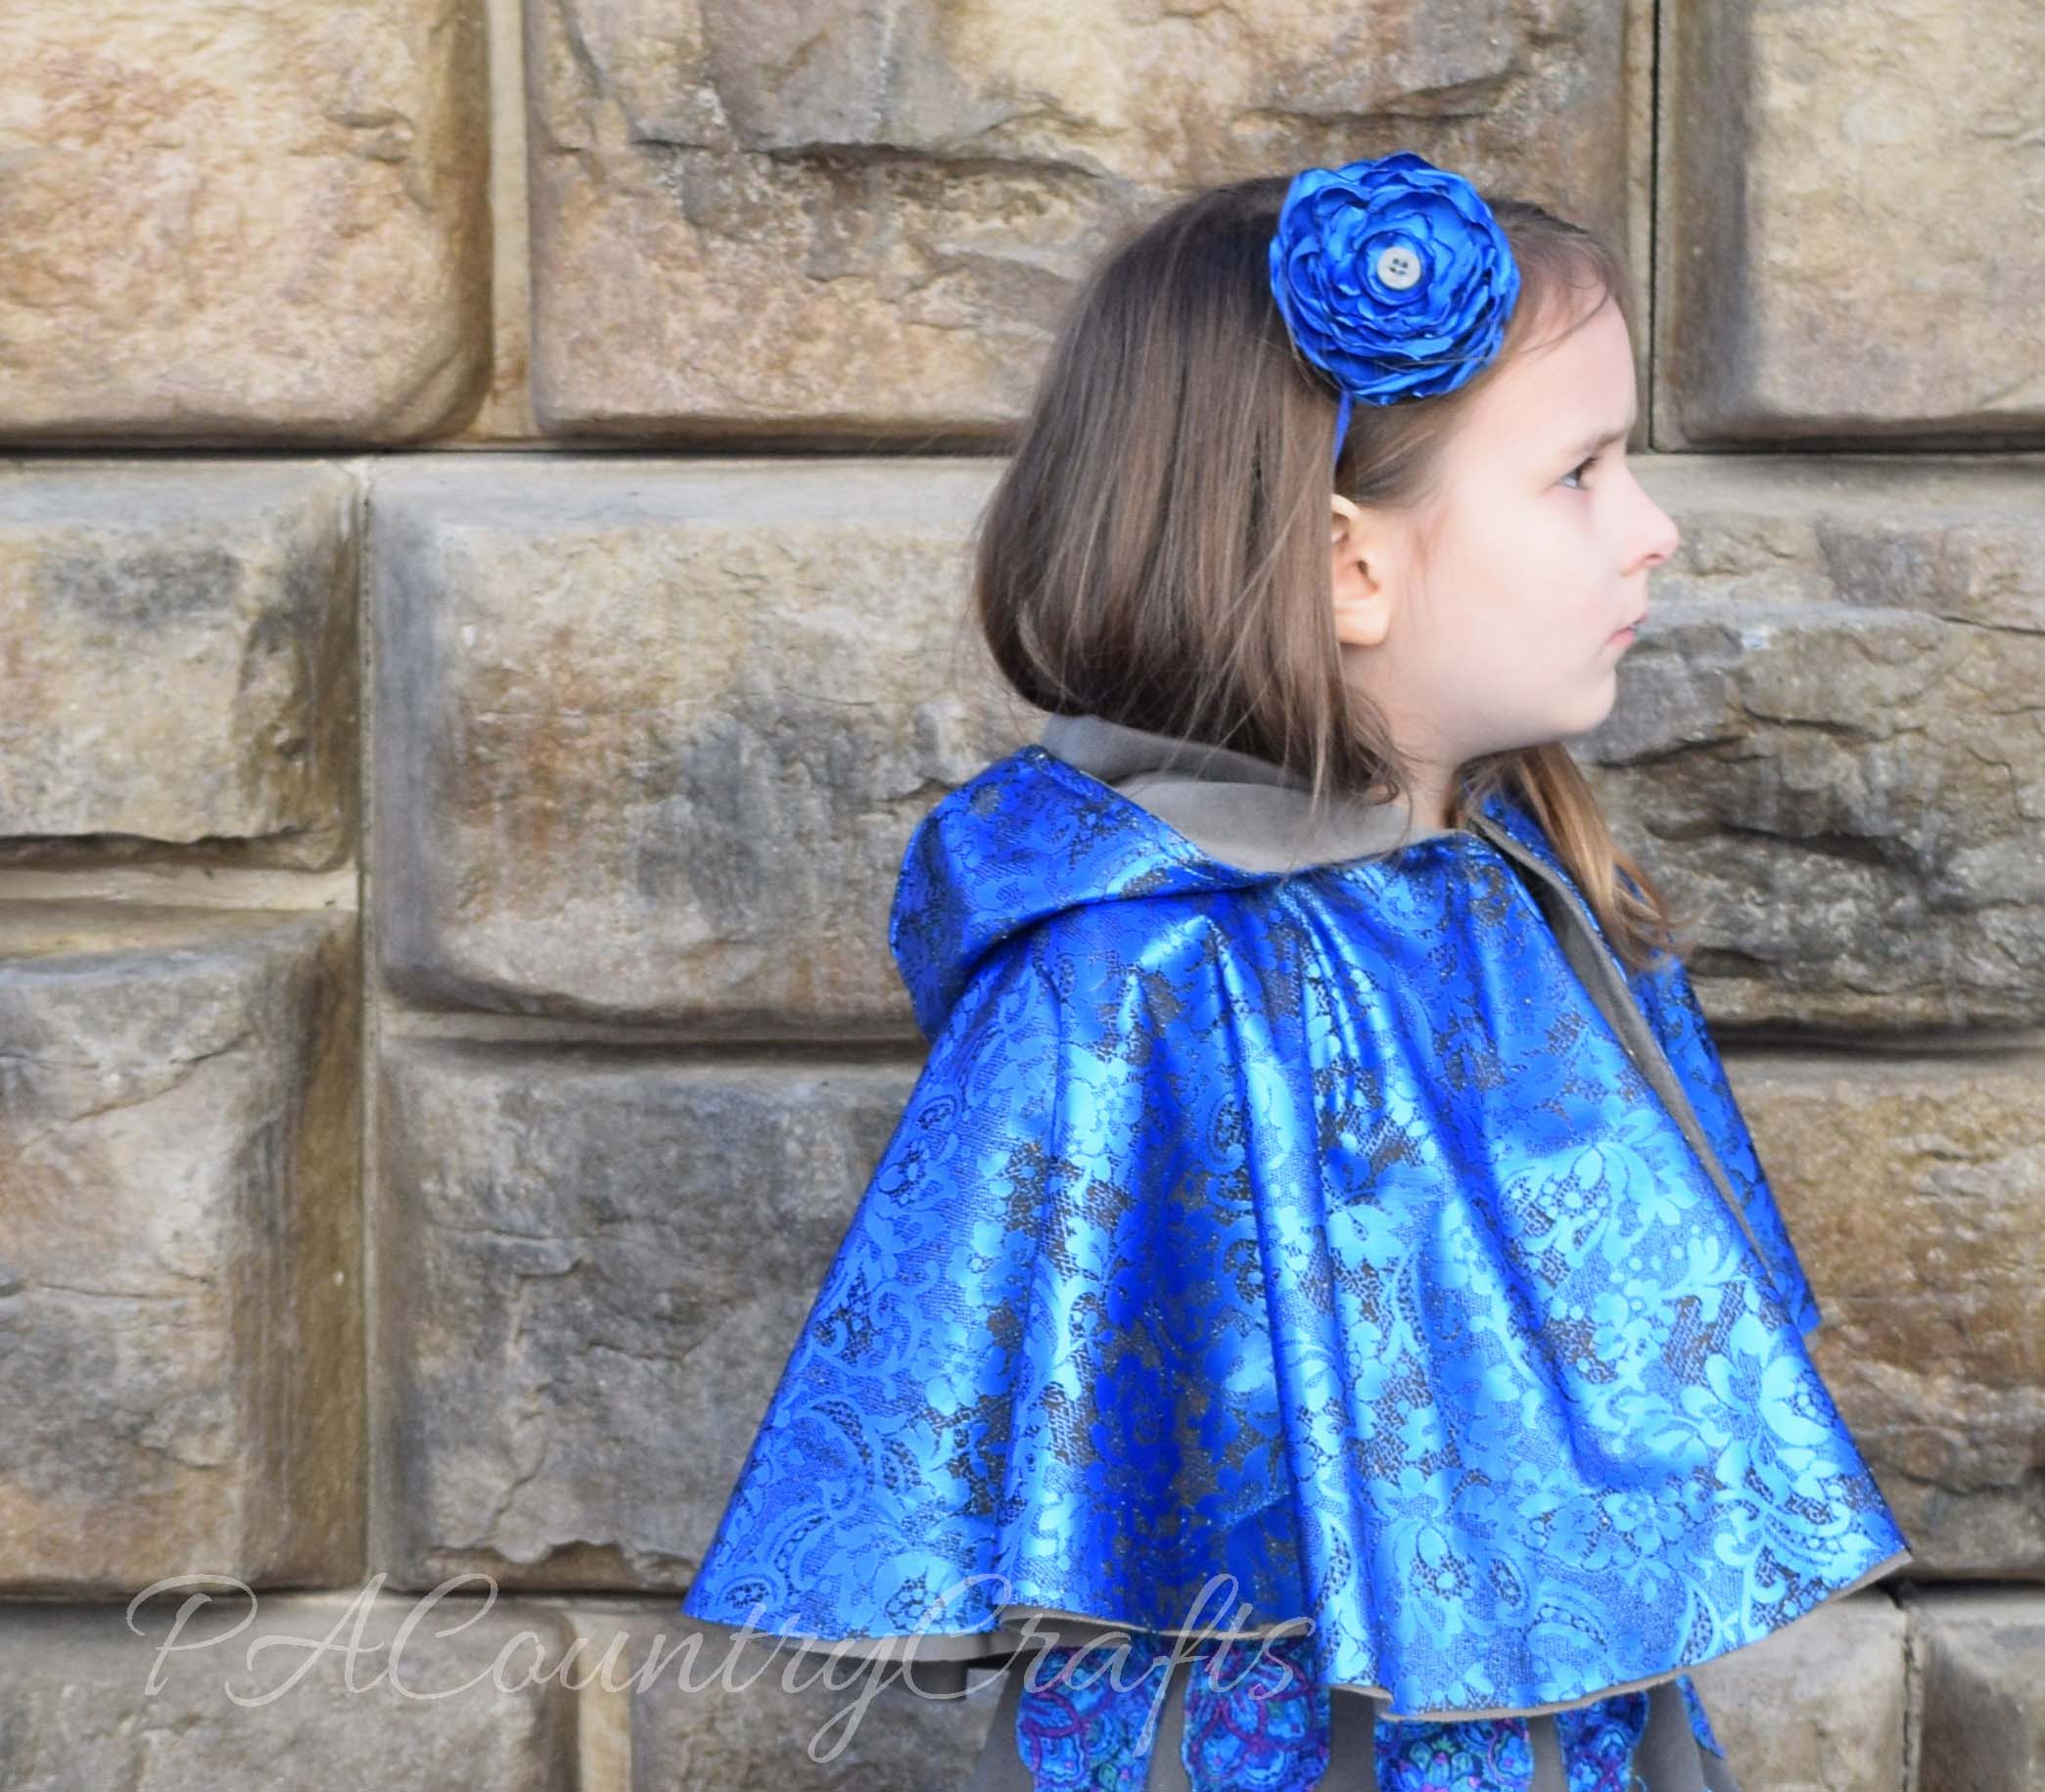 Finally, because she loves to have matching headbands, I made a blue satin flower to coordinate with the dress. Originally I was going to make something much more elaborate, but I thought there was enough going on with the dress already, so simple was best.
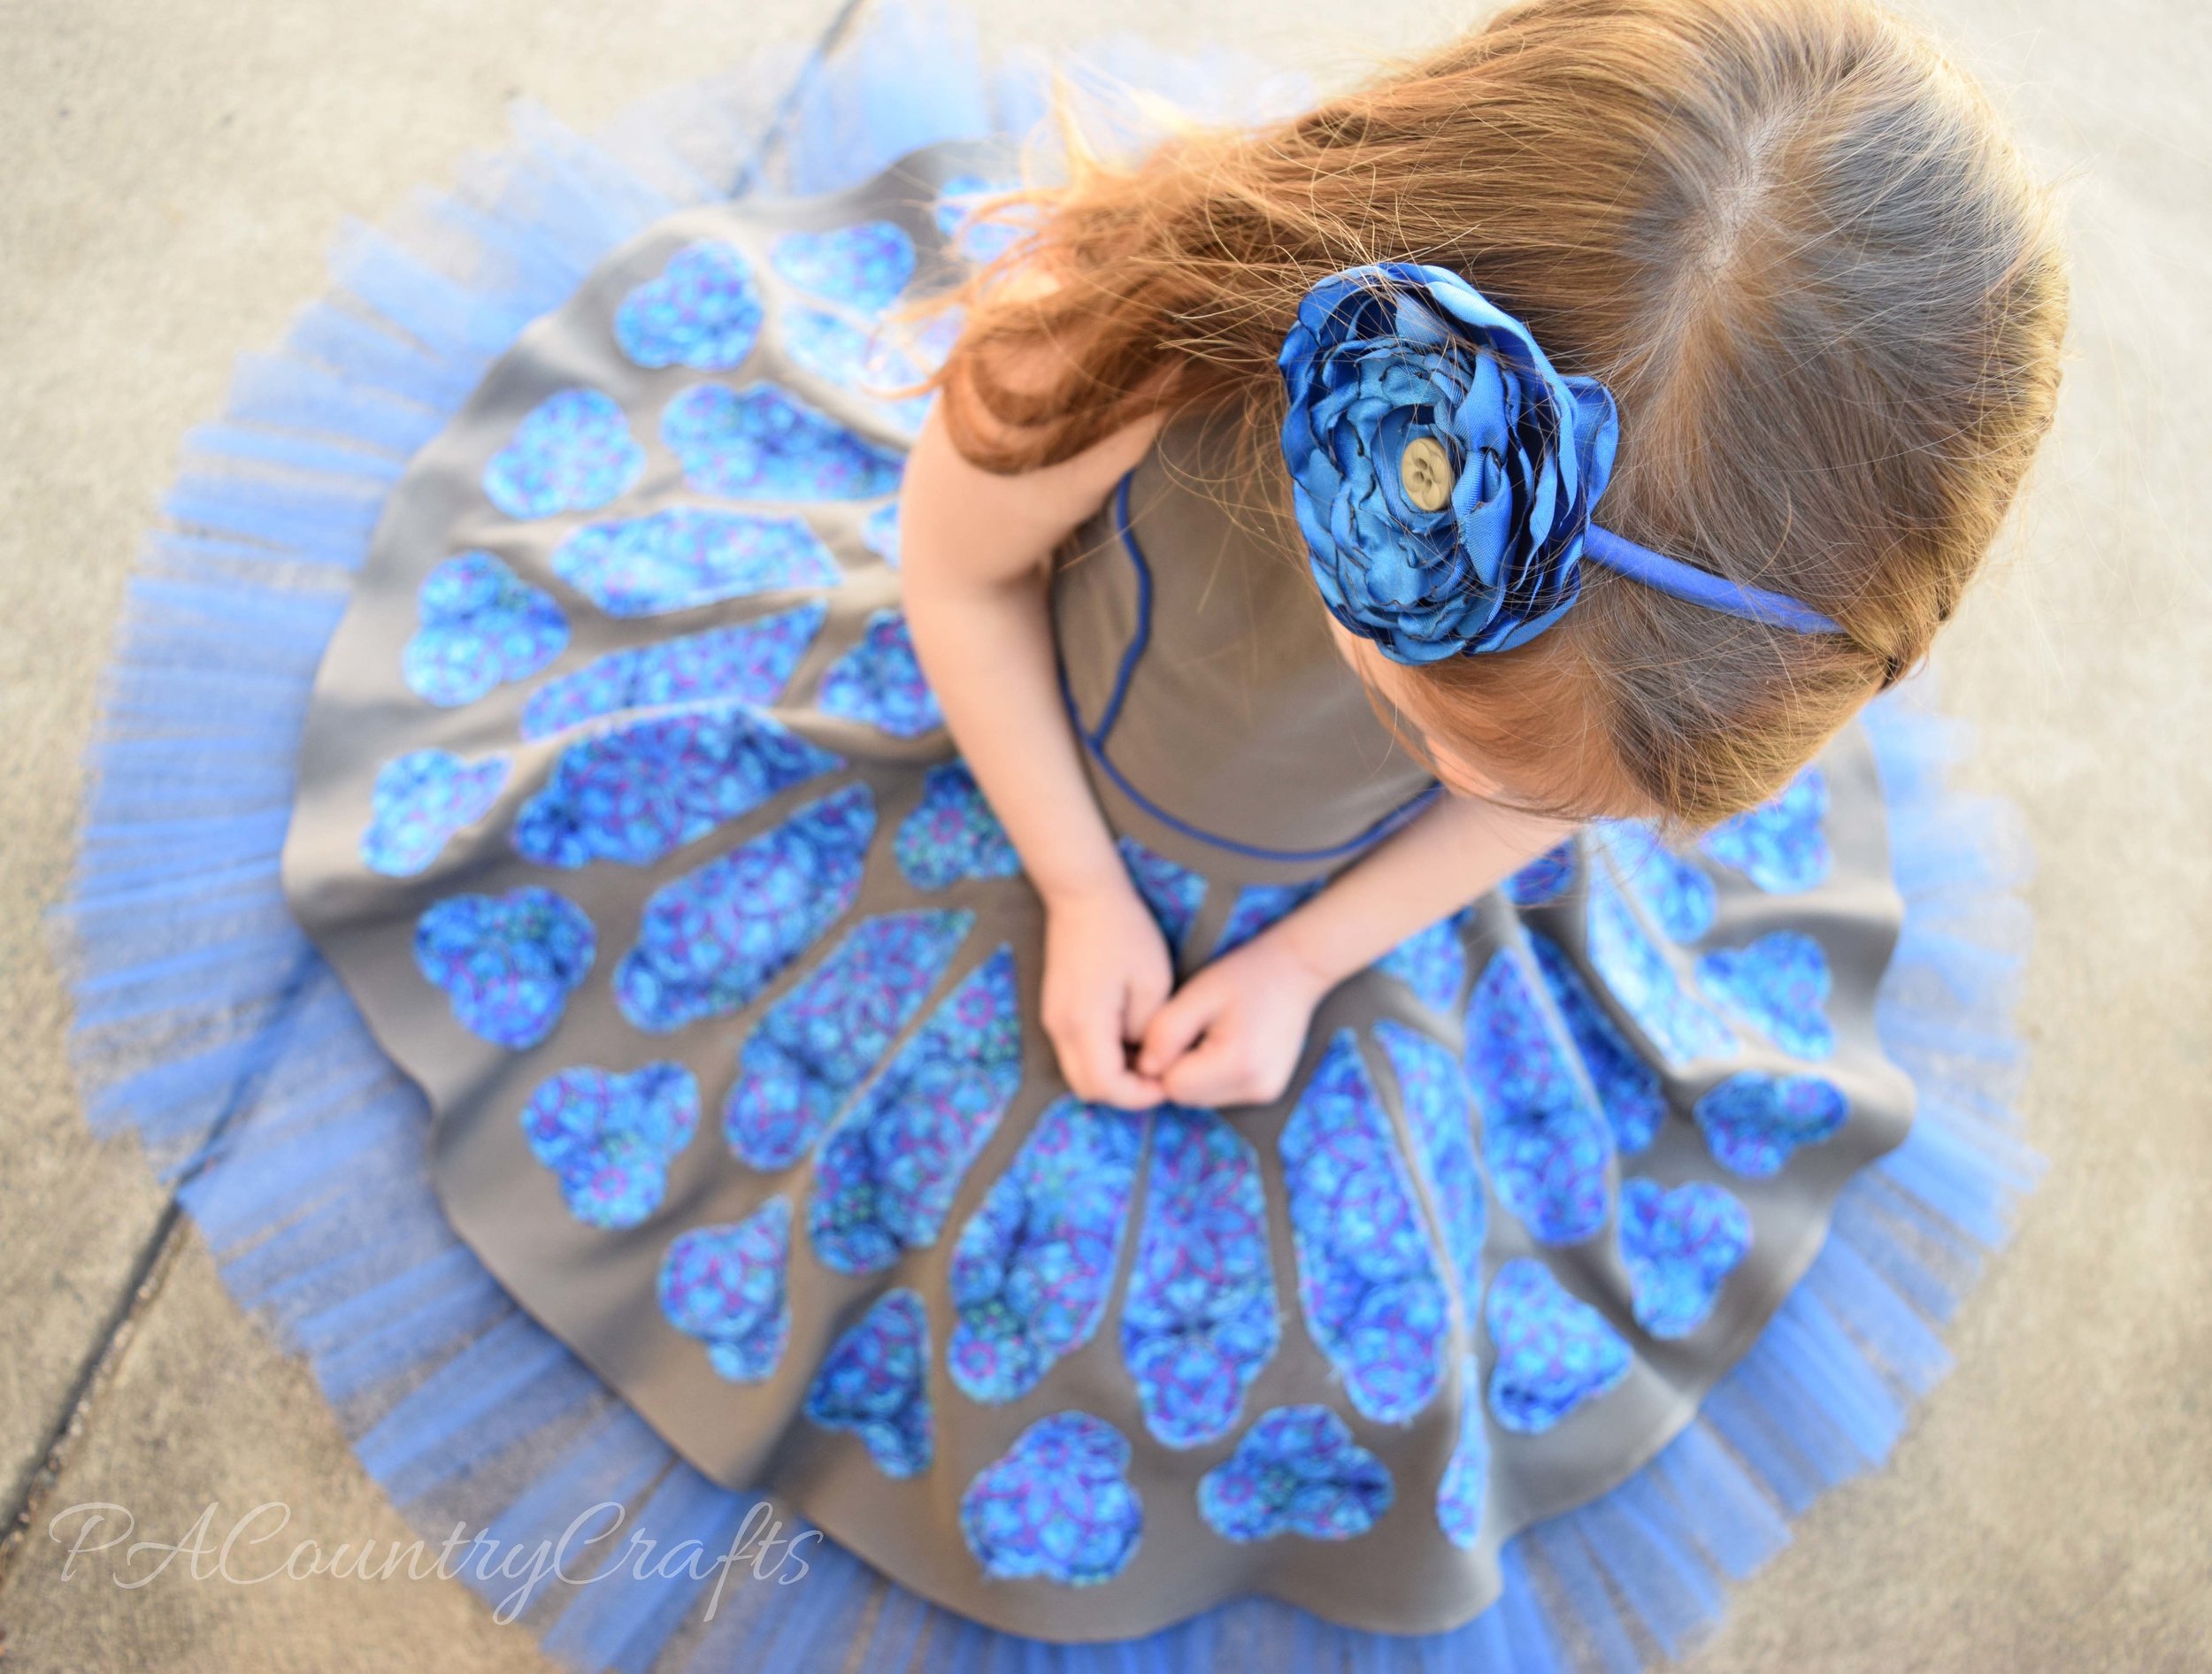 My daughter loves the outfit and she was such a trooper taking these pictures on such a cold day!