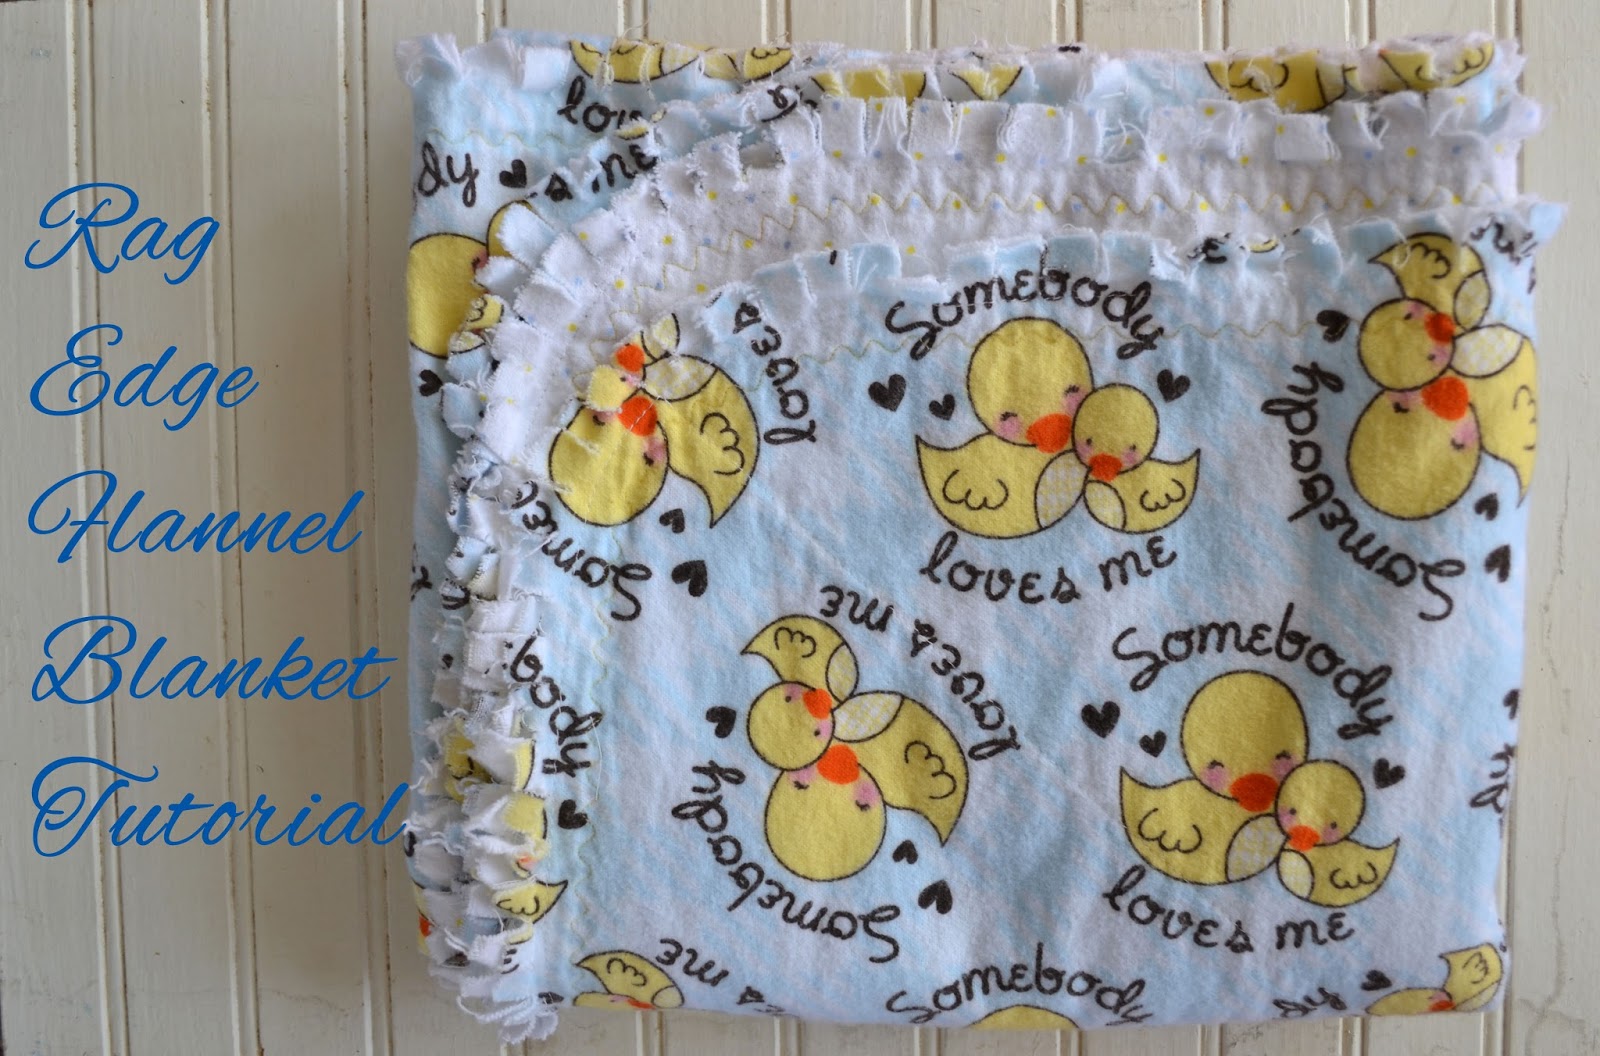
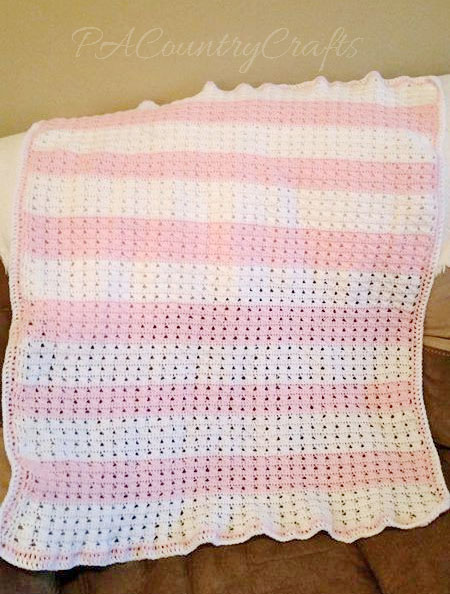
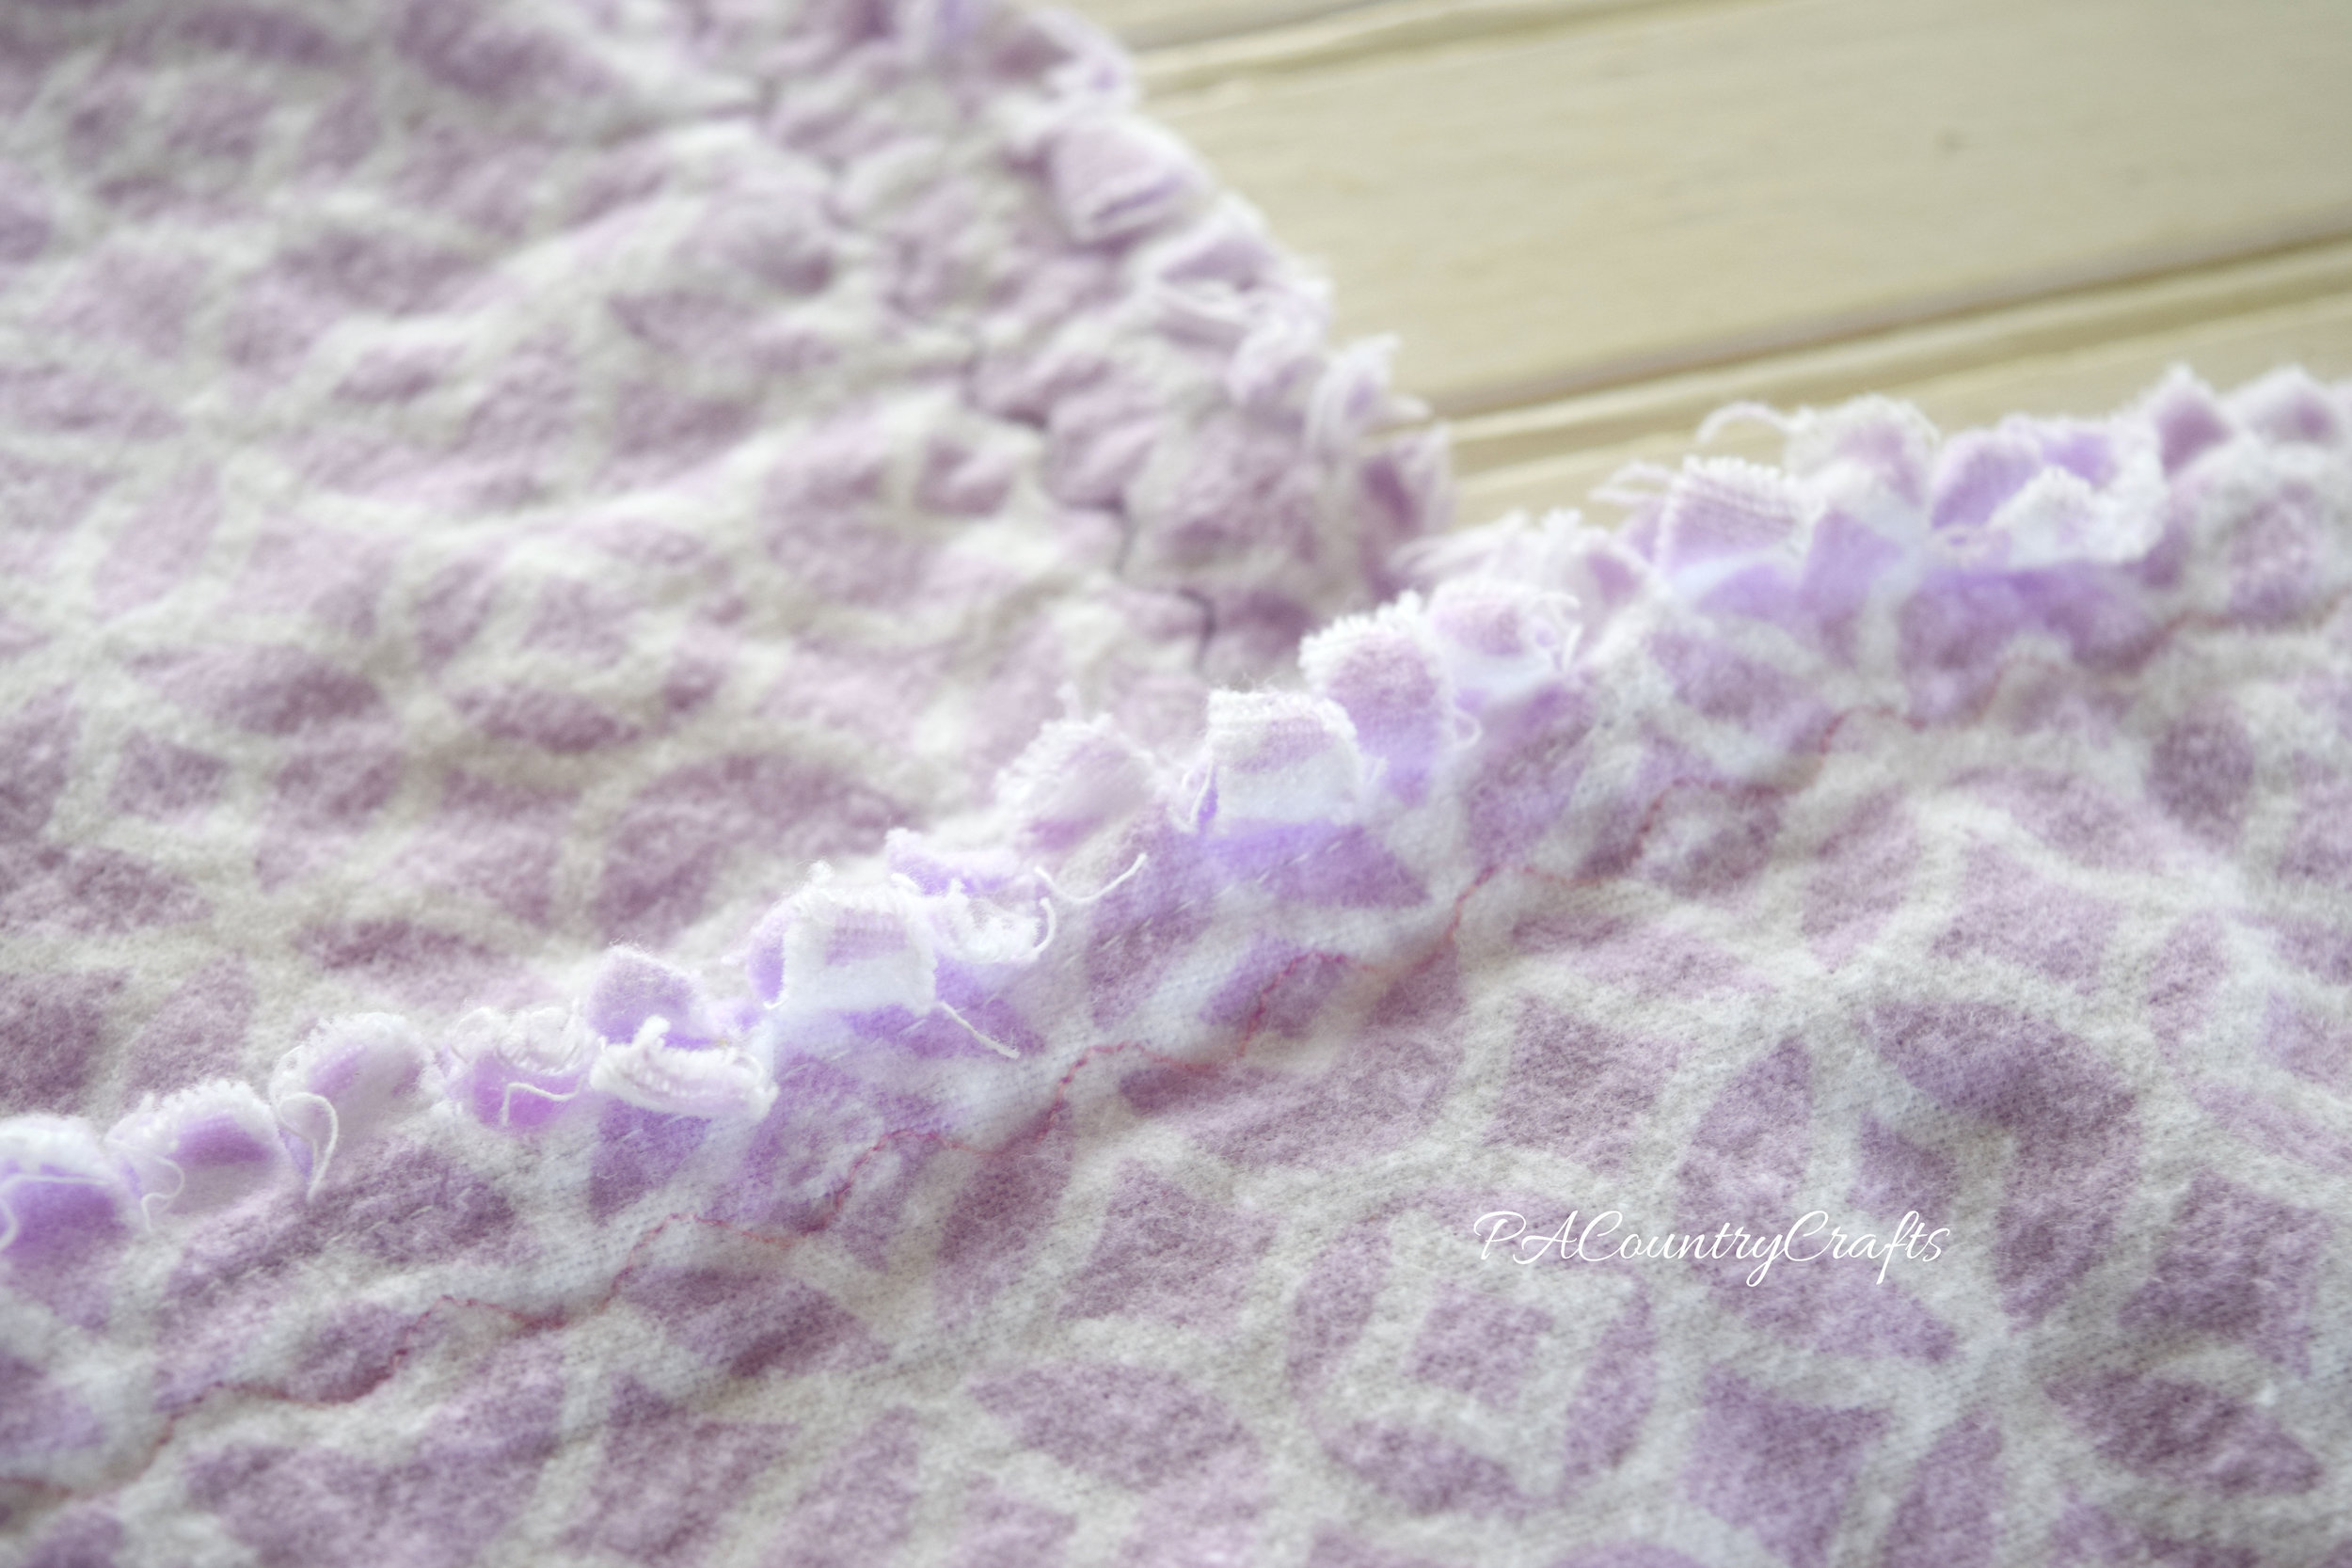
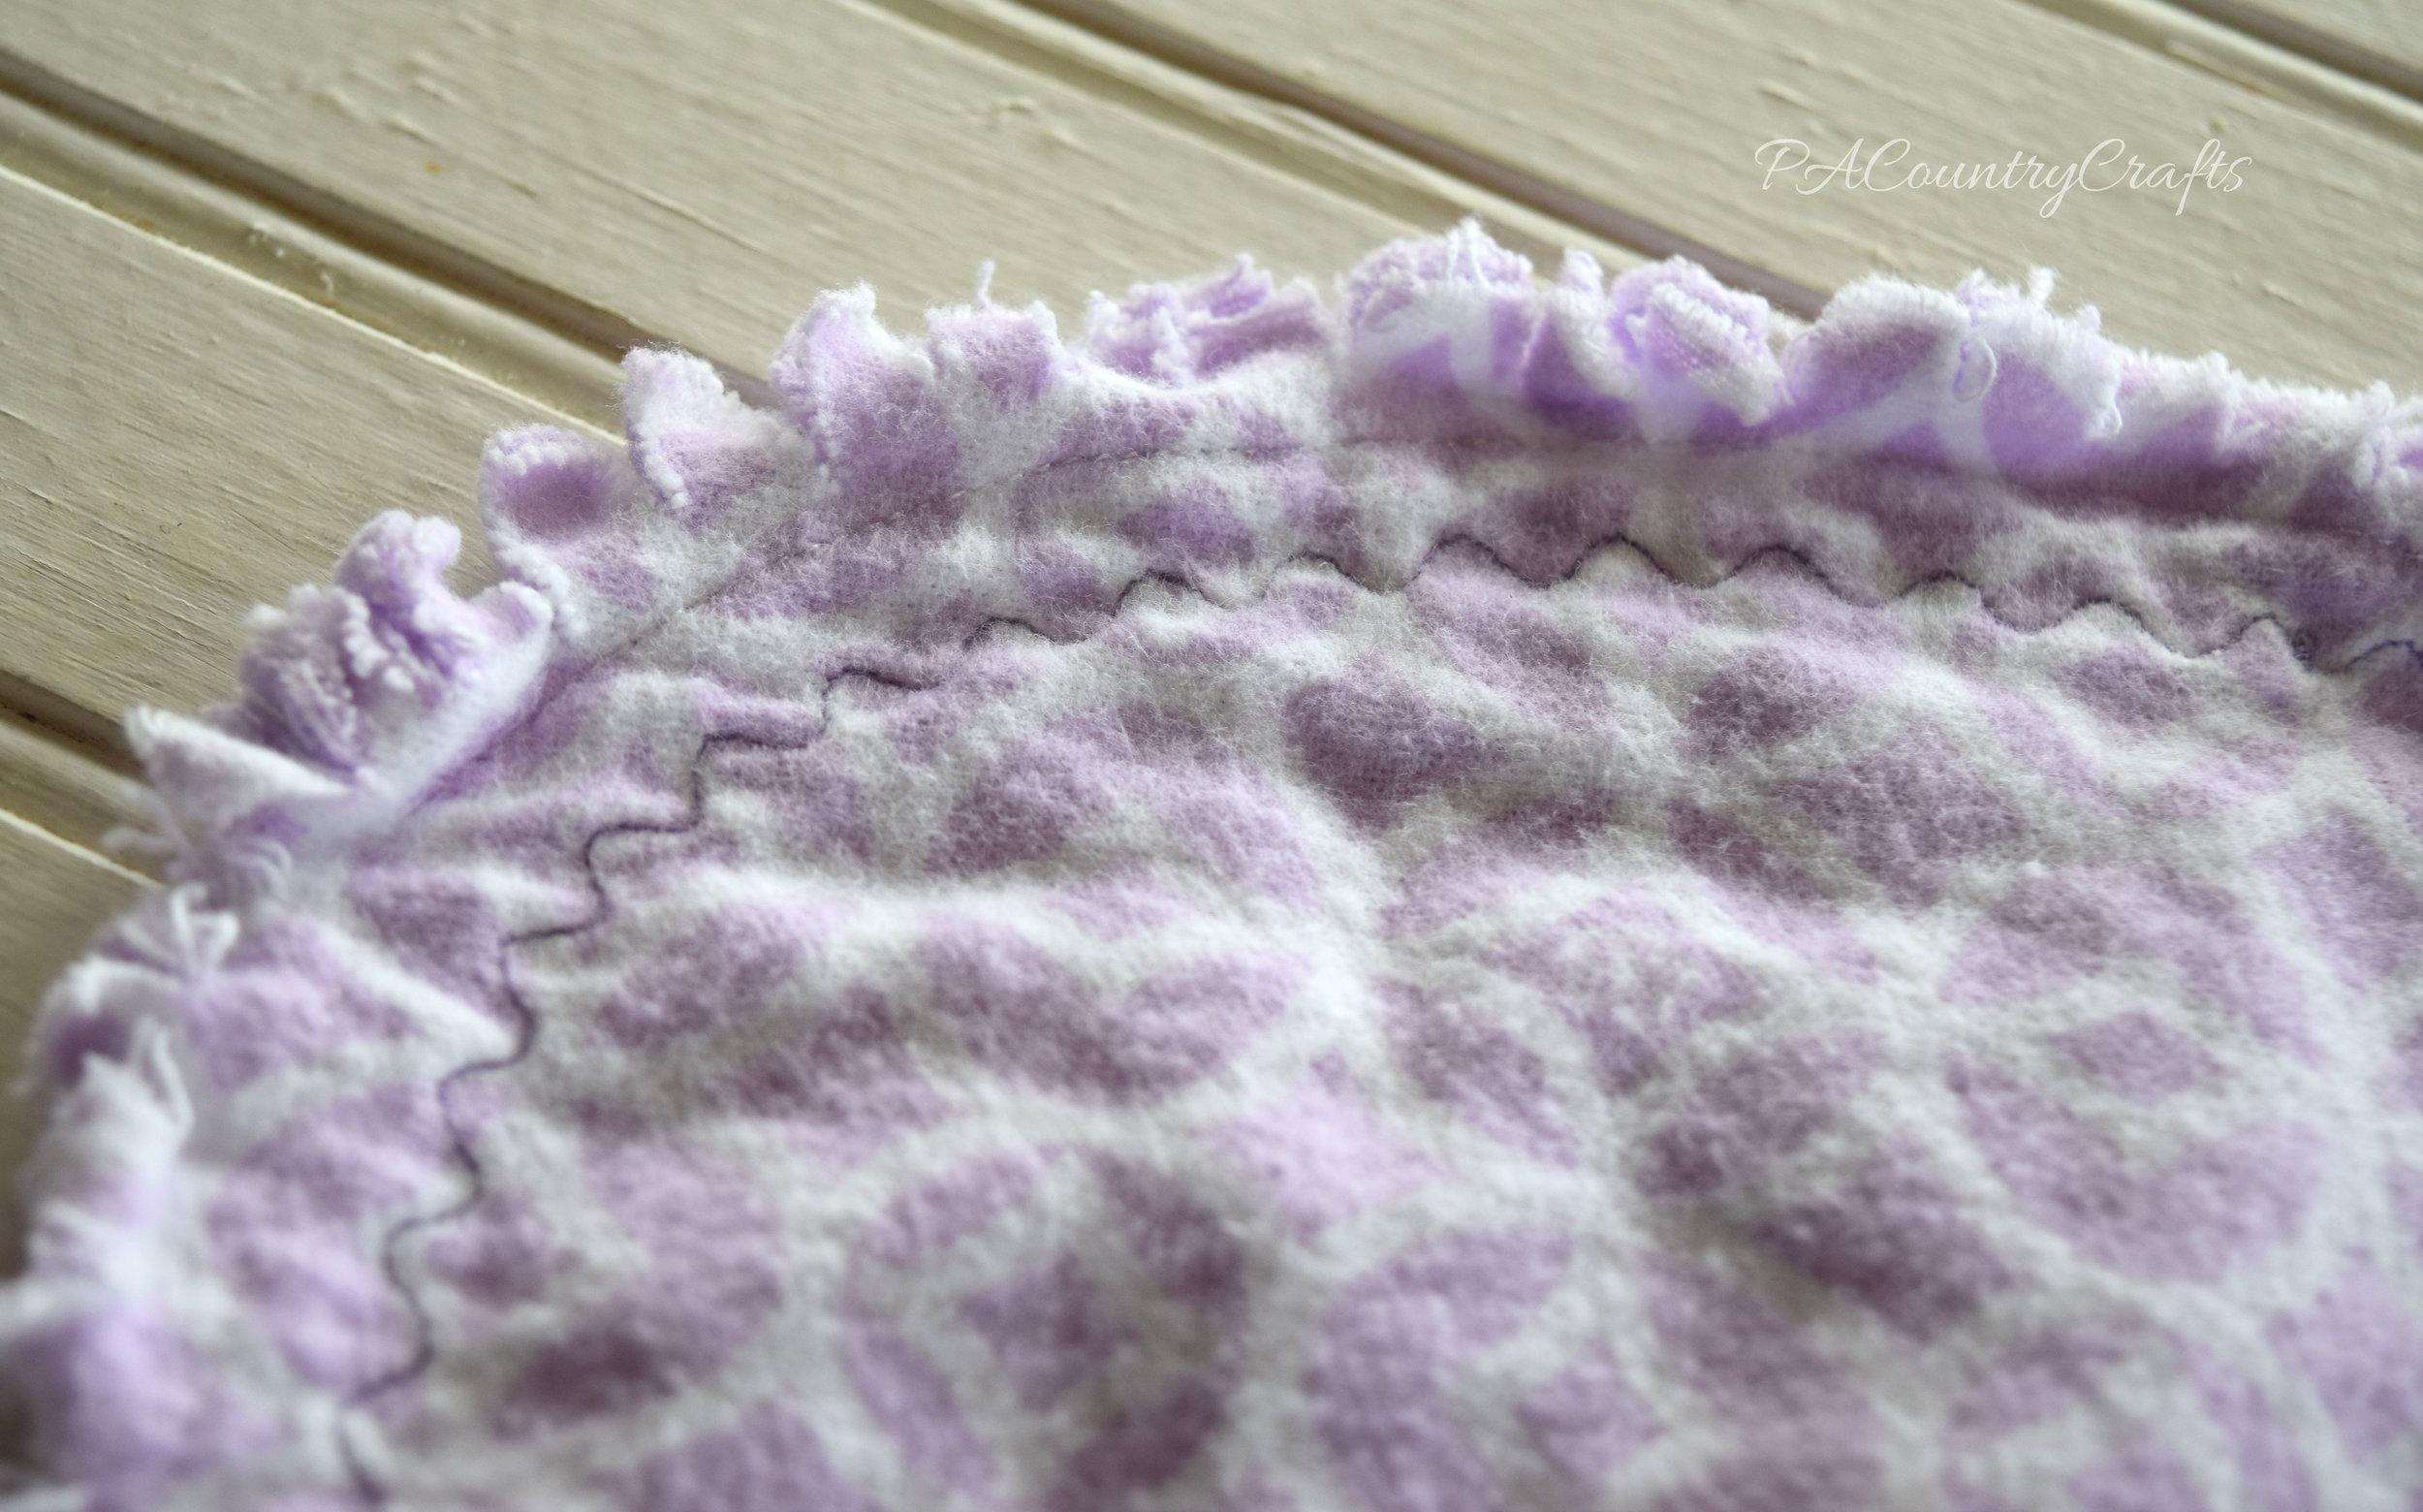
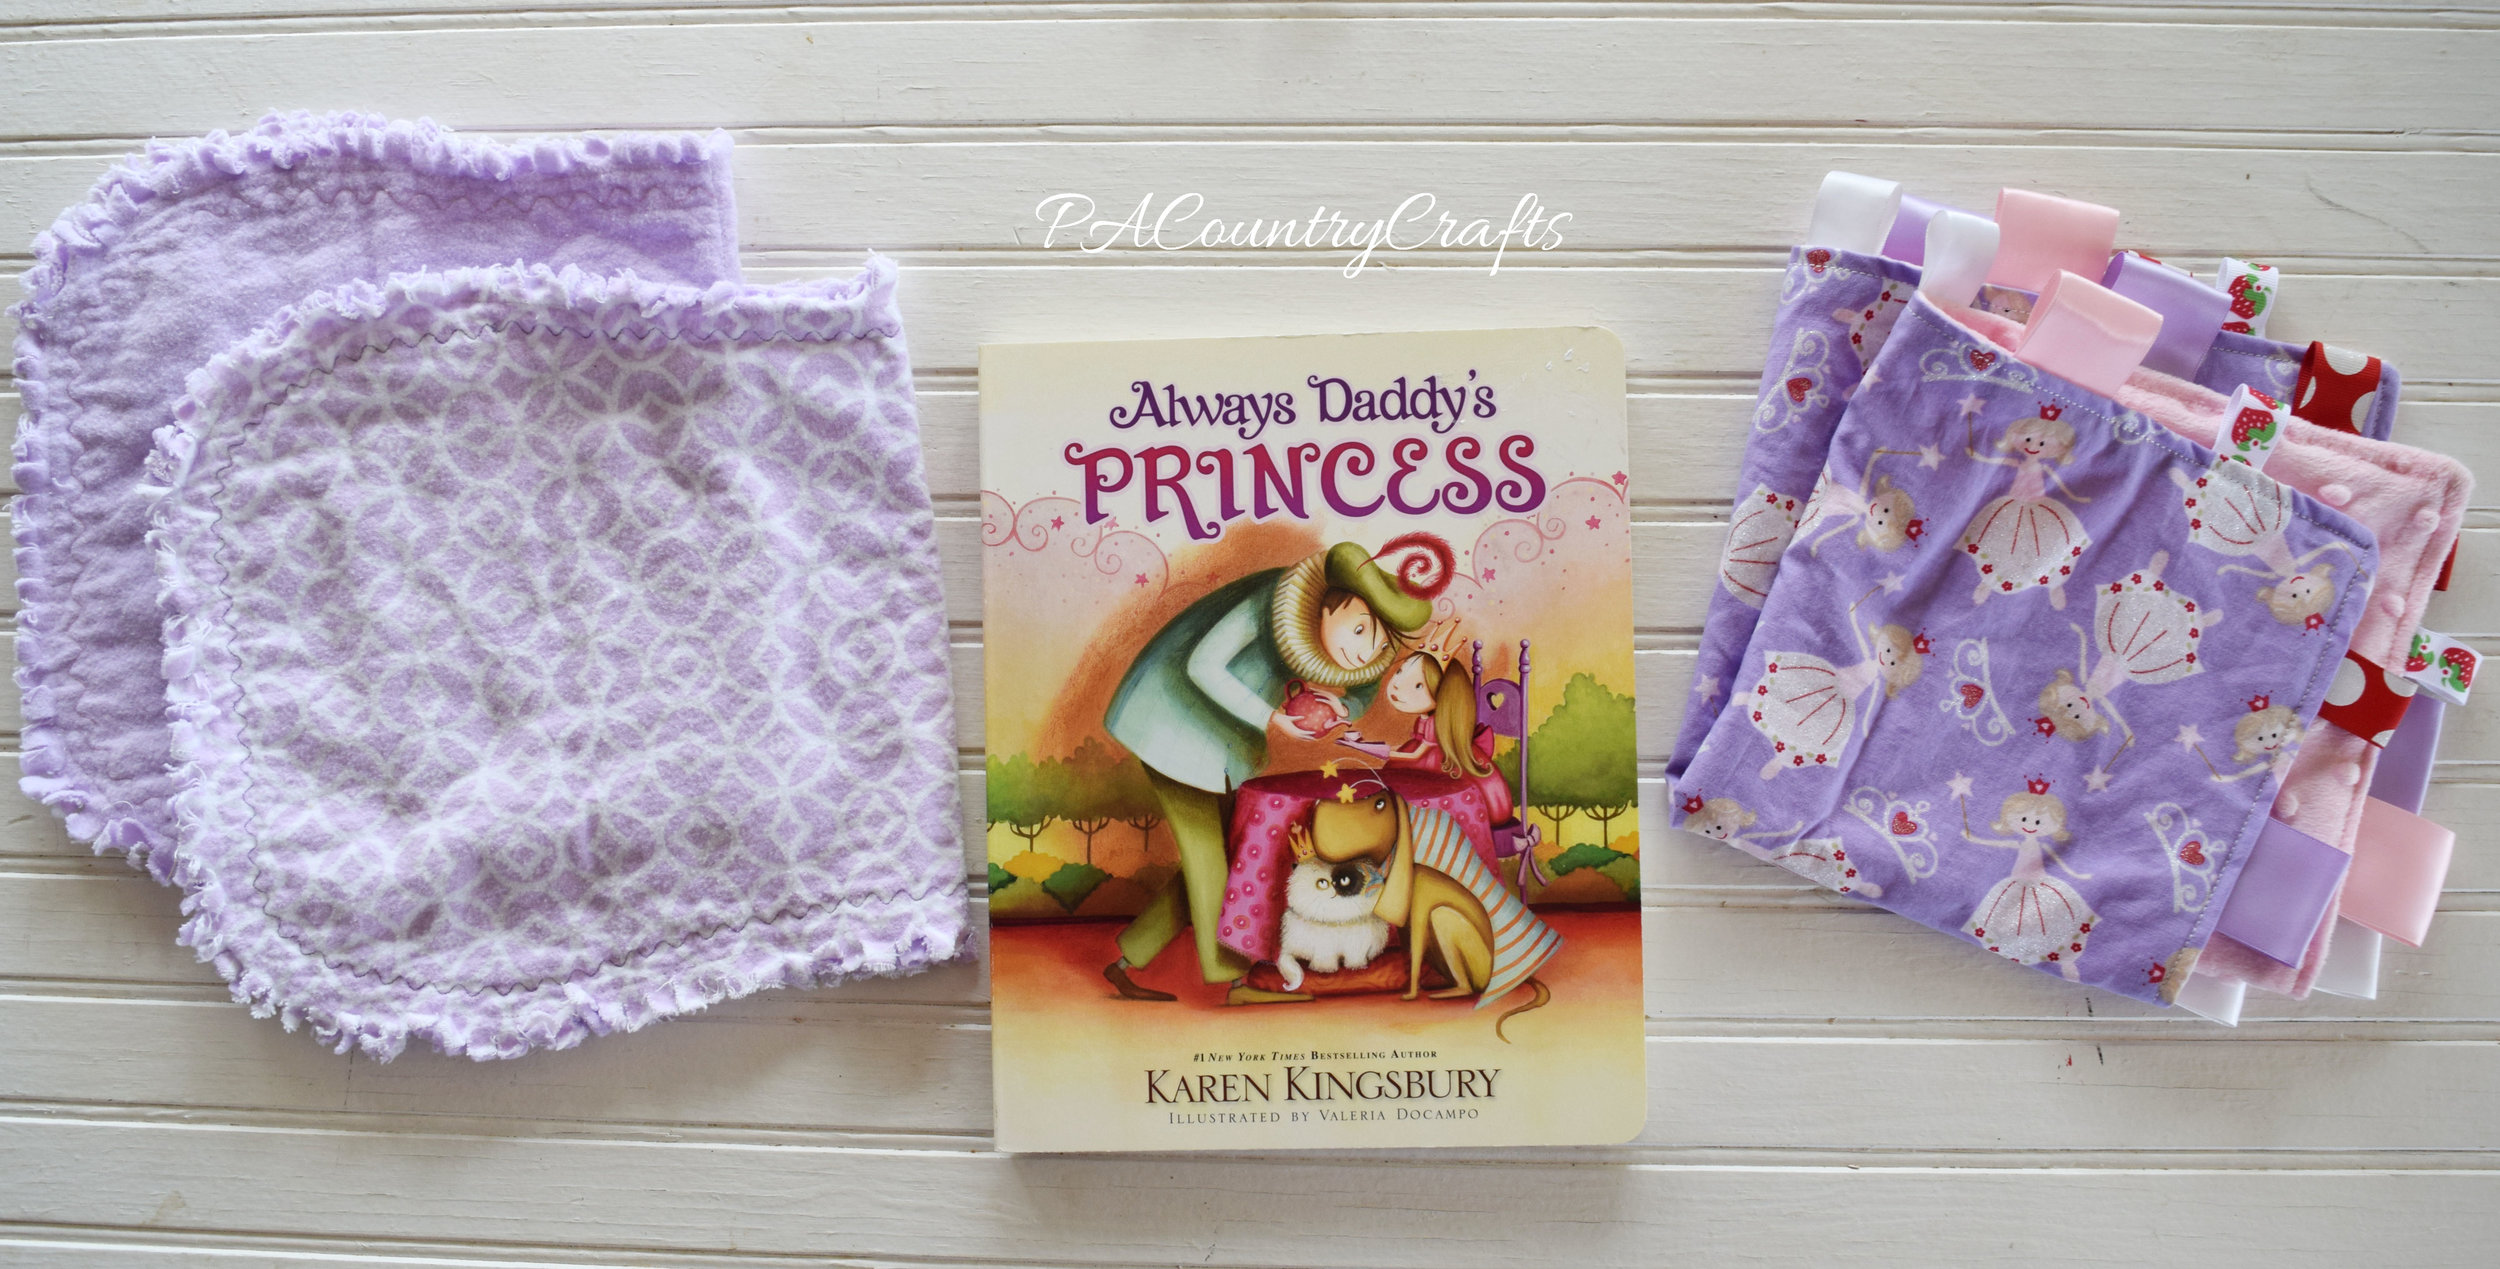
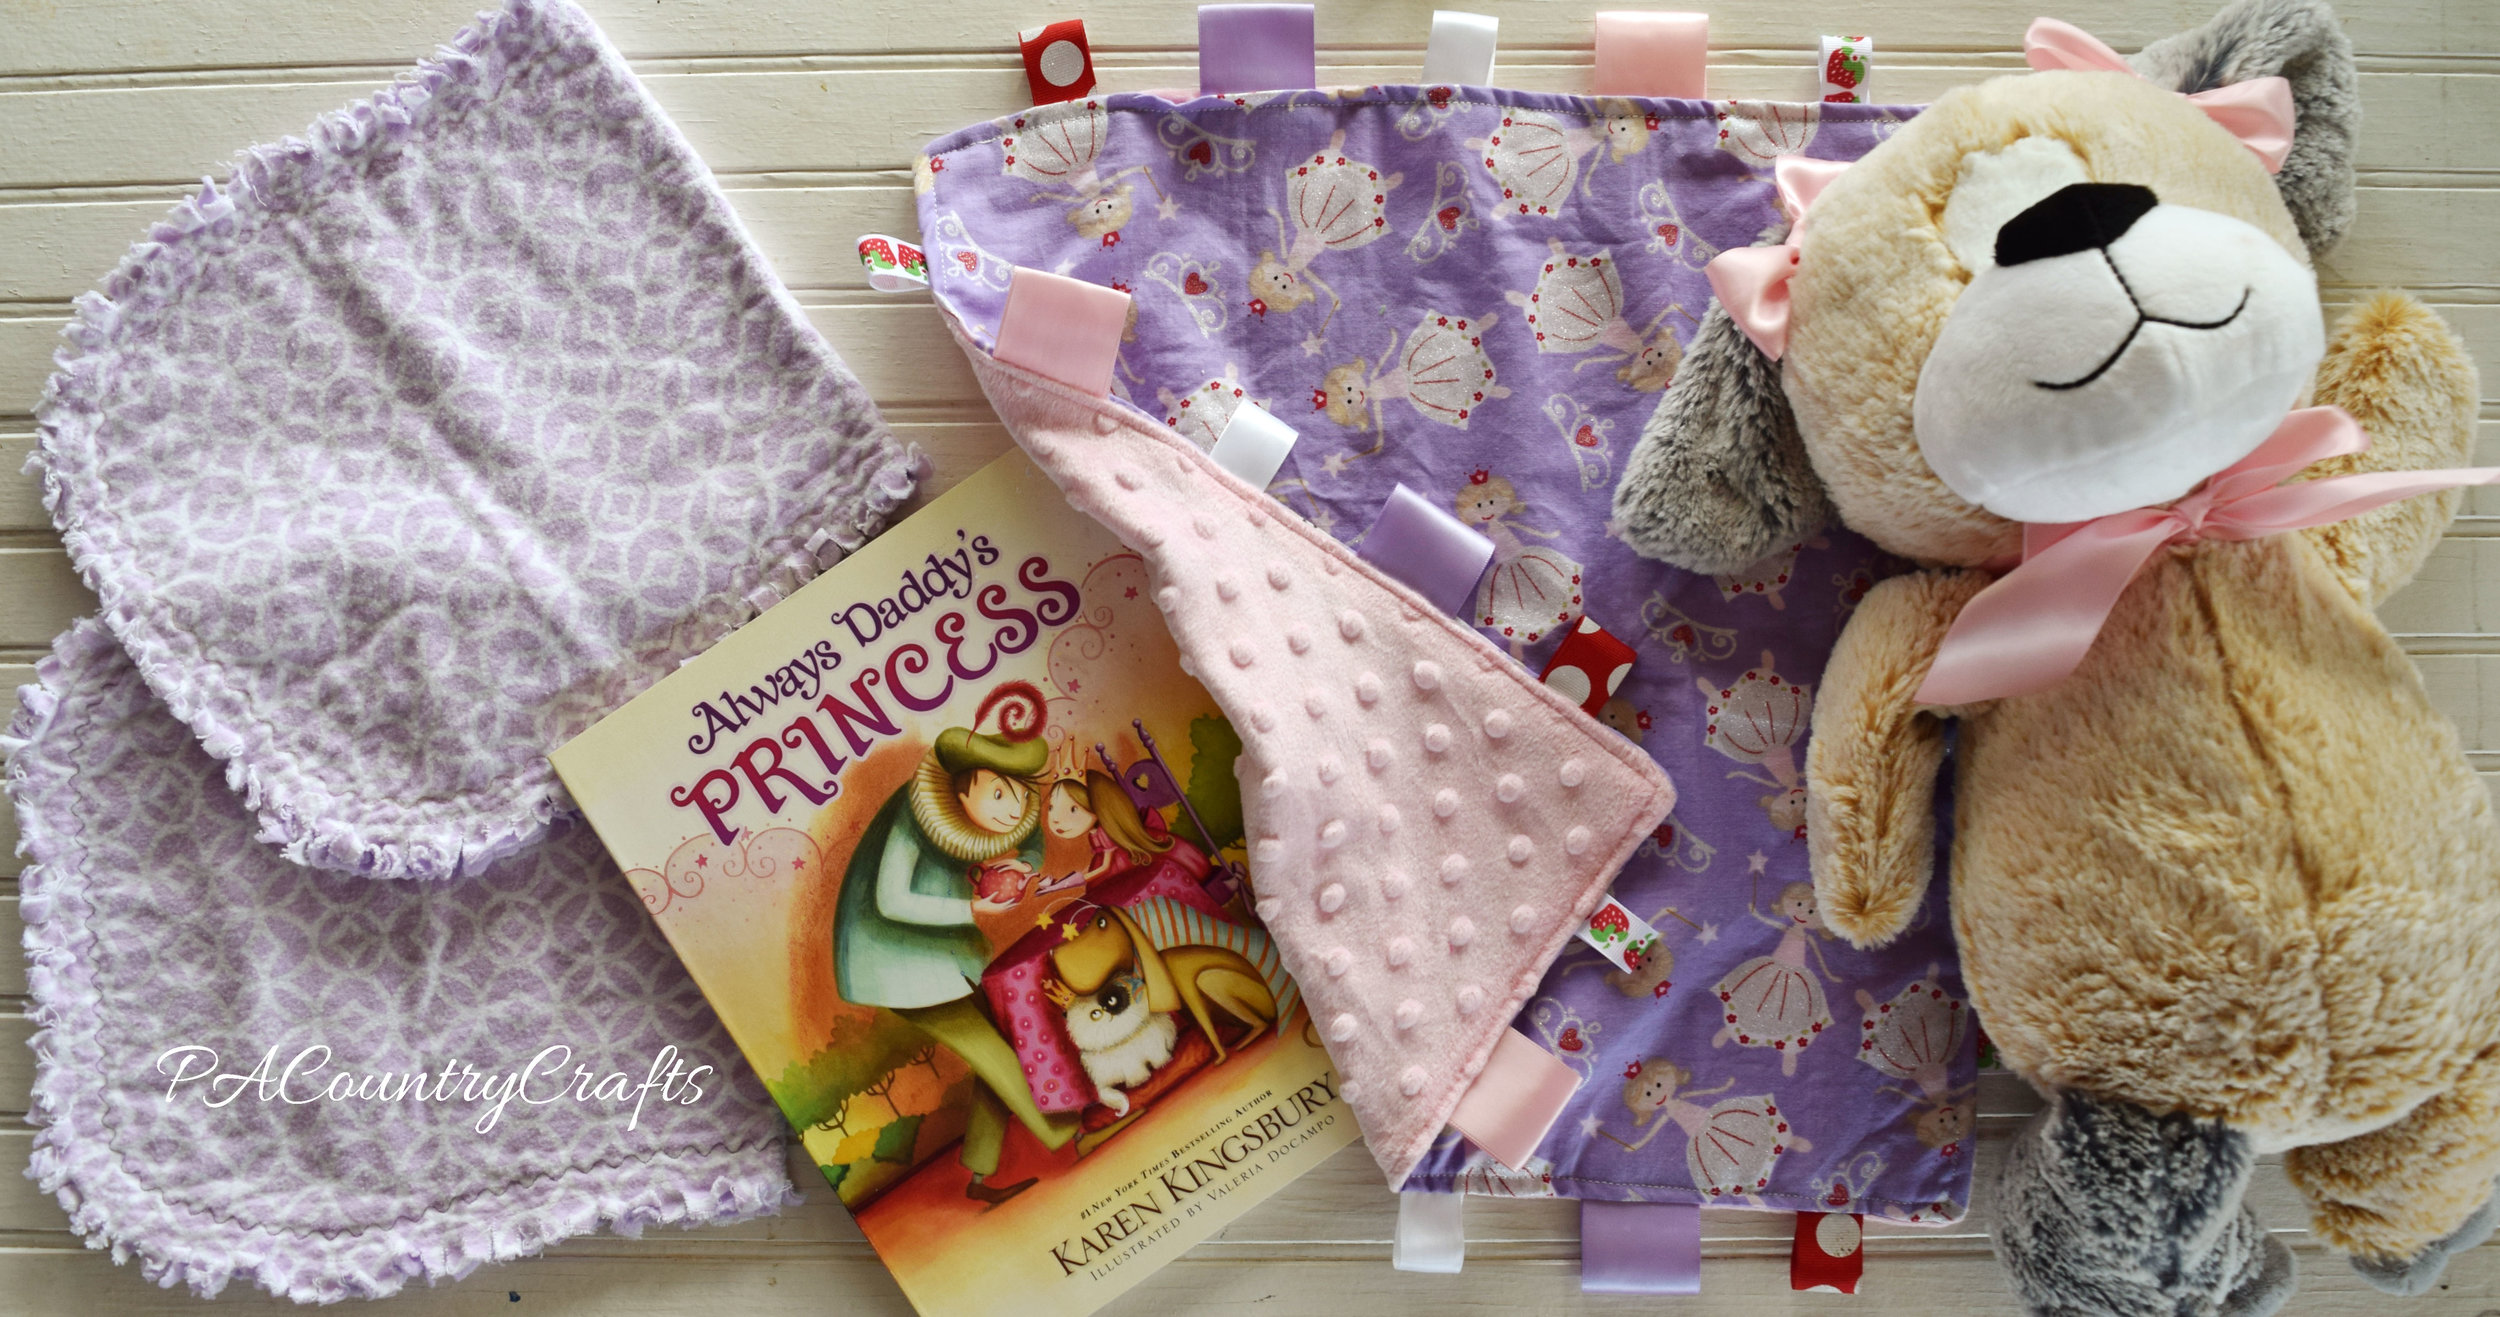
Baby Shower Gifts

I have mentioned before that I LOVE sewing for baby girls! I was invited to a baby shower for my cousin and I am just so excited for them!!! My family does a joint gift in either a wagon or a lamper (yes, that is a real thing- it's like a big laundry basket/hamper) and I wanted to sew some things to put inside. My mom made a beautiful crocheted blanket, so I didn't do my traditional rag edge flannel blanket (tutorial HERE).

pink and white crochet blanket

Her nursery colors are pink, purple, and red. I was really excited when I found this princess fabric in my stash! We were asked to bring a book instead of a card and my traditional girl baby shower gift includes Karen Kingsbury's Always Daddy's Princess. (Seriously, it makes me tear up every time!) Everything just coordinated so well!!! I made a ribbon taggy blanket and backed it in pink dot minky fabric.

minky back princess taggy blanket

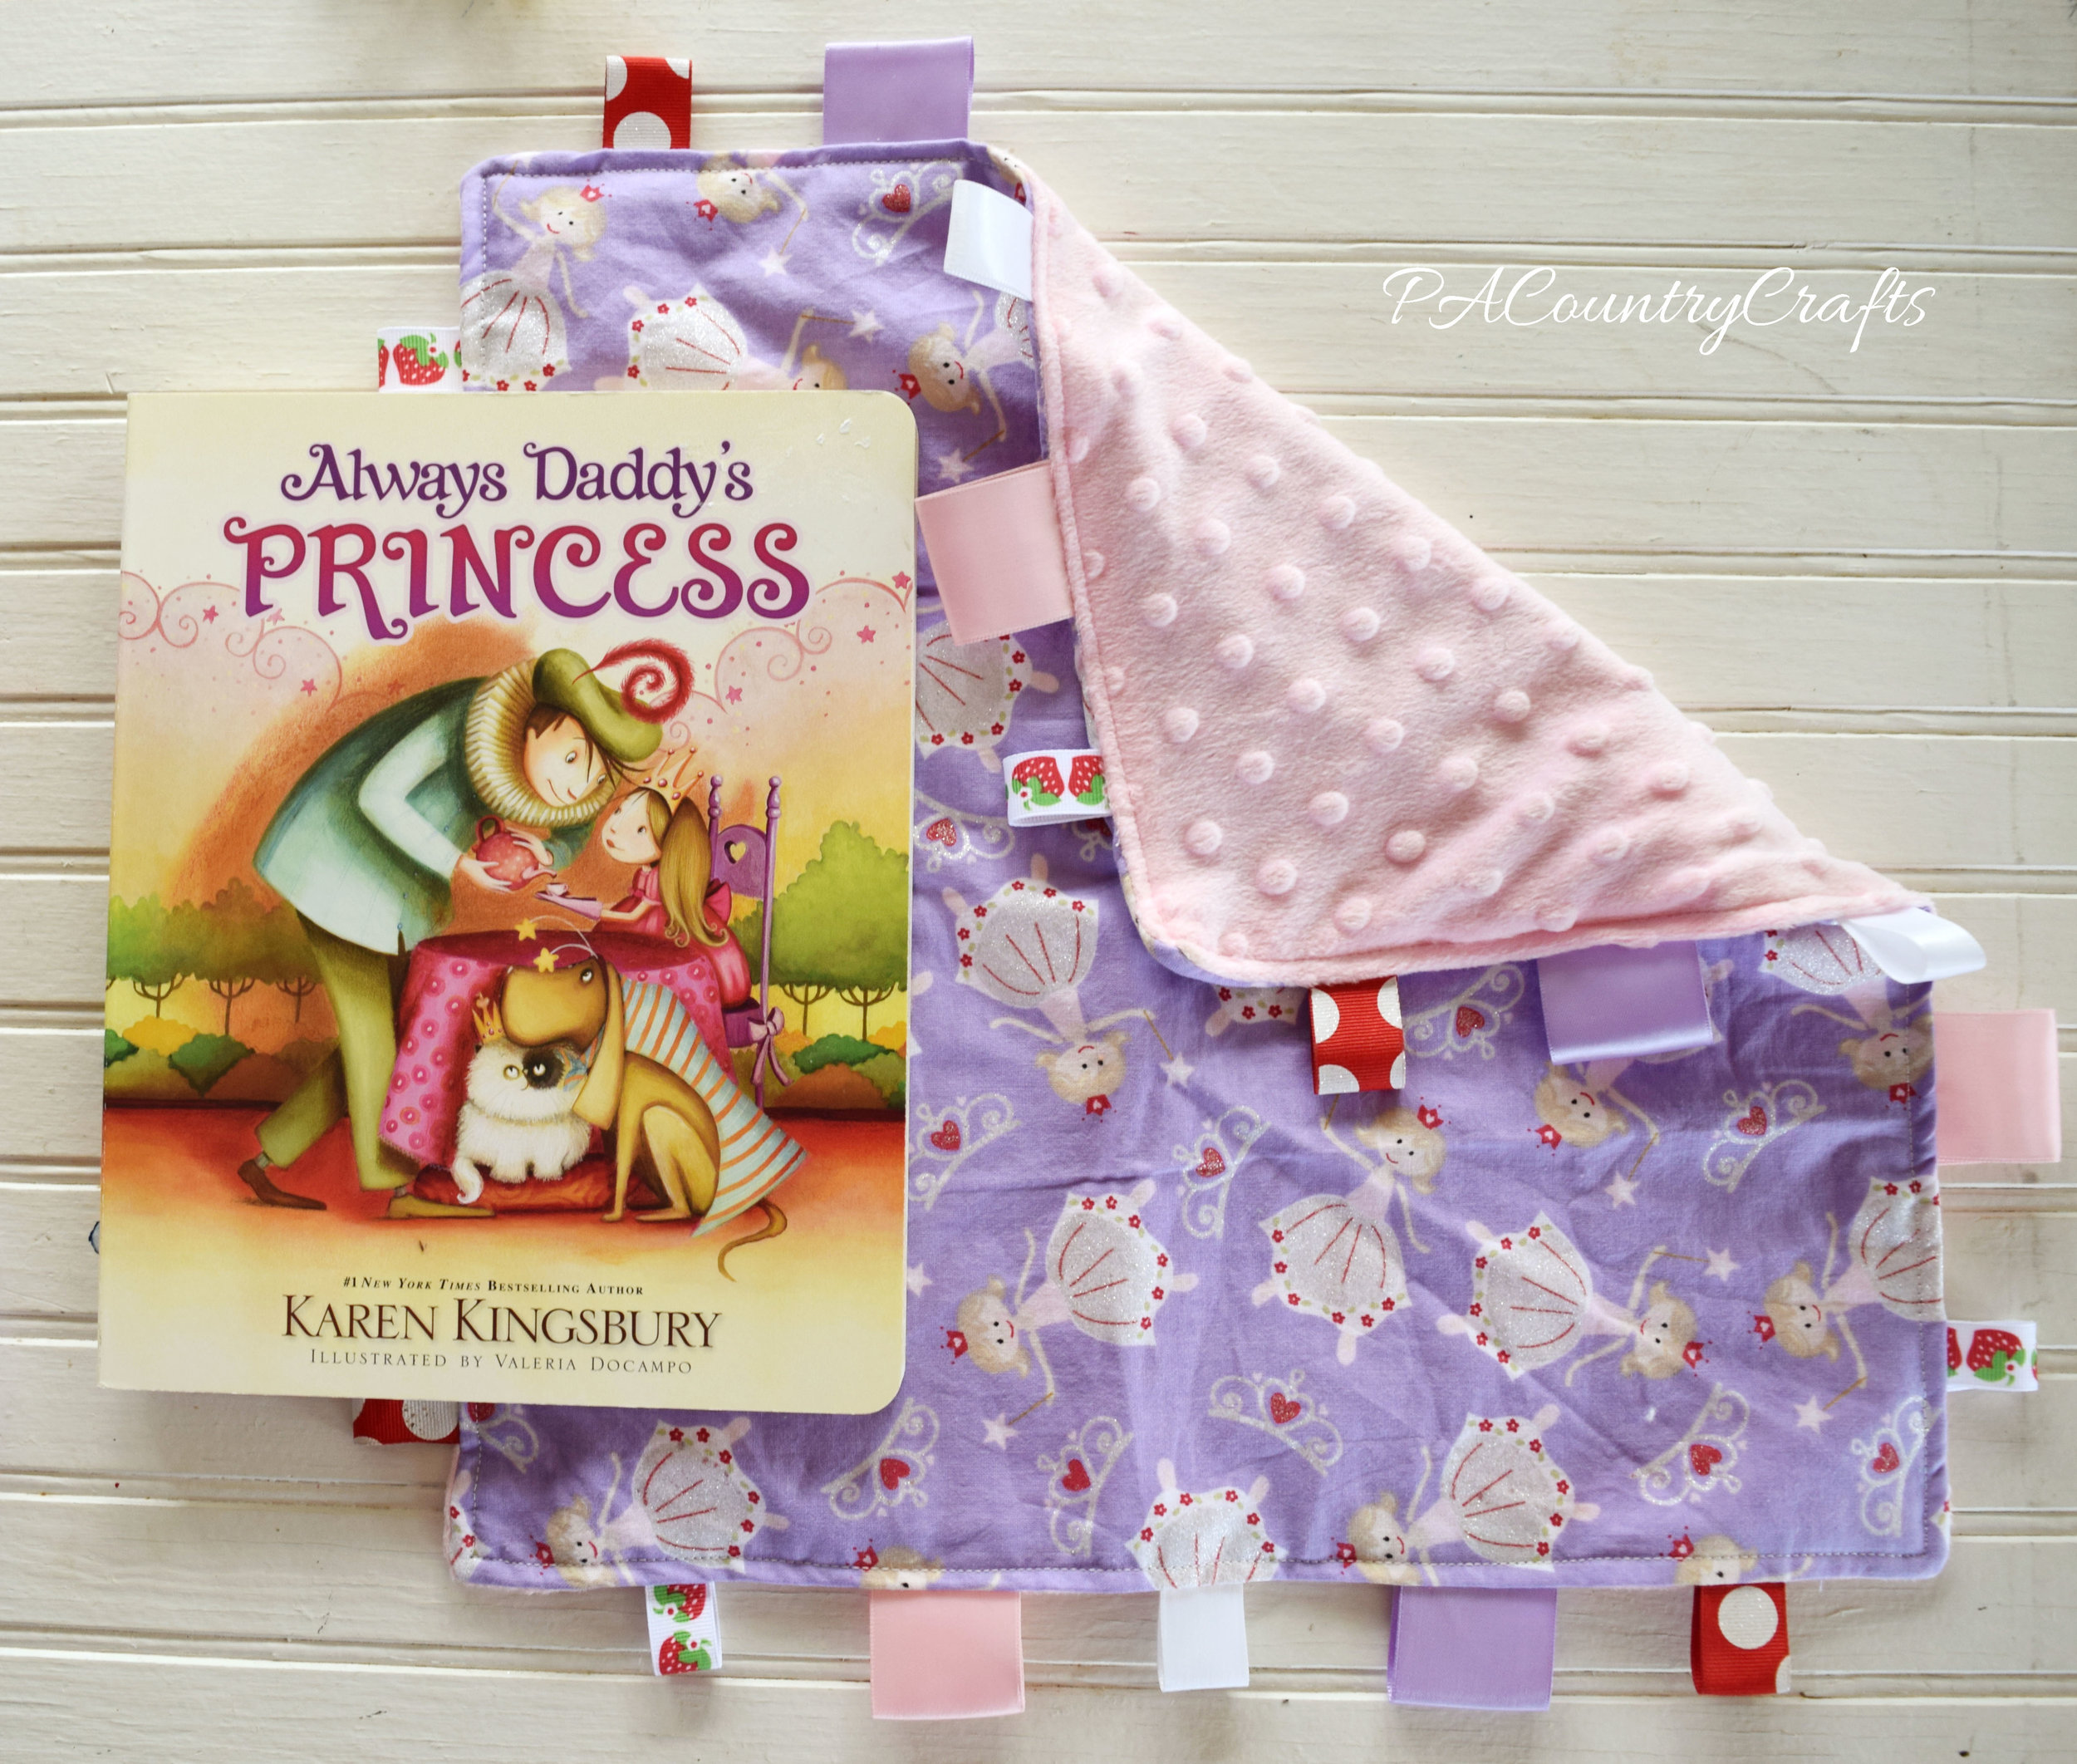
I just want to take a moment to point out that if I ever sew something for you using minky fabric, you are really special. I hate working with that stuff! It is so slippery and a huge pain to work with.

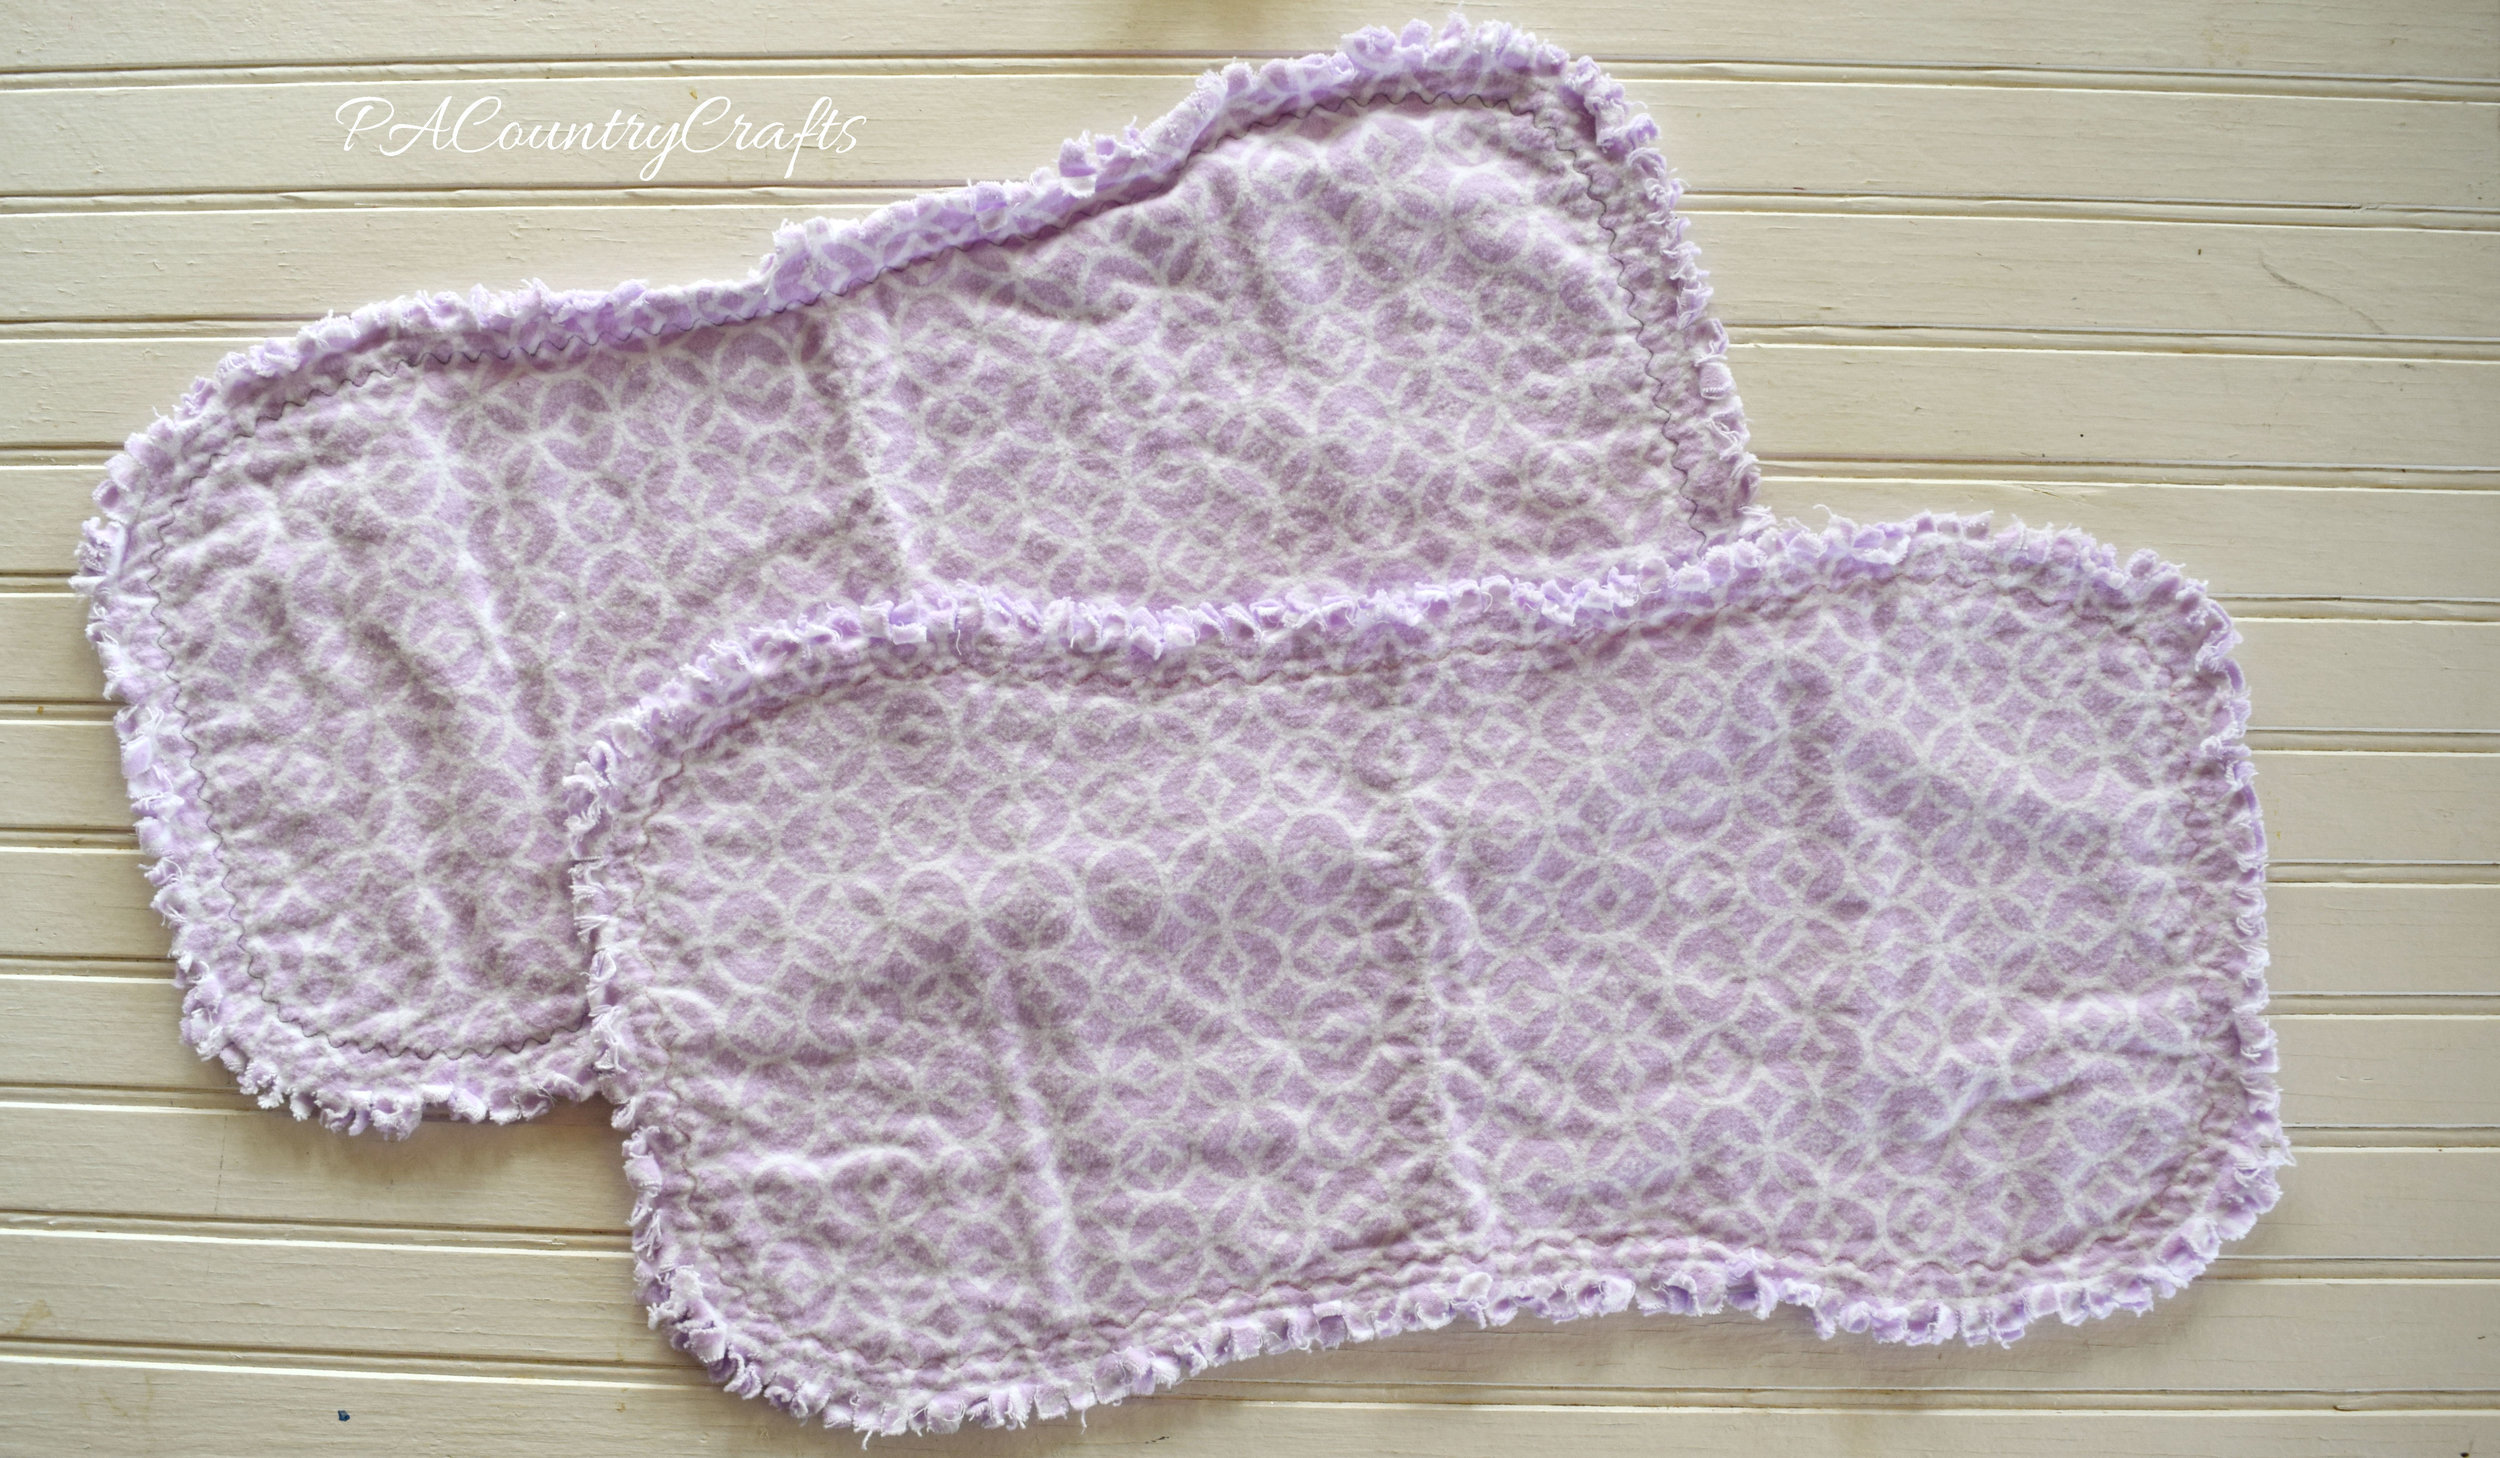
My 11yo wanted to sew something, too. So, we made these flannel rag edge burp cloths. I did the quality control work and the decorative stitching around the edges.

flannel rag edge burp cloths

decorative stitching on flannel rag edge burp cloths

flannel rag edge burp cloth details

pink, purple, and red baby shower gift

Finally, I got a stuffed dog and added pink bows to make it more girly and coordinate with the gift and sit on top of the lamper.

Add ribbon bows to make a stuffed animal match the gift.

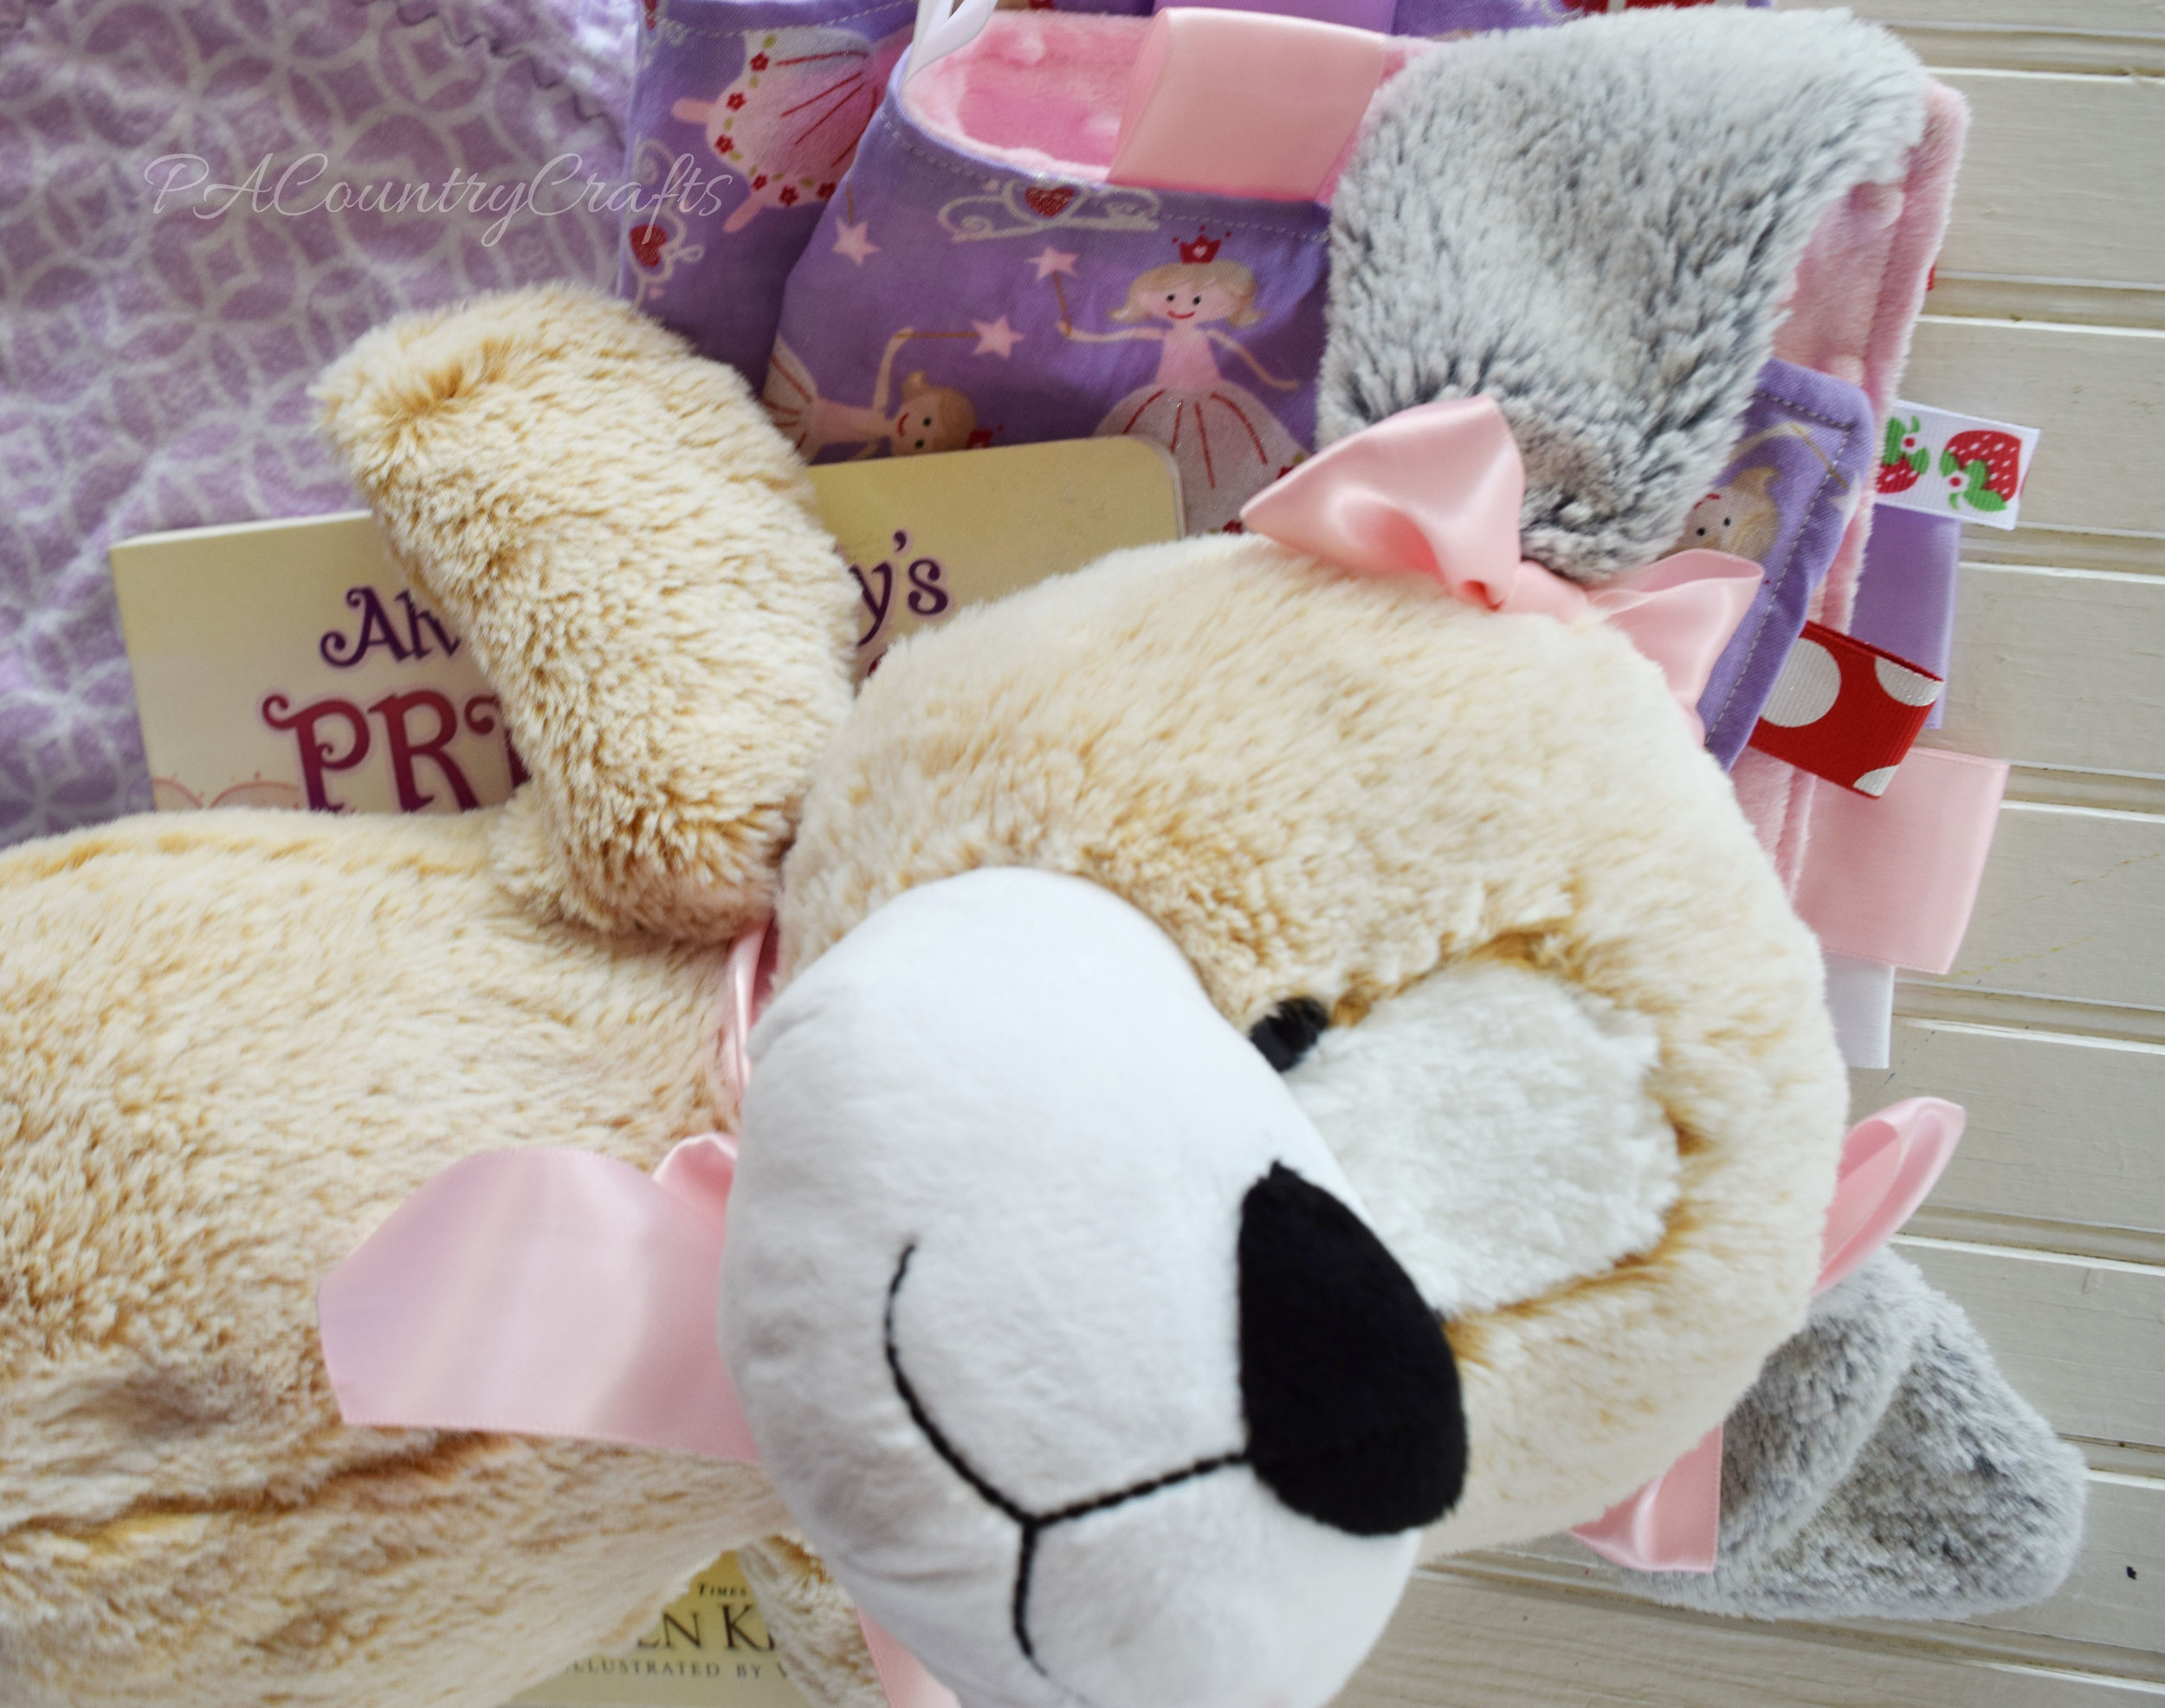
Everything went together so well, so I was really happy with it. It made a nice gift combined with the lamper, mom's blanket, books, some of our favorite tried and true baby products, diapers, and more. We are really excited about this baby girl!!!

Purple princess theme DIY baby shower gift

As I said, I really love making things for babies. Here are a few posts you might also be interested in...

Flannel Rag Edge Baby Blanket Tutorial

Vintage Baby Dress Collar Tutorial

Turn old baby clothes into a memory bear.

I LOVE Baby Girl Sewing!

Regular to Maternity Shirt Refashion

Peanut Butter and Jelly French Toast Roll-Ups

Since we had a snow day, I decided to make a nice breakfast for the kids. I am not so great at early mornings (see my freezer breakfast solution HERE) but I can handle a nice, late breakfast on a relaxing day at home once in awhile. These are one of my kids' favorites. I always have an assortment of jelly (see HERE) so I can make a variety of them with very little effort.

Quick and easy breakfast idea- peanut butter and french toast roll-ups!

peanut butter and french toast french toast roll-ups

I have horrible lighting in my kitchen, especially on a snowy day, so please excuse my lousy pictures.

Spread peanut butter and jelly on bread. (Seeded Italian bread is not ideal, but it is what we had on hand.) On these I used strawberry, grape, and peach jams.

peanut butter and jelly french toast

Roll them up from the jelly side to the peanut butter side. The jelly oozes and the peanut butter is sticky and helps seal it up. The bread might break apart a bit, so just smoosh it together as needed. If you want to cut the crust off, you can do that, but I don't like to waste/encourage picky eating.

how to make peanut butter and jelly french toast

Mix one egg and a cup of milk in a dish- I use a soup bowl. Roll the bread around in the milk-egg mixture to coat.

french-toast-roll
 

Fry in a lightly greased pan on medium-low heat, rolling around to brown all of the outer edges.

how to make peanut butter and jelly french toast roll-ups

how to cook pbj french toast rolls

Remove from heat and sprinkle with powdered sugar.

You can make these in any flavor just by switching out the jelly! Peanut Butter and Jelly French Toast Roll-Ups

I love that these are so easy and add a little extra protein with breakfast. They really aren't that hard to make and it is something different to mix things up.

If you want to pin this for later...

A fun breakfast idea for the kids- peanut butter and jelly french toast roll-ups!

Here are some more recipes you might like...

Baked Omelet Roll

Make Your Own Uncrustables to Freeze

Bread Pudding

Crochet Snowflakes

I procrastinate. Especially with my craft projects.

If it doesn't have a deadline, who knows when it will be finished? I started crocheting snowflakes a really long time ago. It was at least 10 years, but some of them could be older.

Vintage inspired crochet snowflakes

I don't know what is wrong with me, but all of these unfinished projects make me feel like a failure. That is not at all what crafting is supposed to be like. I don't need any guilt or stress added to my life over something so silly.

Someone challenged me to think of a focus for my life for the year 2017. I have never really tried that sort of thing, but I think my goal for this year is best summed up by this: I want to get my act together! I got a planner (LOVE IT!!!) and I want to be more organized. I want to keep my home managably clean and clutter free. I want to finish projects I have started. I want to do all of this so that I can bless my family and bring more peace to my home. (Now, there wasn't a lot of peace in my Momma-flip-out-moment over intentionally-made messes yesterday, but that is another story).

So, these may just look like little crocheted snowflakes, but they mean more than that to me. I mean, I like them, but it is more about the tiny sense of accomplishment.

Beautiful and simple crochet snowflakes
Crochet snowflakes- so easy to make!

I don't have patterns for these. Most of them came from a very old book that my mom gave me that was made on a typewriter. A few I might have found online back in the days of dial-up internet. I guess everything about these is old in some way. It is fitting. They look sort of vintage.

tiny crochet snowflake
crochet snowflake
I love this star shaped crochet snowflake!

All I had to do to finish them was to block them. I put wax paper on a box and pinned them fast. Then, I watered down glue and painted it on them. (My daughters helped, too.) We took them off when they were dry the next day. It definitely wasn't hard or worth procrastinating for a decade.

how to block crochet snowflakes
Crochet snowflakes- so easy to make!

I am heading somewhere with all of these little projects from our craft day and you won't want to miss the final result!!!  If you missed the last few posts, you can click on the pictures below to see more...

DIY Rustic Twine Balls

I really didn't think these were going to work! On Martin Luther King, Jr. Day the girls and I had a "craft day" on their day off of school. We occasionally have themed days like this with special projects. (They have requested a baking day next time!) We had a craft day over Christmas break and made mason jar snow scenes, baked pine cones, and painted ornaments. This time, we worked on winter decor for our home.

I had seen twine balls on Pinterest, looked at several different tutorials, and then did my own thing anyway. I am kind of stubborn like that. I wasn't sure that it would work and after I shared it on facebook, several friends told me that theirs failed, so I was not very optimistic.

However, they turned out great!

DIY twine balls made with jute, balloons, and glue!
Easy to make twine ornament balls
how to make twine ornament balls- so simple and perfect rustic Christmas decor!

I just blew up some balloons to a small size and wrapped twine around them. We painted watered down glue all over the twine and let them dry for a day. So that they would get air flow all the way around, I covered a box with wax paper and pushed pins partway into the cardboard to set them on.  The next day, we used the pins to pop the balloons (holding onto the balloon end) and just pulled the deflated balloon out. Some tutorials called for cooking spray on the balloons, but I didn't like the thought of greasy twine decorations.

DIY Twine Balls
how to make twine balls

These were really simple and inexpensive to make. They definitely fit with the rustic, natural winter look I was going for. I can't wait to show you the rest of the decorations!

rustic twine balls for winter decor

You can see more of our winter decorations here…

Rustic Winter Pine Cone Centerpiece

After all of the Christmas decorations are put away the house can seem a little cold and empty. I wanted to create some neutral, rustic, winter decor to fill the gap a bit. I have a few Valentine's Day decorations, but if I put pink all over the place I would start a pretty big fight in this house since we have strong opinions on both sides about that color. Instead, I went with more natural elements (free stuff I gathered outside) for sort of a rustic, winter look.

pine cone box centerpiece

The first thing I made was this pine cone centerpiece. My husband had built me a box that will hold mason jars for a centerpiece. I had yet to fill it with anything and I was inspired by a centerpiece on Pinterest that has a bad link. I stained my box with a weathered gray stain and topped it with dark walnut antiquing wax.

winter pine cone centerpiece

I found two pillar candles in a cupboard. They aren't even the same color, but I don't care.

natural winter centerpiece

Next, my daughter and I went for a walk and collected pine cones. They were wet from being outside, so we baked them in the oven at 200 degrees Fahrenheit for an hour or two on a foil lined cookie sheet. This makes them open up and draws out the sap and bugs. I spray painted them with a little ivory just to dust them and give them a frosty coating.

how to bake pine cones
How to open pine cones

Finally, we arranged everything in the box with some white berry picks. Those were on clearance after Christmas and the only thing I had to actually buy for this project.  I really think arranging everything in the box was the hardest part. I also dabbed a bit more white paint on the edges of the pine cones for more contrast.  Some of the pine cones went missing before I took these pictures, too. ;)

DIY frosted pine cones
rustic winter centerpiece box

I like my little box and it will be fun to change it out with the seasons. It isn't perfect, but the girls got to help and we made do with what we could find.

I have a few more rustic, winter decorating projects that I will blog about later this week!

Kitchen Organization for Lunchbox Stuff

I must admit, I am slowing down a bit on my decluttering and organizing around here. Part of it is my ambition fizzling out and part of it is the kids being home more. Nothing ruins a good cleaning spree like a phone call about an early dismissal. Speaking of school, my kids go through little spurts where they like to pack their lunches. I used to encourage lunch packing quite a bit more, but frankly, I just got burned out. One year of packing three custom lunches and a snack every day wore me down. I have more of a "whatever" attitude about it now.

I still have a lot of lunch packing supplies- plastic containers, thermoses, etc. They can trash a cupboard pretty quickly. In a perfect world, I would have an entire area just designated to lunchbox stuff where everything is in one place, but my kitchen just isn't set up that way. I gotta' make do.

So, of course, I resorted to plastic bins from the Dollar Tree. They corral most of the plastic containers. I also sometimes use old food storage containers with missing lids. The white one holds my plastic mason jar lids.

lunchbox supplies organization

I like to use the plastic sandwich boxes because their sandwiches don't get smashed. The XS size Glad containers are a perfect snack size for elementary lunches! Also, a friend of mine sent reusable pouches for applesauce when my daughter had sever poison ivy all over her face and lips and couldn't open her mouth wide enough to eat much.

how to organize lunchbox containers

The older girls conned me into buying some cute sectioned containers that they don't really use.

lunchbox container organization

Some of the lunchbox goodies have to be stored in the fridge. I love the plastic baskets with the handles in front since I am short (they have them at our local Dollar Tree in cute colors right now!) It keeps everything in the fridge so much neater!

how to organize refrigerator shelves

The pink basket holds little things for lunchboxes, like yogurt cups and snacks. They would be a mess left loose in the fridge and I keep them up high or they will be gobbled up really quickly in this house. Remember those little Glad containers from a few pictures up? Well, those make perfect DIY jello cups! I also like to make my own granola bars and put them in snack bags.

homemade lunchbox snacks

The white basket is for jelly. We always have an assortment. (See THIS post for jelly recipes!)

how to organize jelly jars

I keep the soup thermoses with the water bottles (see HERE), but maybe I should pitch some of those divided containers and move them. The water bottles need to be kept at a more convenient spot because we use them more often. The actual lunchboxes are stored on the bottom shelf of my bakers rack in a big wire basket. I keep them low so the kids can put them away easily- they are supposed to empty their lunchboxes as soon as they get home.

These are just a few practical things that have helped to corral the mess. You can see my other kitchen organizing posts HERE and HERE.

If you have any organizing tips, I would love to hear them! I am always trying to make things more efficient!