Rag Edge Flannel Baby Blanket Tutorial

ragedgeflannelblanket.jpg
Flannel Rag Edge Baby Blanket Tutorial
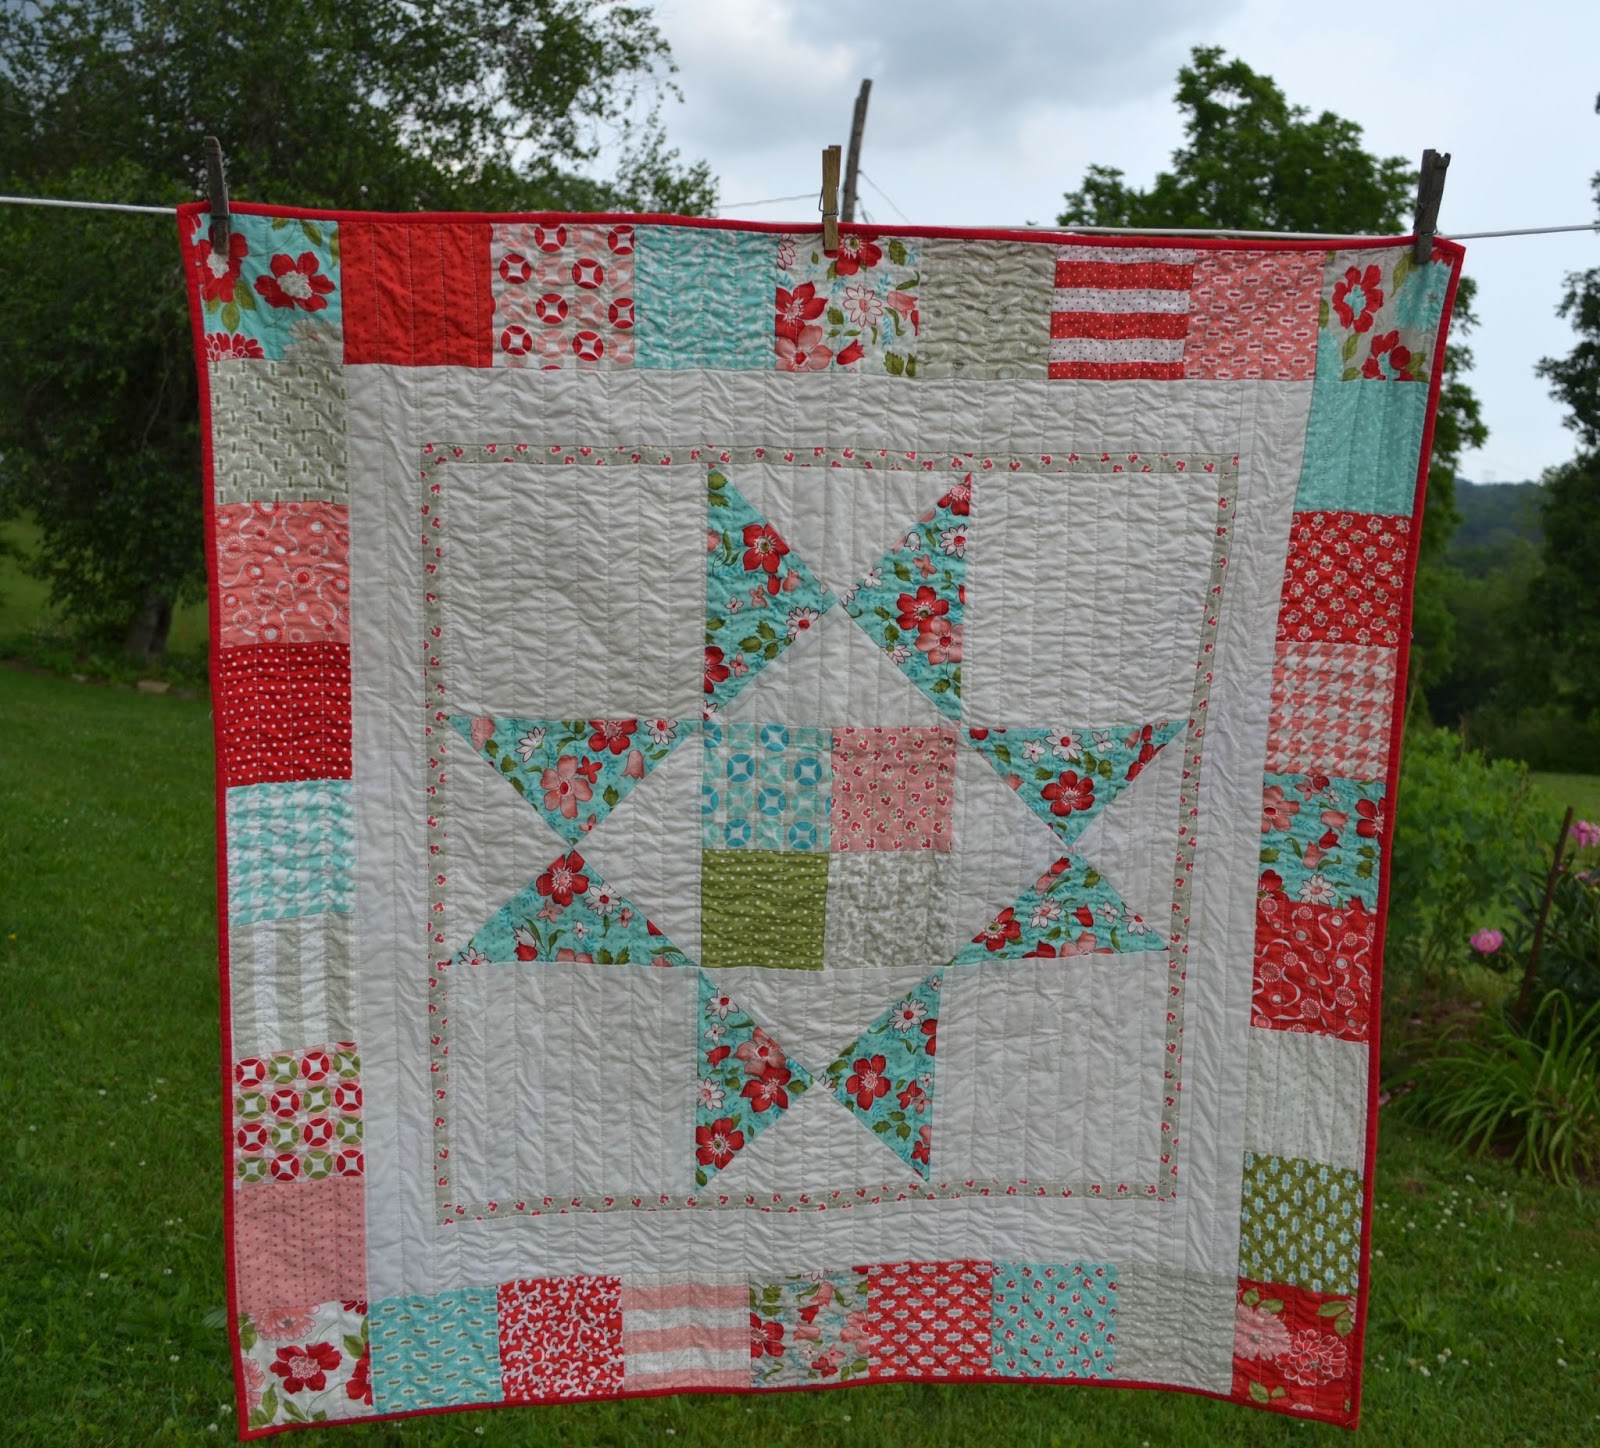
These rag edge flannel blankets are my go-to baby gift. Sometimes I make bibs, burp cloths, and taggy blankets to make it a complete set. With just two layers of flannel, it is a nice weight without being too heavy. The rag edge is soft and popular with babies, too. :) This is what it looks like after just one washing, but it will get more frayed over time.
Flannel Rag Edge Baby Blanket Tutorial
These are so simple to make. Here is a little DIY tutorial for you:
For this blanket, I used two different, yet matching flannel fabrics. I got 1 1/4 yard of each to make the blanket relatively square. You can make it larger or smaller. Whatever you want...
Tape your backing flannel to a flat surface with the right side down. I prefer to use my kitchen table and I use masking tape. Make sure to get all of the wrinkles out.
Flannel Rag Edge Baby Blanket Tutorial
Lay the top layer over the bottom layer with the right side up. The wrong sides will be together. Smooth it out really well and use curved safety pins to baste. Start in the middle and place pins every few inches in a grid form working your way to the outside.
Flannel Rag Edge Baby Blanket Tutorial
Remove the tape. I spread the blanket out on the floor to give me a little more room to work at this point. Trim off any selvage edges.
Flannel Rag Edge Baby Blanket Tutorial
Square up your blanket by folding it in triangles. Check each side. Mine didn't turn out quite square. Whatever...
Flannel Rag Edge Baby Blanket Tutorial
Trace a plate or something round on the corners. Rounded corners are a little easier later.
Flannel Rag Edge Baby Blanket Tutorial
Use a washable marker to trace diagonal lines and lines going through the centers of each side.
Flannel Rag Edge Baby Blanket Tutorial

Now for the sewing... 
From the very center point make a few small stitches and then increase your stitch length. Sew from the center to the outside on the line you drew. Repeat for each line, starting at the center each time.
Flannel Rag Edge Baby Blanket Tutorial
Sew around the outer edge of the quilt about 1/2" from the edge. Then, sew around the edge of the blanket again about an inch from the edge. I like to use two different colors of thread and a fancy stitch on my machine. When you are done, snip the edges of the blanket every 3/8" or so. Try not to get too close to the first stitching line.
Flannel Rag Edge Baby Blanket Tutorial
Wash the blanket and put it in the dryer on low heat. It will make the edge fray out nicely and get rid of those washable marker lines.
Flannel Rag Edge Baby Blanket Tutorial

Link Parties where I sometimes hang out...

Vintage Modern Charm Square Star Quilt

vintagemodernquilt4.jpg
Finally! Another quilt finish! :)

These pics are a little dark since a storm was rolling in... I am gonna' call it dramatic.

I used the Storybook Stars pattern from Moda Bake Shop HERE.

I did straight line quilting on my sewing machine. It is OK. I like wavy lines like I did HERE better.

It is backed in some more Vintage Modern fabric and I used red Kona for the binding.

I don't even know what I am going to do with this quilt, but it is finished! Hooray!

Link Parties where I sometimes hang out...

Vintage Baby Dress Collar Tutorial

vintage-baby-collar-puffy-sleeves-dress.jpg

Here it is! The last Easter dress for this year!

Vintage Baby Dress Collar Tutorial

I let the other girls have a little say (or a lot) in their dress designs. Hannah doesn't care. It is fantastic!

Vintage Baby Dress Collar Tutorial

I wanted it to be simple. So unlike me, I know! I wanted little hints of blue and a sweet, vintage baby look.

Vintage Baby Dress Collar Tutorial

Then, because I can't really let things be simple, I went over the top (after Easter) with a bonnet, shoes, and a diaper cover. Well, I didn't finish the diaper cover quite yet. I'm procrastinating...

Vintage Baby Dress Collar Tutorial

The bonnet is the Peekaboo Bonnet pattern I bought

HERE

. You can see the first one I made

HERE

when she was so teeny tiny. *sniff, sniff*

It is actually reversible, too.

Vintage Baby Dress Collar Tutorial

As you can see by these before and after pictures, she prefers not to wear the bonnet.

But, it keeps her safe from the sun, so too bad!

The shoes were made with

THIS

pattern. They went together pretty well, but this is the second time I have made baby shoes and the little buggers do not want to stay on. I guess all baby shoes are like that, but they look cute anyway. :)

Vintage Baby Dress Collar Tutorial

So, back to the dress...

It is just a basic dress with puffy sleeves, a collar, and buttons in the back. I was a little intimidated by the collar, but it isn't hard after all.

Vintage Baby Dress Collar Tutorial

I didn't take too many pictures as I was sewing (and it really isn't anything wildly original anyway), but I did get enough to show you how I did the collar.

Vintage Baby Dress Collar Tutorial

So, get your dress pieces all cut out and ready to go...

Vintage Baby Dress Collar Tutorial

Sew the shoulders seams of the front and back bodice pieces of the main fabric and lining.

Vintage Baby Dress Collar Tutorial

Use the sewn bodice, folded in half, to draft a collar pattern. It needs to extend

out

1/4" in the center for seam allowances and shift 

in

3/4" at the back for the button closure.

Vintage Baby Dress Collar Tutorial

Cut two contrasting collars and two linings (they can be the same fabric, but I was making do.) Interface one side of each collar- I used a midweight interfacing.

Vintage Baby Dress Collar Tutorial

Sew the right sides together using 1/4" seam allowance and clip the curves.

Vintage Baby Dress Collar Tutorial

Flip and press really well, then sandwich the collars between the main fabric and lining. To hold the collar in place nicely, topstitch the edge of the bodice underneath the collars. This will hold the seam allowance in place and keep the collar from flipping up.

Vintage Baby Dress Collar Tutorial

If you want to make trimmed, puffy sleeves like these, Jess has a great tutorial 

HERE 

(although mine have a little more poof at the top.) The rest of the dress was made just like my Gracie Dress shown 

HERE 

and I cut the skirt from the edge of the sheet (no hemming! Woohoo!) 

Vintage Baby Dress Collar Tutorial

Here are the rest of the dresses in case you missed them...

Lydia's Sweetheart Dress
Gracie Dress Tutorial

Until next year... 

OK. Not really. I have a few more tutorials and fun projects in the works here. If you don't want to miss out on that you can follow my blog with GFC,

RSS feed

bloglovin

' or subscribe by email over there on the sidebar. I am also on

Pinterest

and

Facebook

!

Link Parties where I sometimes hang out...

Sew Can Do

Motivate Me Monday

Anything Goes Monday,

Take a Look Tuesday

Naptime Creations

Carolyn's Homework

The Winthrop Chronicles

,

 Handmade Tuesdays

,

Inspire Me Wednesday

We Did It Wednesday

Adorned From Above

Your Whims Wednesday,

Not Just a Housewife

Weekly Homemaking Party

,

Create It Thursday

The 36th Party

Friday Favs Party

Saturday Sewing

Think Pink Sunday

, and 

Threading Your Way

.

What Moms Really Need for Mother's Day

tantrum.jpg

I want to be totally honest.

I am not Super Mom.

Things are not always sunshine and roses around here. Yes, I squeeze in a lot of crafty things, but there are a lot of things I don't do.

When it comes to school, I am one of those slacker moms.

I don't check my kids' school folders. Yes, I know that I should. The first kid or two I was all over that. Now, not so much. If I get to it once or twice a week that is pretty good for me.

I don't do the homework thing. They need to learn to be responsible. I might as well start them young. Kindergarten homework is the worst. It is really homework for me. We are supposed to read X number of books during the month. I don't even know where April's calendar is. My brain is still back in March and now the calendar says May!?!

I don't keep a very clean house. Now, it isn't something that could be reported to the authorities, but there are cobwebs and dust bunnies and please, oh, please, don't ever look under the couch cushions. The kids have there own methods of "cleaning" so just don't look. Things get cluttered up. That is an ongoing battle around here. I mop, but clean floors never last, and it even gets me locked out of the house in my nightie if I am not careful! (See that story here.)

I don't weed my flower beds. OK, I do weed them sometimes, but I am losing the battle here. I have to do some major work in those. Every other year I seem to find myself pregnant or having a young baby and that one in between year there was a yellow jacket nest... Excuses, I know. I like flowers, but you will only ever see me taking pictures of the pretty flowers up close- there are too many weeds underneath them.

I don't keep up on the mending, even though I sew. I reserve the iron for quilting and sewing- clothes go in the dryer or you are on your own. My husband knows how to starch his own shirts if he so chooses. I am happy if the clothes are washed. Line drying and/or folding earns me bonus points.

I don't keep my temper in check. I yell at the kids, at my husband, at other people when I am driving (although I have now scaled that back to calling them names that my Kindergartener might use and, yes, I called someone a "stupid stoopeyhead" and a "dummy" yesterday.) I even throw a tantrum sometimes.

But, I am doing the best that I can. And you know what? I bet you are, too.

C.S. Lewis said that Motherhood is the Ultimate Career. Well, I think it is also the Ultimate Challenge.

Mother's Day is coming up this month and everyone makes a big deal about getting Mom a nice gift- maybe flowers or a card or chocolate (hint, hint). I think what a mom really needs is some grace, compassion, encouragement, appreciation,...

And maybe some sleep. Oh, wait. Sleep? What is that? How did that get in there?

But, seriously, let's try to encourage each other and build each other up. Us moms can either criticize and judge (I am guilty right here) or we can  recognize that we may do things differently but we all love our children.

And while we are at it, let's cut ourselves some slack, too. Yes, we mess up. I mess up A LOT. This is the toughest job there is, after all. I can either dwell on it, or I can learn from it, ask for forgiveness, hope that my kids don't need counseling, and move on. They say the days are long, but the years are short. Yes, they are much too short for this negativity junk. In the words of Elsa, "Let it go!"

Happy Mother's Day!