Rustic Chicken Wire Photo Display

I think my 17yo son inherited some of my crafty genes. When I took him school shopping he asked to go to craft stores to get inspiration for his girlfriend's birthday gift. I didn't mind. ;) They are renovating her bedroom, so he wanted to make something for her new room. He combined inspiration from a few different pieces that we saw, made a small tray for a practice run, then built the final product.

Rustic chicken wire photo display made from lath

He chose the paint colors (the aqua will match her decor) and did everything by himself. The back of the display is made of plaster lath so it has a rough texture that looks really rustic when painted.

Paint strips of lath for a rustic photo display

His sisters also wanted to make something for her birthday. They insisted that I was not allowed to help them, but somehow blamed me when things didn't work. (You can't hot glue shells to wet sand!) On the third attempt, after much fighting and drama, they finally succeeded.

Sand and seashell frame kids craft

Hopefully she likes to decorate with pictures. :)

Mod Podge Toy Doghouse

My parents have a great tradition with the grandchildren. When they reach a certain age, they are treated to a birthday dinner out/shopping spree/sleepover. My kids really enjoy it. They love having some one on one time with them and getting a break from their siblings! Last year, my dad helped my 9yo build a toy doghouse for some stuffed animals she chose on her shopping spree. She brought it home to have me help her decorate it. We finally got around to it a year later. I am going to let her tell you about it!

mod-podge-toy-doghouse

Scalloped Mod Podge roof made from scrapbook paper circles

Cut out flowers from scrapbook paper to use in mod podge crafts!

Cute kids craft using paint, scrapbook paper, and mod podge!

Wood play doghouse with removable side

~~~~~~~~~~~~~~~~~~~~~~~~~~~~~~~~~~~~~~~~~~~~~~~~

Hi! I'm Lydia. I have 2 stuffed dogs named Sky and Rose. My Pappy and I built a doghouse for my dogs.

Wooden Toy Doghouse
 

Then, my mom helped me decorate the doghouse and it was looking pretty good! First, I decorated the roof. We punched circles out of scrapbook paper. Then, we used Mod Podge to glue them on the roof.

paper-punch-scrapbook-roof
 

Some of them stuck out over the edge so we had to sand them off.

Sand paper edges when using Mod Podge!

how-to-make-a-scalloped-pap
 

Next, I painted the outside of the house red and the inside aqua. Then, we cut out windows, flowers, and butterflies from the leftover paper. We used Mod Podge to put them on, too.

brush-mod-podge-on-wood

lydia-mod-podge-flowers

how-to-make-a-paper-window
 

Last, Mom painted grass, stems, and leaves on the sides of the house.

Use floral scrapbook paper to create flowers with Mod Podge!

My doghouse turned out beautiful!

lydia-with-doghouse

circle-punch-mod-podge-roof

mod-podge-window

Kids craft toy doghouse makeover

~~~~~~~~~~~~~~~~~~~~~~~~~~~~~~~~~~~~~~~~~~~

Thank you, Lydia! The before and after is pretty impressive. I was glad that we could work together on this. It is sometimes hard for me to let go of my perfectionism and let the kids have control of the craft projects. She did a great job!

If you want to pin it for later...

Wow! Look at this toy doghouse makeover!

You may also like...

hippo

no-sew-felt-play-mat

scrapbook-paper-frame

Sweet Caroline

sweet-caroline_edited-1-1.jpg

My great-grandmother, Caroline, was Bohemian; so "boho" means a little something different to me because I think of her.  I remember her fierce hugs and the stories of her spunk and determination. Widowed, with three young children, she moved from the city to rural PA and married a bachelor farmer.  I have always thought she was brave, and I wouldn't be here if she hadn't taken a chance. Characteristic of her generation, she was very resourceful.  My baby quilt is pieced from flour sacks and her quilt templates were cut from old cereal boxes. One Christmas, we all got stuffed pigs made from polyester scraps.  She also worked hard and never gave up. She had to quit school to help at home, but got her GED in her 80s because it was something that she had always wanted to do. I still remember her showing us the certificate hanging proudly in the frame on her living room wall. She made the best out of any situation with creativity and determination. That is a bit of what I tried to do this week. We had 2 feet of snow and 3 snow days, so I had to "make do" with what I had on hand, although it meant a lot more work. In the end, both outfits cost less than $5 to make and all that I had to purchase when I finally was able to leave the house was some thread, embroidery floss, and buttons.

Boho week for Project Run and Play!

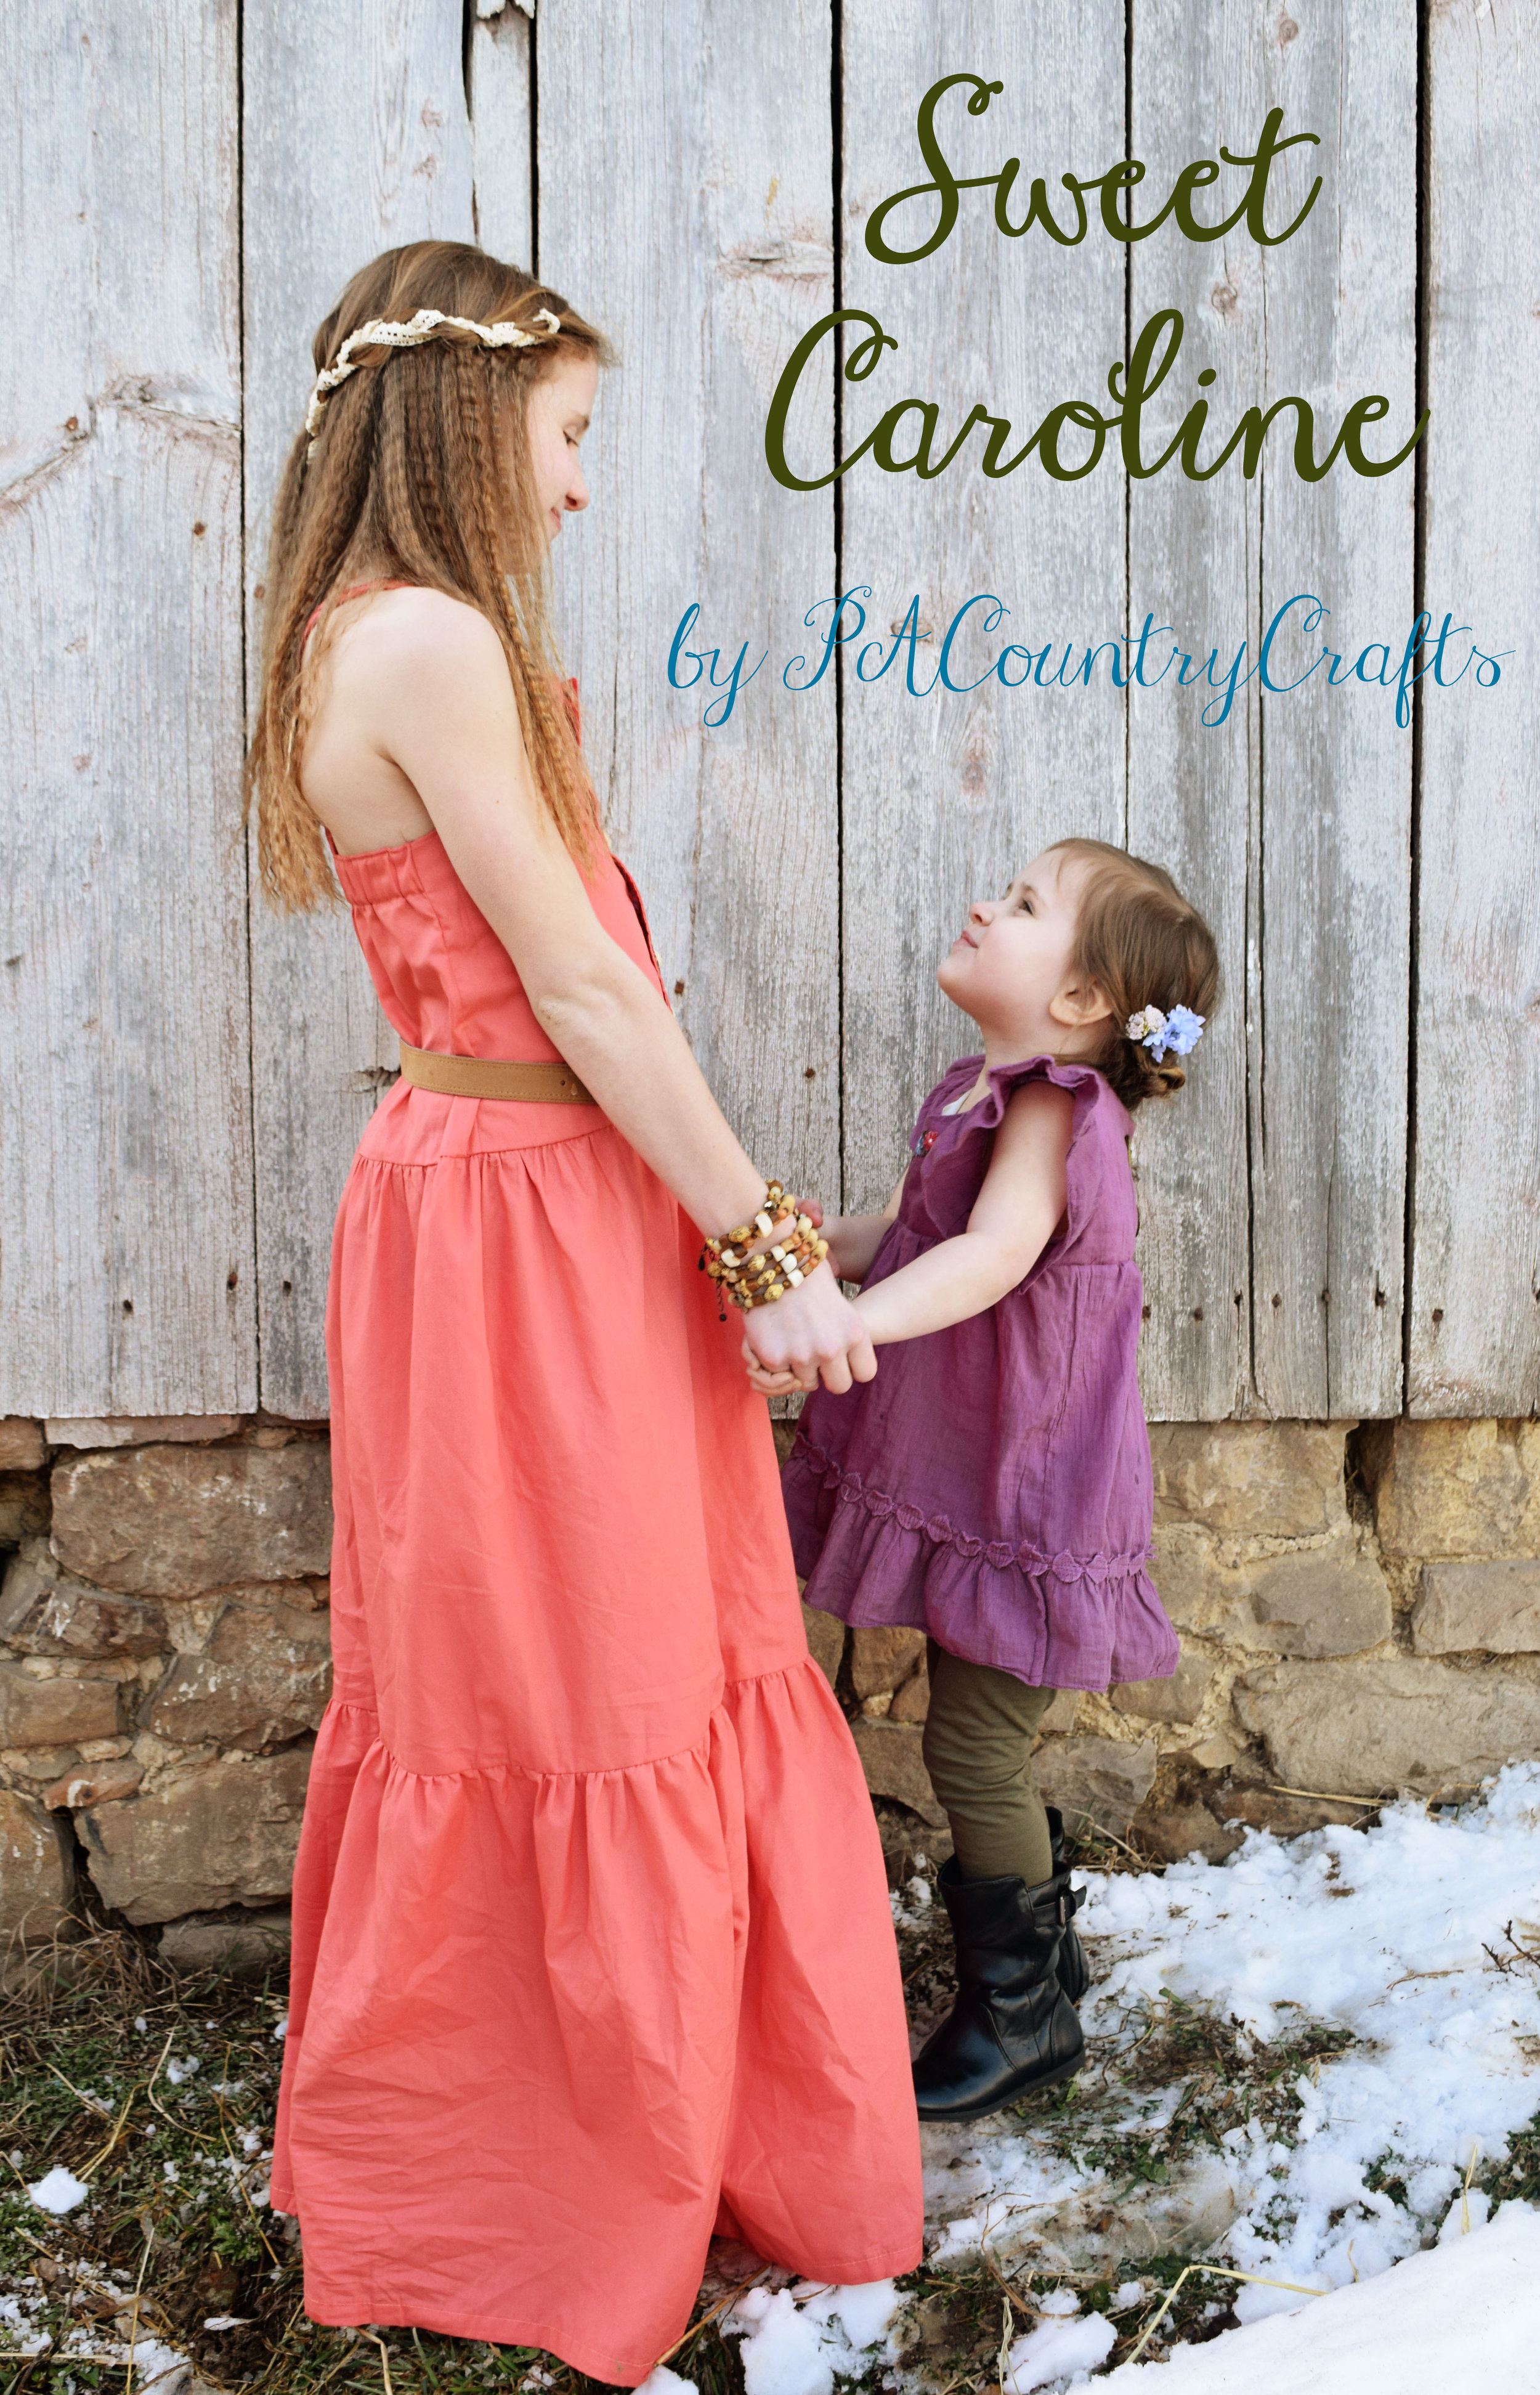
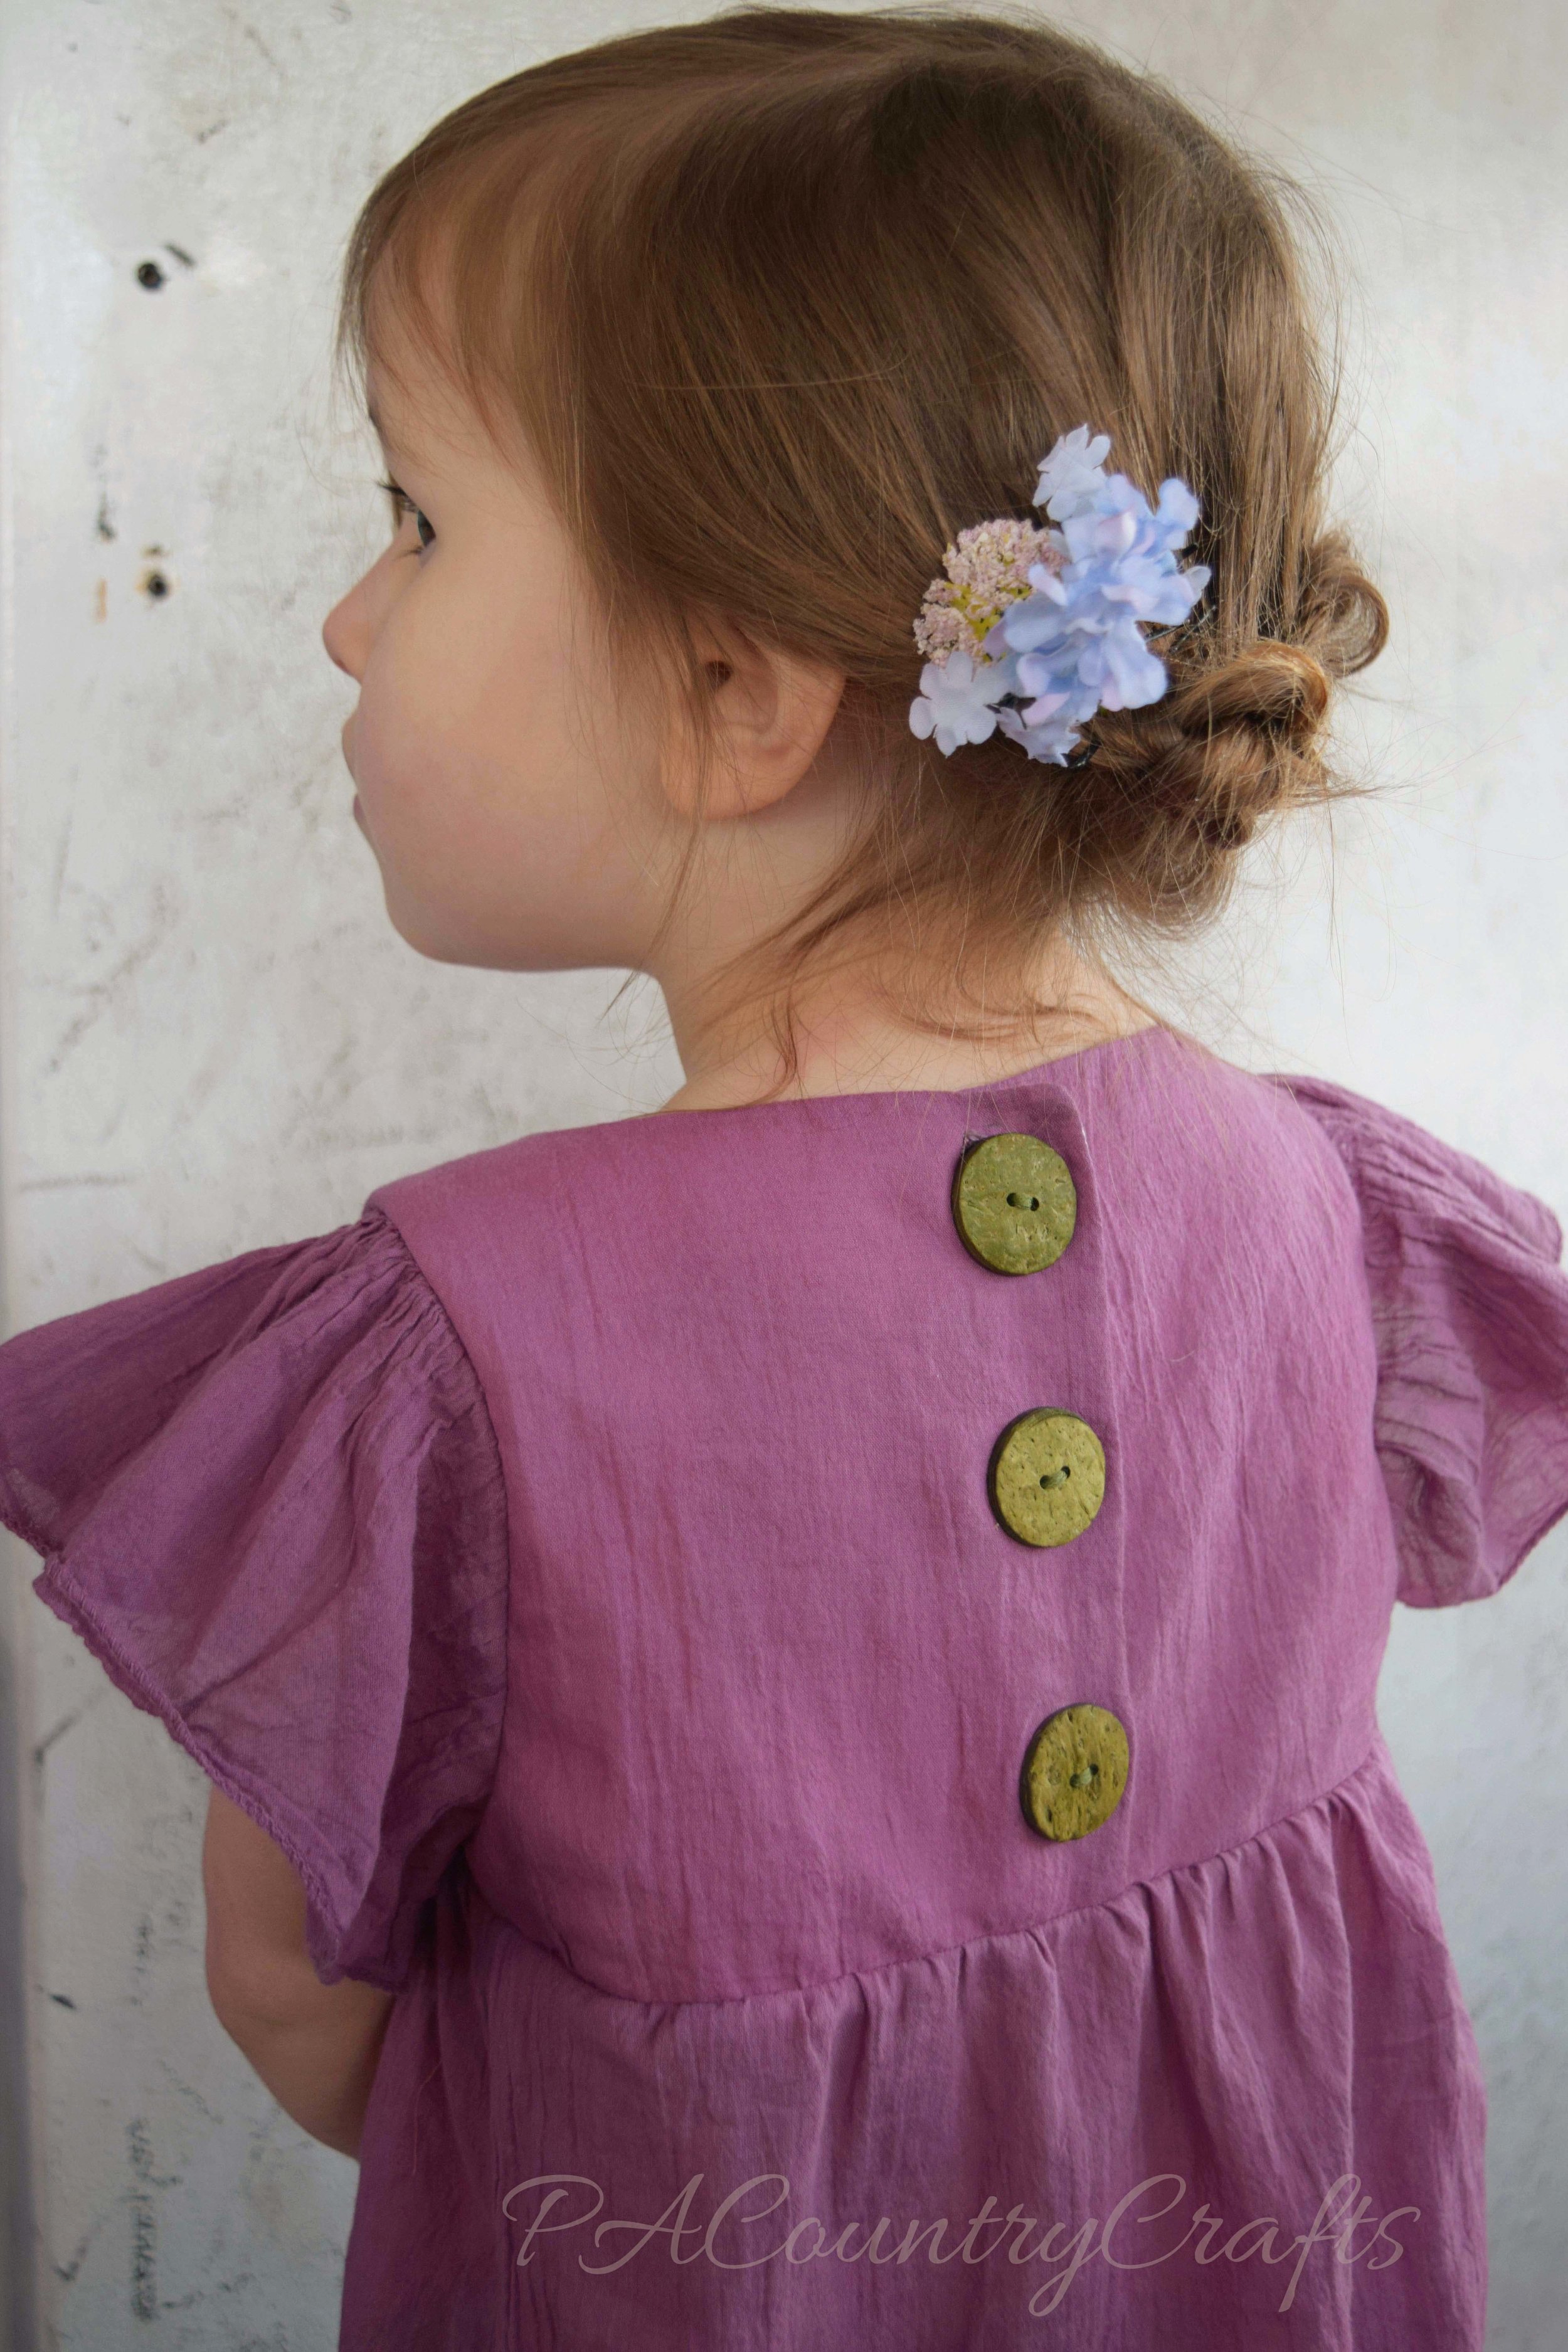
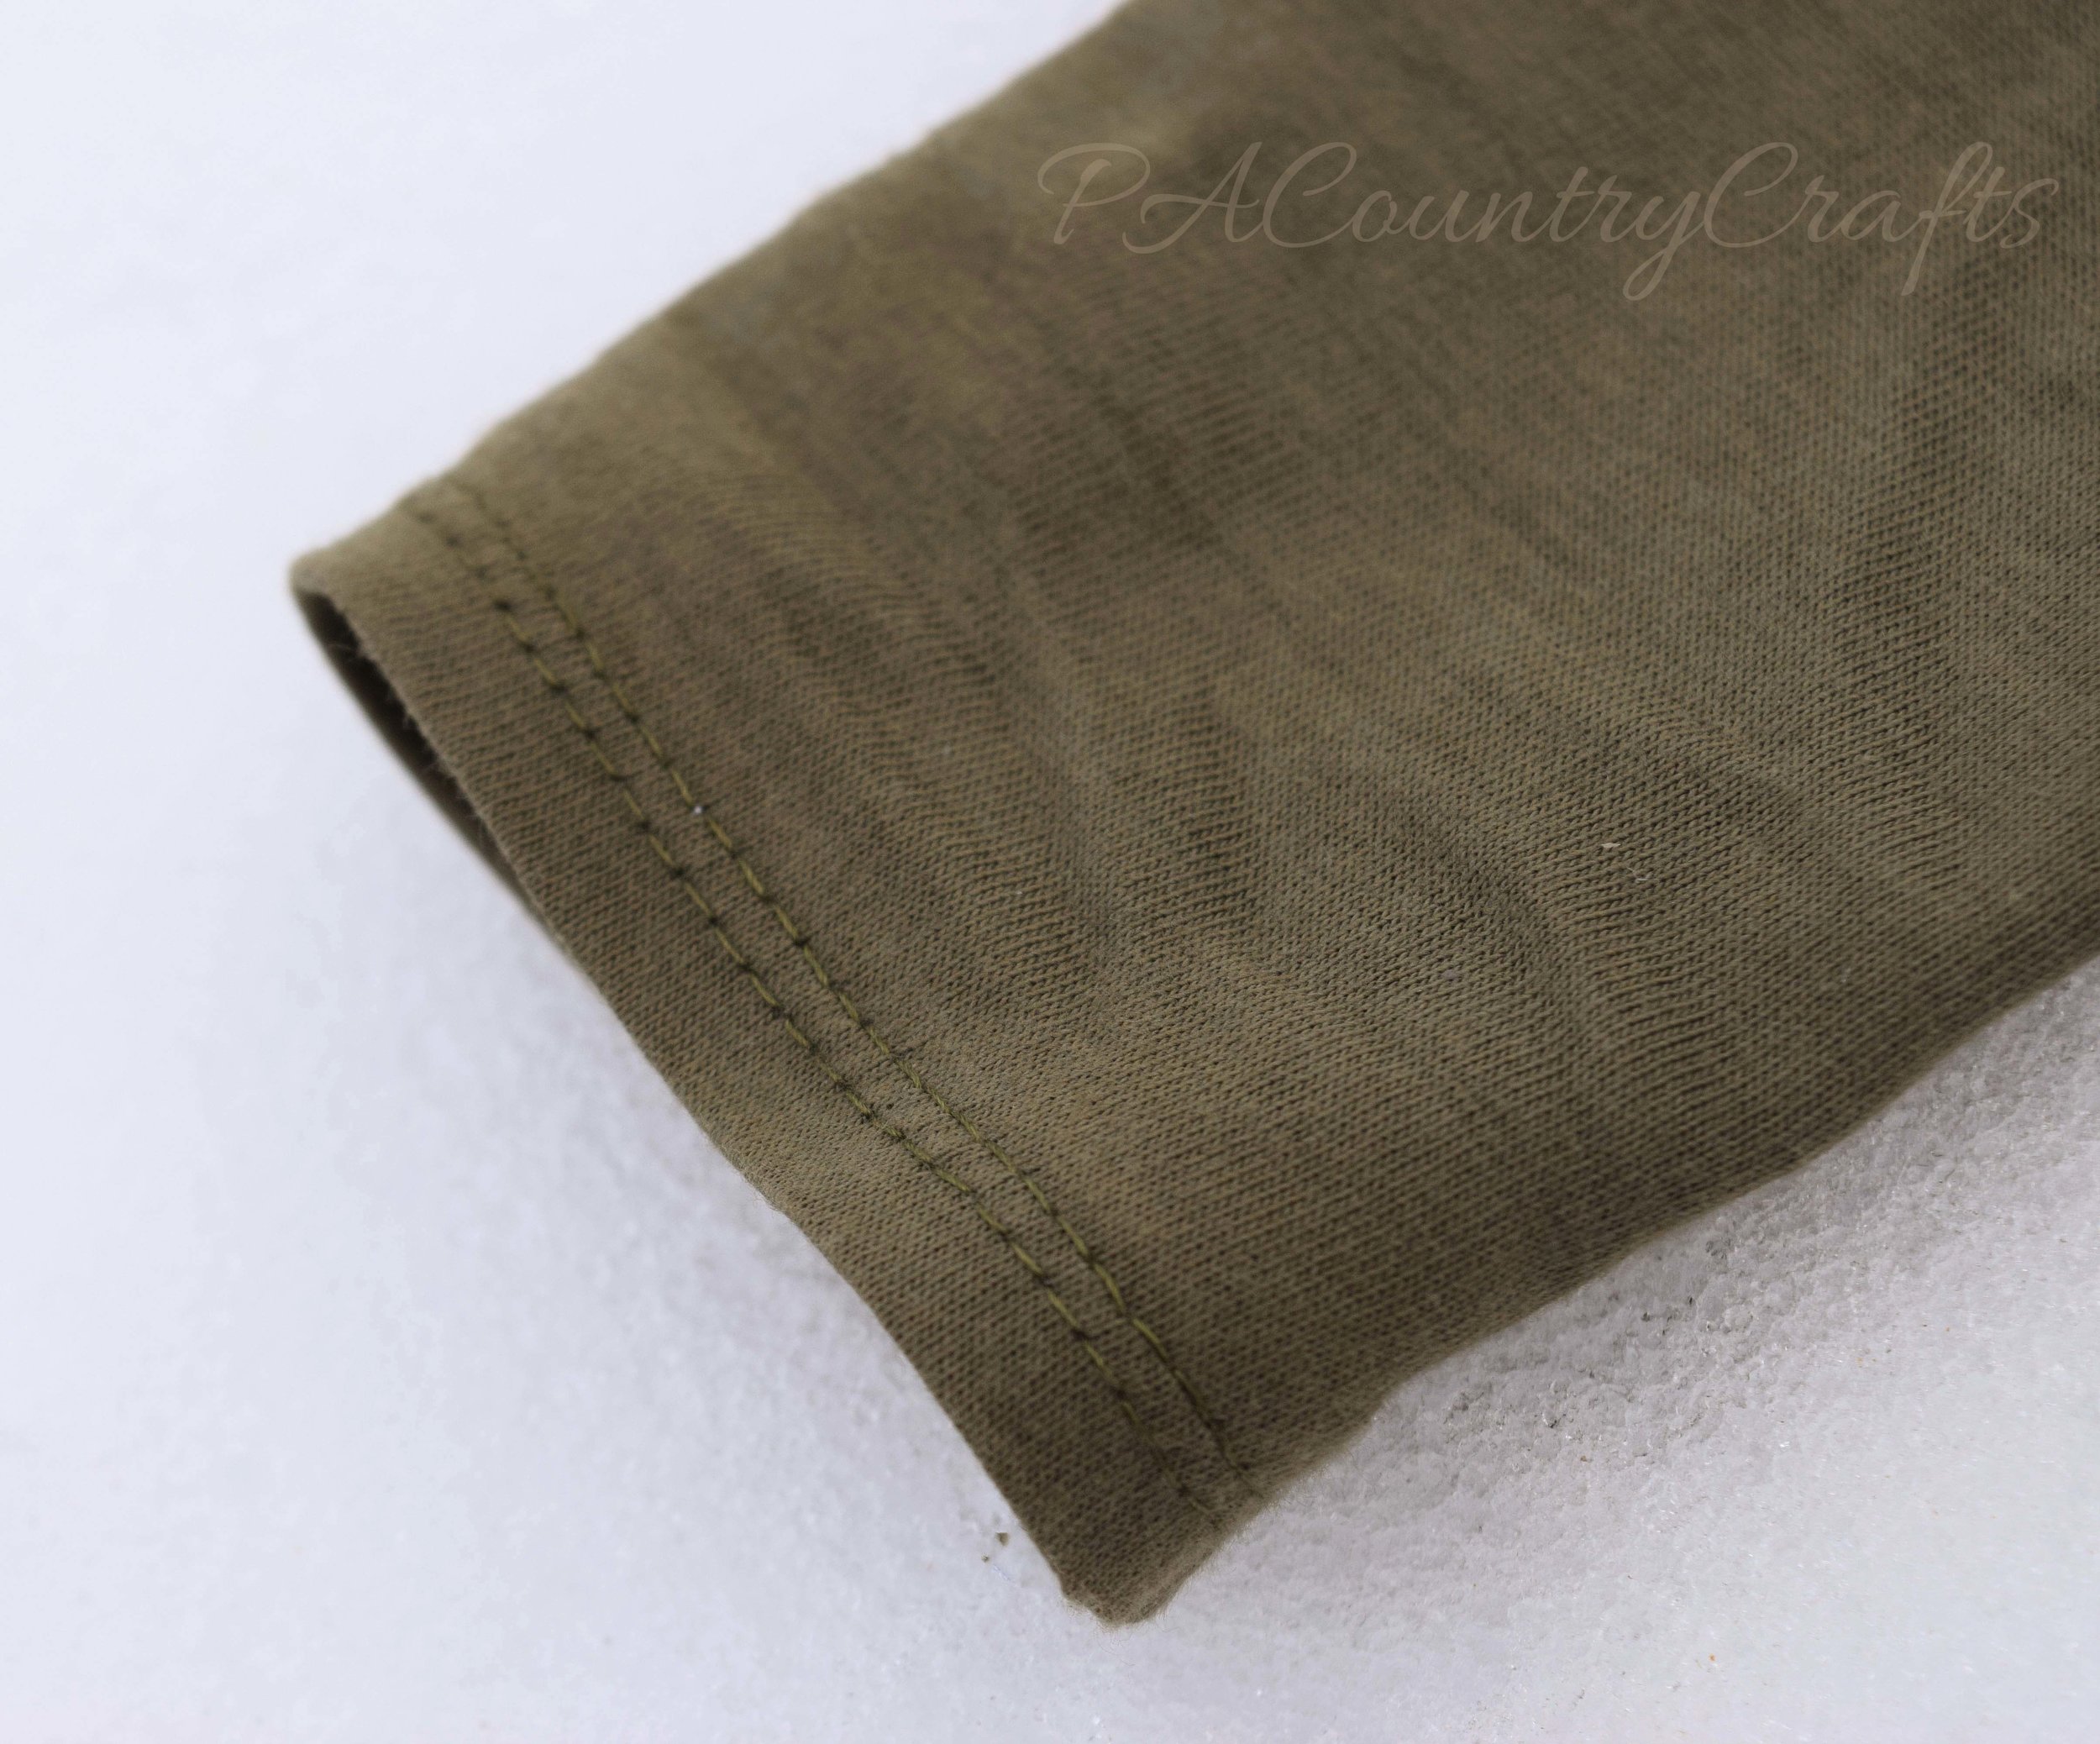
I still tried to incorporate the modern "boho" style in my designs. First, I made a tunic from an old shirt that was given to me. I loved the color (with a slightly uneven dye effect) and it was a thin, flowy fabric perfect for what I had in mind. I removed the bottom ruffle (the open part was badly torn) and the bottoms of the sleeves. Then, I carefully cut the rest of my pieces from what was left of the shirt. I drafted a bodice with a curved front and trimmed the front of the bottom skirt portion a bit to create a high-low effect. The original ruffle was resized and sewed onto the bottom of the tunic. I embroidered the neckline with some simple flowers and vines. It took awhile, but it was definitely worth it to add some lovely detail. The top is lined with remnants of a really soft sheet I used to line THIS dress and I understitched along the inside neckline. I reshaped the sleeves to create a loose, flutter sleeve with a bit of gathering at the top. Then, I sewed it to the bottom and added buttons on the back. I also made a pair of leggings from some olive green knit fabric that I found in a tote after digging a path to my storage shed.
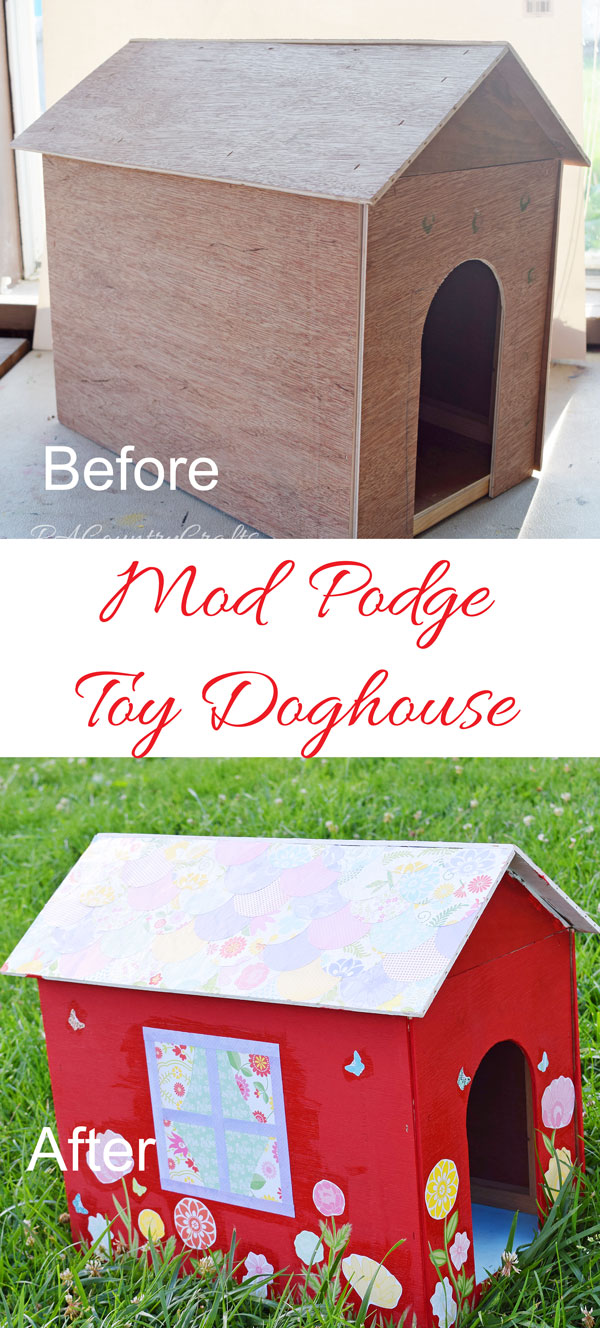
Before...

before-picture-of-shirt

After...

hand embroidery and understitching

buttons on the back of a flowy, boho tunic

butterfly sleeve boho tunic

double needle hem leggings

hi-low hem tunic upcycled from a womens shirt

purple hi-low tunic refashioned from a womens shirt

Hand embroidered girls boho tunic

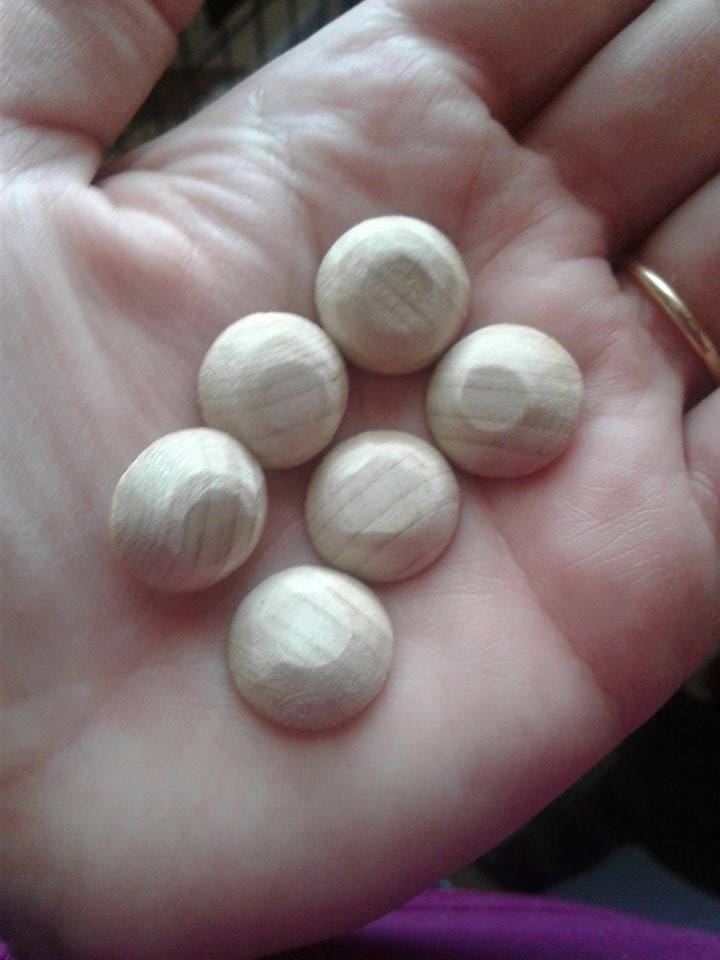
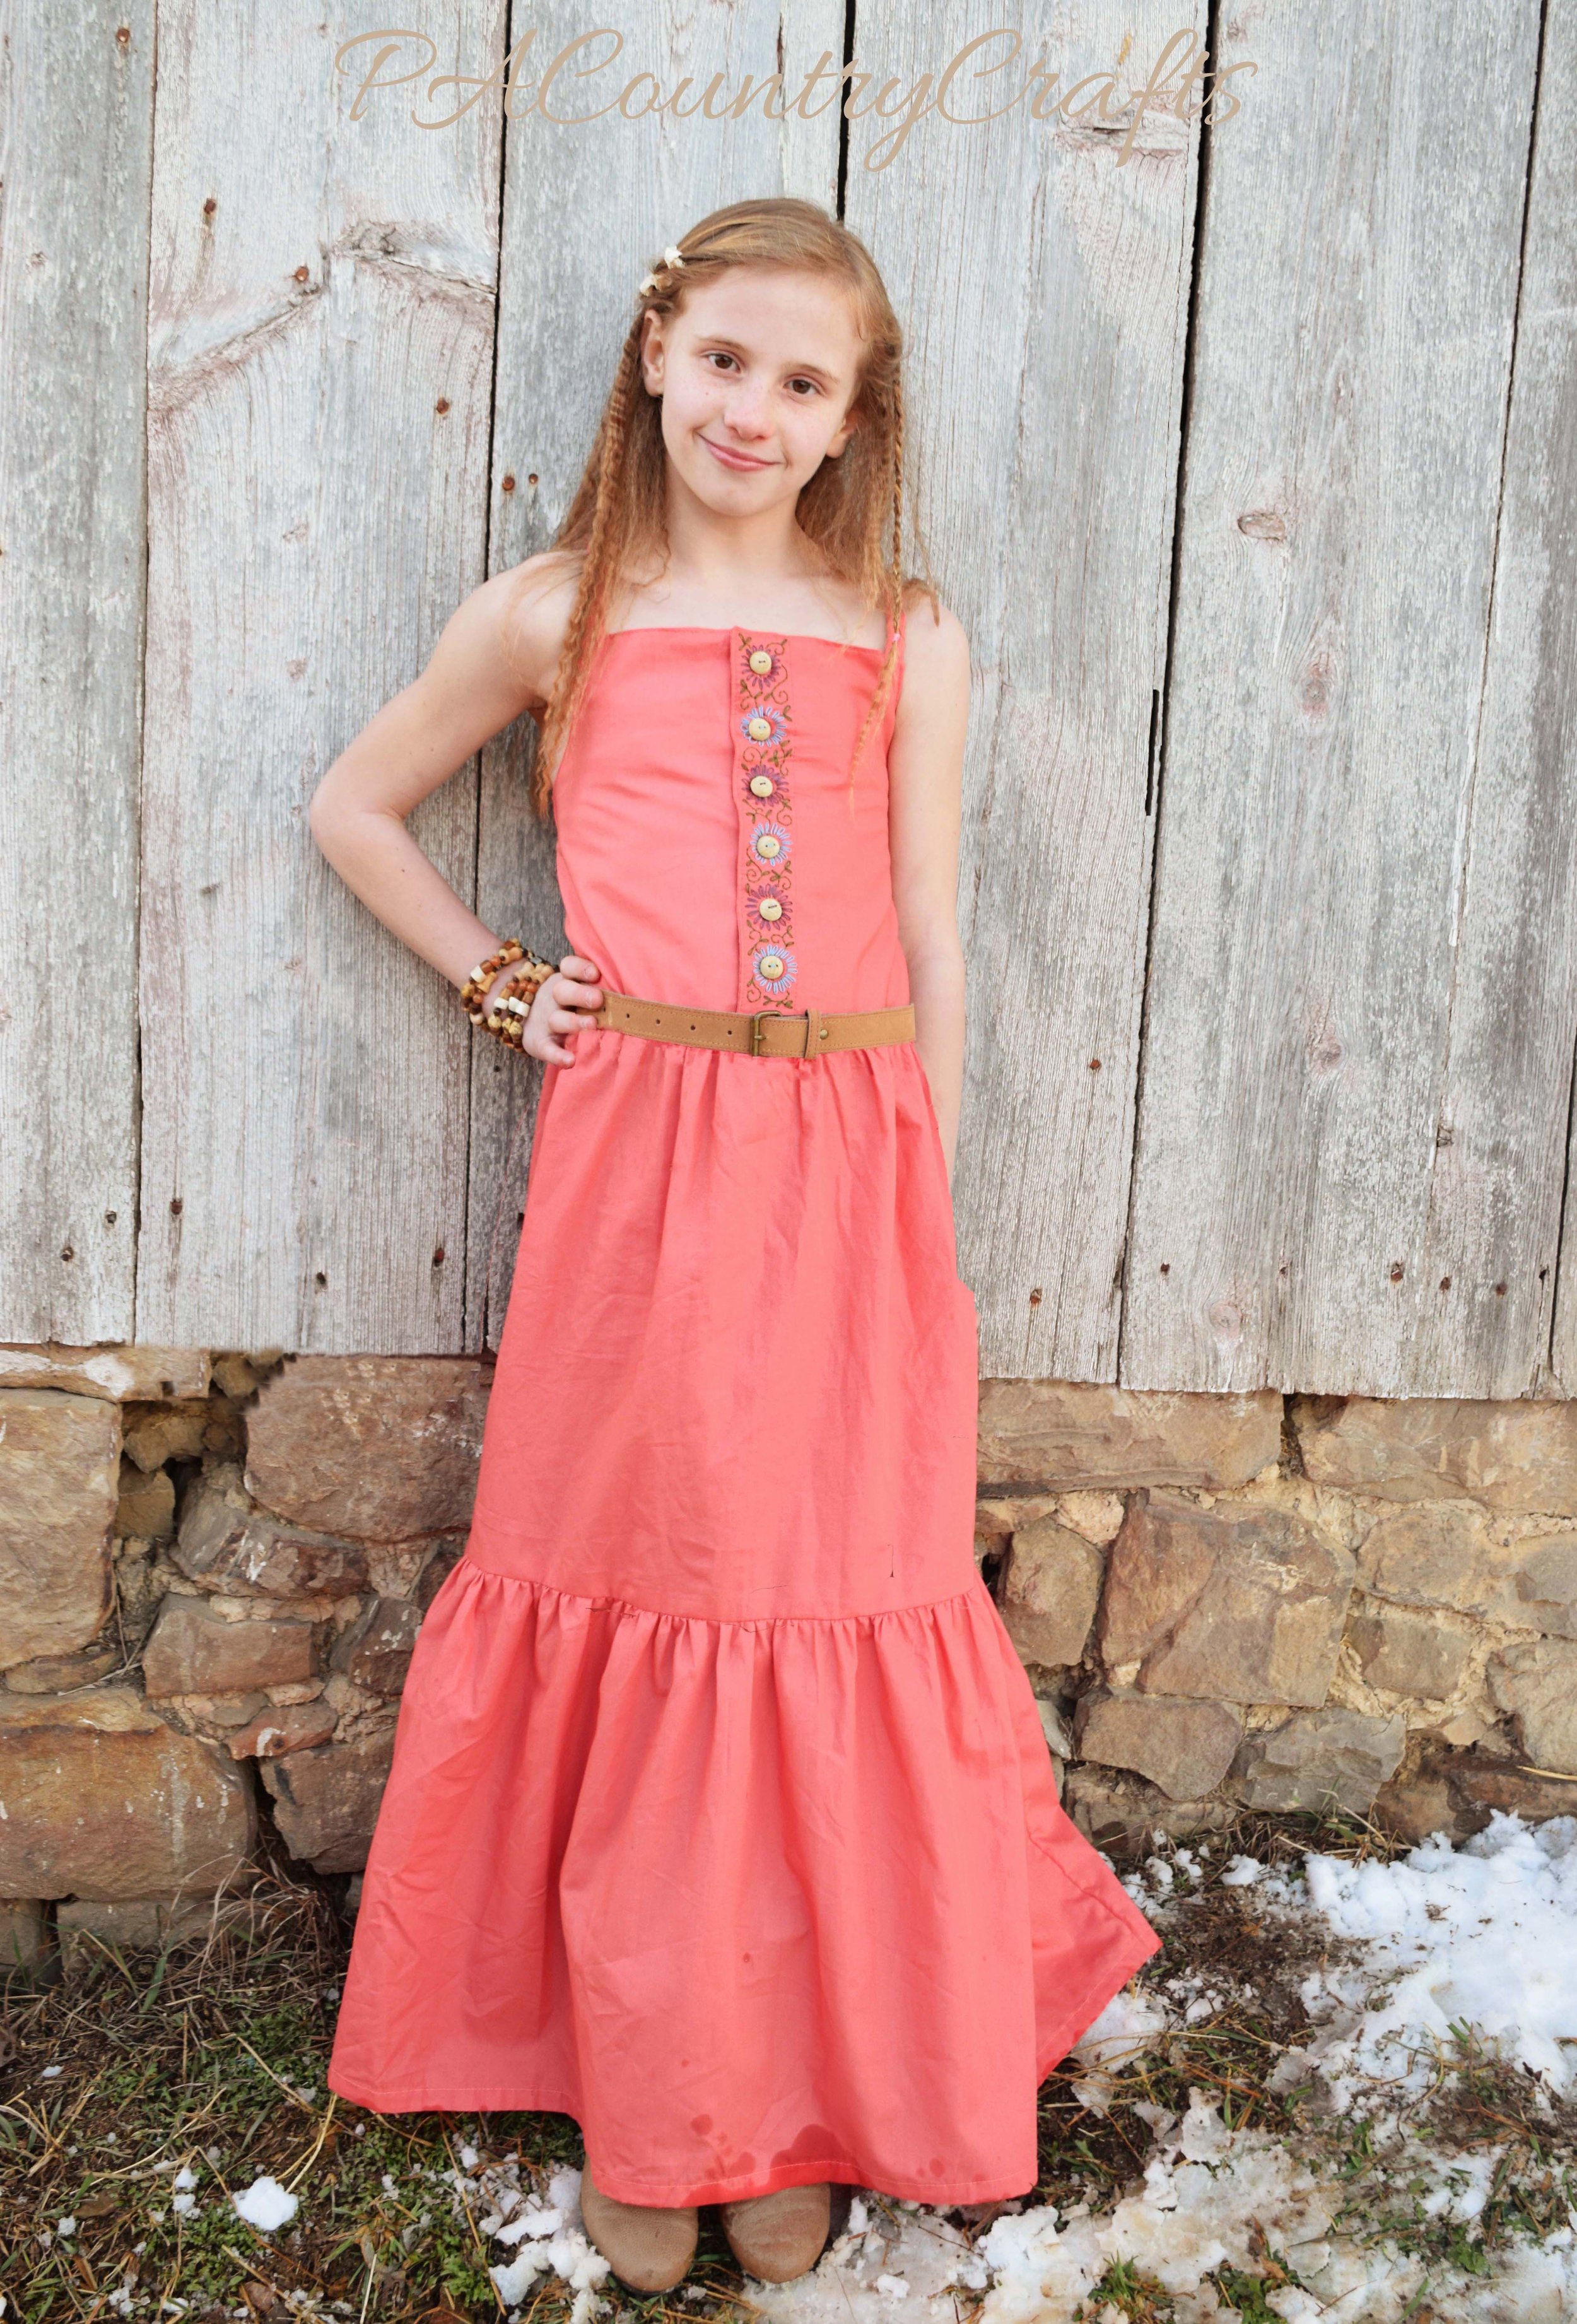
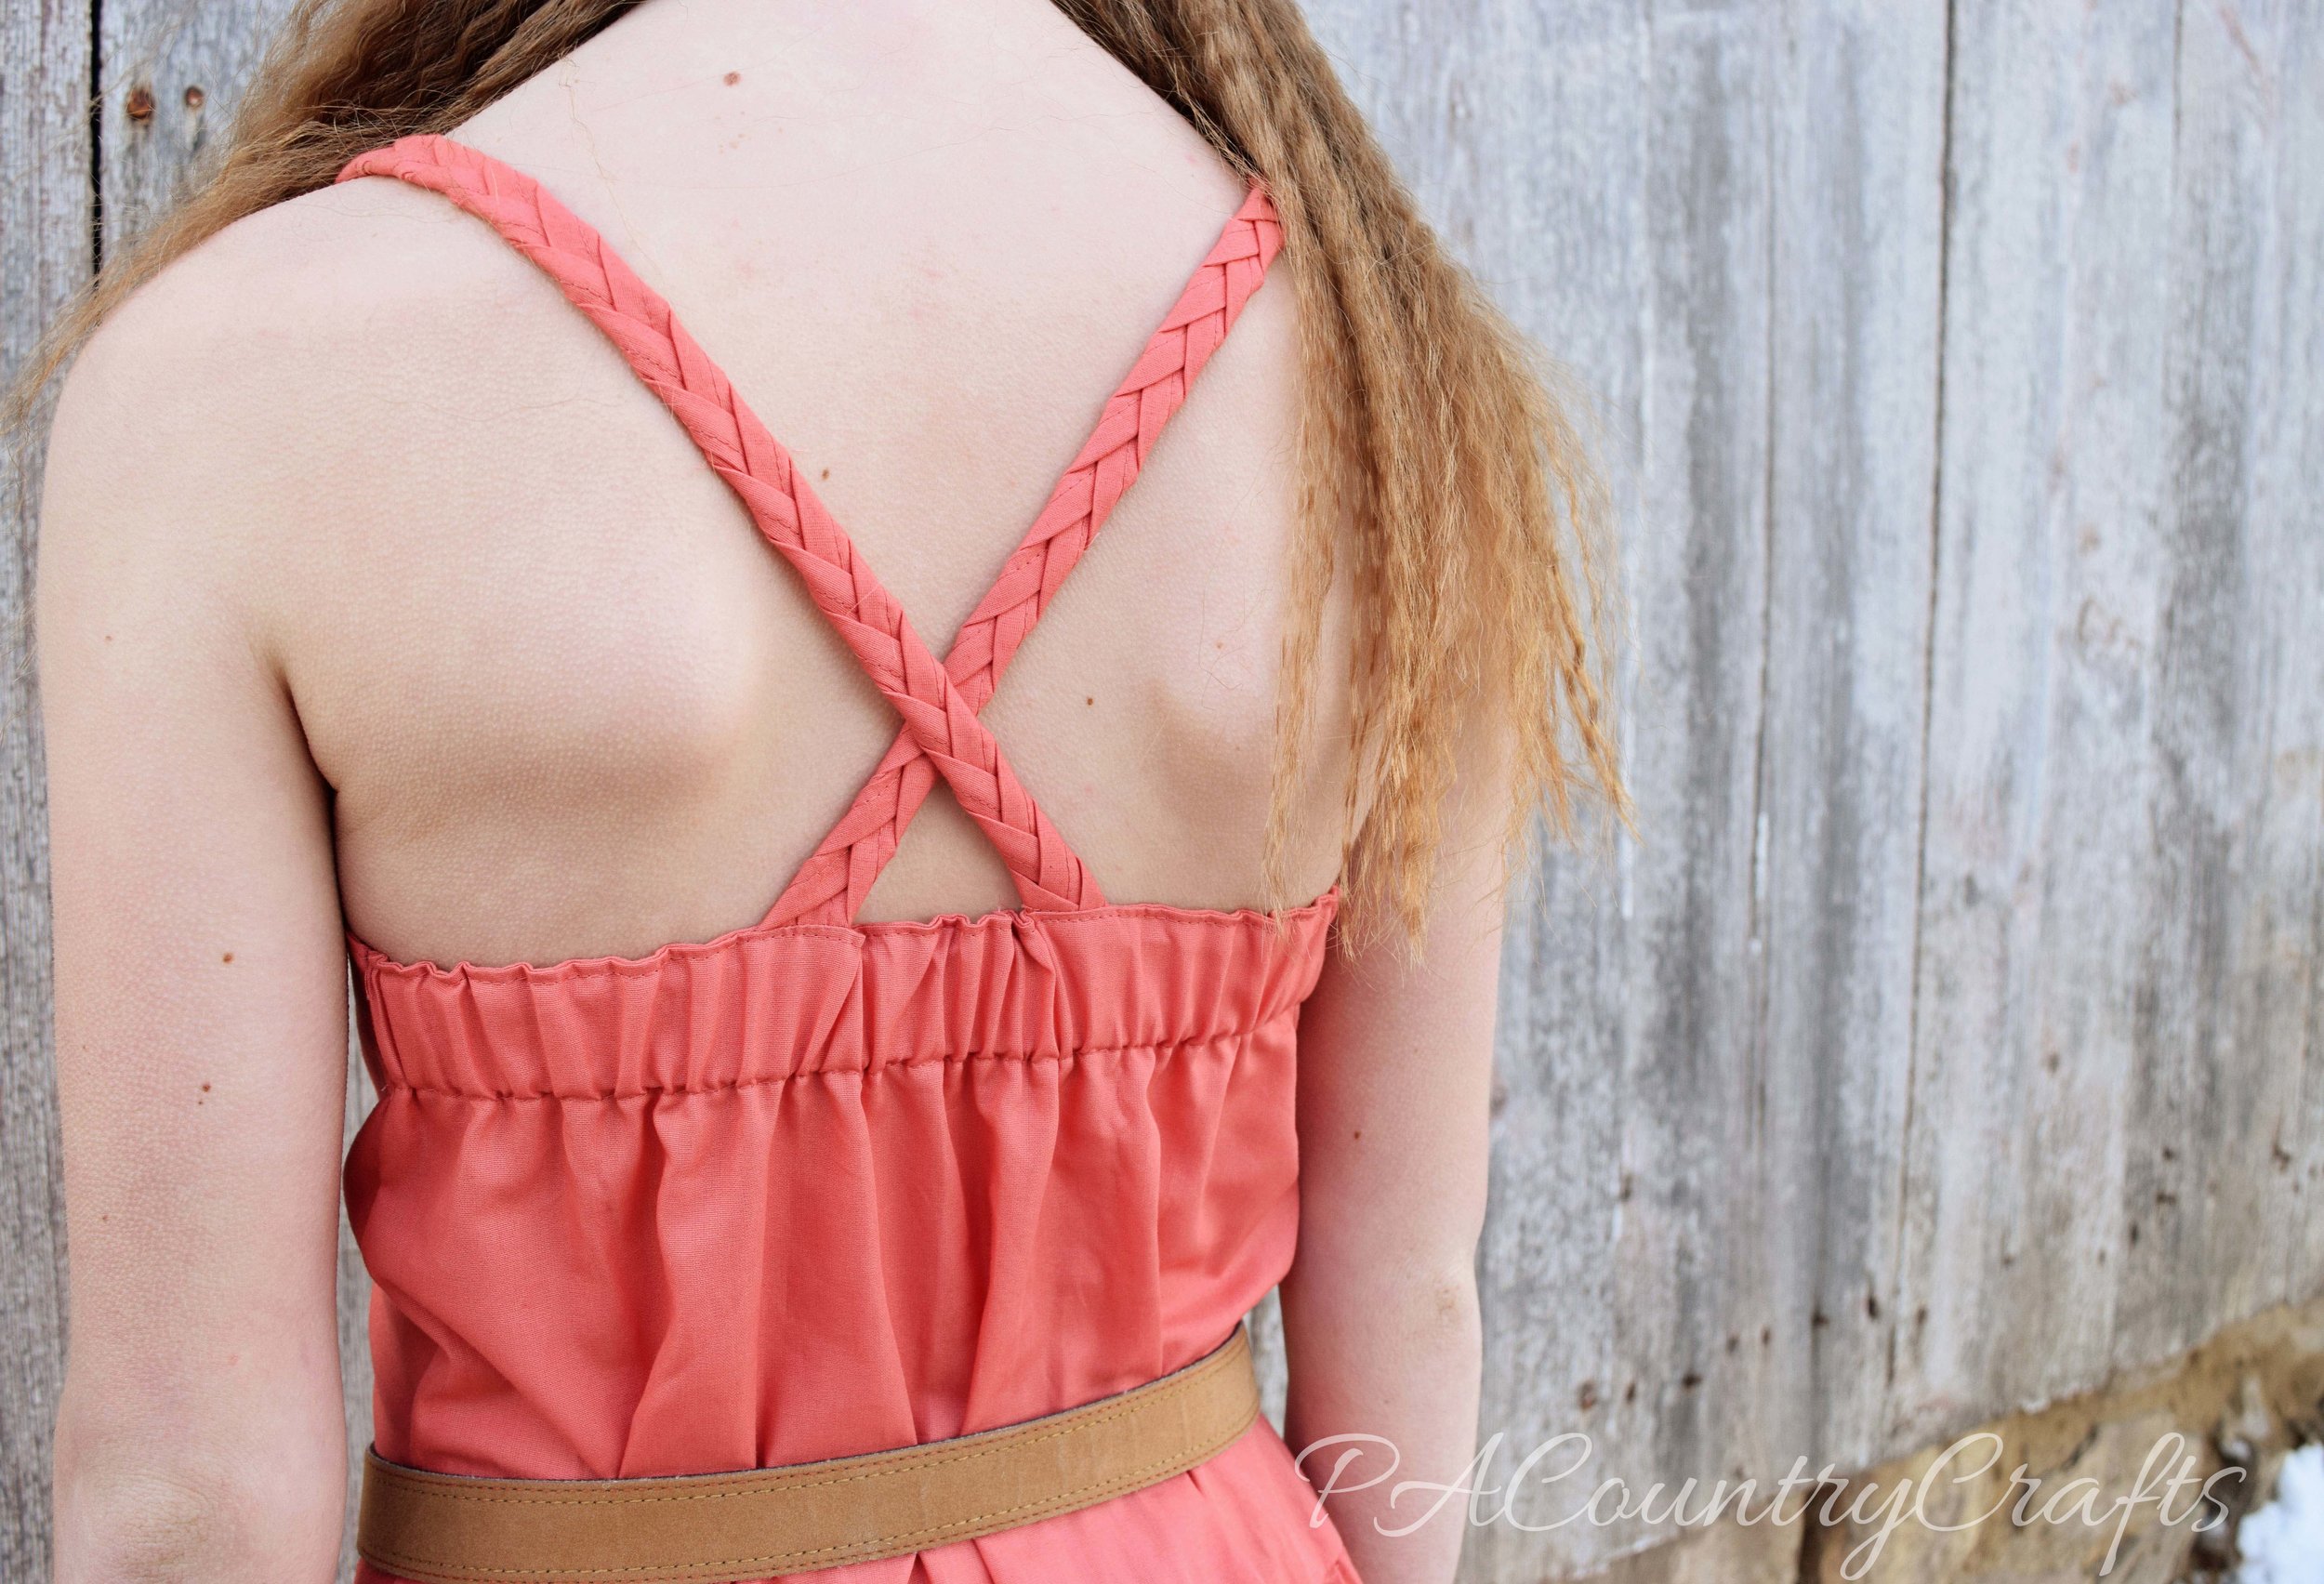
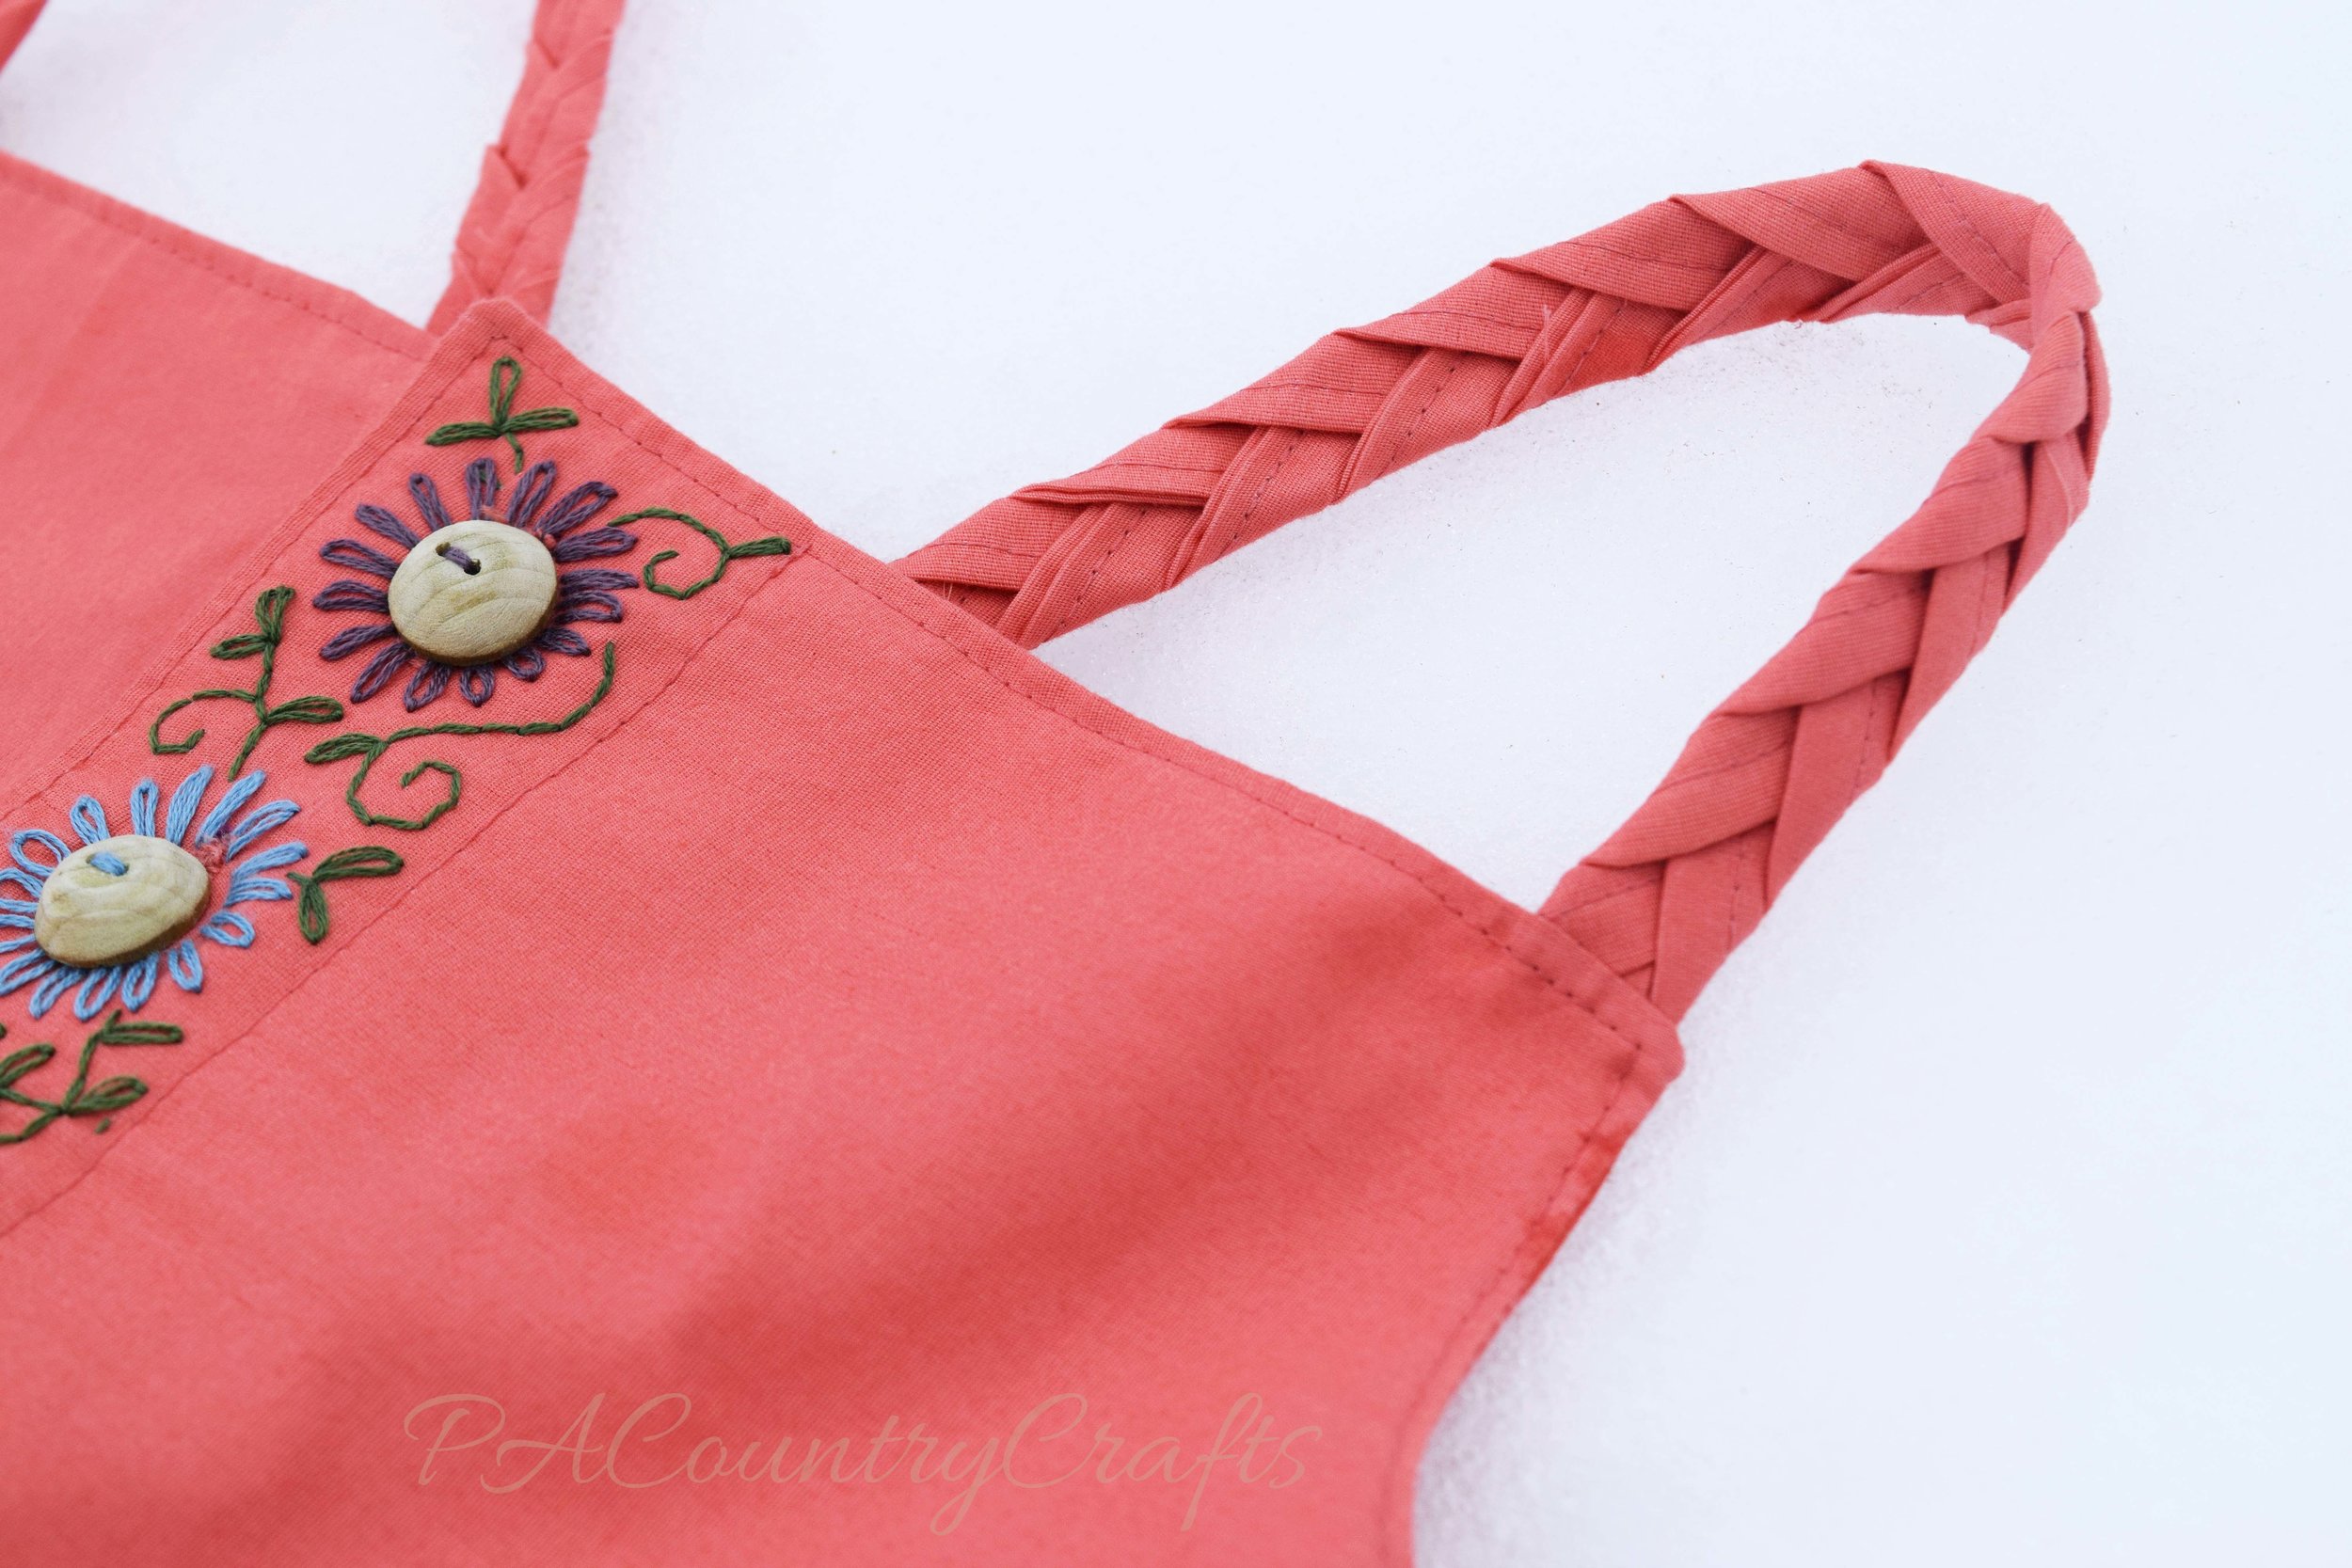
My other daughter wanted a maxi dress and I found a dusty coral sheet I had purchased years ago on clearance at Target and stuffed under my fabric table. I only used about half of the sheet to make this dress. I drafted the pattern to have a drop waist and long, gathered tiers. I was careful in my cutting and able to use the original sheet hem, too! Yay! This time, I put the buttons in the front and hand embroidered the button placket in the same intricate flowers and vines. Oh, and those buttons? My husband made them from a dowel rod! He sanded them on the belt sander to make them round and carefully sliced them off of the dowel. I sanded them by hand to smooth and even them out. After a last-minute trip for 1/16th inch drill bits, he drilled holes in them for me. The straps are made from braided strips folded like bias tape and sewn together. They cross in the back and I added an elastic casing so that it would fit well and not gap in the back.

Some more before pictures...

dowel-buttons     flat-sheet

After...

Girls boho maxi dress made from a sheet

embroidered flowers

braided crossing straps

boho style maxi dress from a sheet

braided straps

Elastic casing to keep the back of the dress from gapping!

handmade wooden button

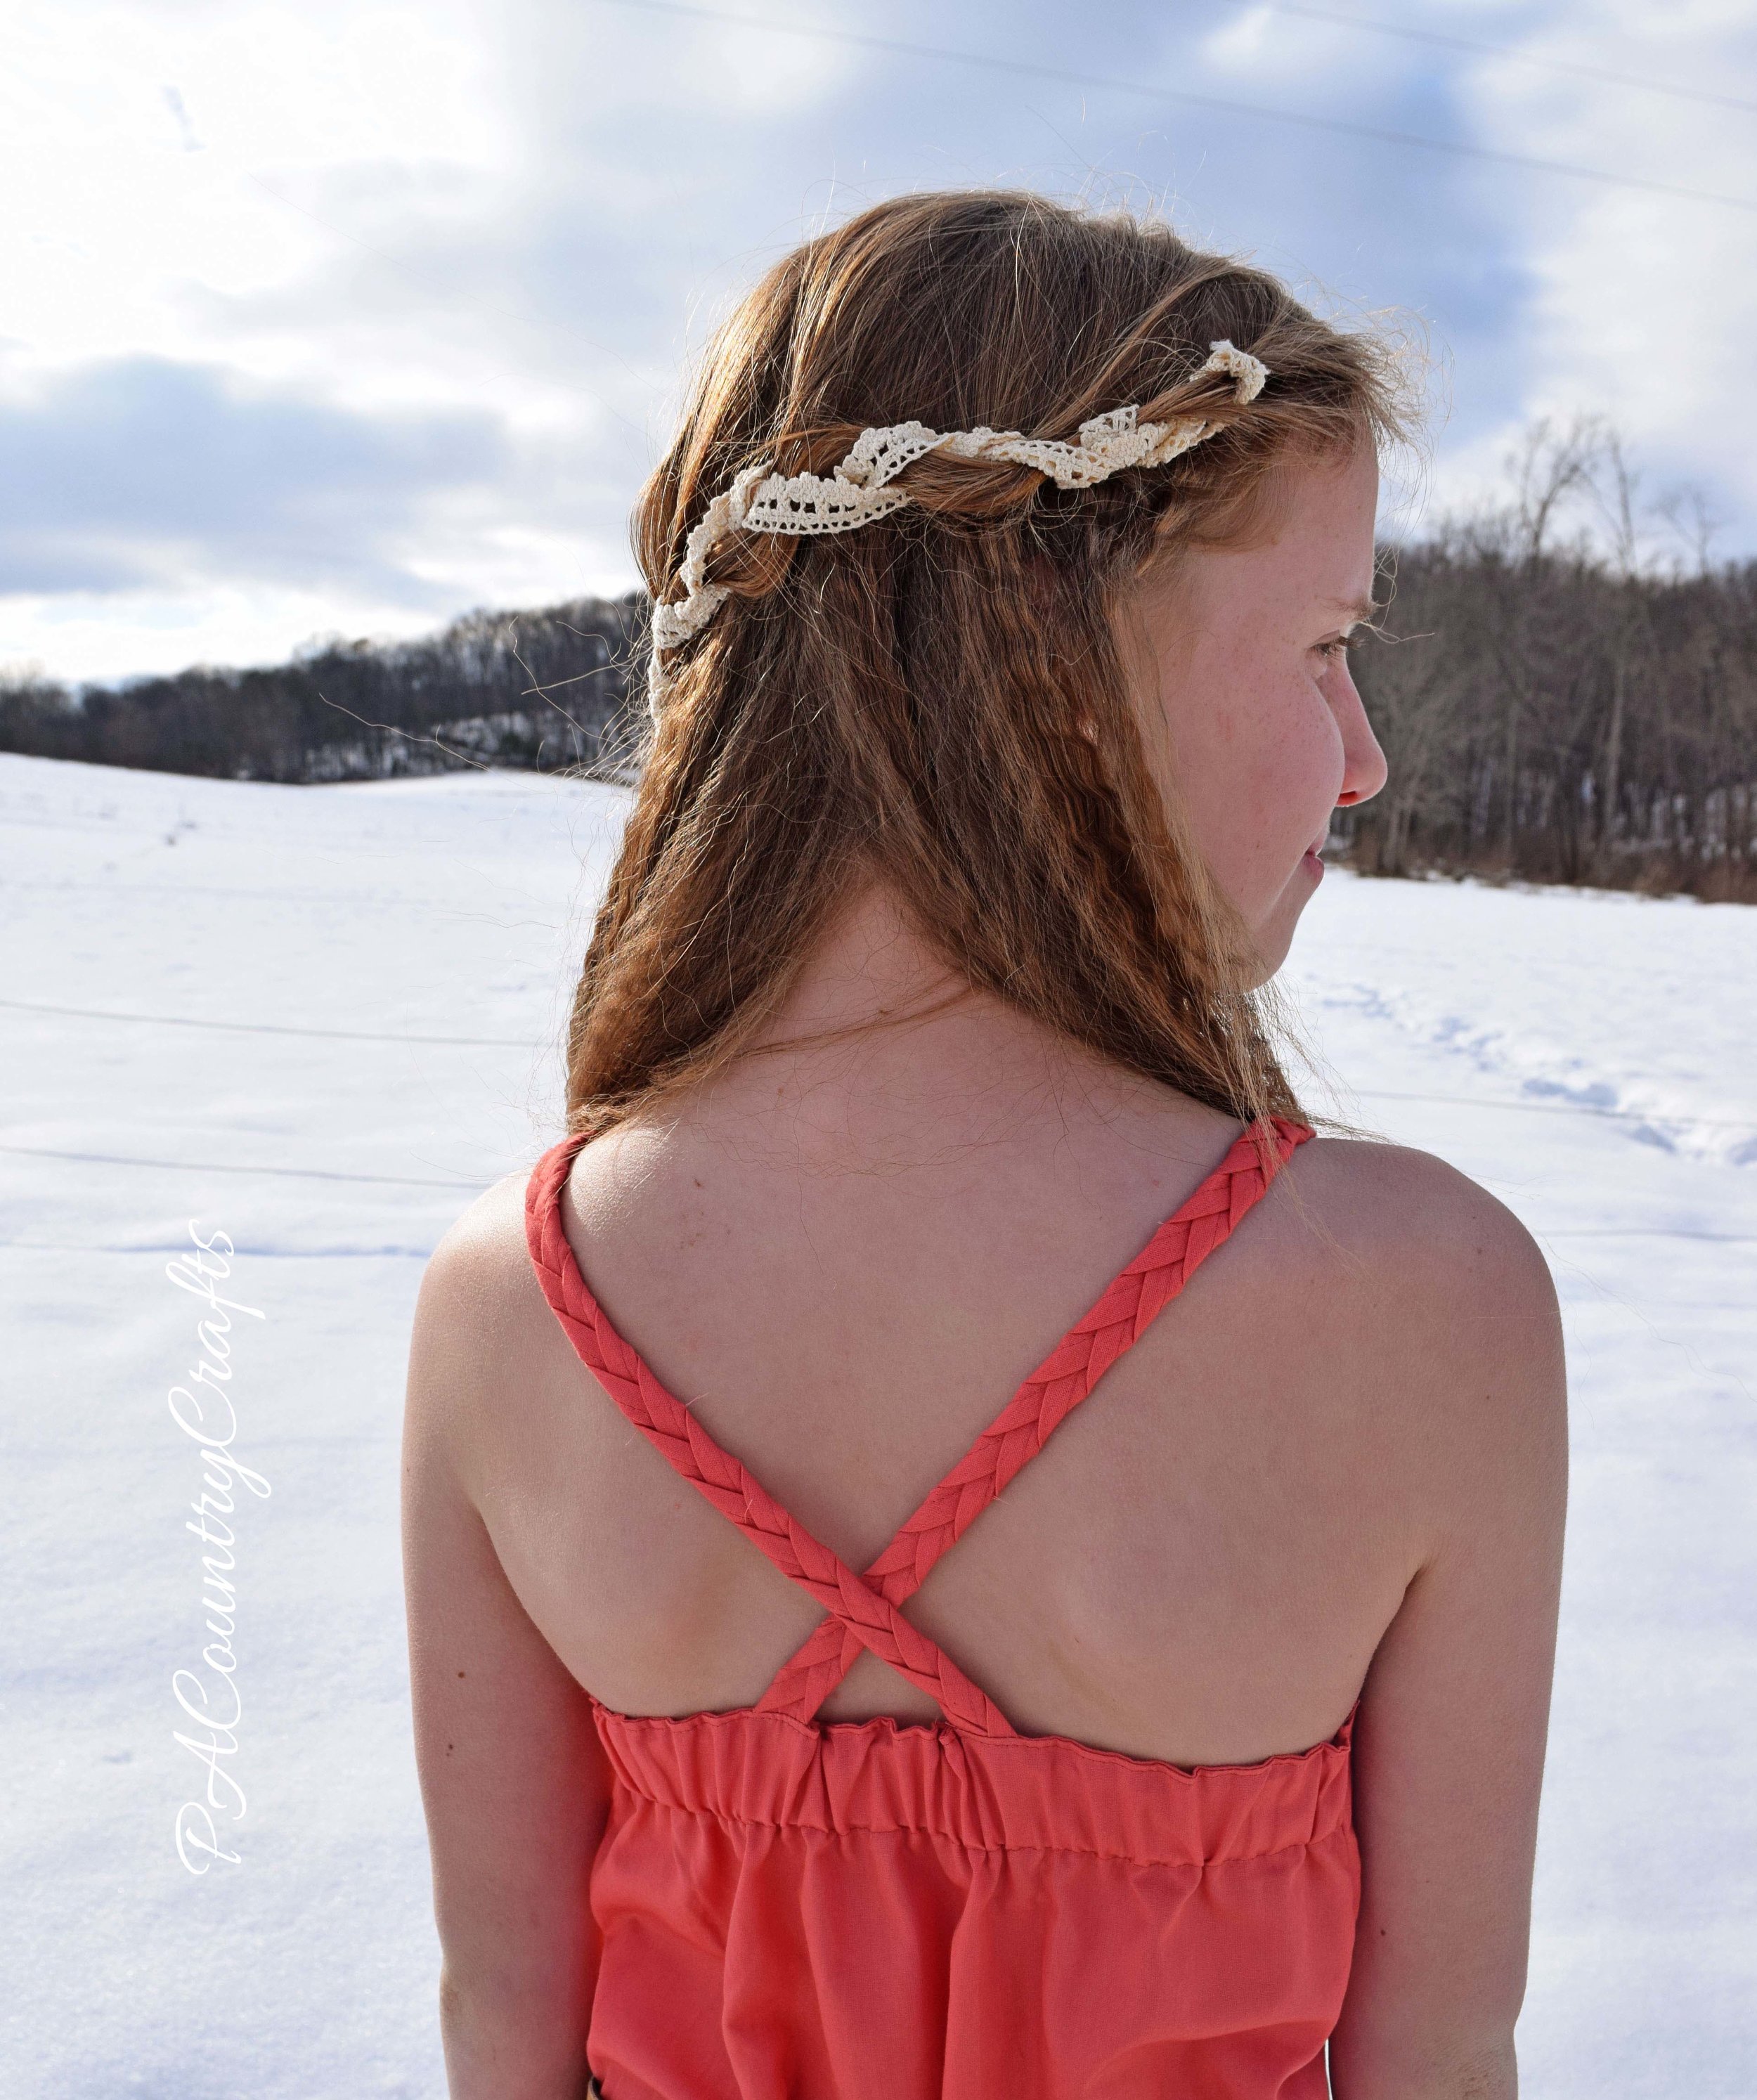
We tried to do a farm themed photo shoot, but it is hard because our options right now are: a) snow or b) mud. At the end, I decided to try to take some pictures with our new chicks, but it was clearly a bad idea. Let's just say that this was the second week in a row that an outfit had to be washed right after the pictures. Ew!!!

peeps_edited-1

peep-pooping

You can vote for your favorite "boho" look HERE over at Project Run and Play!

Thank you again to all of those who have voted and shared and supported me!!! Thank you to Aunt Karen for the purple shirt. A very special thank you to my sisters this week! Loni, you did an awesome job as my hairstylist and ironer. (Also, thank you for returning my vintage crimping iron.) Thank you to my husband for those awesome buttons and for carrying girls over the mud for pictures! Thank you most of all to my grandmother and other family members who pass down stories and leave a legacy to inspire future generations.

Boho style outfits made from a sheet and an old shirt!

Rustic Winter Pine Cone Centerpiece

After all of the Christmas decorations are put away the house can seem a little cold and empty. I wanted to create some neutral, rustic, winter decor to fill the gap a bit. I have a few Valentine's Day decorations, but if I put pink all over the place I would start a pretty big fight in this house since we have strong opinions on both sides about that color. Instead, I went with more natural elements (free stuff I gathered outside) for sort of a rustic, winter look.

pine cone box centerpiece

The first thing I made was this pine cone centerpiece. My husband had built me a box that will hold mason jars for a centerpiece. I had yet to fill it with anything and I was inspired by a centerpiece on Pinterest that has a bad link. I stained my box with a weathered gray stain and topped it with dark walnut antiquing wax.

winter pine cone centerpiece

I found two pillar candles in a cupboard. They aren't even the same color, but I don't care.

natural winter centerpiece

Next, my daughter and I went for a walk and collected pine cones. They were wet from being outside, so we baked them in the oven at 200 degrees Fahrenheit for an hour or two on a foil lined cookie sheet. This makes them open up and draws out the sap and bugs. I spray painted them with a little ivory just to dust them and give them a frosty coating.

how to bake pine cones
How to open pine cones

Finally, we arranged everything in the box with some white berry picks. Those were on clearance after Christmas and the only thing I had to actually buy for this project.  I really think arranging everything in the box was the hardest part. I also dabbed a bit more white paint on the edges of the pine cones for more contrast.  Some of the pine cones went missing before I took these pictures, too. ;)

DIY frosted pine cones
rustic winter centerpiece box

I like my little box and it will be fun to change it out with the seasons. It isn't perfect, but the girls got to help and we made do with what we could find.

I have a few more rustic, winter decorating projects that I will blog about later this week!