Blushing Izzy Dress Tutorial
/
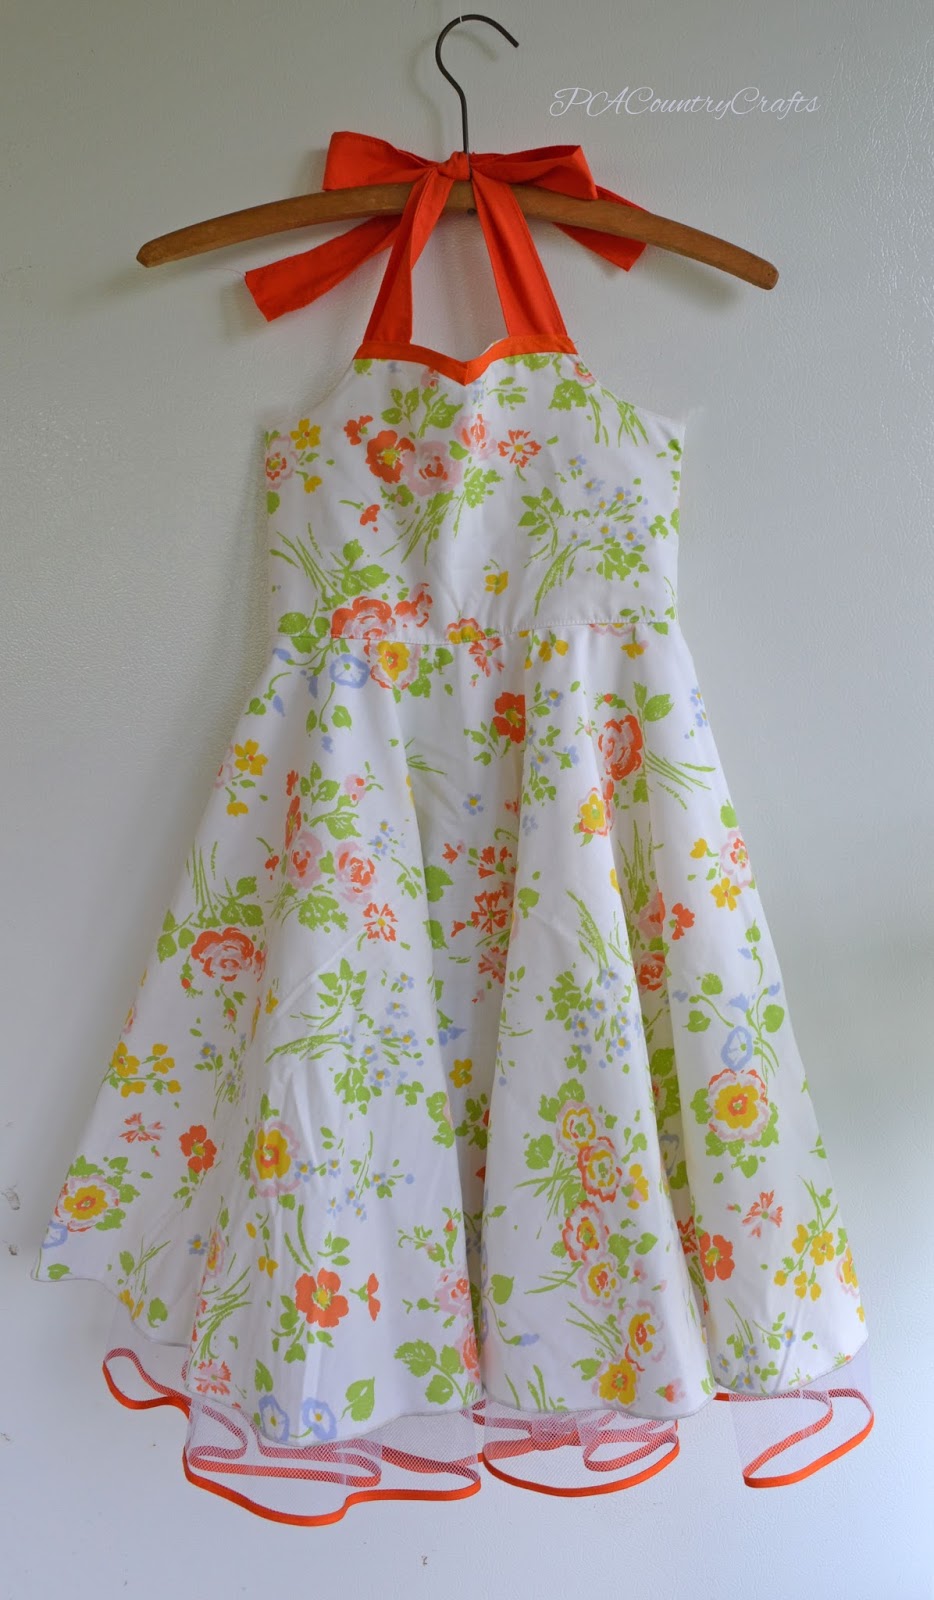
My girls get a lot of say in their Easter dresses. Isabelle came to me with a sketch of her Easter dress a few months ago. She was insistent on the cross-front bodice (I later found out she copied it from a very old Barbie book I didn't even know we had.) When I decided to go all 1950's vintage, we looked on Pinterest and etsy for some styles that matched up with her design. You can see some of our inspiration HERE. I sketched it out since her original was lost and we came up with this:

I did the cross-front and waistband much like the Twirly Lace Dress I made last year, so it really wasn't all that hard to figure out the rest.
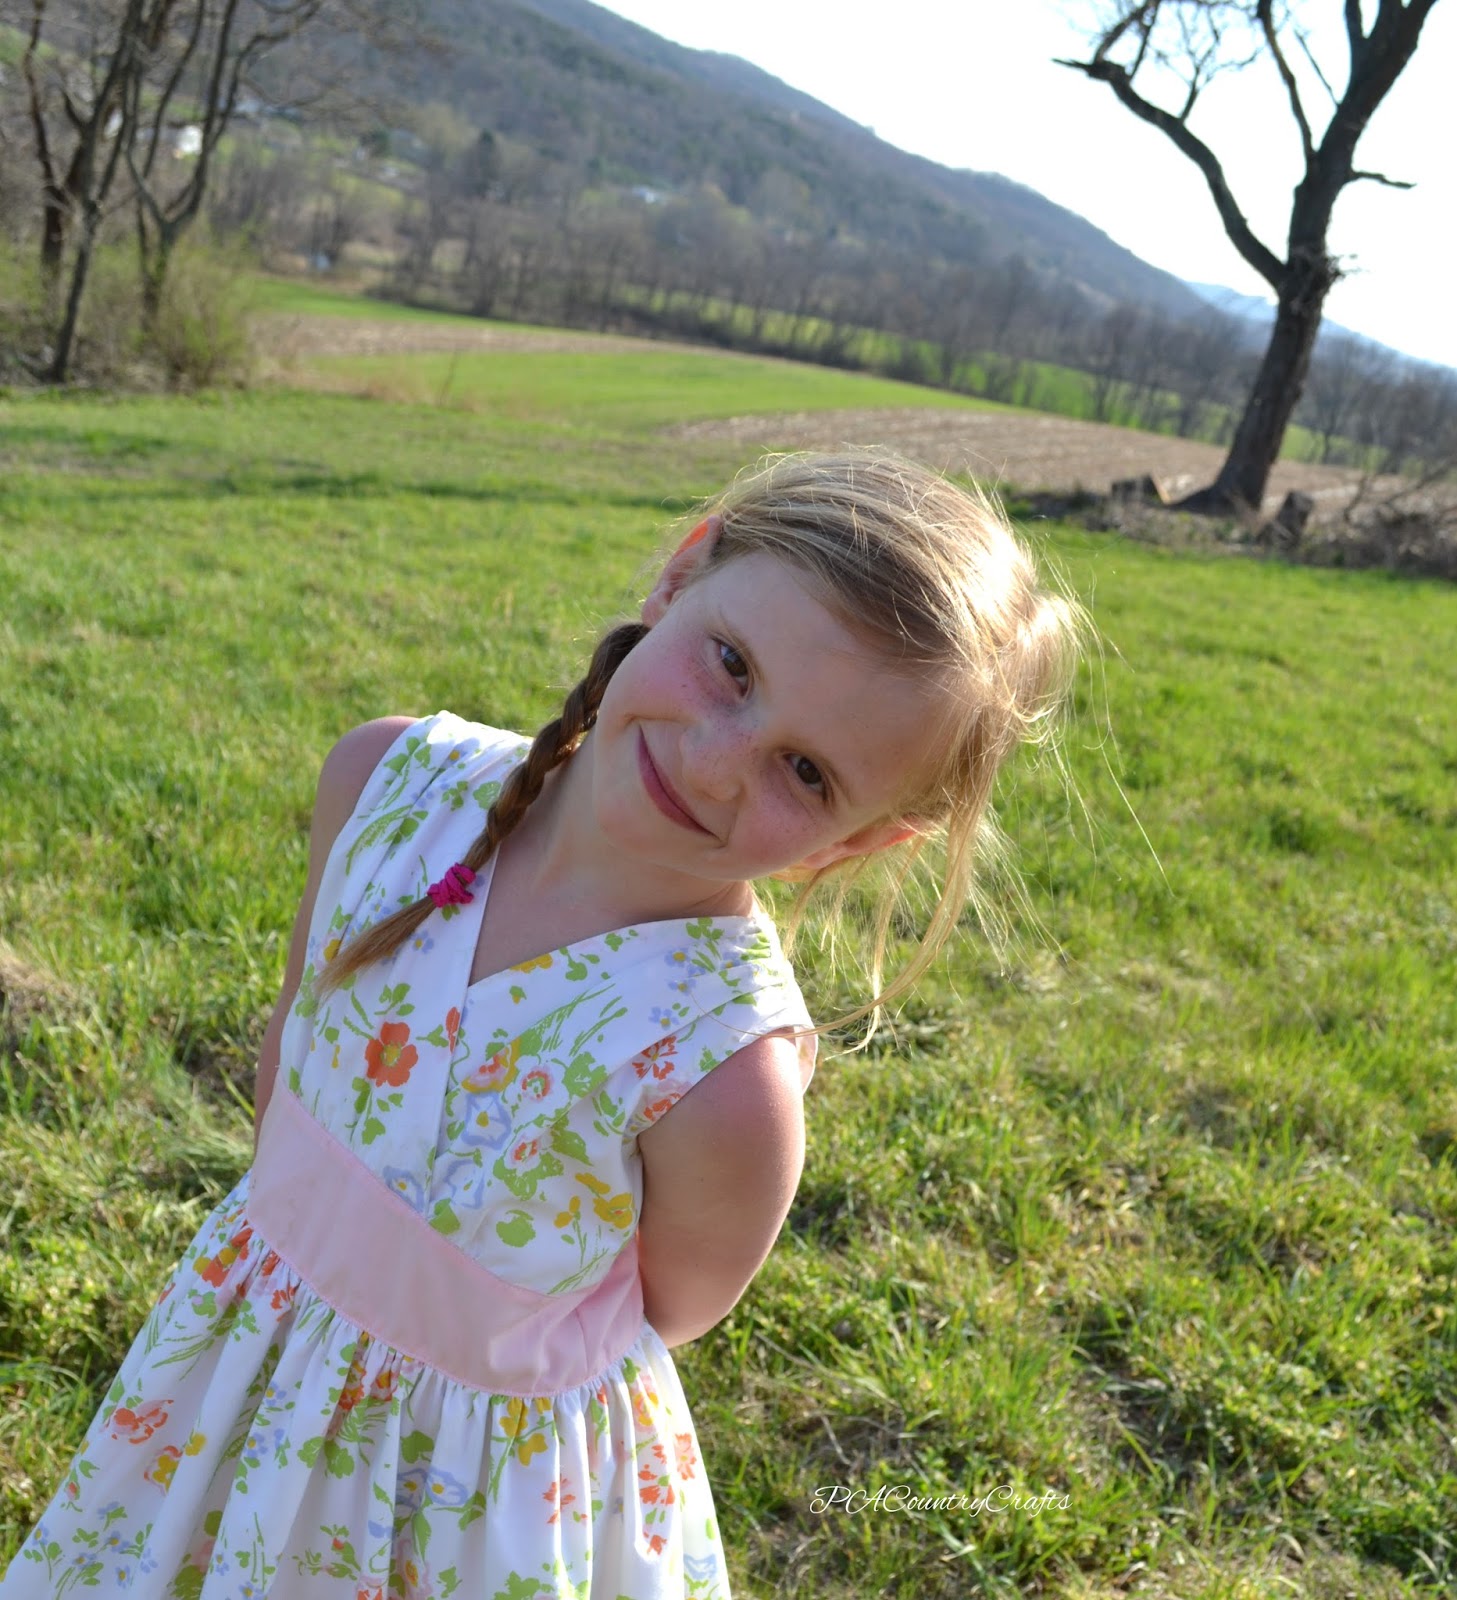
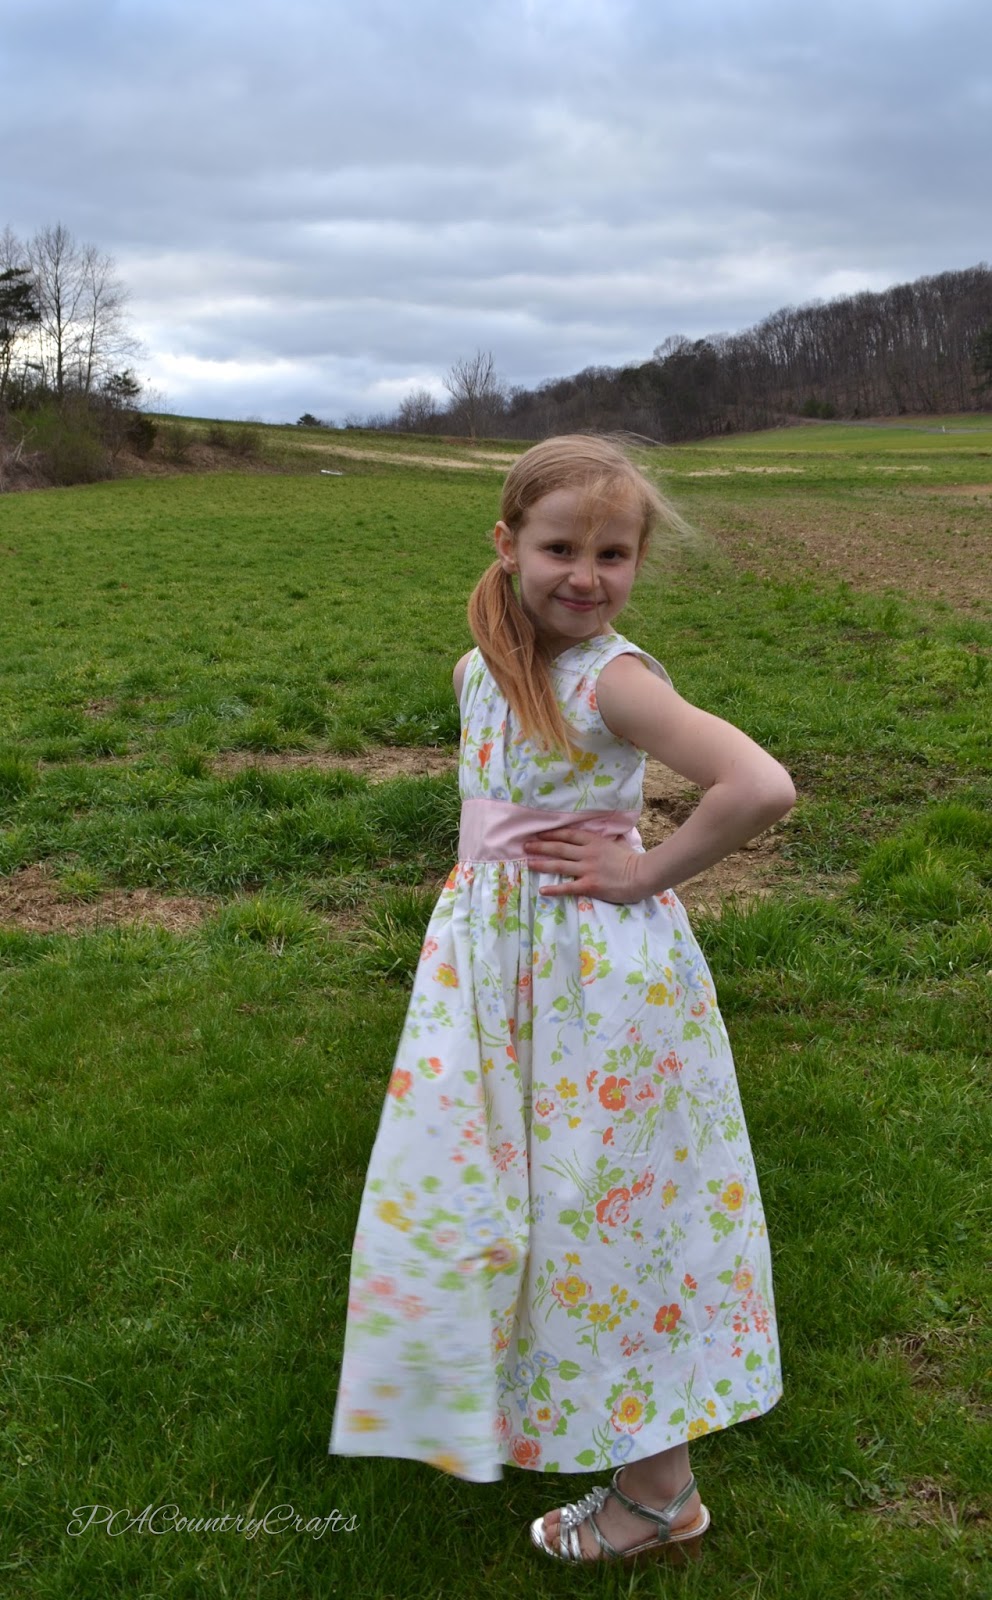
I even let her "name" the dress design. There are five colors besides white in the sheet so each girl got their own accent color. Isabelle loves pink, so I made hers in the same shade of pale pink found in the fabric- I even found the perfect shade of pink in my stash, which is not really surprising with all of these girls. Later I found some vintage trims and a zipper in the same shade, too! So, that is the "blushing" part. "Izzy" is what the kids at school call her. We never do at home, though.

Here is a little tutorial since I took some pics along the way. Let's get started!
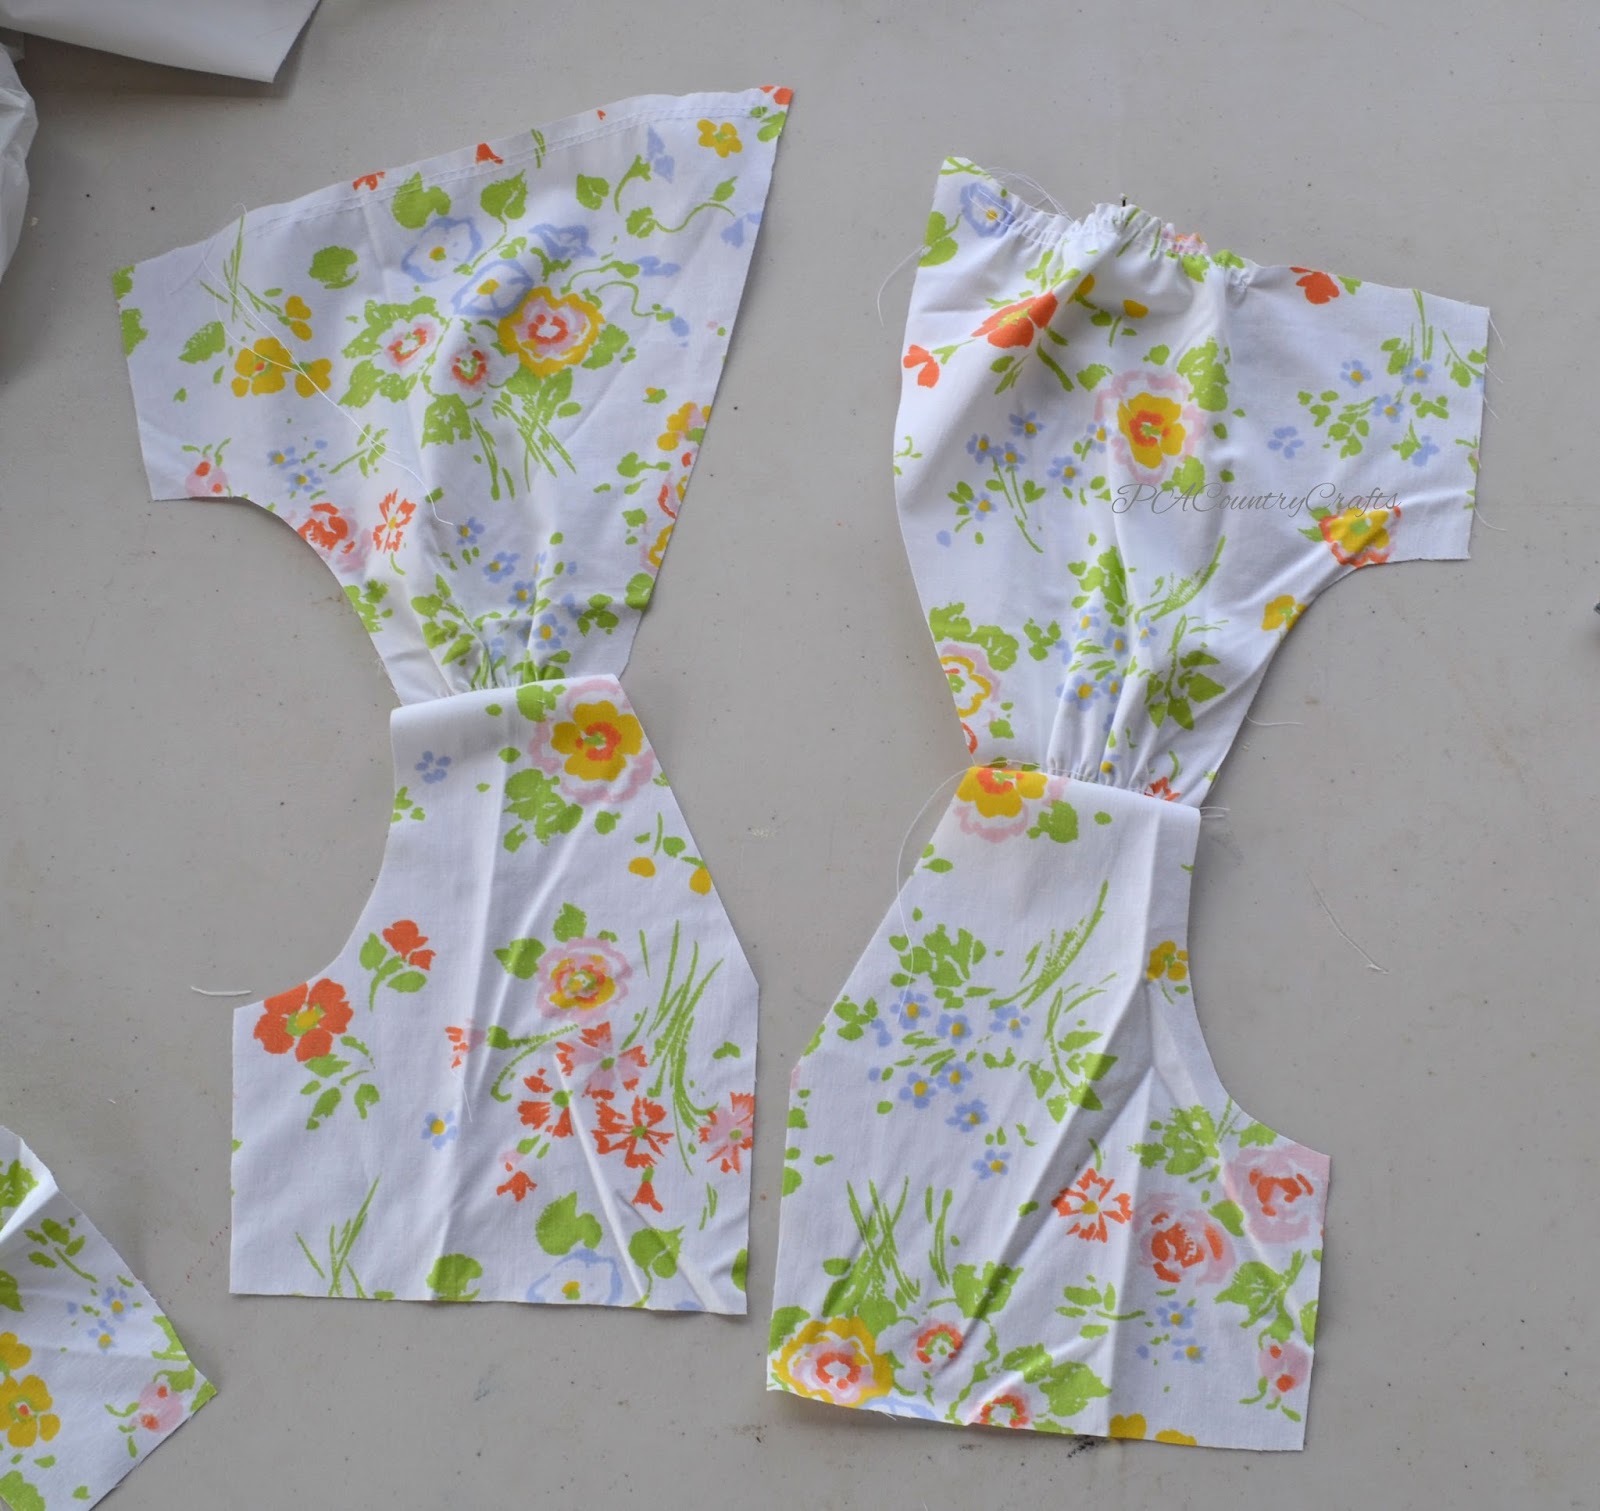
Trace a T-shirt that fits really well to get your bodice shape. From the shoulder, draw a diagonal line towards the middle. Add seam allowances. This is your lining pattern. For the gathered front, extend from the shoulders to the center a few inches. I actually just put it all on one piece of freezer paper and folded it back to cut the lining 'cause I am lazy efficient like that. Cut two bodice pieces from the main fabric (make sure they face opposite directions!) and two from the lining.

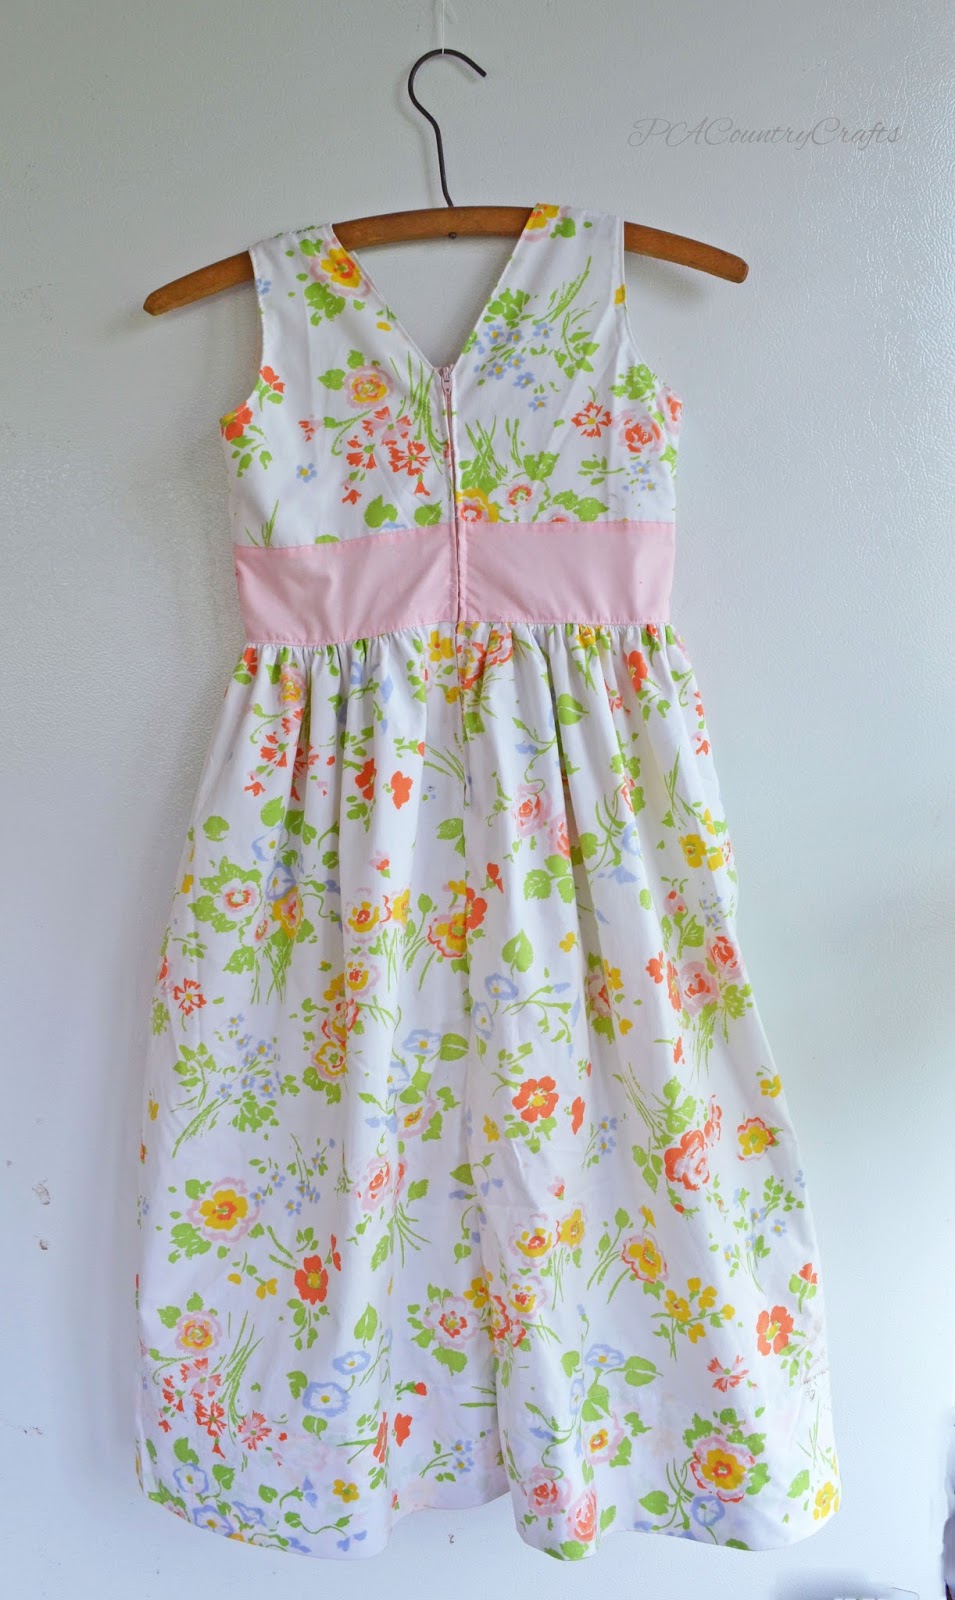
The back pieces are made the same as the front lining with an extra inch at the center for a zipper or buttons or whatever you want to do with it. This creates a V in the back. Symmetry. I like that. Cut two from the main fabric (facing opposite directions again) and two from the lining.
You also need a waistband. I picked a random height for the waistband and made it half of her waist measurement + seam allowances + a half inch for some wiggle room. So, the front waistband here is 3 inches high by 12 inches wide. The back waistband pieces have to be the same width as the back bodice pieces. Cut lining pieces to match, too.
Here are all of the bodice pieces...

You need a skirt piece, too. I cut mine from the top edge of the sheet (NO hemming = SWEET!!!) and kept it the full width of the sheet so it would be nice and full. I made it 24" high, but I wish I had gone shorter. Isabelle wouldn't let me. You also need a lining for the skirt, but it has to be about two inches shorter.

Alright... now for the sewing part...
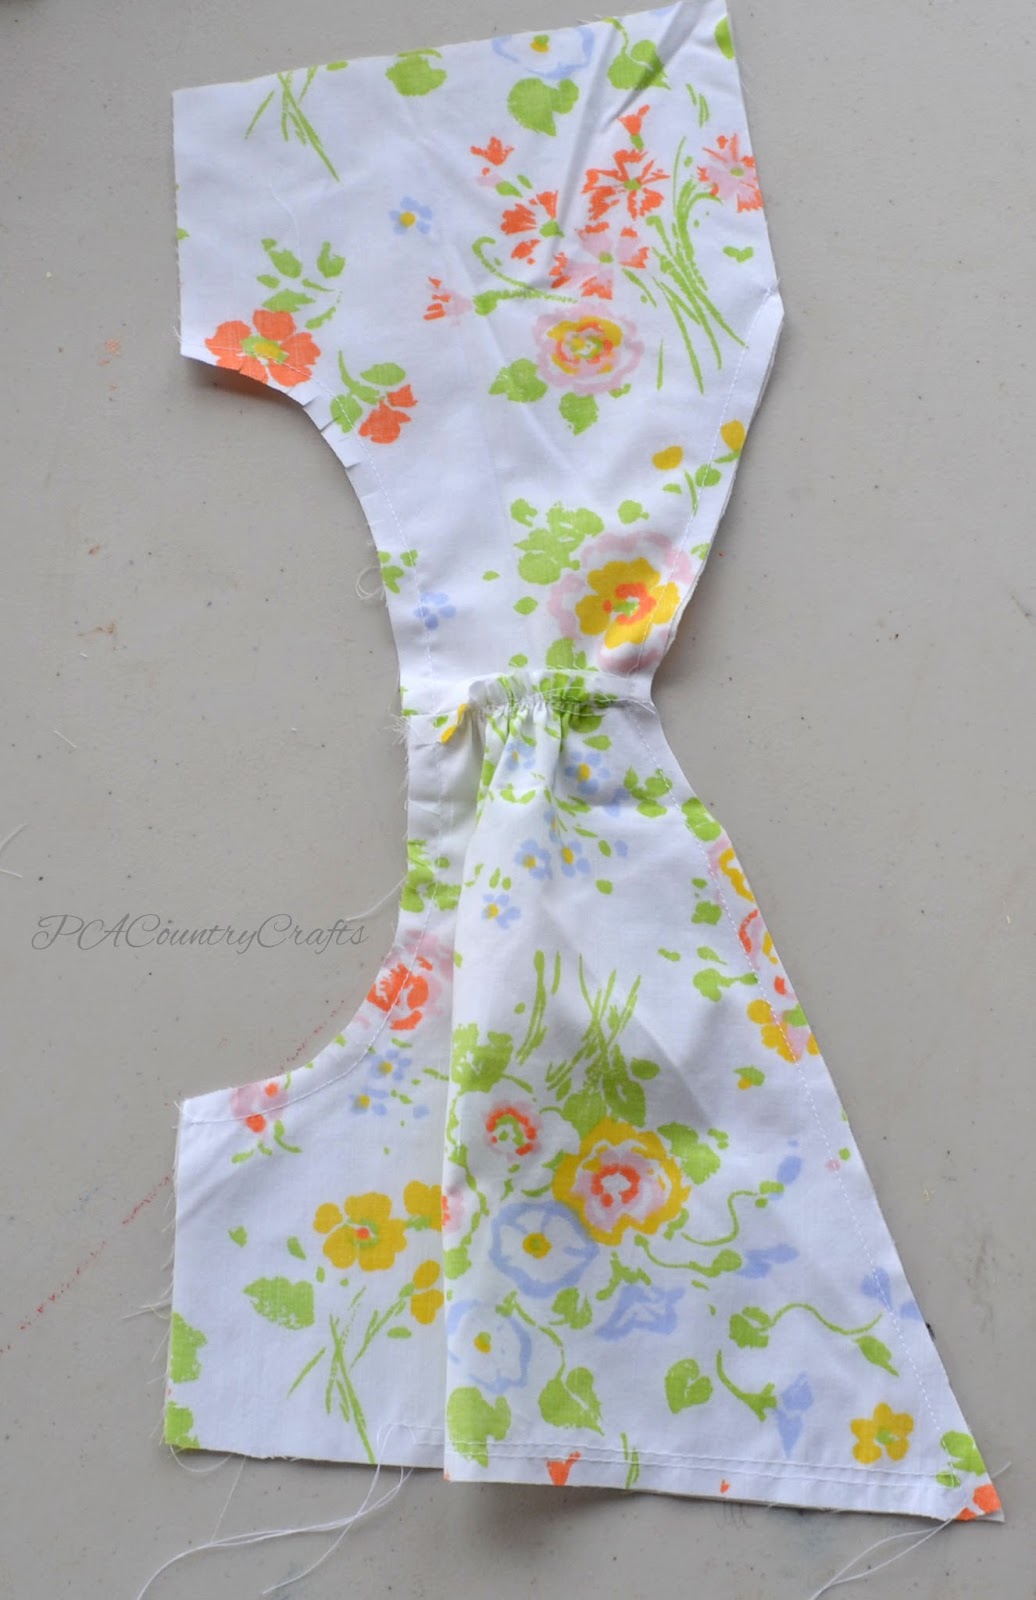
The first thing that needs to be done is the gathering on the bodice. You don't want gathers under the arms, so the bottom will only have a gathering stitch from the center angle to straight down from the arm scythe. The top gather is all the way across. I ran a wide stitch across, then took one big stitch straight down, then ran a long stitch back across. This gives two lines of gathering stitches and it works out so much better than using one. I used to be lazy and stubborn by sewing just one. Not anymore. I have been converted.
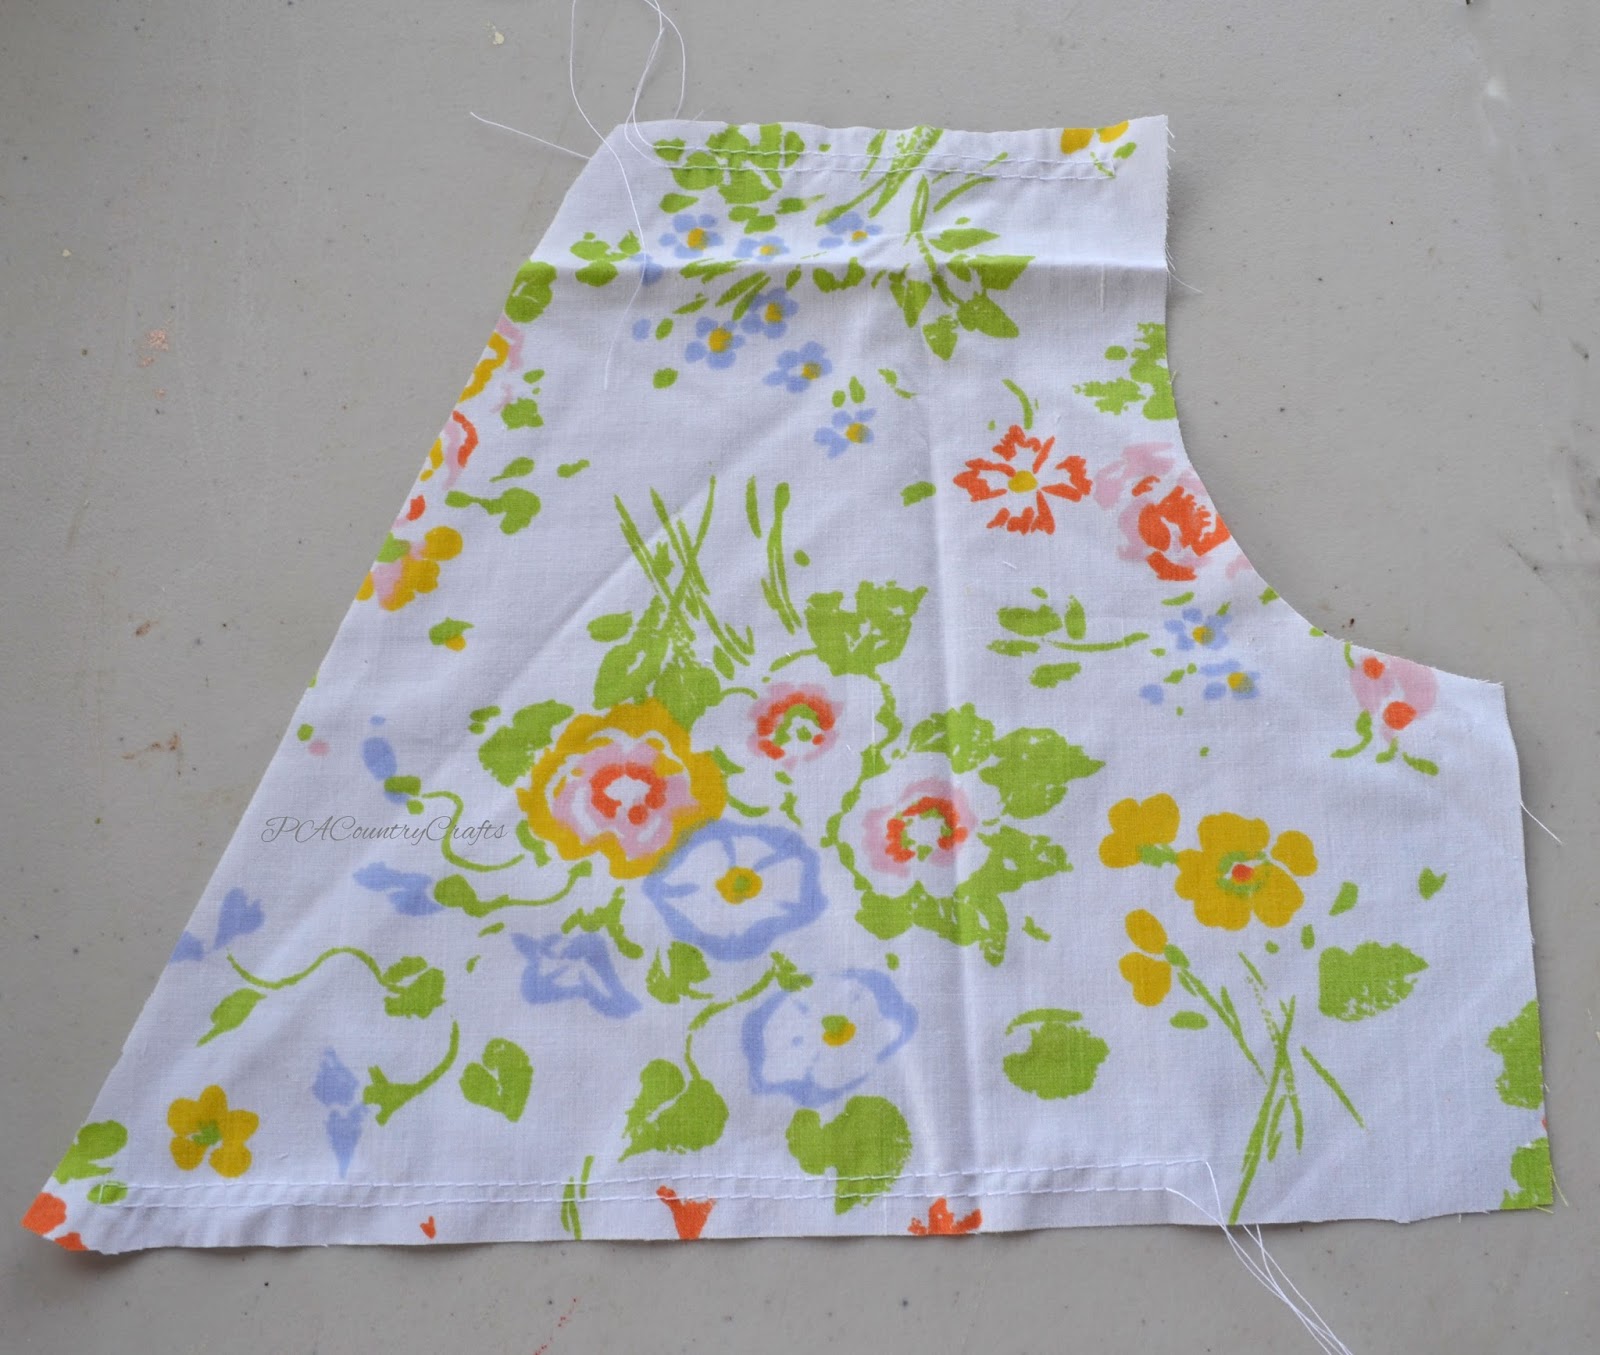
So, pull the ends of the strings and gather the bodice until it matches up with the lining.

Sew the shoulder seams of the main fabric...
...and the lining.

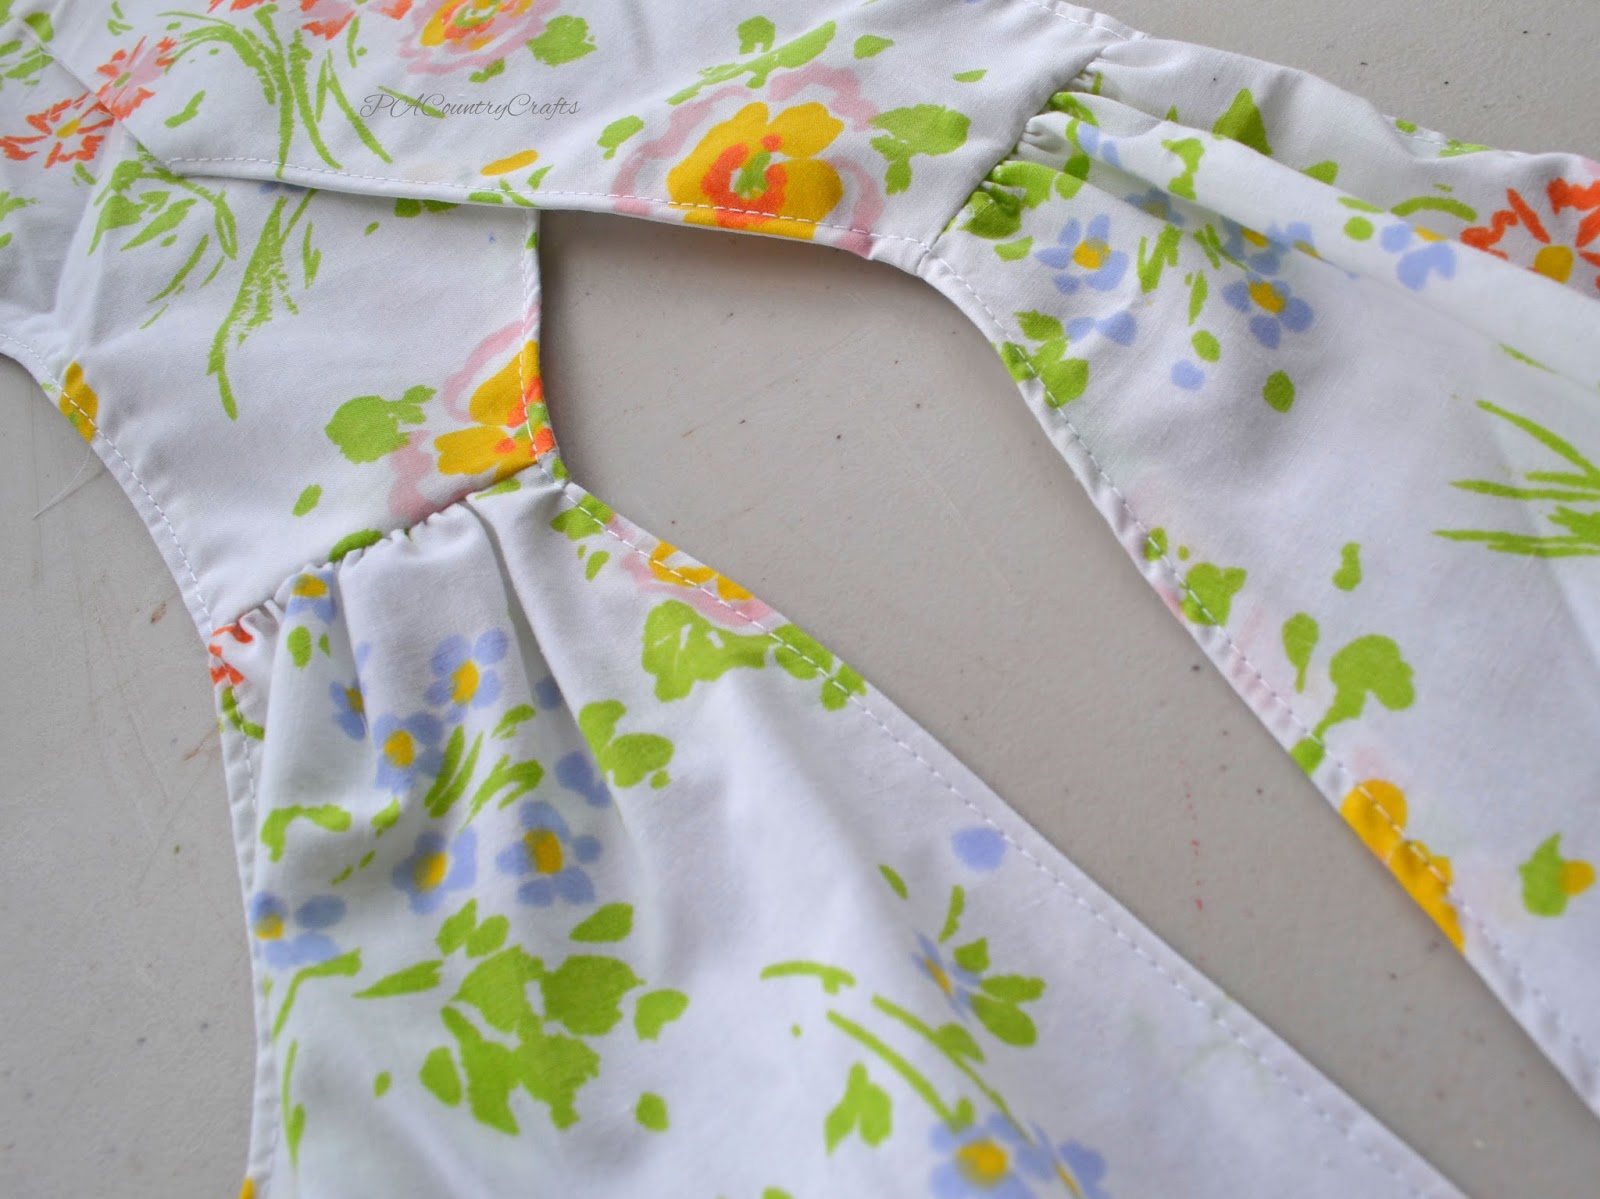
Then, sew the lining to the main fabric along the arm scythes and the middles. Just leave it open at the sides below the arms and the center of the back where it goes straight down. Clip the curves.
***When the top was all done I found some vintage piping in the exact. same. shade. of pink. Oh, it was painful, because it would have been soooooooo perfect to accentuate the cross-front edges. So, if you want to make it better, add piping along the V shape when you sew the main fabric and lining together. And send me a picture to make me feel better. I really considered seam-ripping the whole thing just to add it.
OK. Enough about the lack of piping. I am still sad about it.
Flip, press, and topstitch 'em.

I also couldn't bear to rip out topstitching this nice...
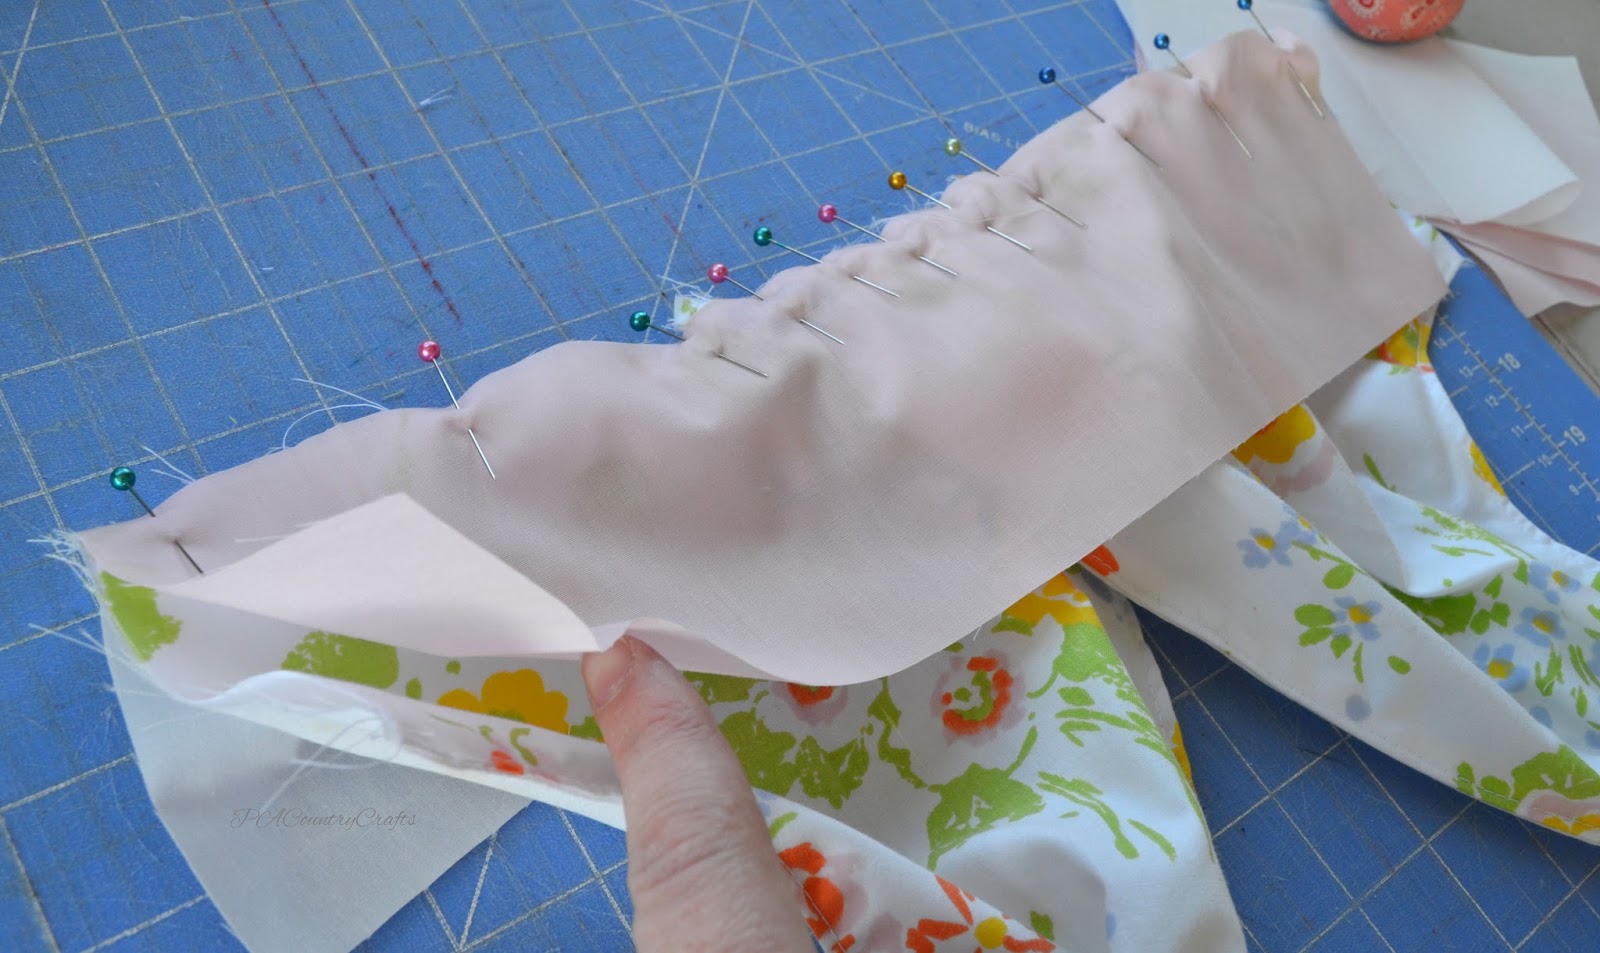
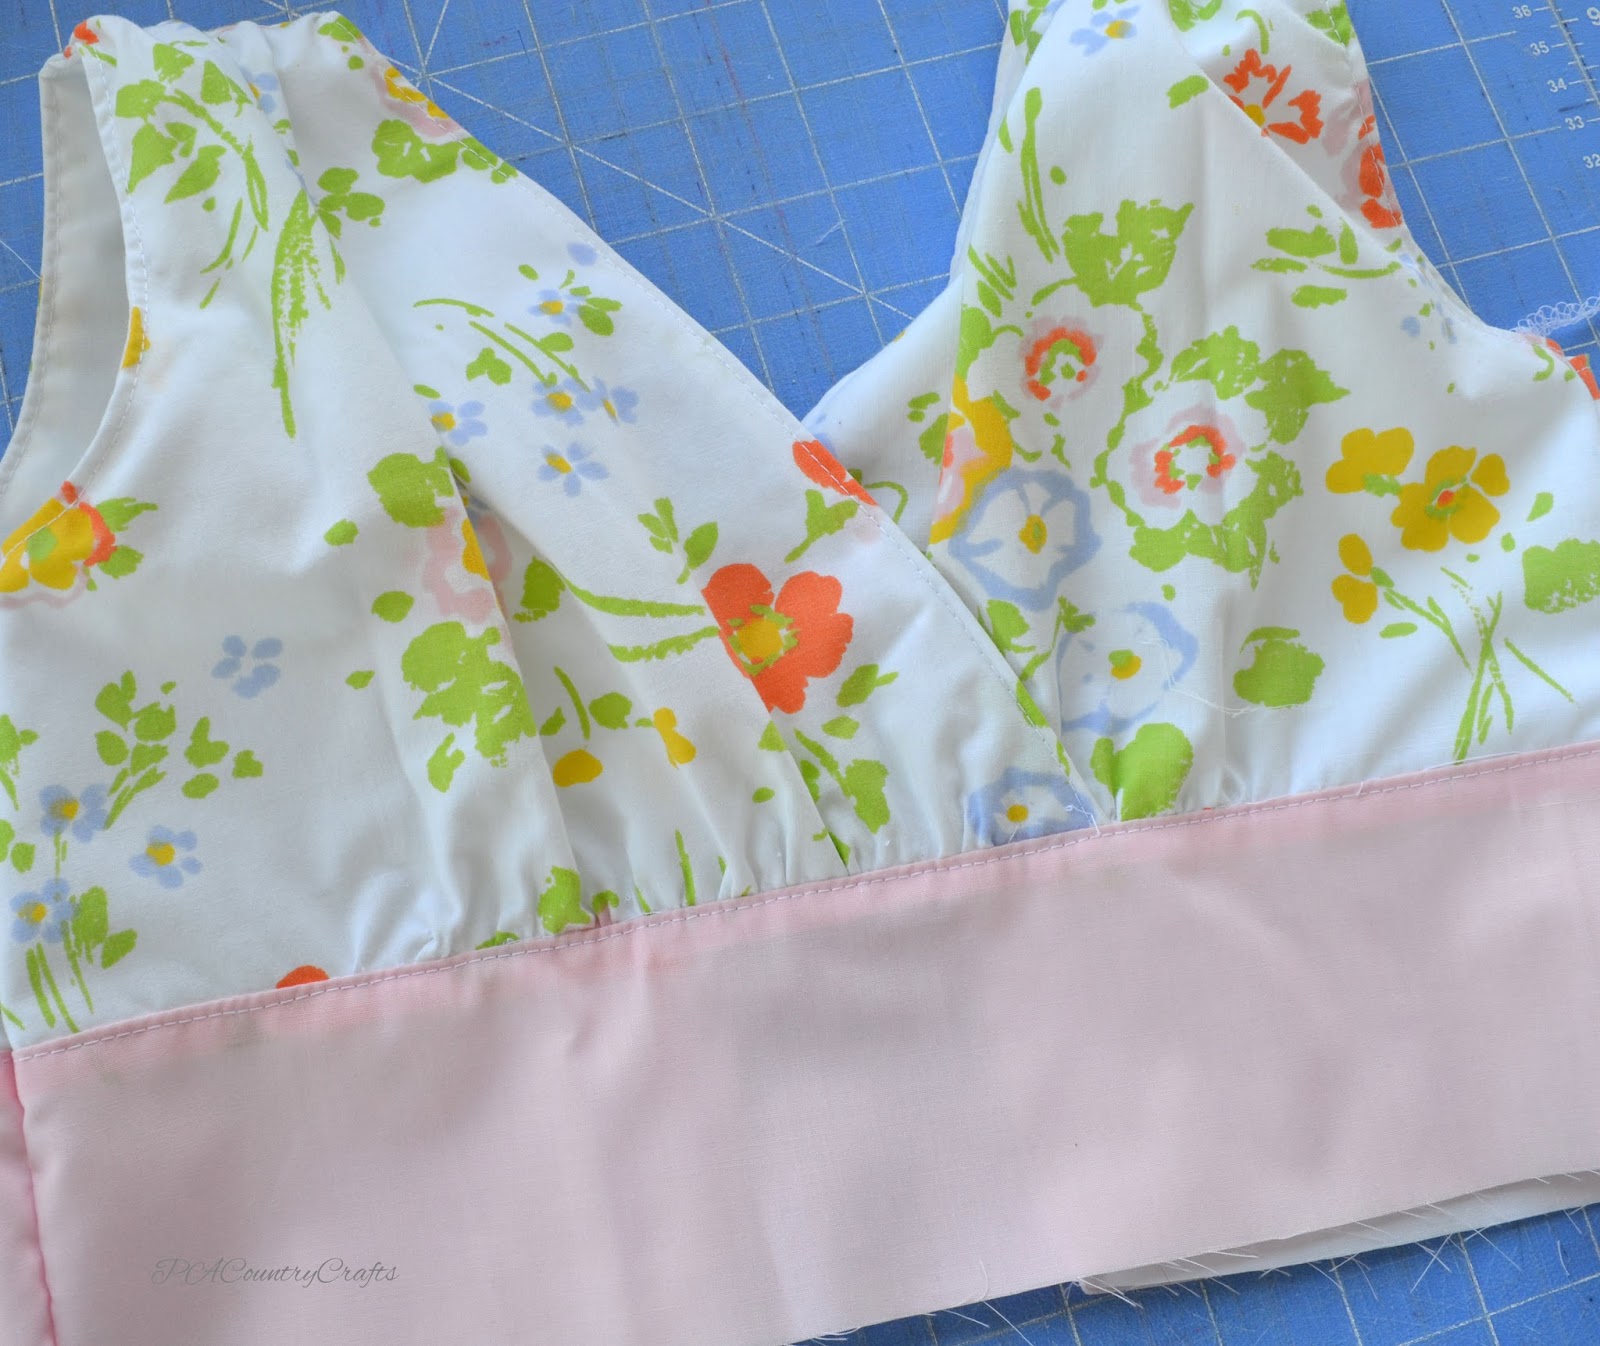
Layer the bodice pieces and make the width match up with the front waistband width and baste.

Sandwich the top between the contrasting front waistband and the lining waistband. Do the same thing for the back pieces, too.
Press the seams down and toptstich along the edge.
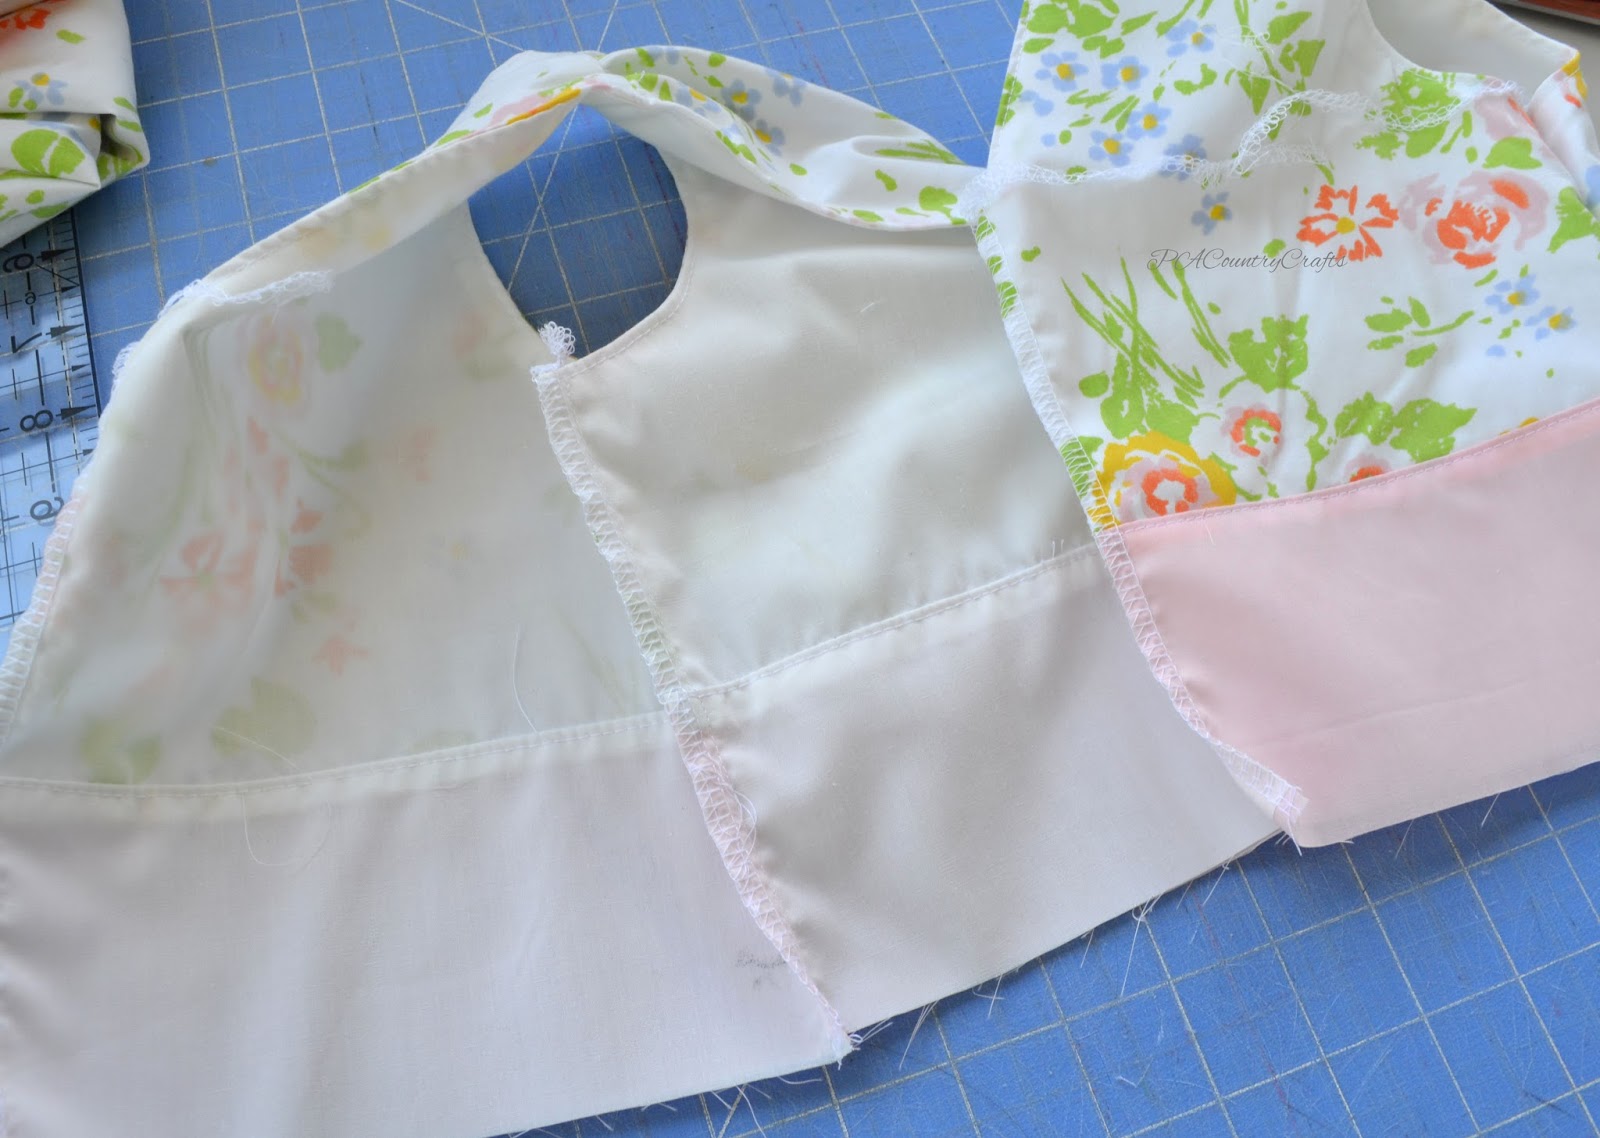
Sew up the sides under the arms and serge the edges. I did the center of the back, too. Everything looks so nice and finished on the inside assembling it this way.
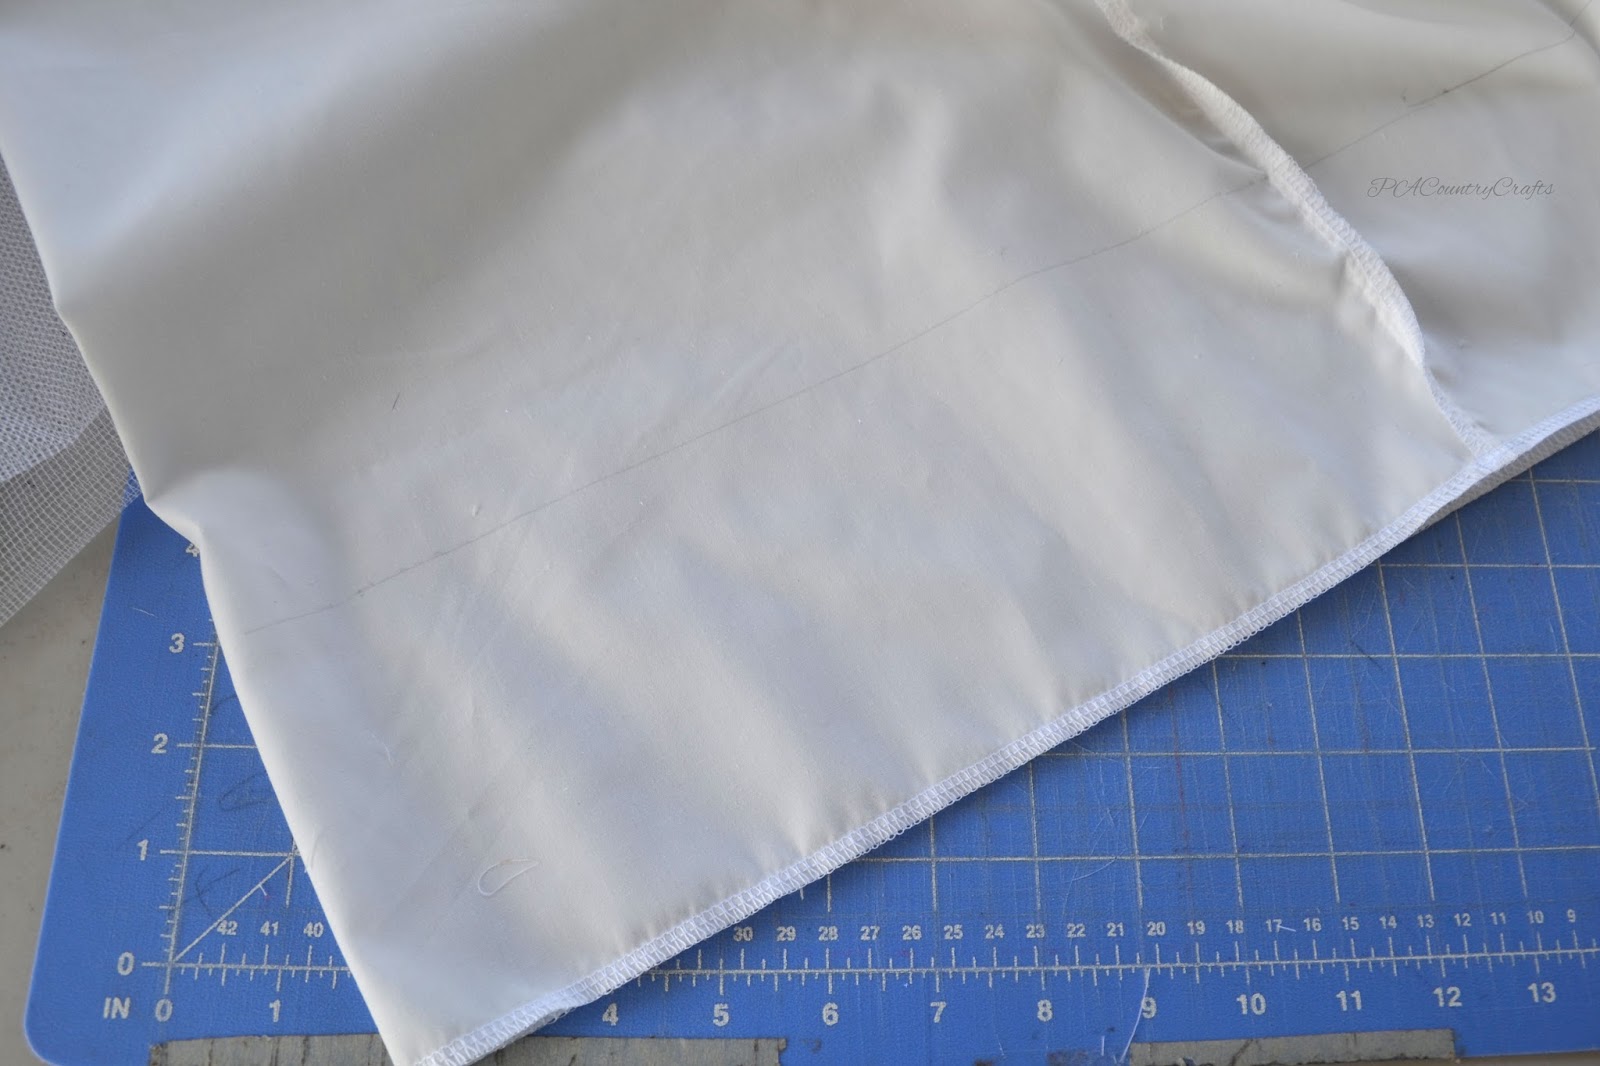
Now, for the skirt. Sew the skirt lining in a tube and run the raw edges of the seams and bottom through the serger (or zig-zag stitch over them if you don't have one.) It needed a petticoat ruffle at the bottom for a little poof (which would have been better if it were shorter, but I was overruled- sewing for littler girls without as much opinion on these matters is easier!) Draw a line four inches from the bottom edge of the skirt lining.
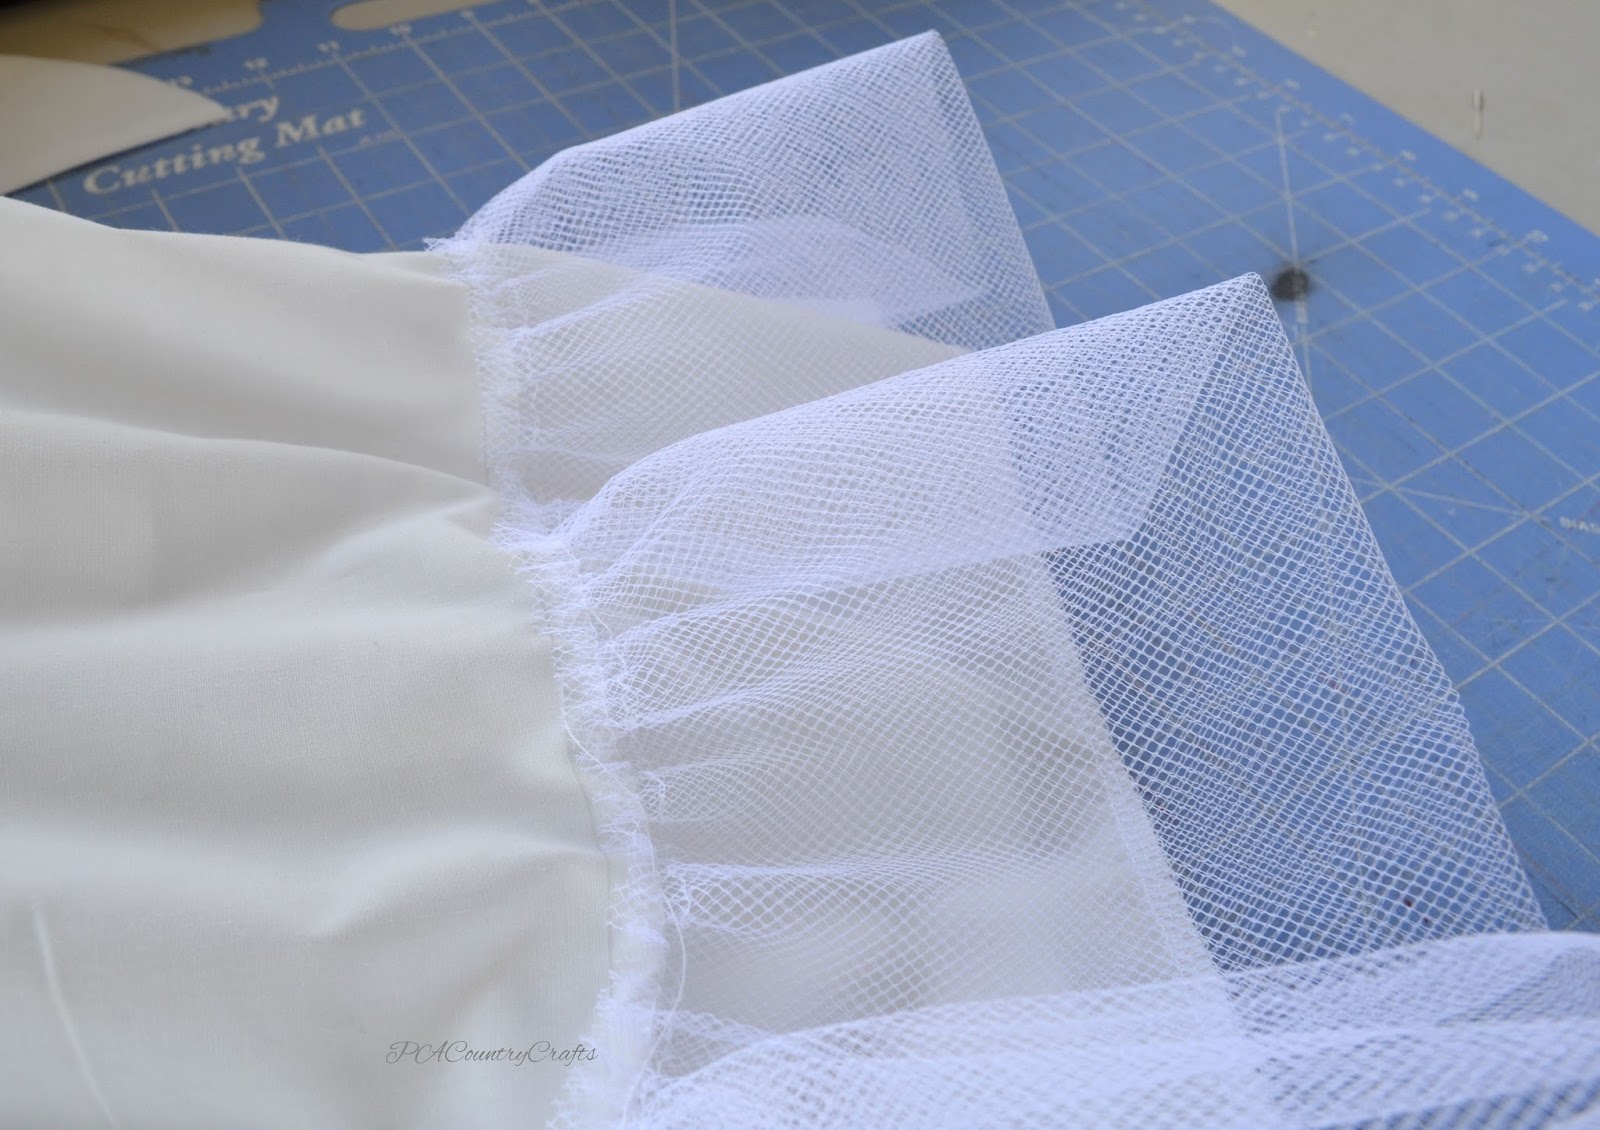
Cut strips of petticoat netting 10 inches high and double the width of your skirt, sewing the short ends together as needed to make one long strip.

I used a ruffler foot on my (other) machine to sew the netting to the lining. I folded the netting in half (seams to the inside) and sewed a basting stitch to prevent shifting, then held the edge of the netting along the pencil line as I fed it through the ruffler, leaving a little seam allowance. It took me awhile to get it set up and get things going, but with 5 dresses, it was worth it! If you don't have a ruffler foot, you can gather the netting the old-fashioned way. Or, if you already have a petticoat or just want to skip this step, it would be just fine.
Gather the skirt and lining (with the old-fashioned, two gathering seams method). I also pressed the gathers with an iron and steam. It does make a nicer gather.
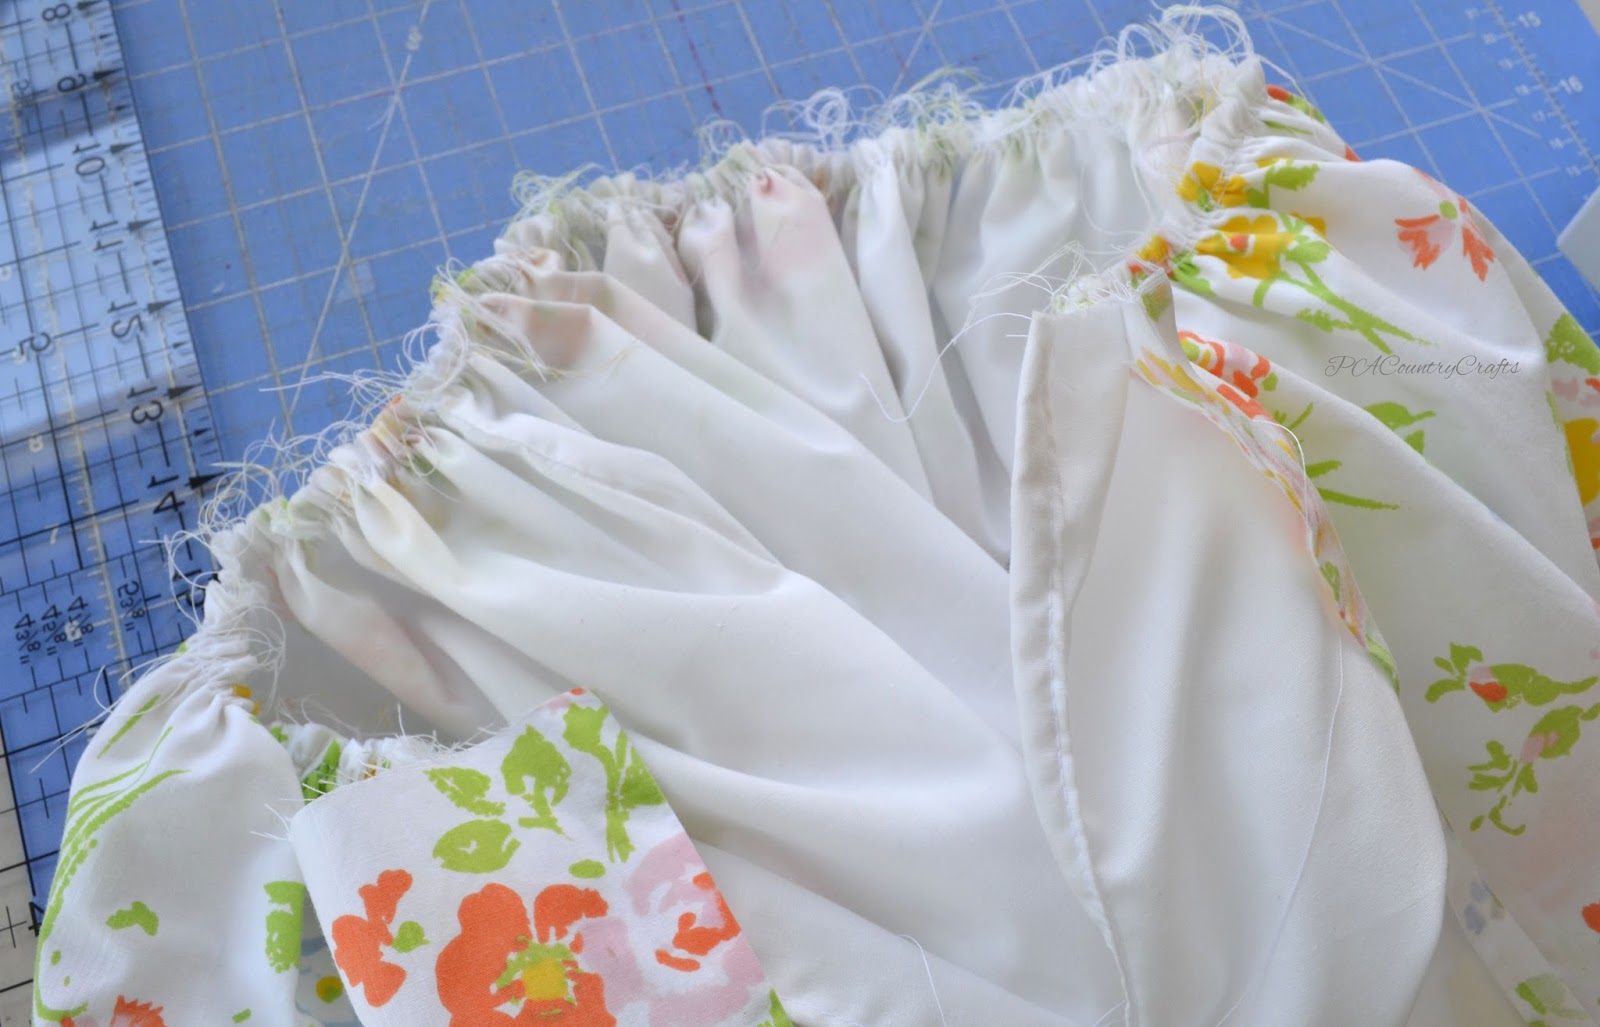
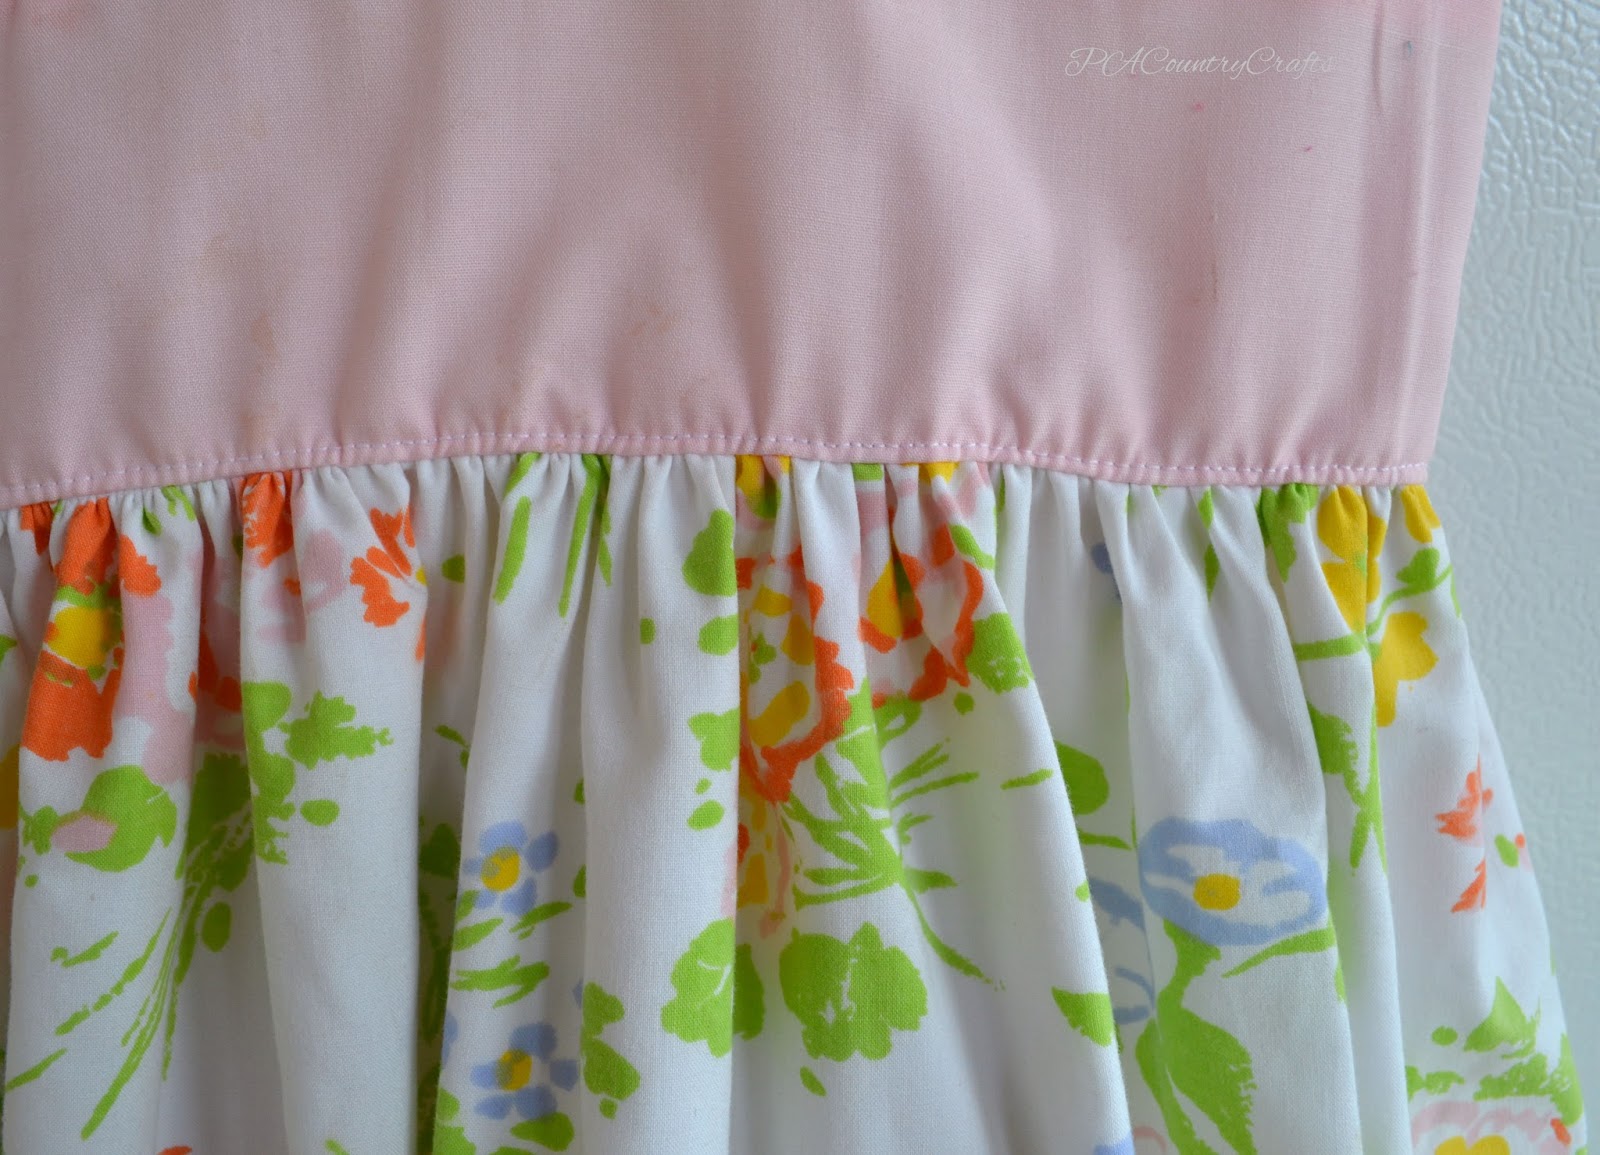
Sew the skirt to the top and topstitch to hold the gathers in place.
I also added a vintage pink zipper, but I wish I had done it differently and either left it exposed or used an invisible zipper. Most of the problem was that I had already sewed the seam in the back of the skirt lining all but the top few inches and tried to keep them hemmed and out of the zipper. It made for a very tight squeeze. You do whatever is easiest for you, though. OK?

Besides the piping (sniffle, sniffle) I wish I had added some little pink bows at the shoulders. I still might do that. If I get ambitious again. So, I might not.
You could also do a circle skirt instead of a gathered skirt if you wanted. If darts were added to the lining of the bodice, this would also make a great dress for an older girl/woman because the gathers in the bodice allow for some room to fill things out. This style of top would also be gorgeous in a chiffon fabric.
This pattern is for non-commercial use only. Please do not sell this pattern or dresses made from this pattern. Thank you! :) If you do make one, I would love, love, love to see a pic, though! Pretty please?
I am hoping to get one tutorial a week posted, so keep checking back for the rest of them, OK?
Psst… Update… Here they are!